> ## Documentation Index
> Fetch the complete documentation index at: https://docs.qbraid.com/llms.txt
> Use this file to discover all available pages before exploring further.
# Getting Started
> This section will walk you through the basics of using the Lab interface and managing your server instance.
## Launch Lab
### Starting an Instance
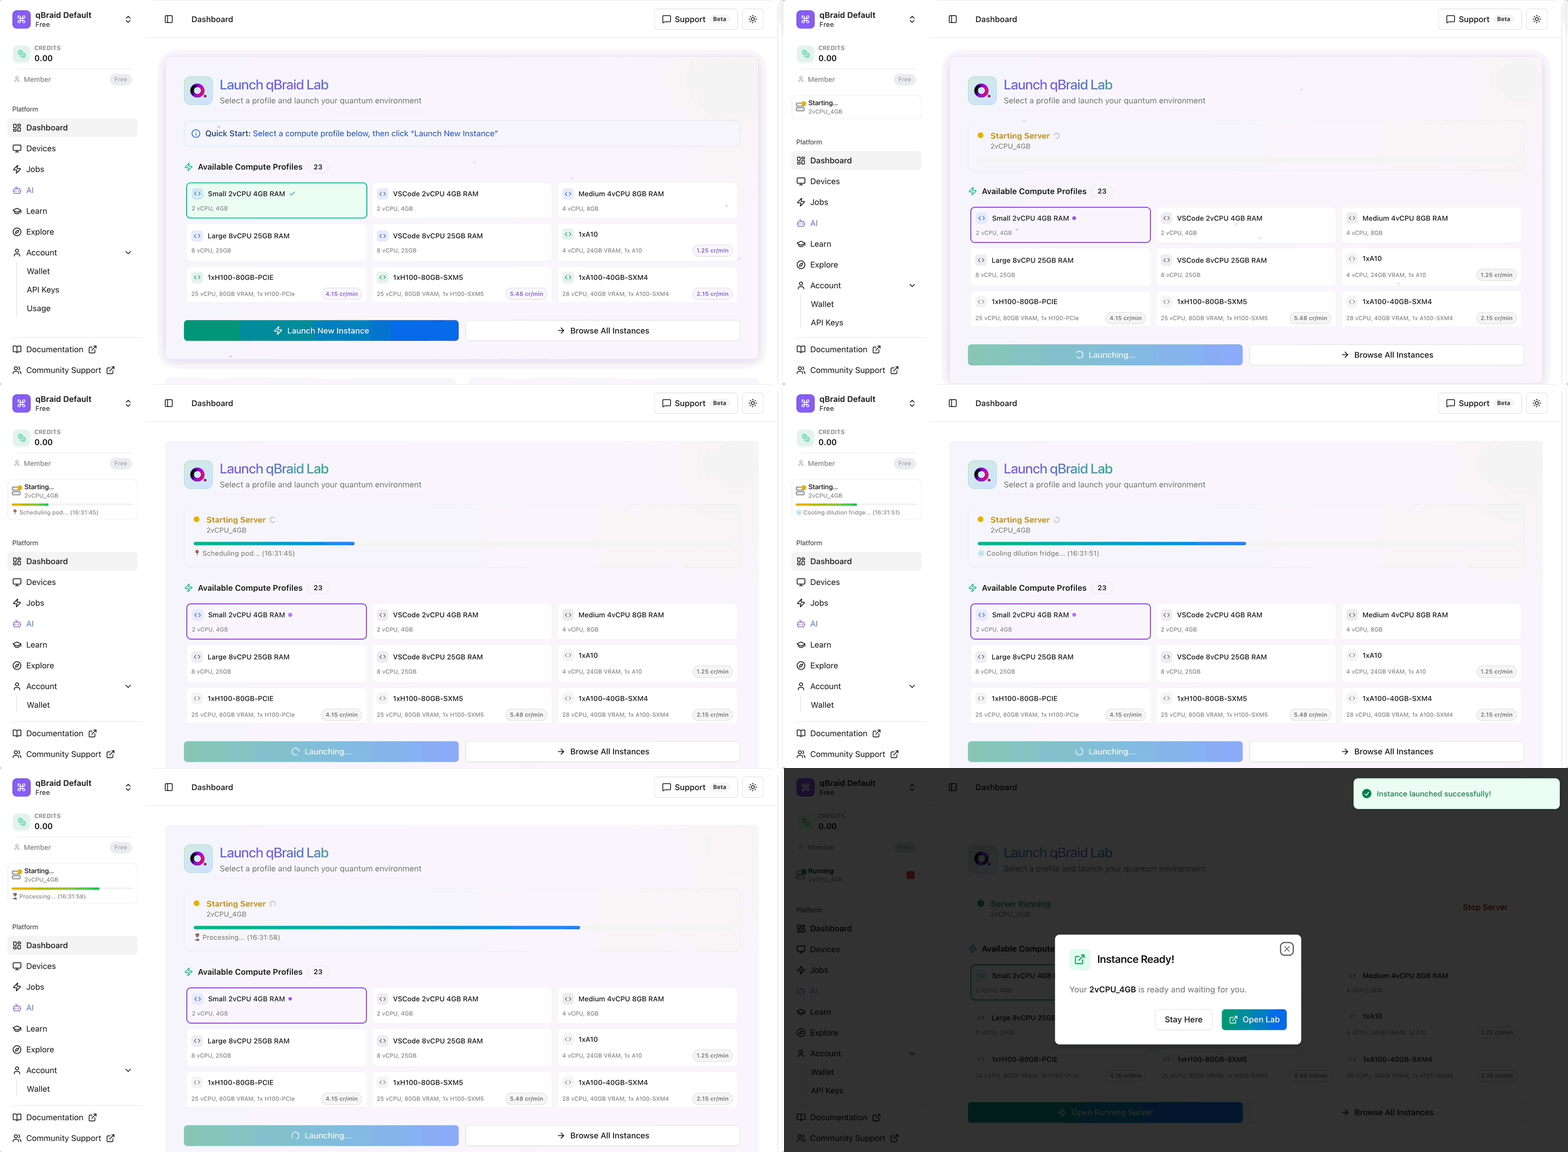
From your [account page](https://account.qbraid.com/), select a compute profile and click **Launch** to start your quantum environment.
qBraid Lab offers two types of instances:
* **Subscription instances** (CPU): Included with your plan, billed against your monthly compute hours. Available in Small (2 vCPU), Medium (4 vCPU), and Large (8 vCPU) configurations. Your files are automatically synced from cloud storage on each launch.
* **On-demand instances** (GPU + high-spec CPU): Pay-as-you-go with [qBraid credits](/v2/home/pricing#credits), billed per minute. Includes 20+ GPU configurations and high-spec CPU instances. See [On-Demand Instances](/v2/lab/user-guide/on-demand-instances) for the full lifecycle guide.
[Paid subscription tiers](https://www.qbraid.com/pricing) provide additional benefits including higher disk storage limits and compute hours.
Depending on its size, pulling an image may take up to 2 minutes for the first time. The next time you launch Lab, it will load much more quickly.
### Stopping Lab
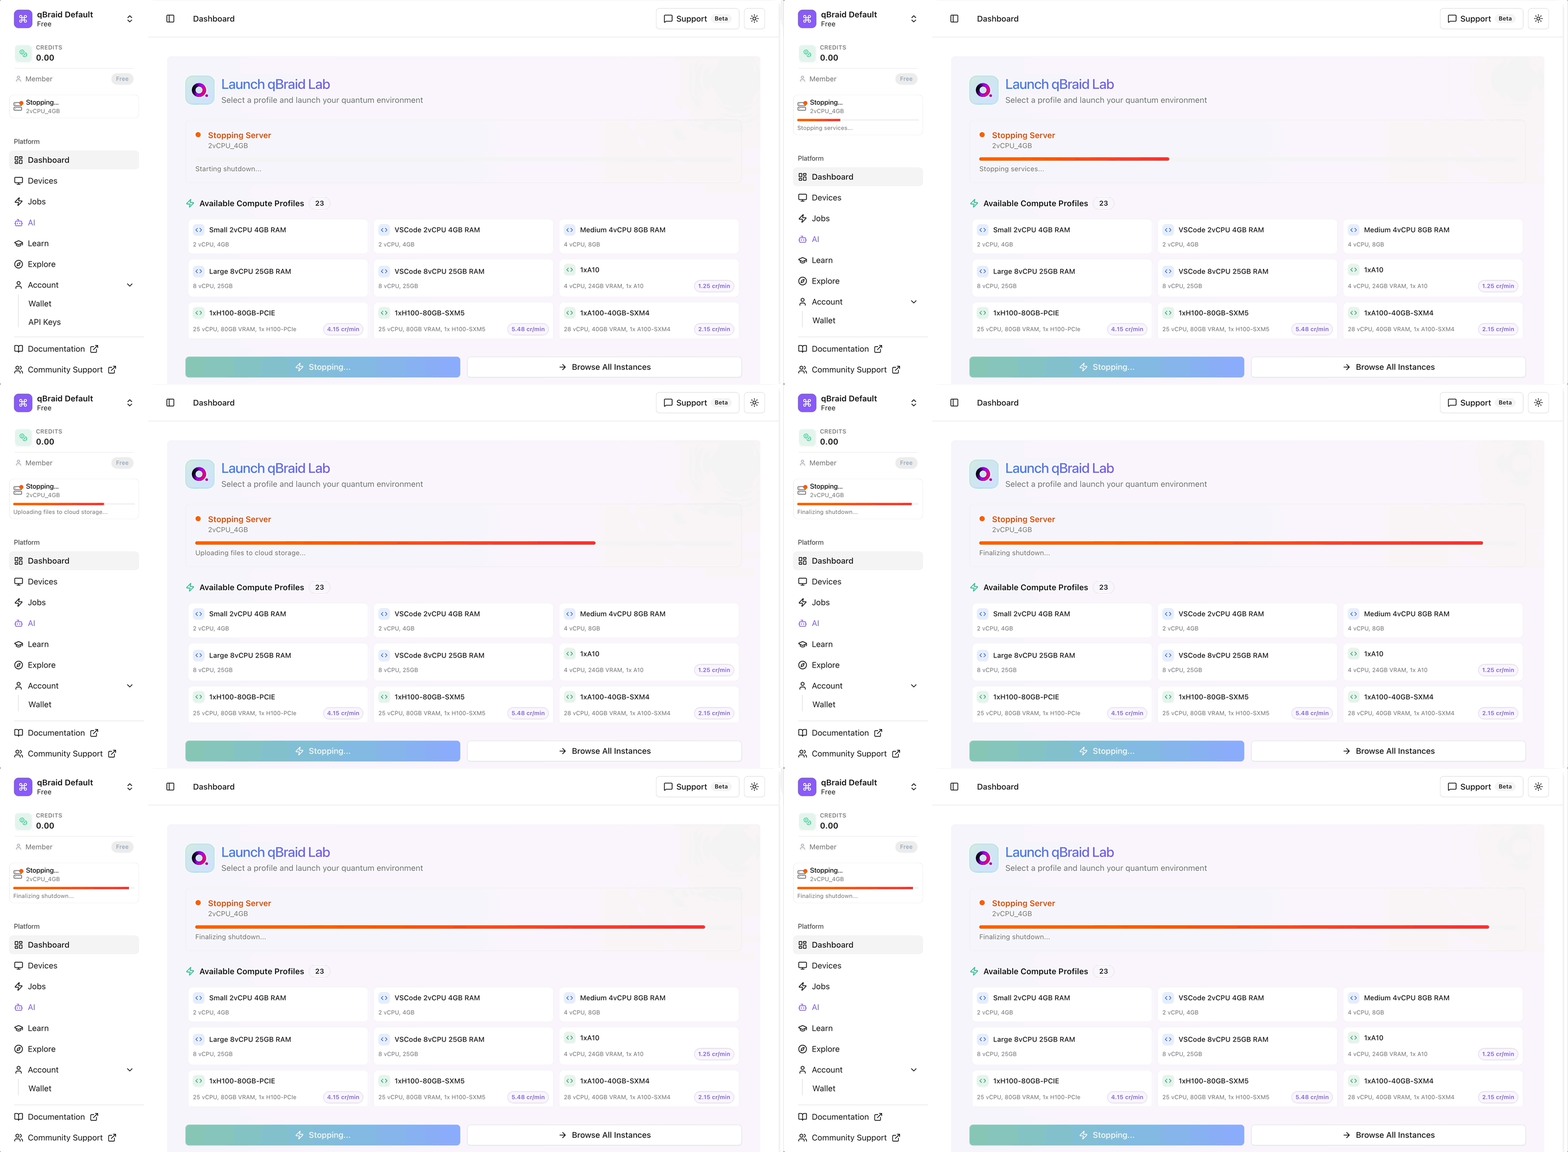
To stop your running Lab instance:
1. Navigate to your [account dashboard](https://account.qbraid.com/)
2. Click **Stop Running Server** to stop the running instance
Stopping your server will not delete your data, but will stop it from running and consuming compute hours.
On-demand instances (GPUs, high-spec CPUs) have an additional **Terminate**
action that permanently deletes the instance and its disk. See [On-Demand
Instances](/v2/lab/user-guide/on-demand-instances#stop-vs-terminate) for
details on the stop vs terminate distinction.
## Lab interface
Once your image is pulled, you will be taken to the qBraid Lab interface. Here are a few helpful resources to get started:
* **Interactive tour**: Click **Start Tour** (pop-up at first launch, or **Help** drop-down) to begin a guided tour of all of the Lab extensions and their key features.
* **Help drop-down**: The top-bar menu **Help** drop-down contains links to qBraid user guides, demos, and other reference materials.