_unrolled`
```shell help command theme={"dark"}
pyqasm unroll --help
```
```shell Output theme={"dark"}
Usage: pyqasm unroll [OPTIONS] SRC_PATHS...
Unroll OpenQASM files.
╭─ Arguments ─────────────────────────────────────────────────────────────────────────────────────────────────────╮
│ * src_paths SRC_PATHS... Source file or directory paths to unroll. │
╰─────────────────────────────────────────────────────────────────────────────────────────────────────────────────╯
╭─ Options ──────────────────────────────────────────────────────────────────────────────────────────────────────╮
│ --skip -s TEXT Files to skip during unrolling. │
│ --overwrite Overwrite original files instead of creating new ones. │
│ --output -o TEXT Output file path (can only be used with a single input file). │
│ --help -h Show this message and exit. │
╰────────────────────────────────────────────────────────────────────────────────────────────────────────────────╯
```
```shell Unroll single QASM file theme={"dark"}
$ pyqasm unroll tests/cli/resources/valid1.qasm
Successfully unrolled 1 file
Checked 1 source file
```
```shell Unroll multiple QASM file inside a dir theme={"dark"}
$ pyqasm unroll tests/cli/resources/
Successfully unrolled 2 files
----------------------------------------------------------------------------------------------------
Failed to unroll: tests/cli/resources/invalid1.qasm
[validation-error] -> Index 2 out of range for register of size 1 in qubit
Error at line 8, column 0 in QASM file
>>>>>> h q[2];
----------------------------------------------------------------------------------------------------
Failed to unroll 1 file
Checked 3 source files
```
# Usage Examples
Source: https://docs.qbraid.com/v2/pyqasm/user-guide/examples
## Compilation
### Inlining and Unrolling
This example demonstrates the capabilities of the PyQASM tool by unrolling a complex OpenQASM program into a simplified form.
In PyQASM, “unrolling” refers to the process of simplifying a quantum program by expanding custom gate definitions and flattening
complex language constructs like subroutines, loops, and conditional statements into basic operations. This technique, also known
as **program flattening** or **inlining**, transforms nested and recursive structures into a linear sequence of operations consisting solely
of qubit and classical bit declarations, gate operations, and measurement operations. By converting the program into this simplified
format, it becomes easier to perform subsequent transpilation or compilation steps before executing the program on a quantum device.
```qasm example.qasm theme={"dark"}
OPENQASM 3.0;
include "stdgates.inc";
// Define custom gates
gate hgate q {
h q;
}
gate xgate q {
x q;
}
gate cxgate q1, q2 {
cx q1, q2;
}
// Define a subroutine for creating a Bell state
def create_bell_state(qubit[2] q) {
hgate q[0];
cxgate q[0], q[1];
return;
}
// Define a subroutine for a generic quantum operation
def generic_operation(qubit[N] q) {
for int i in [0:N-1] {
hgate q[i];
xgate q[i];
y q[i];
rx(pi) q[i];
}
return;
}
// Main program
const int[32] N = 4;
qubit[N] q;
bit[N] c;
// Create a Bell state using the alias
create_bell_state(q[0:2]);
measure q[0:1] -> c[0:1];
// Perform a generic operation on all qubits
generic_operation(q);
// Classical control flow
if (c[0]) {
hgate q[0];
} else {
xgate q[0];
}
// Define an array of angles for parameterized gates
array[float[64], N] angles = {pi/2, pi/4, pi/8, pi/16};
// Apply parameterized rotations
for int i in [0:N-1] {
rx(angles[i]) q[i];
}
// Measure the qubits
c = measure q;
```
```python example.py theme={"dark"}
import pyqasm
module = pyasm.load("example.qasm")
module.validate()
module.unroll()
print(pyqasm.dumps(module))
```
```qasm output theme={"dark"}
OPENQASM 3.0;
include "stdgates.inc";
qubit[4] q;
bit[4] c;
h q[0];
cx q[0], q[1];
c[0] = measure q[0];
h q[0];
x q[0];
y q[0];
rx(3.141592653589793) q[0];
h q[1];
x q[1];
y q[1];
rx(3.141592653589793) q[1];
h q[2];
x q[2];
y q[2];
rx(3.141592653589793) q[2];
h q[3];
x q[3];
y q[3];
rx(3.141592653589793) q[3];
if (c[0] == true) {
h q[0];
} else {
x q[0];
}
rx(1.5707963267948966) q[0];
rx(0.7853981633974483) q[1];
rx(0.39269908169872414) q[2];
rx(0.19634954084936207) q[3];
c[0] = measure q[0];
c[1] = measure q[1];
c[2] = measure q[2];
c[3] = measure q[3];
```
For complete details about the supported operations, see [PyQASM Supported Operations](https://github.com/qBraid/pyqasm/blob/main/src/README.md#supported-operations).
## Analysis
### `num_qubits`, `num_clbits`, and `depth`
This example demonstrates how to use the `num_qubits`, `num_clbits`, and `depth` methods.
```python example.py theme={"dark"}
import pyqasm
qasm_code = """
OPENQASM 3.0;
include "stdgates.inc";
qubit[3] q;
bit[3] c;
h q[0];
cx q[0], q[1];
c[0] = measure q[0];
"""
# Load QASM code from a string into a QasmModule object
module = pyqasm.loads(qasm_code)
# Get the number of qubits and classical bits
num_qubits = module.num_qubits
num_clbits = module.num_clbits
# Calculate the depth of the circuit
depth = module.depth()
print(f"Number of qubits: {num_qubits}")
print(f"Number of classical bits: {num_clbits}")
print(f"Depth of the circuit: {depth}")
```
```bash Output theme={"dark"}
Number of qubits: 3
Number of classical bits: 3
Depth of the circuit: 3
```
## Transformations
### `has_measurements` and `remove_measurements`
This example demonstrates how to check for measurements and remove them.
```python example.py theme={"dark"}
import pyqasm
qasm_code = """
OPENQASM 3.0;
include "stdgates.inc";
qubit[3] q;
bit[3] c;
h q[0];
cx q[0], q[1];
c[0] = measure q[0];
"""
# Load QASM code from a string into a QasmModule object
module = pyqasm.loads(qasm_code)
# Check if the module has measurements
print(f"Has measurements: {module.has_measurements()}")
# Remove measurements
module.remove_measurements()
print("\nModule without measurements: ")
print(pyqasm.dumps(module))
# Check if the module has measurements
print(f"Has measurements: {module.has_measurements()}")
```
```bash Output theme={"dark"}
Has measurements: True
Module without measurements:
OPENQASM 3.0;
include "stdgates.inc";
qubit[3] q;
bit[3] c;
h q[0];
cx q[0], q[1];
Has measurements: False
```
Very similar to the previous example, we also have `has_barriers` and `remove_barriers` methods
to check for barriers and remove them, respectively.
### `populate_idle_qubits`
This example demonstrates how to populate idle qubits with identity gates -
```python example.py theme={"dark"}
import pyqasm
qasm_code = """
OPENQASM 3.0;
include "stdgates.inc";
qubit[5] q;
h q[0];
cx q[0], q[1];
"""
# Load QASM code from a string into a QasmModule object
module = pyqasm.loads(qasm_code)
# Populate idle qubits with identity gates
module.populate_idle_qubits()
print(pyqasm.dumps(module))
```
```qasm Output theme={"dark"}
OPENQASM 3.0;
include "stdgates.inc";
qubit[5] q;
h q[0];
cx q[0], q[1];
id q[2];
id q[3];
id q[4];
```
### `remove_idle_qubits`
This example demonstrates how to remove idle qubits from the module and shows the qubit count before and after.
```python example.py theme={"dark"}
import pyqasm
qasm_code = """
OPENQASM 3.0;
include "stdgates.inc";
qubit[5] q;
h q[0];
"""
# Load QASM code from a string into a QasmModule object
module = pyqasm.loads(qasm_code)
# Print the number of qubits before removing idle qubits
print(f"Number of qubits before: {module.num_qubits}")
# Remove idle qubits
module.remove_idle_qubits()
# Print the number of qubits after removing idle qubits
print(f"Number of qubits after: {module.num_qubits}")
print(pyqasm.dumps(module))
```
```qasm Output theme={"dark"}
Number of qubits before: 5
Number of qubits after: 1
OPENQASM 3.0;
include "stdgates.inc";
qubit[1] q;
h q[0];
```
### `reverse_qubit_order`
This example demonstrates how to reverse the order of qubits in the module with a more involved program.
```python example.py theme={"dark"}
import pyqasm
qasm_code = """
OPENQASM 3.0;
include "stdgates.inc";
qubit[5] q;
h q[0];
cx q[0], q[1];
cx q[1], q[2];
cx q[2], q[3];
cx q[3], q[4];
"""
# Load QASM code from a string into a QasmModule object
module = pyqasm.loads(qasm_code)
# Reverse the order of qubits
module.reverse_qubit_order()
print(pyqasm.dumps(module))
```
```qasm Output theme={"dark"}
OPENQASM 3.0;
include "stdgates.inc";
qubit[5] q;
h q[4];
cx q[4], q[3];
cx q[3], q[2];
cx q[2], q[1];
cx q[1], q[0];
```
### `rebase`
Unroll and convert an QASM program to a specified basis gate set.
The target basis set can be chosen from the options present in the `pyqasm.elements.BasisSet` class. Currently we
support conversion to the following basis sets:
1. `BasisSet.CLIFFORD_T` : `{"h", "t", "s", "cx", "tdg", "sdg"}`
2. `BasisSet.ROTATIONAL_CX` : `{"rx", "ry", "rz", "cx"}`
For example -
```python example.py theme={"dark"}
import pyqasm
qasm_code = """
OPENQASM 3.0;
include "stdgates.inc";
qubit[2] q;
bit[2] c;
// Operations
h q;
x q;
cz q[0], q[1];
c = measure q;
"""
module = pyqasm.loads(qasm_code)
module.rebase(pyqasm.elements.BasisSet.ROTATIONAL_CX)
print(pyqasm.dumps(module))
```
```qasm Output theme={"dark"}
OPENQASM 3.0;
include "stdgates.inc";
qubit[2] q;
bit[2] c;
ry(1.5707963267948966) q[0];
rx(3.141592653589793) q[0];
ry(1.5707963267948966) q[1];
rx(3.141592653589793) q[1];
rx(3.141592653589793) q[0];
rx(3.141592653589793) q[1];
ry(1.5707963267948966) q[1];
rx(3.141592653589793) q[1];
cx q[0], q[1];
ry(1.5707963267948966) q[1];
rx(3.141592653589793) q[1];
c[0] = measure q[0];
c[1] = measure q[1];
```
The `rebase` functionality is useful for converting a program to a basis set that is supported by a specific
quantum device. This conversion can be extended to new custom basis sets by adding the required gate decompositions
to the `pyqasm.maps.decomposition_rules` module.
Currently we have complete conversion support for the `BasisSet.ROTATIONAL_CX` basis set,
whereas only non-parameterized gate conversion is available for `BasisSet.CLIFFORD_T`.
Refer to the [PyQASM API Documentation](https://qbraid.github.io/pyqasm/api/pyqasm.html)
for more details on the available methods and their usage.
# OpenPulse
Source: https://docs.qbraid.com/v2/pyqasm/user-guide/openpulse
A low-level pulse programming extension of OpenQASM 3, giving developers direct control over the physical signals that manipulate qubits.
## Overview
**OpenPulse** extends **OpenQASM3** beyond the gate model by introducing constructs for **ports**, **frames**, and **waveforms** that describe the actual control signals sent to quantum hardware. This allows programmers to implement custom calibrated gates, adjust frequencies and phases dynamically, and align timing at the hardware level. With **OpenPulse**, quantum programs can bridge the gap between high-level circuits and the physical pulses that drive qubit operations.
## PyQASM 🤝 OpenPulse
**PyQASM** now understands and validates **OpenPulse** constructs embedded in `OpenQASM3` programs. This includes parsing `cal` blocks and `defcal` definitions and validating pulse-level statements.
While most existing tools focus on gate-level `OpenQASM`, few provide strong support for pulse-level semantics and most of them lack comprehensive semantic analysis -- such as validating scope rules, deterministic durations in defcal, and hardware-level constraints
**PyQASM** aims to fill this gap by:
* Providing a unified parser and validator for both `OpenQASM3` and `OpenPulse`.
* Enforcing semantic correctness of pulse operations, not just syntax.
* Allowing users to configure `backend-specific` rules (duration tracking, frame limits, etc.).
* Building towards a complete analysis and compilation toolkit for pulse-level programs, bridging high-level circuits with low-level control.
This makes **PyQASM** a foundation for researchers and hardware providers who need **validation** and **compilation** of **OpenPulse** programs.
## Core Constructs
The OpenPulse grammar—activated by `defcal grammar "openpulse";` — adds these core constructs to OpenQASM3.
* [**Ports**](https://openqasm.com/versions/3.0/language/openpulse.html#ports) (`port`): Abstract I/O channels representing hardware control lines.
* Real hardware often restricts the number of active frames per physical port. pyqasm introduces a `frame_limit_per_port` option that users can set when loading a program.
```python QASM-Code theme={"dark"}
import pyqasm
qasm = """
OPENQASM 3.0;
defcalgrammar "openpulse";
cal {
port d0;
frame fr1 = newframe(d0, 100.0, 5.0);
frame fr2 = newframe(d0, 100.0, 5.0);
}
"""
module = pyqasm.loads(qasm, frame_limit_per_port = 1)
module.unroll()
print(pyqasm.dumps(module))
```
```qasm output theme={"dark"}
ERROR:pyqasm: Error at line 4, column 16 in QASM file
> > > > > > newframe(d0, 100.0, 5.0)
pyqasm.exceptions.ValidationError: Port 'd0' has exceeded the 'frame-limit' of '1'
```
* [**Frames**](https://openqasm.com/versions/3.0/language/openpulse.html#frames) (`frame`): Stateful carriers with port, timing, frequency, and phase.
* Users can configure whether frames are allowed in `defcal` blocks via the `frame_in_defcal` option when loading a program.
```python QASM-Code theme={"dark"}
import pyqasm
qasm = """
OPENQASM 3.0;
defcalgrammar "openpulse";
cal {
port d0;
frame fr1 = newframe(d0, 100.0, 5.0);
}
defcal gate $0{
frame fr2 = newframe(d0, 100.0, 5.0);
}
"""
module = pyqasm.loads(qasm, frame_in_defcal = False)
module.unroll()
print(pyqasm.dumps(module))
```
```qasm output theme={"dark"}
ERROR:pyqasm: Error at line 2, column 16 in QASM file
> > > > > > newframe(d0, 100.0, 5.0)
pyqasm.exceptions.ValidationError: 'Frame' initialization in 'defcal' block is not allowed
```
* pyqasm also supports the full set of [**frame manipulators**](https://openqasm.com/versions/3.0/language/openpulse.html#phase-tracking) defined in the OpenPulse grammar
* `set_frequency()` / `shift_frequency()` / `shift_phase()` / `get_frequency()` / `get_phase()`.
* [**Waveforms**](https://openqasm.com/versions/3.0/language/openpulse.html#waveforms) (`waveform`): Envelopes modulating signals on ports.
* pyqasm supports all `waveform` types defined in the OpenPulse specification -- `gaussian`, `sech`, `gaussian_square`, `drag`, `constant`, `sine`, `mix`, `sum`, `phase_shift`, `scale`.
* validates all declarations conform to the OpenPulse grammar, including parameter correctness and waveform compatibility.
* [**Capture**](https://openqasm.com/versions/3.0/language/openpulse.html#capture-instruction) (`capture`): Measurement/capture operations.
* pyqasm also supports the `capture` operations defined in the OpenPulse grammar -- `capture_v1()`, `capture_v2()`, `capture_v3()`, `capture_v4()`.
* **Operations** within `cal` / `defcal`:
* [**play()**](https://openqasm.com/versions/3.0/language/openpulse.html#play-instruction) — apply a waveform via a frame.
* By default, `play` is intended for use inside `defcal` blocks. pyqasm introduces a configurable option, `play_in_cal_block`, which allows users to enable or restrict the use of `play` instructions inside `cal` blocks as well.
```python QASM-Code theme={"dark"}
import pyqasm
qasm = """
OPENQASM 3.0;
defcalgrammar "openpulse";
cal {
port d0;
frame fr1 = newframe(d0, 100.0, 5.0);
waveform wf = constant(1.0+2.0im, 100.0ns);
play(fr1, wf);
}
"""
module = pyqasm.loads(qasm, play_in_cal_block = False)
module.unroll()
print(pyqasm.dumps(module))
```
```qasm output theme={"dark"}
ERROR:pyqasm: Error at line 5, column 11 in QASM file
> > > > > > play(fr1, wf)
pyqasm.exceptions.ValidationError: 'Play' function is only allowed in 'defcal' block
```
* [**delay()**](https://openqasm.com/versions/3.0/language/openpulse.html#delay) — Advance the `time-cursor` of a frame by a given `duration`.
* [**barrier()**](https://openqasm.com/versions/3.0/language/openpulse.html#barrier) — `synchronize` the time-cursor of multiple frames to the same point in time.
## Capabilities
* [**Duration Tracking**](https://openqasm.com/versions/3.0/language/openpulse.html#timing)
* Each frame carries an internal **time-cursor** that advances as operations (`play`, `delay`, `capture`) are applied.
* pyqasm performs semantic tracking of `durations`, ensuring that timing across frames remains consistent throughout the program.
* This enables correct validation of `defcal` blocks, which must have deterministic total durations across all execution paths.
* **PyQASM** Supports [**Frames-Collisions**](https://openqasm.com/versions/3.0/language/openpulse.html#collisions) validation in `defcal` blocks.
* **PyQASM** also unrolls `cal` blocks, which is useful for debugging and visualization. Since, `defcal` are acted as functions, we are not unrolling them.
- **Currently, pyqasm does not support `extern` declarations in OpenPulse
blocks**.
For more details, please refer to the [OpenPulse
specification](https://openqasm.com/versions/3.0/language/openpulse.html).
## Examples
```python QASM-Code theme={"dark"}
import pyqasm
qasm_code = """
OPENQASM 3.0;
defcalgrammar "openpulse";
complex[float[32]] amp = 1.0 + 2.0im;
cal {
port d0;
frame driveframe = newframe(d0, 5.0e9, 0.0);
waveform wf = gaussian(amp, 16ns, 4ns);
}
const float frequency_start = 4.5e9;
const float frequency_step = 1e6;
const int frequency_num_steps = 3;
defcal saturation_pulse $0 {
play(driveframe, constant(amp, 100e-6s));
}
cal {
set_frequency(driveframe, frequency_start);
}
for int i in [1:frequency_num_steps] {
cal {
shift_frequency(driveframe, frequency_step);
}
saturation_pulse $0;
}
"""
module = pyqasm.loads(qasm_code)
module.unroll()
print(pyqasm.dumps(module))
```
```qasm output theme={"dark"}
OPENQASM 3.0;
qubit[1] __PYQASM_QUBITS__;
defcalgrammar "openpulse";
cal {
port d0;
frame driveframe = newframe(d0, 5000000000.0, 0.0, 0ns);
waveform wf = gaussian(1.0 + 2.0im, 16.0ns, 4.0ns);
}
defcal saturation_pulse() $0 {
play(driveframe, constant(amp, 0.0001s));
}
cal {
set_frequency(driveframe, 4500000000.0);
}
cal {
shift_frequency(driveframe, 4501000000.0);
}
saturation_pulse __PYQASM_QUBITS__[0];
cal {
shift_frequency(driveframe, 4502000000.0);
}
saturation_pulse __PYQASM_QUBITS__[0];
cal {
shift_frequency(driveframe, 4503000000.0);
}
saturation_pulse __PYQASM_QUBITS__[0];
```
```python QASM-Code theme={"dark"}
import pyqasm
qasm_code = """
OPENQASM 3.0;
defcalgrammar "openpulse";
qubit[4] q;
const duration pulse_length_start = 20ns;
const duration pulse_length_step = 1ns;
const int pulse_length_num_steps = 3;
cal {
port d0;
frame driveframe = newframe(d0, 5.0e9, 0.0);
}
for int i in [1:pulse_length_num_steps] {
duration pulse_length = pulse_length_start + (i-1)*pulse_length_step;
duration sigma = pulse_length / 4;
// since we are manipulating pulse lengths it is easier to define and play the waveform in a `cal` block
cal {
waveform wf = gaussian(1.0 + 2.0im, pulse_length, sigma);
// assume frame can be linked from a vendor supplied `cal` block
play(driveframe, wf);
}
measure $0;
}
"""
module = pyqasm.loads(qasm_code)
module.unroll()
print(pyqasm.dumps(module))
```
```qasm output theme={"dark"}
OPENQASM 3.0;
qubit[4] __PYQASM_QUBITS__;
defcalgrammar "openpulse";
cal {
port d0;
frame driveframe = newframe(d0, 5000000000.0, 0.0, 0ns);
}
cal {
waveform wf = gaussian(1.0 + 2.0im, 20.0ns, 5.0ns);
play(driveframe, wf);
}
measure __PYQASM_QUBITS__[0];
cal {
waveform wf = gaussian(1.0 + 2.0im, 21.0ns, 5.25ns);
play(driveframe, wf);
}
measure __PYQASM_QUBITS__[0];
cal {
waveform wf = gaussian(1.0 + 2.0im, 22.0ns, 5.5ns);
play(driveframe, wf);
}
measure __PYQASM_QUBITS__[0];
```
```python QASM-Code theme={"dark"}
import pyqasm
qasm_code = """
OPENQASM 3.0;
defcalgrammar "openpulse";
// Raman transition detuning delta from the 5S1/2 to 5P1/2 transition
const float delta = 100e6;
// Hyperfine qubit frequency
const float qubit_freq = 6.0e9;
// Positional frequencies for the AODS to target the specific qubit
const float q1_pos_freq = 5.0e9;
const float q2_pos_freq = 5.0e9;
const float q3_pos_freq = 5.0e9;
// Calibrated amplitudes and durations for the Raman pulses supplied via the AOD envelopes
const complex[float[32]] q1*π_half_amp = 1.0 + 2.0im;
const complex[float[32]] q2*π*half_amp = 1.0 + 2.0im;
const complex[float[32]] q3*π_half_amp = 1.0 + 2.0im;
const duration pi_half_time = 10.0ns;
// Time-proportional phase increment
const float tppi_1 = 1.0;
const float tppi_2 = 1.0;
const float tppi_3 = 1.0;
cal {
port eom_a_port;
port eom_b_port;
port aod_port;
// Define the Raman frames, which are detuned by an amount delta from the 5S1/2 to 5P1/2 transition
// and offset from each other by the qubit_freq
frame raman_a_frame = newframe(eom_a_port, delta, 0.0);
frame raman_b_frame = newframe(eom_b_port, delta-qubit_freq, 0.0);
const complex[float[32]] raman_a_amp = 1.0 + 2.0im;
const complex[float[32]] raman_b_amp = 1.0 + 2.0im;
// Three frames to phase track each qubit's rotating frame of reference at it's frequency
frame q1_frame = newframe(aod_port, qubit_freq, 0.0);
frame q2_frame = newframe(aod_port, qubit_freq, 0.0);
frame q3_frame = newframe(aod_port, qubit_freq, 0.0);
// Generic gaussian envelope
waveform pi_half_sig = gaussian(1.0 + 2.0im, pi_half_time, 100ns);
// Waveforms ultimately supplied to the AODs. We mix our general Gaussian pulse with a sine wave to
// put a sideband on the outgoing pulse. This helps us target the qubit position while maintainig the
// desired Rabi rate.
waveform q1_pi_half_sig = mix(pi_half_sig, sine(q1_π_half_amp, pi_half_time, q1_pos_freq-qubit_freq, 0.0));
waveform q2_pi_half_sig = mix(pi_half_sig, sine(q2_π_half_amp, pi_half_time, q2_pos_freq-qubit_freq, 0.0));
waveform q3_pi_half_sig = mix(pi_half_sig, sine(q3_π_half_amp, pi_half_time, q3_pos_freq-qubit_freq, 0.0));
}
// π/2 pulses on all three qubits
defcal rx(angle theta) $1, $2, $3 {
// Simultaneous π/2 pulses
play(raman_a_frame, constant(raman_a_amp, pi_half_time));
play(raman_b_frame, constant(raman_b_amp, pi_half_time));
play(q1_frame, q1_pi_half_sig);
play(q2_frame, q2_pi_half_sig);
play(q3_frame, q3_pi_half_sig);
}
// π/2 pulse on only qubit $2
defcal rx(angle theta) $2 {
play(raman_a_frame, constant(raman_a_amp, pi_half_time));
play(raman_b_frame, constant(raman_b_amp, pi_half_time));
play(q2_frame, q2_pi_half_sig);
}
// Ramsey sequence on qubit 1 and 3, Hahn echo on qubit 2
for duration tau_val in [1us:1us:2us] {
// First π/2 pulse
rx(pi/2) $1, $2, $3;
// First half of evolution time
cal {
delay[tau_val/2] raman_a_frame, raman_b_frame, q1_frame, q2_frame, q3_frame;
}
// Hahn echo π pulse composed of two π/2 pulses
for int ct in [0:1]{
rx(π/2) $2;
}
cal {
// Align all frames
barrier raman_a_frame, raman_b_frame, q1_frame, q2_frame, q3_frame;
// Second half of evolution time
delay[tau_val/2] raman_a_frame, raman_b_frame, q1_frame, q2_frame, q3_frame;
// Time-proportional phase increment signals different amount
shift_phase(q1_frame, tppi_1 * tau_val);
shift_phase(q2_frame, tppi_2 * tau_val);
shift_phase(q3_frame, tppi_3 * tau_val);
}
// Second π/2 pulse
rx(π/2) $1, $2, $3;
}
"""
module = pyqasm.loads(qasm_code)
module.unroll()
print(pyqasm.dumps(module))
```
```qasm output theme={"dark"}
OPENQASM 3.0;
qubit[4] __PYQASM_QUBITS__;
defcalgrammar "openpulse";
cal {
port eom_a_port;
port eom_b_port;
port aod_port;
frame raman_a_frame = newframe(eom_a_port, 100000000.0, 0.0, 0ns);
frame raman_b_frame = newframe(eom_b_port, -5900000000.0, 0.0, 0ns);
const complex[float[32]] raman_a_amp = 1.0 + 2.0im;
const complex[float[32]] raman_b_amp = 1.0 + 2.0im;
frame q1_frame = newframe(aod_port, 6000000000.0, 0.0, 0ns);
frame q2_frame = newframe(aod_port, 6000000000.0, 0.0, 0ns);
frame q3_frame = newframe(aod_port, 6000000000.0, 0.0, 0ns);
waveform pi_half_sig = gaussian(1.0 + 2.0im, 10.0ns, 100.0ns);
waveform q1_pi_half_sig = mix(pi_half_sig, sine(1.0 + 2.0im, 10.0ns, -1000000000.0, 0.0));
waveform q2_pi_half_sig = mix(pi_half_sig, sine(1.0 + 2.0im, 10.0ns, -1000000000.0, 0.0));
waveform q3_pi_half_sig = mix(pi_half_sig, sine(1.0 + 2.0im, 10.0ns, -1000000000.0, 0.0));
}
defcal rx(angle theta) $1, $2, $3 {
play(raman_a_frame, constant(raman_a_amp, pi_half_time));
play(raman_b_frame, constant(raman_b_amp, pi_half_time));
play(q1_frame, q1_pi_half_sig);
play(q2_frame, q2_pi_half_sig);
play(q3_frame, q3_pi_half_sig);
}
defcal rx(angle theta) $2 {
play(raman_a_frame, constant(raman_a_amp, pi_half_time));
play(raman_b_frame, constant(raman_b_amp, pi_half_time));
play(q2_frame, q2_pi_half_sig);
}
rx(1.5707963267948966) __PYQASM_QUBITS__[1], __PYQASM_QUBITS__[2], __PYQASM_QUBITS__[3];
cal {
delay[500.0ns] raman_a_frame, raman_b_frame, q1_frame, q2_frame, q3_frame;
}
rx(1.5707963267948966) __PYQASM_QUBITS__[2];
rx(1.5707963267948966) __PYQASM_QUBITS__[2];
cal {
barrier raman_a_frame, raman_b_frame, q1_frame, q2_frame, q3_frame;
delay[500.0ns] raman_a_frame, raman_b_frame, q1_frame, q2_frame, q3_frame;
shift_phase(q1_frame, 0.9735361584457891);
shift_phase(q2_frame, 0.9735361584457891);
shift_phase(q3_frame, 0.9735361584457891);
}
rx(1.5707963267948966) __PYQASM_QUBITS__[1], __PYQASM_QUBITS__[2], __PYQASM_QUBITS__[3];
rx(1.5707963267948966) __PYQASM_QUBITS__[1], __PYQASM_QUBITS__[2], __PYQASM_QUBITS__[3];
cal {
delay[1000.0ns] raman_a_frame, raman_b_frame, q1_frame, q2_frame, q3_frame;
}
rx(1.5707963267948966) __PYQASM_QUBITS__[2];
rx(1.5707963267948966) __PYQASM_QUBITS__[2];
cal {
barrier raman_a_frame, raman_b_frame, q1_frame, q2_frame, q3_frame;
delay[1000.0ns] raman_a_frame, raman_b_frame, q1_frame, q2_frame, q3_frame;
shift_phase(q1_frame, 2.920608475337346);
shift_phase(q2_frame, 2.920608475337346);
shift_phase(q3_frame, 2.920608475337346);
}
rx(1.5707963267948966) __PYQASM_QUBITS__[1], __PYQASM_QUBITS__[2], __PYQASM_QUBITS__[3];
```
```python QASM-Code theme={"dark"}
import pyqasm
qasm_code = """
OPENQASM 3.0;
defcalgrammar "openpulse";
const duration electrical_delay = 100ns;
const float q0_ro_freq = 5.0e9;
const float q1_ro_freq = 6.0e9;
cal {
// the transmission/captures ports are the same for $0 and $1
port ro_tx;
port ro_rx;
// readout stimulus and capture frames of different frequencies
frame q0_stimulus_frame = newframe(ro_tx, q0_ro_freq, 0.0);
frame q0_capture_frame = newframe(ro_rx, q0_ro_freq, 0.0);
frame q1_stimulus_frame = newframe(ro_tx, q1_ro_freq, 0.0);
frame q1_capture_frame = newframe(ro_rx, q1_ro_freq, 0.0);
}
defcal multiplexed_readout_and_capture $0, $1 -> bit[2] {
bit[2] b;
int sairam;
waveform q0_ro_wf = constant(1.0 + 2.0im, 100ns);
waveform q1_ro_wf = constant(1.0 + 2.0im, 100ns);
// multiplexed readout
play(q0_stimulus_frame, q0_ro_wf);
play(q1_stimulus_frame, q1_ro_wf);
// simple boxcar kernel
waveform ro_kernel = constant(1.0 + 2.0im, 100ns);
barrier q0_stimulus_frame, q1_stimulus_frame, q0_capture_frame, q1_capture_frame;
delay[electrical_delay] q0_capture_frame, q1_capture_frame;
b[0] = capture_v2(q0_capture_frame, ro_kernel);
b[1] = capture_v2(q1_capture_frame, ro_kernel);
return b;
}
multiplexed_readout_and_capture $0, $1;
"""
module = pyqasm.loads(qasm_code)
module.unroll()
print(pyqasm.dumps(module))
```
```qasm output theme={"dark"}
OPENQASM 3.0;
qubit[2] __PYQASM_QUBITS__;
defcalgrammar "openpulse";
cal {
port ro_tx;
port ro_rx;
frame q0_stimulus_frame = newframe(ro_tx, 5000000000.0, 0.0, 0ns);
frame q0_capture_frame = newframe(ro_rx, 5000000000.0, 0.0, 0ns);
frame q1_stimulus_frame = newframe(ro_tx, 6000000000.0, 0.0, 0ns);
frame q1_capture_frame = newframe(ro_rx, 6000000000.0, 0.0, 0ns);
}
defcal multiplexed_readout_and_capture() $0, $1 -> bit[2] {
bit[2] b;
int sairam;
waveform q0_ro_wf = constant(1.0 + 2.0im, 100.0ns);
waveform q1_ro_wf = constant(1.0 + 2.0im, 100.0ns);
play(q0_stimulus_frame, q0_ro_wf);
play(q1_stimulus_frame, q1_ro_wf);
waveform ro_kernel = constant(1.0 + 2.0im, 100.0ns);
barrier q0_stimulus_frame, q1_stimulus_frame, q0_capture_frame, q1_capture_frame;
delay[electrical_delay] q0_capture_frame, q1_capture_frame;
b[0] = capture_v2(q0_capture_frame, ro_kernel);
b[1] = capture_v2(q1_capture_frame, ro_kernel);
return b;
}
multiplexed_readout_and_capture __PYQASM_QUBITS__[0], __PYQASM_QUBITS__[1];
```
# Overview
Source: https://docs.qbraid.com/v2/pyqasm/user-guide/overview
![PyQASM]()
![PyQASM]()
*Python toolkit for OpenQASM program analysis, validation and compilation.*
## Motivation
[OpenQASM](https://openqasm.com/) is a powerful language for expressing hybrid quantum-classical programs,
but it lacks a comprehensive tool supporting the full capabilities of the language. PyQASM aims to fill this
gap by building upon the [`openqasm3.parser`](https://github.com/openqasm/openqasm/blob/ast-py/v1.0.1/source/openqasm/openqasm3/parser.py),
and providing support for semantic analysis and utilities for program compilation.
## Installation
PyQASM requires Python 3.10 or greater, and can be installed with pip as follows:
```shell theme={"dark"}
pip install pyqasm
```
### Optional dependencies
PyQASM offers integrations that require extra (optional) dependencies, which can be installed as follows:
To use the [CLI tool](/v2/pyqasm/user-guide/cli), install the `cli` extra:
```shell theme={"dark"}
pip install 'pyqasm[cli]'
```
To use the [circuit drawer tool](/v2/pyqasm/user-guide/circuit-drawer), install the `visualization` extra:
```shell theme={"dark"}
pip install 'pyqasm[visualization]'
```
### Install from source
You can also install from source by cloning this repository and running a pip install command
in the root directory of the repository:
```shell theme={"dark"}
git clone https://github.com/qBraid/pyqasm.git
cd pyqasm
pip install .
```
To include optional dependencies when installing from source, use the same "extras\_require" format, e.g.
```shell theme={"dark"}
pip install '.[cli,visualization]'
```
### Check version
You can view the version of pyqasm you have installed within a Python shell as follows:
```python theme={"dark"}
In [1]: import pyqasm
In [2]: pyqasm.__version__
```
## Using PyQASM
We will use simple QASM strings for demonstrating the core functionalities of `pyqasm` API.
A detailed overview of the supported QASM features can be found in the [Usage Examples](/v2/pyqasm/user-guide/examples) section.
### `load` and `dump`
The `load` and `dump` functions are used to read QASM code from a file and write QASM code to a file, respectively.
* **`load`**: Reads QASM code from a file and returns a `QasmModule` object.
* **`dump`**: Writes QASM code from a `QasmModule` object to a file.
```python theme={"dark"}
import pyqasm
# ensure that the file exists and the path is correct
file_path = "example.qasm"
# Load QASM code from the file into a QasmModule object
module = pyqasm.load(file_path)
# Write QASM code from a QasmModule object to a file
pyqasm.dump(module, "output.qasm")
```
### `loads` and `dumps`
The `loads` and `dumps` functions are used to read QASM code from a string and write QASM code to a string, respectively.
* **`loads`**: Reads QASM code from a string and returns a `QasmModule` object.
* **`dumps`**: Writes QASM code from a `QasmModule` object to a string.
```python Using loads and dumps theme={"dark"}
import pyqasm
qasm_code = """
OPENQASM 3.0;
include "stdgates.inc";
qubit[2] q;
bit[2] c;
h q[0];
cx q[0], q[1];
c = measure q;
"""
# Load QASM code from a string into a QasmModule object
module = pyqasm.loads(qasm_code)
# Write QASM code from a QasmModule object to a string
qasm_code = pyqasm.dumps(module)
print(qasm_code)
```
```qasm Output theme={"dark"}
OPENQASM 3.0;
include "stdgates.inc";
qubit[2] q;
bit[2] c;
h q[0];
cx q[0], q[1];
c = measure q;
```
### The `QasmModule` object
The `QasmModule` object is the main data structure used to represent a QASM program. The two important
methods of the `QasmModule` object are `validate` and `unroll` -
* `validate` : Used to check the semantic validity of the QASM program represented by the `QasmModule` object.
```python Using validate method theme={"dark"}
import pyqasm
qasm_str = """
OPENQASM 3.0;
include "stdgates.inc";
qubit[2] q;
bit[2] c;
h q[0];
cx q[0], q[1];
c = measure q;
"""
module = pyqasm.loads(qasm_str)
module.validate()
```
```python Output theme={"dark"}
None
```
Raises an exception if the program is not semantically valid and points out the error in the program.
```python Using validate method with invalid QASM code theme={"dark"}
import pyqasm
qasm_str = """
OPENQASM 3.0;
include "stdgates.inc";
qubit[2] q;
bit[2] c;
h q[0];
cx q[0], q[1];
c = measure q[3];
"""
module = pyqasm.loads(qasm_str)
module.validate()
```
```bash Output theme={"dark"}
Traceback (most recent call last):
...
ValidationError: Index 3 out of range for register of size 2 in qubit
```
To see the full capabilities of the semantic validation, refer to the [Usage Examples](/v2/pyqasm/user-guide/examples) section.
* `unroll` : Used to unroll the QASM program represented by the `QasmModule` object. Also performs semantic validation
while unrolling the program.
```python Using unroll method theme={"dark"}
import pyqasm
qasm_str = """
OPENQASM 3.0;
include "stdgates.inc";
qubit[5] q;
bit[5] c;
h q;
cx q[0], q[1];
c = measure q;
"""
module = pyqasm.loads(qasm_str)
module.unroll()
print(pyqasm.dumps(module))
```
```qasm Output theme={"dark"}
OPENQASM 3.0;
include "stdgates.inc";
qubit[5] q;
bit[5] c;
h q[0];
h q[1];
h q[2];
h q[3];
h q[4];
cx q[0], q[1];
c[0] = measure q[0];
c[1] = measure q[1];
c[2] = measure q[2];
c[3] = measure q[3];
c[4] = measure q[4];
```
A useful argument for the method is `external_gates` that takes in a list of gate names
considered external to the program. Only the number of parameters and qubit arguments must
be declared for validation but the body of the gate is not required in the program.
```python Using external_gates theme={"dark"}
import pyqasm
qasm_str = """
OPENQASM 3.0;
include "stdgates.inc";
gate custom (p1) q1, q2, q3 {
// empty body
}
qubit[4] q;
custom(pi / 2) q[0], q[1], q[2];
cx q[1], q[2];
"""
module = pyqasm.loads(qasm_str)
module.unroll(external_gates=["custom"])
print(pyqasm.dumps(module))
```
```qasm Output theme={"dark"}
OPENQASM 3.0;
include "stdgates.inc";
qubit[4] q;
custom(1.5707963267948966) q[0], q[1], q[2];
cx q[1], q[2];
```
For more details about the `QasmModule` and its features, please refer to our
[API Reference](https://qbraid.github.io/pyqasm/stubs/pyqasm.QasmModule.html#pyqasm.QasmModule).
[Currently Supported Operations](https://github.com/qBraid/pyqasm/blob/main/src/README.md) for OpenQASM language
features supported, in progress, and planned for future support.
## Contributing
* Interested in contributing code, or making a PR? See
[CONTRIBUTING.md](https://github.com/qBraid/pyqasm/blob/main/CONTRIBUTING.md)
* For feature requests and bug reports:
[Submit an issue](https://github.com/qBraid/pyqasm/issues)
* For discussions, and specific questions about pyqasm, or
other topics, [join our discord community](https://discord.gg/TPBU2sa8Et)
* For questions that are more suited for a forum, post to
[Quantum Computing Stack Exchange](https://quantumcomputing.stackexchange.com/)
with the [`pyqasm`](https://quantumcomputing.stackexchange.com/questions/tagged/pyqasm) tag.
## Citation
If you use PyQASM in your research, we kindly request that you cite it appropriately.
The BibTeX entry below is aligned with the latest stable release. For the most up-to-date
citation details, please refer to [CITATION.cff](https://github.com/qBraid/pyqasm/blob/main/CITATION.cff).
```tex theme={"dark"}
@software{Gupta_PyQASM_Python_package_2026,
author = {Gupta, Harshit and Hill, Ryan James},
license = {Apache-2.0},
month = jul,
title = {{PyQASM: Python toolkit for OpenQASM program analysis and compilation.}},
url = {https://github.com/qBraid/pyqasm},
version = {1.0.4},
year = {2026}
}
```
## License
[Apache-2.0 License](https://www.apache.org/licenses/LICENSE-2.0)
# qbraid-qir
Source: https://docs.qbraid.com/v2/qir/api-reference/qbraid-qir
# Cirq conversions
Source: https://docs.qbraid.com/v2/qir/user-guide/cirq-qir
## Example Usage
Convert a `Cirq` circuit to `QIR` code:
```python Code theme={"dark"}
import cirq
from qbraid_qir import dumps
from qbraid_qir.cirq import cirq_to_qir
# create a test circuit
q0, q1 = cirq.LineQubit.range(2)
circuit = cirq.Circuit(cirq.H(q0), cirq.CNOT(q0, q1), cirq.measure(q0, q1))
# convert to QIR
module = cirq_to_qir(circuit, name="bell")
# saves to .ll and .bc files in working directory
dumps(module)
print(module)
```
```output Output theme={"dark"}
; ModuleID = 'bell'
source_filename = "bell"
%Qubit = type opaque
%Result = type opaque
define void @main() #0 {
entry:
call void @__quantum__qis__h__body(%Qubit* inttoptr (i64 0 to %Qubit*))
call void @__quantum__qis__cnot__body(%Qubit* inttoptr (i64 0 to %Qubit*), %Qubit* inttoptr (i64 1 to %Qubit*))
call void @__quantum__qis__mz__body(%Qubit* inttoptr (i64 0 to %Qubit*), %Result* inttoptr (i64 0 to %Result*))
call void @__quantum__qis__mz__body(%Qubit* inttoptr (i64 1 to %Qubit*), %Result* inttoptr (i64 1 to %Result*))
ret void
}
declare void @__quantum__qis__h__body(%Qubit*)
declare void @__quantum__qis__cnot__body(%Qubit*, %Qubit*)
declare void @__quantum__qis__mz__body(%Qubit*, %Result* writeonly) #1
attributes #0 = { "entry_point" "output_labeling_schema" "qir_profiles"="custom" "required_num_qubits"="2" "required_num_results"="2" }
attributes #1 = { "irreversible" }
!llvm.module.flags = !{!0, !1, !2, !3}
!0 = !{i32 1, !"qir_major_version", i32 1}
!1 = !{i32 7, !"qir_minor_version", i32 0}
!2 = !{i32 1, !"dynamic_qubit_management", i1 false}
!3 = !{i32 1, !"dynamic_result_management", i1 false}
```
### Note
Circuits constructed using qubits of type `cirq.NameQubit` or `cirq.GridQubit` will be transformed to type `cirq.LineQubit` before conversion to QIR.
Execute the QIR program using the [qir-runner](https://github.com/qir-alliance/qir-runner) command line tool:
```bash theme={"dark"}
$ qir-runner -f bell.bc
```
[https://github.com/qBraid/qbraid-qir/tree/main/docker/linux-amd64](https://github.com/qBraid/qbraid-qir/tree/main/docker/linux-amd64)
# Overview
Source: https://docs.qbraid.com/v2/qir/user-guide/overview
![qBraid-QIR]()
![qBraid-QIR]()
*qBraid-SDK extension providing support for QIR conversions.*
## Motivation
This project aims to make QIR
representations accessible via the qBraid-SDK
transpiler, and by doing so, open the
door to language-specific conversions from any and all high-level quantum
languages [supported](/v2/sdk/user-guide/overview/#supported-frontends) by
qbraid.
See QIR Alliance: Why do we need it?
![QIR Alliance]()
![QIR Alliance]()
## Installation
qBraid-QIR requires Python 3.10 or greater, and can be installed with pip as follows:
```shell theme={"dark"}
pip install qbraid-qir
```
### Optional dependencies
qBraid-QIR offers integrations that require extra (optional) dependencies, which can be installed as follows:
For Cirq to QIR conversions, install the `cirq` extra:
```shell theme={"dark"}
pip install 'qbraid-qir[cirq]'
```
For OpenQASM 3 to QIR conversions, install the `qasm3` extra:
```shell theme={"dark"}
pip install 'qbraid-qir[qasm3]'
```
For Qiskit to QIR conversions, install the `qiskit` extra:
```shell theme={"dark"}
pip install 'qbraid-qir[qiskit]'
```
For Squin to QIR conversions, install the `squin` extra:
```shell theme={"dark"}
pip install 'qbraid-qir[squin]'
```
### Install from source
You can also install from source by cloning this repository and running a pip install command
in the root directory of the repository:
```shell theme={"dark"}
git clone https://github.com/qBraid/qbraid-qir.git
cd qbraid-qir
pip install .
```
To include optional dependencies when installing from source, use the same "extras\_require" format, e.g.
```shell theme={"dark"}
pip install '.[qiskit,cirq,qasm3,squin]'
```
## Check version
You can view the version of qbraid-qir you have installed within a Python shell as follows:
```python theme={"dark"}
In [1]: import qbraid_qir
In [2]: qbraid_qir.__version__
```
## Usage examples
### Qiskit conversions
```python theme={"dark"}
from qiskit import QuantumCircuit
from qbraid_qir.qiskit import qiskit_to_qir
qc = QuantumCircuit(2, 2)
qc.h(0)
qc.cx(0, 1)
qc.measure([0, 1], [0, 1])
module = qiskit_to_qir(qc, name="bell")
ir = str(module)
```
### Cirq conversions
```python theme={"dark"}
import cirq
from qbraid_qir.cirq import cirq_to_qir
q0, q1 = cirq.LineQubit.range(2)
circuit = cirq.Circuit(
cirq.H(q0),
cirq.CNOT(q0, q1),
cirq.measure(q0, q1)
)
module = cirq_to_qir(circuit, name="my-circuit")
ir = str(module)
```
### OpenQASM 3 conversions
```python theme={"dark"}
from qbraid_qir.qasm3 import qasm3_to_qir
program = """
OPENQASM 3;
include "stdgates.inc";
qubit[2] q;
bit[2] c;
h q[0];
cx q[0], q[1];
measure q[0] -> c[0];
measure q[1] -> c[1];
"""
module = qasm3_to_qir(program, name="my-program")
ir = str(module)
```
[Currently Supported Operations](https://github.com/qBraid/qbraid-qir/tree/main/qbraid_qir/qasm3/README.md)
### QIR to Squin conversions
```python theme={"dark"}
from qbraid_qir.squin import load
from pyqir import BasicQisBuilder, SimpleModule
mod = SimpleModule("bell", num_qubits=2, num_results=2)
qis = BasicQisBuilder(mod.builder)
qis.h(mod.qubits[0])
qis.cnot(mod.qubits[0], mod.qubits[1])
squin_kernel = load(mod._module)
squin_kernel.print()
```
## Architecture diagram
qBraid-SDK transpiler hub-and-spokes architecture with
qbraid-qir integration (left) mapped to language specific conversion step in QIR abstraction
[layers](https://www.qir-alliance.org/qir-book/concepts/why-do-we-need.html) (right).
![]()
![]()
## Contributing
* Interested in contributing code, or making a PR? See
[CONTRIBUTING.md](https://github.com/qBraid/qbraid-qir/blob/main/CONTRIBUTING.md)
* For feature requests and bug reports:
[Submit an issue](https://github.com/qBraid/qbraid-qir/issues)
* For discussions, and specific questions about qBraid-QIR [join our discord community](https://discord.gg/TPBU2sa8Et)
* For questions that are more suited for a forum, post to
[Quantum Computing Stack Exchange](https://quantumcomputing.stackexchange.com/)
with the [`qbraid`](https://quantumcomputing.stackexchange.com/questions/tagged/qbraid) tag.
## Citation
If you use qBraid-QIR in your research, we kindly request that you cite it appropriately.
The BibTeX entry below is aligned with the latest stable release. For the most up-to-date
citation details, please refer to [CITATION.cff](https://github.com/qBraid/qbraid-qir/blob/main/CITATION.cff).
```tex theme={"dark"}
@software{Gupta_qBraid-QIR_Python_package_2026,
author = {Gupta, Harshit and Hill, Ryan James},
license = {Apache-2.0},
month = may,
title = {{qBraid-QIR: Python package for QIR conversions, integrations, and utilities.}},
url = {https://github.com/qBraid/qbraid-qir},
version = {0.6.0},
year = {2026}
}
```
## Acknowledgements
This project was conceived in cooperation with the Quantum Open Source Foundation ([QOSF](https://qosf.org/)).
![Quantum Open Source Foundation]() ## License
[Apache-2.0 License](https://www.apache.org/licenses/LICENSE-2.0)
# QIR Profiles
Source: https://docs.qbraid.com/v2/qir/user-guide/profiles
QIR (Quantum Intermediate Representation) profiles in `qbraid-qir` define the rules, restrictions,
and capabilities that govern how OpenQASM 3 programs are converted to QIR. When converting a QASM
program to QIR using `qbraid-qir`, you must specify a profile—either **Base** or **Adaptive**—which
determines the allowed quantum operations, branching, measurement handling, and output recording.
This ensures that the generated QIR is compliant with the requirements of the target quantum backend
or workflow.
## Available Profiles
### Base Profile
* **Name:** `Base`
* **Capabilities:**
* Conditional execution (`if` statements) is supported.
* Only sequential output recording is supported.
* **Restrictions:**
* No forward branching (no `goto` or loops).
* Qubit reuse after measurement is **not** allowed.
* Measurement tracking is **not** enabled.
* No grouped output recording.
* No qubit reuse after measurement.
* Barriers must cover **all** qubits (no subset barriers).
* Only a fixed set of gates is supported.
### Adaptive Profile
* **Name:** `AdaptiveExecution`
* **Capabilities:**
* Conditional execution and forward branching are supported.
* Qubit reuse after measurement is **allowed**.
* Measurement tracking is enabled.
* Grouped output recording is supported (register structure is preserved).
* Barriers must cover **all** qubits.
* Supports a broader set of gates and more flexible control flow.
* **Restrictions:**
* Subset barriers are **not** allowed (barriers must cover all qubits).
* Only constant parameters for parameterized gates.
## How to Use
When converting QASM to QIR, specify the profile using the `profile` argument:
```python converting qasm to qir theme={"dark"}
from qbraid_qir.qasm3 import qasm3_to_qir
qasm3_code = """
OPENQASM 3;
qubit[2] q;
bit[2] c;
h q[0];
c[0] = measure q[0];
if (c[0]) {
x q[1];
}
c[1] = measure q[1];
"""
# Convert using the Base profile
qir_base = qasm3_to_qir(qasm3_code, profile="base")
print(qir_base)
# Convert using the Adaptive profile
qir_adaptive = qasm3_to_qir(qasm3_code, profile="adaptive")
print(qir_adaptive)
```
```llvm base profile output theme={"dark"}
; ModuleID = 'program-b27e5a7a-4b58-11f0-824a-cae339f58535'
source_filename = "program-b27e5a7a-4b58-11f0-824a-cae339f58535"
%Qubit = type opaque
%Result = type opaque
define void @program-b27e5a7a-4b58-11f0-824a-cae339f58535() #0 {
entry:
call void @__quantum__rt__initialize(i8* null)
call void @__quantum__qis__h__body(%Qubit* null)
call void @__quantum__qis__mz__body(%Qubit* null, %Result* null)
%0 = call i1 @__quantum__qis__read_result__body(%Result* null)
br i1 %0, label %then, label %else
then: ; preds = %entry
call void @__quantum__qis__x__body(%Qubit* inttoptr (i64 1 to %Qubit*))
br label %continue
else: ; preds = %entry
br label %continue
continue: ; preds = %else, %then
call void @__quantum__qis__mz__body(%Qubit* inttoptr (i64 1 to %Qubit*), %Result* inttoptr (i64 1 to %Result*))
call void @__quantum__rt__result_record_output(%Result* null, i8* null)
call void @__quantum__rt__result_record_output(%Result* inttoptr (i64 1 to %Result*), i8* null)
ret void
}
declare void @__quantum__rt__initialize(i8*)
declare void @__quantum__qis__h__body(%Qubit*)
declare void @__quantum__qis__mz__body(%Qubit*, %Result* writeonly) #1
declare i1 @__quantum__qis__read_result__body(%Result*)
declare void @__quantum__qis__x__body(%Qubit*)
declare void @__quantum__rt__result_record_output(%Result*, i8*)
attributes #0 = { "entry_point" "output_labeling_schema" "qir_profiles"="base" "required_num_qubits"="2" "required_num_results"="2" }
attributes #1 = { "irreversible" }
!llvm.module.flags = !{!0, !1, !2, !3}
!0 = !{i32 1, !"qir_major_version", i32 1}
!1 = !{i32 7, !"qir_minor_version", i32 0}
!2 = !{i32 1, !"dynamic_qubit_management", i1 false}
!3 = !{i32 1, !"dynamic_result_management", i1 false}
```
```llvm adaptive profile output theme={"dark"}
; ModuleID = 'program-b27f2086-4b58-11f0-824a-cae339f58535'
source_filename = "program-b27f2086-4b58-11f0-824a-cae339f58535"
%Qubit = type opaque
%Result = type opaque
define void @program-b27f2086-4b58-11f0-824a-cae339f58535() #0 {
entry:
call void @__quantum__rt__initialize(i8* null)
call void @__quantum__qis__h__body(%Qubit* null)
call void @__quantum__qis__mz__body(%Qubit* null, %Result* null)
%0 = call i1 @__quantum__qis__read_result__body(%Result* null)
br i1 %0, label %then, label %else
then: ; preds = %entry
call void @__quantum__qis__x__body(%Qubit* inttoptr (i64 1 to %Qubit*))
br label %continue
else: ; preds = %entry
br label %continue
continue: ; preds = %else, %then
call void @__quantum__qis__mz__body(%Qubit* inttoptr (i64 1 to %Qubit*), %Result* inttoptr (i64 1 to %Result*))
call void @__quantum__rt__array_record_output(i64 2, i8* null)
call void @__quantum__rt__result_record_output(%Result* inttoptr (i64 1 to %Result*), i8* null)
call void @__quantum__rt__result_record_output(%Result* null, i8* null)
ret void
}
declare void @__quantum__rt__initialize(i8*)
declare void @__quantum__qis__h__body(%Qubit*)
declare void @__quantum__qis__mz__body(%Qubit*, %Result* writeonly) #1
declare i1 @__quantum__qis__read_result__body(%Result*)
declare void @__quantum__qis__x__body(%Qubit*)
declare void @__quantum__rt__array_record_output(i64, i8*)
declare void @__quantum__rt__result_record_output(%Result*, i8*)
attributes #0 = { "entry_point" "output_labeling_schema" "qir_profiles"="adaptive" "required_num_qubits"="2" "required_num_results"="2" }
attributes #1 = { "irreversible" }
!llvm.module.flags = !{!0, !1, !2, !3}
!0 = !{i32 1, !"qir_major_version", i32 1}
!1 = !{i32 7, !"qir_minor_version", i32 0}
!2 = !{i32 1, !"dynamic_qubit_management", i1 false}
!3 = !{i32 1, !"dynamic_result_management", i1 false}
```
The `qir_base` and `qir_adaptive` variables will contain the generated QIR code for the specified profile.
## Example QASM Programs
```qasm theme={"dark"}
OPENQASM 3;
qubit[2] q;
bit[2] c;
h q[0];
c[0] = measure q[0];
x q[1]; // Allowed
reset q[0]; // Not allowed in Base profile (qubit reuse forbidden)
```
The last line will cause an error in the Base profile because qubit reuse after measurement is not
permitted
```qasm theme={"dark"}
OPENQASM 3;
qubit[2] q;
bit[2] c;
h q[0];
c[0] = measure q[0];
reset q[0]; // Allowed in Adaptive profile
x q[0]; // Allowed in Adaptive profile
```
This program is valid in the Adaptive profile, which allows qubit reuse after measurement and reset.
```qasm theme={"dark"}
OPENQASM 3;
qubit[2] q;
bit[2] c;
h q[0];
c[0] = measure q[0];
if (c[0]) {
x q[1];
}
```
Both profiles support conditional execution, but only the `Adaptive` profile supports more advanced
branching and measurement-based control flow.
## Conclusion
When converting QASM to QIR with `qbraid-qir`, always choose the profile that **matches your target
backend's requirements** The `Base` profile is strict and suitable for simple, hardware-oriented
workflows, while the `Adaptive` profile enables more advanced quantum programming features such as
qubit reuse, grouped output, and flexible control flow.
# OpenQASM 3 conversions
Source: https://docs.qbraid.com/v2/qir/user-guide/qasm3-qir
```python Code theme={"dark"}
from qbraid_qir.qasm3 import qasm3_to_qir
program = """
OPENQASM 3;
include "stdgates.inc";
qubit[2] q;
bit[2] c;
h q[0];
cx q[0], q[1];
measure q[0] -> c[0];
measure q[1] -> c[1];
"""
module = qasm3_to_qir(program, name="bell")
ir = str(module)
```
```output Output theme={"dark"}
; ModuleID = 'bell'
source_filename = "bell"
%Qubit = type opaque
%Result = type opaque
define void @main() #0 {
entry:
call void @__quantum__qis__h__body(%Qubit* inttoptr (i64 0 to %Qubit*))
call void @__quantum__qis__cnot__body(%Qubit* inttoptr (i64 0 to %Qubit*), %Qubit* inttoptr (i64 1 to %Qubit*))
call void @__quantum__qis__mz__body(%Qubit* inttoptr (i64 0 to %Qubit*), %Result* inttoptr (i64 0 to %Result*))
call void @__quantum__qis__mz__body(%Qubit* inttoptr (i64 1 to %Qubit*), %Result* inttoptr (i64 1 to %Result*))
ret void
}
declare void @__quantum__qis__h__body(%Qubit*)
declare void @__quantum__qis__cnot__body(%Qubit*, %Qubit*)
declare void @__quantum__qis__mz__body(%Qubit*, %Result*) #1
attributes #0 = { "entry_point" "output_labeling_schema" "qir_profiles"="custom" "required_num_qubits"="2" "required_num_results"="2" }
attributes #1 = { "irreversible" }
!llvm.module.flags = !{!0, !1, !2, !3}
!0 = !{i32 1, !"qir_major_version", i32 1}
!1 = !{i32 7, !"qir_minor_version", i32 0}
!2 = !{i32 1, !"dynamic_qubit_management", i1 false}
!3 = !{i32 1, !"dynamic_result_management", i1 false}
```
Execute the QIR program using the qir-runner command line tool:
```bash theme={"dark"}
$ qir-runner -f bell.bc
```
## Currently Supported Constructs
The `qbraid_qir.qasm3.qasm3_to_qir()` converter supports the following OpenQASM 3 constructs:
### 1. [Register Declarations](https://openqasm.com/language/types.html#quantum-types)
OpenQASM declarations of all forms `qreg`, `qubit`, `bit`, and `creg` are supported.
```qasm theme={"dark"}
OPENQASM 3;
// qubit declaration
qubit q1;
qubit[2] q2;
qreg q3[3];
qubit[1] q4;
// bit declaration
bit c1;
bit[2] c2;
creg c3[3];
bit[1] c4;
```
### 2. [Quantum Measurements](https://openqasm.com/language/insts.html#measurement)
OpenQASM measurements are supported which involve single qubit measurement and full register measurements.
Range based measurements are not supported currently.
```qasm theme={"dark"}
OPENQASM 3;
qubit[2] q1;
qubit[5] q2;
qubit q3;
bit[2] c1;
bit c2;
// supported
c1 = measure q1;
measure q1 -> c1;
c2[0] = measure q3[0];
//ERROR: not supported
c1[0:2] = measure q1[0:2];
```
### 3. [Quantum Reset](https://openqasm.com/language/insts.html#initialization)
Resets are supported on declared quantum registers in all forms.
```qasm theme={"dark"}
OPENQASM 3;
include "stdgates.inc";
// qubit declarations
qubit q1;
qubit[2] q2;
qreg q3[3];
// reset operations
reset q1;
reset q2[1];
reset q3[2];
reset q3[:2];
```
### 4. Quantum Gates
* `pyqir._native` gates are supported along with support for `U3` and U2 gates. The `U[x]` gates are defined in terms of existing `rx` and `rz` gates according to the decomposition present on the [Qiskit UGate documentation](https://docs.quantum.ibm.com/api/qiskit/qiskit.circuit.library.UGate) and [PhaseGate documentation](https://docs.quantum.ibm.com/api/qiskit/qiskit.circuit.library.PhaseGate).
* Full set of the openqasm3 ["stdgates.inc" gates](https://openqasm.com/language/standard_library.html) are supported. These gates are decomposed with the help of the `pyqir._native` gate set and subsequently converted to QIR.
### 5. [Quantum Barriers](https://openqasm.com/language/delays.html#barrier-instruction)
Barriers are supported only if they are placed on ALL the qubits in the circuit. For example:
```qasm theme={"dark"}
qubit q[2];
U(0.1, 0.2, 0.3) q[0];
// Barrier on all qubits
barrier q;
// ERROR: Barrier on a subset of qubits
barrier q[0];
```
### 6. [Custom Quantum Gates](https://openqasm.com/language/gates.html#defining-gates)
Gates defined by users are supported as long as they are defined in terms of `pyqir._native` gate set. Identifier mapping in gate parameter expressions is not supported at the moment. Example:
```qasm theme={"dark"}
OPENQASM 3.0;
include "stdgates.inc";
// Supported
gate custom2(g) s {
h s;
rz(g) s;
}
// Supported
gate custom(a,b,c) p, q {
custom2(a) q;
h p;
cx p,q;
rx(a) q;
ry(0.5/0.1) q;
}
qubit[2] q;
custom(2 + 3 - 1/5, 0.1, 0.3) q[0], q[1];
```
### 7. [Simple Branching Statements](https://openqasm.com/language/classical.html#if-else-statements)
Since QIR supports branching on a measurement result, **single bit branching** statements are supported at the moment. General boolean expressions and support for branching on full registers will be added in future. For example:
```qasm theme={"dark"}
OPENQASM 3;
include "stdgates.inc";
qubit[4] q;
bit[4] c;
h q;
measure q -> c;
// supported
if (c[0]) {
x q[0];
cx q[0], q[1];
}
if (c[1] == 1) {
cx q[1], q[2];
}
if (!c[2]) {
h q[2];
}
// ERROR: not supported
if (c == 8) {
x q[0];
}
// ERROR: not supported
int[4] element;
if (element > 5) {
y q[1];
}
```
### 8. [Expressions](https://openqasm.com/language/classical.html#low-level-classical-instructions)
* General expression evaluation involving literals and constants is supported.
* Expressions involving constants and variables are fully supported.
* Expressions with arrays are also supported (in global scopes).
```qasm expression with literals theme={"dark"}
OPENQASM 3;
qubit q;
// supported
rx(1.57) q;
rz(3-2*3) q;
rz(3-2*3\*(8/2)) q;
rx(-1.57) q;
rx(4%2) q;
```
```qasm expression with scalar variables theme={"dark"}
OPENQASM 3;
// scalar value assignment and declaration
int[32] a = 5;
float[32] b;
b = 3.14;
// constant value assignment and declaration
const int[32] c_int = 5;
const float[32] c_float = 3.141592;
// arbitary expressions
int[32] x = a + 5*c_int;
```
```qasm expression with arrays theme={"dark"}
OPENQASM 3;
// static initialization
array[int[32], 3, 2] arr_int = { {1, 2}, {3, 4}, {5, 6} };
array[float[32], 3, 2] arr_float32 = { {1.0, 2.0}, {3.0, 4.0}, {5.0, 6.0} };
// assignment of individual elements
int a = 2;
arr_int[1][1] = a; // arr_int = { {1, 2}, {3, 2}, {5, 6} }
// array elements in expressions
float[32] b = arr_float32[1][1] * 3.1415; // b = 4.0*3.1415 = 12.566
qubit q;
rx(b) q; // rx(12.566) is applied on qubit q
```
### 9. [Variables and Types](https://openqasm.com/language/types.html)
* Scalar types `int`, `uint`, `float`, `bool` and `bit` with arbitrary sizes are supported.
* `array` type is supported for `int`, `uint`, `float`, `bool` and `bit`.
* `complex` and `angle` types are not supported yet.
```qasm scalar variables theme={"dark"}
OPENQASM 3;
// declarations
int a;
uint b;
int[2] c = 1;
uint[13] d = 2;
float[32] my_pi = 3.14;
// assignments and expressions
a = 5 \* c;
b = 6 - d;
```
```qasm array variables theme={"dark"}
OPENQASM 3;
// declarations
array[int[32], 3, 2] arr_int = { {1, 2}, {3, 4}, {5, 6} };
array[float[32], 3, 2] arr_float32;
// element assignment
float[32] c = 4.5;
arr_float32[1][1] = c; // arr_float32 = { {None, None}, {None, 4.5}, {None, None} }
arr_int[1][1] = 5; // arr_int = { {1, 2}, {3, 5}, {5, 6} }
// expressions
float[32] d = arr_float32[1][1] * 3.1415; // d = 4.5*3.1415 = 14.13775
```
### 10. [Loops](https://openqasm.com/language/classical.html#for-loops)
Both `for` and `while` loops are supported at the moment. For example:
```qasm simple for loop theme={"dark"}
OPENQASM 3.0;
include "stdgates.inc";
qubit[2] q;
int[32] i;
for int[32] i in [0:2] {
h q[i];
}
```
```qasm complex for loop theme={"dark"}
OPENQASM 3.0;
include "stdgates.inc";
qubit[4] q;
bit[4] c;
int j = 0;
h q;
for int i in [0:2]{
cx q[i], q[i+1];
h q[j];
j += 1;
}
h q[j];
measure q -> c;
```
```qasm simple while loop theme={"dark"}
OPENQASM 3.0;
include "stdgates.inc";
qubit[4] q;
int i = 0;
while (i < 3) {
h q[i];
cx q[i], q[i+1];
i += 1;
}
```
```qasm combined loops theme={"dark"}
OPENQASM 3.0;
include "stdgates.inc";
qubit[2] q;
int i = 0;
while (i < 2) {
for int j in {0, 1} {
h q[j];
}
i += 1;
}
```
### 11. [**Aliasing**](https://openqasm.com/language/types.html#aliasing)
* Aliasing quantum registers is supported and can be used to refer to the same quantum register with different names.
* Aliases are currently supported in global scope of the qasm3 program, with support for function scopes coming soon.
```qasm simple aliasing theme={"dark"}
OPENQASM 3.0;
include "stdgates.inc";
qubit[5] q;
let myqreg0 = q;
let myqreg1 = q[1];
let myqreg2 = q[1:];
let myqreg3 = q[:4];
let myqreg4 = q[1:4];
let myqreg5 = q[1:2:4];
let myqreg6 = q[{0, 1}];
x myqreg0[0];
h myqreg1;
cx myqreg2[0], myqreg2[1];
cx myqreg3[2], myqreg3[3];
ccx myqreg4;
swap myqreg5[0], myqreg5[1];
cz myqreg6;
```
```qasm aliasing in scope theme={"dark"}
OPENQASM 3;
include "stdgates.inc";
qubit[4] q;
bit[4] c;
h q;
measure q -> c;
if (c[0]) {
let alias = q[0:2];
x alias[0];
cx alias[0], alias[1];
}
if (c[1] == 1) {
cx q[1], q[2];
}
if (!c[2]) {
h q[2];
}
```
### 12. [Subroutines](https://openqasm.com/language/subroutines.html)
We support QASM3 subroutines in the QIR converter
Subroutines are supported in QASM3 and can be defined using the `def` keyword and are only allowed in the global scope.
```qasm simple definition theme={"dark"}
OPENQASM 3;
include "stdgates.inc";
def my_function(qubit q) { // void function
h q;
return;
}
```
```qasm definition with return type theme={"dark"}
OPENQASM 3;
include "stdgates.inc";
def my_function(qubit q) -> int[32] {
h q;
return 1;
}
```
Subroutines can be called from within the main program or from other subroutines.
```qasm simple call theme={"dark"}
OPENQASM 3.0;
include "stdgates.inc";
def my_function(qubit a, float[32] b) {
rx(b) a;
float[64] c = 2*b;
rx(c) a;
return;
}
qubit q;
bit c;
float[32] r = 3.14;
my_function(q, r);
```
```qasm call in expression theme={"dark"}
OPENQASM 3;
include "stdgates.inc";
def my_function(qubit q) -> bool{
h q;
return true;
}
qubit q;
bool b = my_function(q);
```
```qasm call from another subroutine theme={"dark"}
OPENQASM 3;
include "stdgates.inc";
def my_function(qubit q) {
h q;
return;
}
def my_function_2(qubit[2] q) {
my_function(q[1]);
return;
}
qubit[2] q;
my_function_2(q);
```
* Quantum arguments of type `qubit` are supported in subroutines.
* Classical arguments are supported for any scalar type and can return values of any scalar type.
* All argument validations mentioned in the OpenQASM3 specification are supported.
```qasm mixed arguments theme={"dark"}
OPENQASM 3;
include "stdgates.inc";
def my_function(qubit q, int[32] a, float[32] b) {
rz(a) q;
rx(b) q;
return;
}
qubit q;
int[32] n = 5;
float[32] b = 3.14;
my_function(q, n, b);
```
```qasm simple return type theme={"dark"}
OPENQASM 3;
include "stdgates.inc";
def my_function(qubit q) -> bool {
h q;
return true;
}
qubit q;
bool b = my_function(q);
```
```qasm testing return values theme={"dark"}
OPENQASM 3;
include "stdgates.inc";
def my_function(qubit q) -> float[32] {
h q;
return 3.14;
}
def my_function_2(qubit q, float[32] r) {
rx(r) q;
return;
}
qubit[2] q;
float[32] r1 = my_function(q[0]);
my_function_2(q[0], r1);
array[float[32], 1, 1] r2 = {{3.14}};
my_function_2(q[1], r2[0,0]);
```
* Add `mutable` and `readonly` arrays as classical arguments in a subroutines
* Support looping statements inside a subroutine - Support switch statements
inside a subroutine - Support for aliasing in a subroutine
### 13. [Switch](https://openqasm.com/language/classical.html#the-switch-statement)
Switch statements in QASM3 are supported in the QIR converter. These are defined according to the OpenQASM3 spec
and support all the features mentioned in the specification.
```qasm simple switch theme={"dark"}
OPENQASM 3.0;
include "stdgates.inc";
const int i = 4;
const int j = 4;
qubit q;
switch(i) {
case 6, j {
x q;
}
default {
z q;
}
}
```
```qasm nested switch theme={"dark"}
OPENQASM 3.0;
include "stdgates.inc";
const int i = 1;
qubit q;
switch(i) {
case 1,3,5,7 {
int j = 4; // definition inside scope
switch(j) {
case 1,3,5,7 {
x q;
}
case 2,4,6,8 {
y q; // this will be executed
}
default {
z q;
}
}
}
case 2,4,6,8 {
y q;
}
default {
z q;
}
}
```
# Squin conversions
Source: https://docs.qbraid.com/v2/qir/user-guide/qir-squin
This module enables conversion from Quantum Intermediate Representation ([PyQIR](https://github.com/qir-alliance/pyqir)) to Squin kernels, allowing you to execute QIR circuits using the [Bloqade](https://github.com/QuEraComputing/bloqade) SDK's Squin execution engine. [Squin](https://bloqade.quera.com/dev/digital/dialects_and_kernels/squin/) provides a high-performance quantum circuit execution environment, and this conversion opens the door to running QIR circuits on Bloqade simulators and hardware backends.
## Installation
```shell theme={"dark"}
pip install 'qbraid-qir[squin]'
```
## Conversions
This section highlights the different ways in which the converter `load()` can be used with various formats and input types. Each conversion method is demonstrated with practical examples below.
### PyQIR String to Squin kernel
Convert PyQIR `IR string` to a Squin kernel:
```python Code theme={"dark"}
from qbraid_qir.squin import load
qir_str = """
; ModuleID = 'bell'
source_filename = "bell"
%Qubit = type opaque
define void @main() #0 {
entry:
call void @__quantum__qis__h__body(%Qubit* null)
call void @__quantum__qis__cnot__body(%Qubit* null, %Qubit* inttoptr (i64 1 to %Qubit*))
ret void
}
declare void @__quantum__qis__h__body(%Qubit*)
declare void @__quantum__qis__cnot__body(%Qubit*, %Qubit*)
attributes #0 = { "entry_point" "output_labeling_schema" "qir_profiles"="custom" "required_num_qubits"="2" "required_num_results"="2" }
!llvm.module.flags = !{!0, !1, !2, !3}
!0 = !{i32 1, !"qir_major_version", i32 1}
!1 = !{i32 7, !"qir_minor_version", i32 0}
!2 = !{i32 1, !"dynamic_qubit_management", i1 false}
!3 = !{i32 1, !"dynamic_result_management", i1 false}
"""
squin_kernel = load(qir_str, kernel_name="bell")
squin_kernel.print()
```
```output Output theme={"dark"}
func.func @bell() -> !py.NoneType {
^0(%bell_self):
│ %0 = func.invoke new() : !py.Qubit maybe_pure=False
│ %1 = func.invoke new() : !py.Qubit maybe_pure=False
│ %2 = func.invoke h(%0) : !py.NoneType maybe_pure=False
│ %3 = func.invoke cx(%0, %1) : !py.NoneType maybe_pure=False
│ %4 = func.const.none() : !py.NoneType
│ func.return %4
} // func.func bell
```
### PyQIR Module to Squin kernel
Convert a PyQIR `Module` object to a Squin kernel:
```python Code theme={"dark"}
from qbraid_qir.squin import load
from pyqir import BasicQisBuilder, SimpleModule
mod = SimpleModule("ghz", num_qubits=3, num_results=3)
qis = BasicQisBuilder(mod.builder)
qis.h(mod.qubits[0])
qis.cx(mod.qubits[0], mod.qubits[1])
qis.cx(mod.qubits[1], mod.qubits[2])
squin_kernel = load(mod._module)
squin_kernel.print()
```
```output Output theme={"dark"}
func.func @main() -> !py.NoneType {
^0(%main_self):
│ %0 = func.invoke new() : !py.Qubit maybe_pure=False
│ %1 = func.invoke new() : !py.Qubit maybe_pure=False
│ %2 = func.invoke new() : !py.Qubit maybe_pure=False
│ %3 = func.invoke h(%0) : !py.NoneType maybe_pure=False
│ %4 = func.invoke cx(%0, %1) : !py.NoneType maybe_pure=False
│ %5 = func.invoke cx(%1, %2) : !py.NoneType maybe_pure=False
│ %6 = func.const.none() : !py.NoneType
│ func.return %6
} // func.func main
```
### Conversion from File
Load PyQIR IR from a `file` (`.ll` for LLVM IR text or `.bc` for LLVM bitcode):
```python Code theme={"dark"}
from qbraid_qir.squin import load
# Load from .ll file (LLVM IR text)
kernel = load("path/to/circuit.ll", kernel_name="my_circuit")
# Load from .bc file (LLVM bitcode)
kernel = load("path/to/circuit.bc", kernel_name="my_circuit")
```
### Integration with OpenQASM 3
Convert `OpenQASM3` programs to Squin kernels using `qbraid-qir`:
```python Code theme={"dark"}
from qbraid_qir.qasm3 import qasm3_to_qir
from qbraid_qir.squin import load
program = """
OPENQASM 3;
include "stdgates.inc";
qubit[2] q;
bit[2] c;
h q[0];
x q[0], q[1];
rx(pi/2) q[0];
"""
module = qasm3_to_qir(program, name="my_program")
squin_kernel = load(str(module))
squin_kernel.print()
```
```output Output theme={"dark"}
func.func @main() -> !py.NoneType {
^0(%main_self):
│ %0 = func.invoke new() : !py.Qubit maybe_pure=False
│ %1 = func.invoke new() : !py.Qubit maybe_pure=False
│ %2 = func.invoke h(%0) : !py.NoneType maybe_pure=False
│ %3 = func.invoke x(%0) : !py.NoneType maybe_pure=False
│ %4 = func.invoke x(%1) : !py.NoneType maybe_pure=False
│ %5 = py.constant.constant 1.5707963267948966 : !py.float
│ %6 = func.invoke rx(%5, %0) : !py.NoneType maybe_pure=False
│ %7 = func.const.none() : !py.NoneType
│ func.return %7
} // func.func main
```
### Integration with CUDA-Q
Convert `CUDA-Q` kernels to Squin kernels
```python Code theme={"dark"}
import cudaq
from qbraid_qir.squin import load
@cudaq.kernel
def bell():
q = cudaq.qvector(2)
h(q[0])
cx(q[0], q[1])
# Generate QIR from kernel
qir_str = cudaq.translate(bell, format="qir-base")
squin_kernel = load(qir_str, kernel_name="bell")
squin_kernel.print()
```
**CUDA-Q** is capable of exporting QIR using multiple profiles (such
as`qir-base, qir-adaptive,` etc.). Currently, the qbraid-qir Squin integration
supports only QIR generated with the **qir-base** profile. Ensure that when
using **cudaq.translate**, you specify **format="qir-base"** for
compatibility.
### Using Qubit Register as Argument
Create a kernel that accepts a qubit register as an argument, enabling composition of kernel functions:
```python Code theme={"dark"}
from qbraid_qir.squin import load
from pyqir import BasicQisBuilder, SimpleModule
mod = SimpleModule("main", num_qubits=3, num_results=3)
qis = BasicQisBuilder(mod.builder)
qis.h(mod.qubits[0])
qis.cx(mod.qubits[0], mod.qubits[1])
squin_kernel = load(
module=mod._module,
kernel_name="bell",
register_as_argument=True,
register_argument_name="qreg"
)
squin_kernel.print()
```
```output Output theme={"dark"}
func.func @bell(qreg : !py.IList[!py.Qubit, Literal(2,int)]) -> !py.NoneType {
^0(%bell_self, %qreg):
│ %0 = py.constant.constant 0 : !py.int
│ %1 = py.indexing.getitem(%qreg : !py.IList[!py.Qubit, Literal(2,int)], %0) : !py.Qubit
│ %2 = py.constant.constant 1 : !py.int
│ %3 = py.indexing.getitem(%qreg : !py.IList[!py.Qubit, Literal(2,int)], %2) : !py.Qubit
│ %4 = func.invoke h(%1) : !py.NoneType maybe_pure=False
│ %5 = func.invoke cx(%1, %3) : !py.NoneType maybe_pure=False
│ %6 = func.const.none() : !py.NoneType
│ func.return %6
} // func.func bell
```
## Supported Gates
The following gates are currently supported for conversion from PyQIR to Squin kernels:
| QIR Gate | Squin Gate | Description |
| ---------------------------- | ------------- | ---------------------- |
| `__quantum__qis__h__body` | `squin.h` | Hadamard gate |
| `__quantum__qis__x__body` | `squin.x` | Pauli-X gate |
| `__quantum__qis__y__body` | `squin.y` | Pauli-Y gate |
| `__quantum__qis__z__body` | `squin.z` | Pauli-Z gate |
| `__quantum__qis__s__body` | `squin.s` | S gate (π/2 phase) |
| `__quantum__qis__t__body` | `squin.t` | T gate (π/4 phase) |
| `__quantum__qis__s__adj` | `squin.s_adj` | S† gate (adjoint S) |
| `__quantum__qis__t__adj` | `squin.t_adj` | T† gate (adjoint T) |
| `__quantum__qis__rx__body` | `squin.rx` | Rotation around X-axis |
| `__quantum__qis__ry__body` | `squin.ry` | Rotation around Y-axis |
| `__quantum__qis__rz__body` | `squin.rz` | Rotation around Z-axis |
| `__quantum__qis__cnot__body` | `squin.cx` | Controlled-NOT gate |
| `__quantum__qis__cz__body` | `squin.cz` | Controlled-Z gate |
## Next Steps
Our current implementation provides comprehensive support for standard QIR gates and circuit conversion. We are actively working on expanding functionality in the following areas:
* **Measurement operations**: Support for measurement operations is planned for a future release.
* **Classical control flow**: Conditional gates and classical control flow are on our roadmap.
* **Custom gates**: We currently support all standard QIR gates listed in the [Supported Gates](#supported-gates) table, with plans to extend support for custom gate definitions.
# Qiskit conversions
Source: https://docs.qbraid.com/v2/qir/user-guide/qiskit-qir
## Installation
Install the `qiskit` extra:
```shell theme={"dark"}
pip install 'qbraid-qir[qiskit]'
```
Requires Qiskit >= 2.0.
## Example Usage
Convert a Qiskit `QuantumCircuit` to QIR:
```python Code theme={"dark"}
from qiskit import QuantumCircuit
from qbraid_qir import dumps
from qbraid_qir.qiskit import qiskit_to_qir
# create a test circuit
qc = QuantumCircuit(2, 2)
qc.h(0)
qc.cx(0, 1)
qc.measure([0, 1], [0, 1])
# convert to QIR
module = qiskit_to_qir(qc, name="bell")
# saves to .ll and .bc files in working directory
dumps(module)
print(module)
```
```output Output theme={"dark"}
; ModuleID = 'bell'
source_filename = "bell"
%Qubit = type opaque
%Result = type opaque
define void @main() #0 {
entry:
call void @__quantum__qis__h__body(%Qubit* inttoptr (i64 0 to %Qubit*))
call void @__quantum__qis__cnot__body(%Qubit* inttoptr (i64 0 to %Qubit*), %Qubit* inttoptr (i64 1 to %Qubit*))
call void @__quantum__qis__mz__body(%Qubit* inttoptr (i64 0 to %Qubit*), %Result* inttoptr (i64 0 to %Result*))
call void @__quantum__qis__mz__body(%Qubit* inttoptr (i64 1 to %Qubit*), %Result* inttoptr (i64 1 to %Result*))
ret void
}
declare void @__quantum__qis__h__body(%Qubit*)
declare void @__quantum__qis__cnot__body(%Qubit*, %Qubit*)
declare void @__quantum__qis__mz__body(%Qubit*, %Result* writeonly) #1
attributes #0 = { "entry_point" "output_labeling_schema" "qir_profiles"="custom" "required_num_qubits"="2" "required_num_results"="2" }
attributes #1 = { "irreversible" }
!llvm.module.flags = !{!0, !1, !2, !3}
!0 = !{i32 1, !"qir_major_version", i32 1}
!1 = !{i32 7, !"qir_minor_version", i32 0}
!2 = !{i32 1, !"dynamic_qubit_management", i1 false}
!3 = !{i32 1, !"dynamic_result_management", i1 false}
```
## Transpilation
If your circuit contains gates not directly supported by QIR, you can set `transpile=True` to automatically decompose them into the supported basis gate set before conversion:
```python theme={"dark"}
module = qiskit_to_qir(qc, name="my-circuit", transpile=True)
```
## Supported Operations
| Category | Gates |
| ---------------- | --------------------------------------------------------- |
| **Single-qubit** | `h`, `x`, `y`, `z`, `s`, `sdg`, `t`, `tdg`, `id`, `reset` |
| **Rotations** | `rx`, `ry`, `rz` |
| **Two-qubit** | `cx`, `cz`, `swap` |
| **Three-qubit** | `ccx` |
| **Measurement** | `measure` |
| **Other** | `barrier`, `delay` |
# qbraid
Source: https://docs.qbraid.com/v2/sdk/api-reference/qbraid
# Interface
Source: https://docs.qbraid.com/v2/sdk/user-guide/interface
Generate random circuits, unitary matrices, and test circuit equivalence.
API Reference:
[qbraid.interface](https://qbraid.github.io/qBraid/api/qbraid.interface.html)
## Generate random circuits
Generate a random quantum circuit object of any registered program type from
`qbraid.NATIVE_REGISTRY`. For example:
```python Input theme={"dark"}
from qbraid import random_circuit
circuit = random_circuit("qiskit") # Swap "cirq", "braket", "qasm3", etc.
print(circuit)
```
```text Sample Output theme={"dark"}
q_0: ─────────────■──────────────■─
│ │
q_1: ─────────────■──────────────X─
┌─────────────────────────┐ │
q_2: ┤ U(3.8035,5.0708,2.3633) ├─X─
└─────────────────────────┘
```
Optionally specify number of qubits, circuit depth, and whether to measure over all qubits.
```python Input theme={"dark"}
circuit = random_circuit("cirq", num_qubits=2, depth=2, measure=True)
print(circuit)
```
```text Sample Output theme={"dark"}
q_0: ───×───Rz(1.34π)───────────M('c_0')───
│
q_1: ───×───U3(0.0, 0.0, 0.0)───M('c_1')───
```
## Generate random unitaries
Generate random unitary matrices of any specified dimension (`dim`):
```python Input theme={"dark"}
from qbraid.interface import random_unitary_matrix
unitary = random_unitary_matrix(2)
print(unitary)
```
```text Sample Output theme={"dark"}
[[-0.46060623-0.33349006j -0.82238991+0.01735275j]
[ 0.48450787-0.66473935j 0.01019327+0.56856822j]]
```
## Check circuit unitary equivalence
Check whether two quantum circuits have equivalent unitary representations, regardless of their types.
All input circuits must be registered in `qbraid.programs.NATIVE_REGISTRY`. Below is an example demonstrating
the comparison between two circuits that each create a Bell state using different quantum programming libraries
(Cirq and Qiskit).
```python theme={"dark"}
import cirq
import qiskit
from qbraid.interface import circuits_allclose
def cirq_bell():
circuit = cirq.Circuit()
q0, q1 = cirq.LineQubit.range(2)
circuit.append(cirq.H(q0))
circuit.append(cirq.CNOT(q0, q1))
return circuit
def qiskit_bell():
circuit = qiskit.QuantumCircuit(2)
circuit.h(0)
circuit.cx(0,1)
return circuit
# Returns True if the unitary matrices of the two circuits are equivalent
print(circuits_allclose(cirq_bell(), qiskit_bell())) # Output: True
```
This function also supports several optional keyword arguments that allow customization of the equivalence checking process:
* `index_contig`: If set to True, maps both circuits to use sequential qubit indexing prior to computing their unitaries. Defaults to False.
* `allow_rev_qubits`: If set to True, allows the function to consider circuits as equivalent even if their qubits are in reversed order. Defaults to False.
* `strict_gphase`: If set to False, ignores differences in global phase between the circuits. Defaults to True.
* `atol`: Sets the absolute tolerance level for the numerical comparison of unitaries, using np.allclose. Defaults to 1e-7.
Here are some examples of how these arguments could be used:
```python theme={"dark"}
# ignore global phase and use an increased error margin
circuits_allclose(circuit0, circuit1, strict_gphase=False, atol=1e-6)
# allow for non-sequential qubit indexing and reversed qubit order
circuits_allclose(circuit2, circuit3, index_contig=True, allow_rev_qubits=True)
```
# Overview
Source: https://docs.qbraid.com/v2/sdk/user-guide/overview
## License
[Apache-2.0 License](https://www.apache.org/licenses/LICENSE-2.0)
# QIR Profiles
Source: https://docs.qbraid.com/v2/qir/user-guide/profiles
QIR (Quantum Intermediate Representation) profiles in `qbraid-qir` define the rules, restrictions,
and capabilities that govern how OpenQASM 3 programs are converted to QIR. When converting a QASM
program to QIR using `qbraid-qir`, you must specify a profile—either **Base** or **Adaptive**—which
determines the allowed quantum operations, branching, measurement handling, and output recording.
This ensures that the generated QIR is compliant with the requirements of the target quantum backend
or workflow.
## Available Profiles
### Base Profile
* **Name:** `Base`
* **Capabilities:**
* Conditional execution (`if` statements) is supported.
* Only sequential output recording is supported.
* **Restrictions:**
* No forward branching (no `goto` or loops).
* Qubit reuse after measurement is **not** allowed.
* Measurement tracking is **not** enabled.
* No grouped output recording.
* No qubit reuse after measurement.
* Barriers must cover **all** qubits (no subset barriers).
* Only a fixed set of gates is supported.
### Adaptive Profile
* **Name:** `AdaptiveExecution`
* **Capabilities:**
* Conditional execution and forward branching are supported.
* Qubit reuse after measurement is **allowed**.
* Measurement tracking is enabled.
* Grouped output recording is supported (register structure is preserved).
* Barriers must cover **all** qubits.
* Supports a broader set of gates and more flexible control flow.
* **Restrictions:**
* Subset barriers are **not** allowed (barriers must cover all qubits).
* Only constant parameters for parameterized gates.
## How to Use
When converting QASM to QIR, specify the profile using the `profile` argument:
```python converting qasm to qir theme={"dark"}
from qbraid_qir.qasm3 import qasm3_to_qir
qasm3_code = """
OPENQASM 3;
qubit[2] q;
bit[2] c;
h q[0];
c[0] = measure q[0];
if (c[0]) {
x q[1];
}
c[1] = measure q[1];
"""
# Convert using the Base profile
qir_base = qasm3_to_qir(qasm3_code, profile="base")
print(qir_base)
# Convert using the Adaptive profile
qir_adaptive = qasm3_to_qir(qasm3_code, profile="adaptive")
print(qir_adaptive)
```
```llvm base profile output theme={"dark"}
; ModuleID = 'program-b27e5a7a-4b58-11f0-824a-cae339f58535'
source_filename = "program-b27e5a7a-4b58-11f0-824a-cae339f58535"
%Qubit = type opaque
%Result = type opaque
define void @program-b27e5a7a-4b58-11f0-824a-cae339f58535() #0 {
entry:
call void @__quantum__rt__initialize(i8* null)
call void @__quantum__qis__h__body(%Qubit* null)
call void @__quantum__qis__mz__body(%Qubit* null, %Result* null)
%0 = call i1 @__quantum__qis__read_result__body(%Result* null)
br i1 %0, label %then, label %else
then: ; preds = %entry
call void @__quantum__qis__x__body(%Qubit* inttoptr (i64 1 to %Qubit*))
br label %continue
else: ; preds = %entry
br label %continue
continue: ; preds = %else, %then
call void @__quantum__qis__mz__body(%Qubit* inttoptr (i64 1 to %Qubit*), %Result* inttoptr (i64 1 to %Result*))
call void @__quantum__rt__result_record_output(%Result* null, i8* null)
call void @__quantum__rt__result_record_output(%Result* inttoptr (i64 1 to %Result*), i8* null)
ret void
}
declare void @__quantum__rt__initialize(i8*)
declare void @__quantum__qis__h__body(%Qubit*)
declare void @__quantum__qis__mz__body(%Qubit*, %Result* writeonly) #1
declare i1 @__quantum__qis__read_result__body(%Result*)
declare void @__quantum__qis__x__body(%Qubit*)
declare void @__quantum__rt__result_record_output(%Result*, i8*)
attributes #0 = { "entry_point" "output_labeling_schema" "qir_profiles"="base" "required_num_qubits"="2" "required_num_results"="2" }
attributes #1 = { "irreversible" }
!llvm.module.flags = !{!0, !1, !2, !3}
!0 = !{i32 1, !"qir_major_version", i32 1}
!1 = !{i32 7, !"qir_minor_version", i32 0}
!2 = !{i32 1, !"dynamic_qubit_management", i1 false}
!3 = !{i32 1, !"dynamic_result_management", i1 false}
```
```llvm adaptive profile output theme={"dark"}
; ModuleID = 'program-b27f2086-4b58-11f0-824a-cae339f58535'
source_filename = "program-b27f2086-4b58-11f0-824a-cae339f58535"
%Qubit = type opaque
%Result = type opaque
define void @program-b27f2086-4b58-11f0-824a-cae339f58535() #0 {
entry:
call void @__quantum__rt__initialize(i8* null)
call void @__quantum__qis__h__body(%Qubit* null)
call void @__quantum__qis__mz__body(%Qubit* null, %Result* null)
%0 = call i1 @__quantum__qis__read_result__body(%Result* null)
br i1 %0, label %then, label %else
then: ; preds = %entry
call void @__quantum__qis__x__body(%Qubit* inttoptr (i64 1 to %Qubit*))
br label %continue
else: ; preds = %entry
br label %continue
continue: ; preds = %else, %then
call void @__quantum__qis__mz__body(%Qubit* inttoptr (i64 1 to %Qubit*), %Result* inttoptr (i64 1 to %Result*))
call void @__quantum__rt__array_record_output(i64 2, i8* null)
call void @__quantum__rt__result_record_output(%Result* inttoptr (i64 1 to %Result*), i8* null)
call void @__quantum__rt__result_record_output(%Result* null, i8* null)
ret void
}
declare void @__quantum__rt__initialize(i8*)
declare void @__quantum__qis__h__body(%Qubit*)
declare void @__quantum__qis__mz__body(%Qubit*, %Result* writeonly) #1
declare i1 @__quantum__qis__read_result__body(%Result*)
declare void @__quantum__qis__x__body(%Qubit*)
declare void @__quantum__rt__array_record_output(i64, i8*)
declare void @__quantum__rt__result_record_output(%Result*, i8*)
attributes #0 = { "entry_point" "output_labeling_schema" "qir_profiles"="adaptive" "required_num_qubits"="2" "required_num_results"="2" }
attributes #1 = { "irreversible" }
!llvm.module.flags = !{!0, !1, !2, !3}
!0 = !{i32 1, !"qir_major_version", i32 1}
!1 = !{i32 7, !"qir_minor_version", i32 0}
!2 = !{i32 1, !"dynamic_qubit_management", i1 false}
!3 = !{i32 1, !"dynamic_result_management", i1 false}
```
The `qir_base` and `qir_adaptive` variables will contain the generated QIR code for the specified profile.
## Example QASM Programs
```qasm theme={"dark"}
OPENQASM 3;
qubit[2] q;
bit[2] c;
h q[0];
c[0] = measure q[0];
x q[1]; // Allowed
reset q[0]; // Not allowed in Base profile (qubit reuse forbidden)
```
The last line will cause an error in the Base profile because qubit reuse after measurement is not
permitted
```qasm theme={"dark"}
OPENQASM 3;
qubit[2] q;
bit[2] c;
h q[0];
c[0] = measure q[0];
reset q[0]; // Allowed in Adaptive profile
x q[0]; // Allowed in Adaptive profile
```
This program is valid in the Adaptive profile, which allows qubit reuse after measurement and reset.
```qasm theme={"dark"}
OPENQASM 3;
qubit[2] q;
bit[2] c;
h q[0];
c[0] = measure q[0];
if (c[0]) {
x q[1];
}
```
Both profiles support conditional execution, but only the `Adaptive` profile supports more advanced
branching and measurement-based control flow.
## Conclusion
When converting QASM to QIR with `qbraid-qir`, always choose the profile that **matches your target
backend's requirements** The `Base` profile is strict and suitable for simple, hardware-oriented
workflows, while the `Adaptive` profile enables more advanced quantum programming features such as
qubit reuse, grouped output, and flexible control flow.
# OpenQASM 3 conversions
Source: https://docs.qbraid.com/v2/qir/user-guide/qasm3-qir
```python Code theme={"dark"}
from qbraid_qir.qasm3 import qasm3_to_qir
program = """
OPENQASM 3;
include "stdgates.inc";
qubit[2] q;
bit[2] c;
h q[0];
cx q[0], q[1];
measure q[0] -> c[0];
measure q[1] -> c[1];
"""
module = qasm3_to_qir(program, name="bell")
ir = str(module)
```
```output Output theme={"dark"}
; ModuleID = 'bell'
source_filename = "bell"
%Qubit = type opaque
%Result = type opaque
define void @main() #0 {
entry:
call void @__quantum__qis__h__body(%Qubit* inttoptr (i64 0 to %Qubit*))
call void @__quantum__qis__cnot__body(%Qubit* inttoptr (i64 0 to %Qubit*), %Qubit* inttoptr (i64 1 to %Qubit*))
call void @__quantum__qis__mz__body(%Qubit* inttoptr (i64 0 to %Qubit*), %Result* inttoptr (i64 0 to %Result*))
call void @__quantum__qis__mz__body(%Qubit* inttoptr (i64 1 to %Qubit*), %Result* inttoptr (i64 1 to %Result*))
ret void
}
declare void @__quantum__qis__h__body(%Qubit*)
declare void @__quantum__qis__cnot__body(%Qubit*, %Qubit*)
declare void @__quantum__qis__mz__body(%Qubit*, %Result*) #1
attributes #0 = { "entry_point" "output_labeling_schema" "qir_profiles"="custom" "required_num_qubits"="2" "required_num_results"="2" }
attributes #1 = { "irreversible" }
!llvm.module.flags = !{!0, !1, !2, !3}
!0 = !{i32 1, !"qir_major_version", i32 1}
!1 = !{i32 7, !"qir_minor_version", i32 0}
!2 = !{i32 1, !"dynamic_qubit_management", i1 false}
!3 = !{i32 1, !"dynamic_result_management", i1 false}
```
Execute the QIR program using the qir-runner command line tool:
```bash theme={"dark"}
$ qir-runner -f bell.bc
```
## Currently Supported Constructs
The `qbraid_qir.qasm3.qasm3_to_qir()` converter supports the following OpenQASM 3 constructs:
### 1. [Register Declarations](https://openqasm.com/language/types.html#quantum-types)
OpenQASM declarations of all forms `qreg`, `qubit`, `bit`, and `creg` are supported.
```qasm theme={"dark"}
OPENQASM 3;
// qubit declaration
qubit q1;
qubit[2] q2;
qreg q3[3];
qubit[1] q4;
// bit declaration
bit c1;
bit[2] c2;
creg c3[3];
bit[1] c4;
```
### 2. [Quantum Measurements](https://openqasm.com/language/insts.html#measurement)
OpenQASM measurements are supported which involve single qubit measurement and full register measurements.
Range based measurements are not supported currently.
```qasm theme={"dark"}
OPENQASM 3;
qubit[2] q1;
qubit[5] q2;
qubit q3;
bit[2] c1;
bit c2;
// supported
c1 = measure q1;
measure q1 -> c1;
c2[0] = measure q3[0];
//ERROR: not supported
c1[0:2] = measure q1[0:2];
```
### 3. [Quantum Reset](https://openqasm.com/language/insts.html#initialization)
Resets are supported on declared quantum registers in all forms.
```qasm theme={"dark"}
OPENQASM 3;
include "stdgates.inc";
// qubit declarations
qubit q1;
qubit[2] q2;
qreg q3[3];
// reset operations
reset q1;
reset q2[1];
reset q3[2];
reset q3[:2];
```
### 4. Quantum Gates
* `pyqir._native` gates are supported along with support for `U3` and U2 gates. The `U[x]` gates are defined in terms of existing `rx` and `rz` gates according to the decomposition present on the [Qiskit UGate documentation](https://docs.quantum.ibm.com/api/qiskit/qiskit.circuit.library.UGate) and [PhaseGate documentation](https://docs.quantum.ibm.com/api/qiskit/qiskit.circuit.library.PhaseGate).
* Full set of the openqasm3 ["stdgates.inc" gates](https://openqasm.com/language/standard_library.html) are supported. These gates are decomposed with the help of the `pyqir._native` gate set and subsequently converted to QIR.
### 5. [Quantum Barriers](https://openqasm.com/language/delays.html#barrier-instruction)
Barriers are supported only if they are placed on ALL the qubits in the circuit. For example:
```qasm theme={"dark"}
qubit q[2];
U(0.1, 0.2, 0.3) q[0];
// Barrier on all qubits
barrier q;
// ERROR: Barrier on a subset of qubits
barrier q[0];
```
### 6. [Custom Quantum Gates](https://openqasm.com/language/gates.html#defining-gates)
Gates defined by users are supported as long as they are defined in terms of `pyqir._native` gate set. Identifier mapping in gate parameter expressions is not supported at the moment. Example:
```qasm theme={"dark"}
OPENQASM 3.0;
include "stdgates.inc";
// Supported
gate custom2(g) s {
h s;
rz(g) s;
}
// Supported
gate custom(a,b,c) p, q {
custom2(a) q;
h p;
cx p,q;
rx(a) q;
ry(0.5/0.1) q;
}
qubit[2] q;
custom(2 + 3 - 1/5, 0.1, 0.3) q[0], q[1];
```
### 7. [Simple Branching Statements](https://openqasm.com/language/classical.html#if-else-statements)
Since QIR supports branching on a measurement result, **single bit branching** statements are supported at the moment. General boolean expressions and support for branching on full registers will be added in future. For example:
```qasm theme={"dark"}
OPENQASM 3;
include "stdgates.inc";
qubit[4] q;
bit[4] c;
h q;
measure q -> c;
// supported
if (c[0]) {
x q[0];
cx q[0], q[1];
}
if (c[1] == 1) {
cx q[1], q[2];
}
if (!c[2]) {
h q[2];
}
// ERROR: not supported
if (c == 8) {
x q[0];
}
// ERROR: not supported
int[4] element;
if (element > 5) {
y q[1];
}
```
### 8. [Expressions](https://openqasm.com/language/classical.html#low-level-classical-instructions)
* General expression evaluation involving literals and constants is supported.
* Expressions involving constants and variables are fully supported.
* Expressions with arrays are also supported (in global scopes).
```qasm expression with literals theme={"dark"}
OPENQASM 3;
qubit q;
// supported
rx(1.57) q;
rz(3-2*3) q;
rz(3-2*3\*(8/2)) q;
rx(-1.57) q;
rx(4%2) q;
```
```qasm expression with scalar variables theme={"dark"}
OPENQASM 3;
// scalar value assignment and declaration
int[32] a = 5;
float[32] b;
b = 3.14;
// constant value assignment and declaration
const int[32] c_int = 5;
const float[32] c_float = 3.141592;
// arbitary expressions
int[32] x = a + 5*c_int;
```
```qasm expression with arrays theme={"dark"}
OPENQASM 3;
// static initialization
array[int[32], 3, 2] arr_int = { {1, 2}, {3, 4}, {5, 6} };
array[float[32], 3, 2] arr_float32 = { {1.0, 2.0}, {3.0, 4.0}, {5.0, 6.0} };
// assignment of individual elements
int a = 2;
arr_int[1][1] = a; // arr_int = { {1, 2}, {3, 2}, {5, 6} }
// array elements in expressions
float[32] b = arr_float32[1][1] * 3.1415; // b = 4.0*3.1415 = 12.566
qubit q;
rx(b) q; // rx(12.566) is applied on qubit q
```
### 9. [Variables and Types](https://openqasm.com/language/types.html)
* Scalar types `int`, `uint`, `float`, `bool` and `bit` with arbitrary sizes are supported.
* `array` type is supported for `int`, `uint`, `float`, `bool` and `bit`.
* `complex` and `angle` types are not supported yet.
```qasm scalar variables theme={"dark"}
OPENQASM 3;
// declarations
int a;
uint b;
int[2] c = 1;
uint[13] d = 2;
float[32] my_pi = 3.14;
// assignments and expressions
a = 5 \* c;
b = 6 - d;
```
```qasm array variables theme={"dark"}
OPENQASM 3;
// declarations
array[int[32], 3, 2] arr_int = { {1, 2}, {3, 4}, {5, 6} };
array[float[32], 3, 2] arr_float32;
// element assignment
float[32] c = 4.5;
arr_float32[1][1] = c; // arr_float32 = { {None, None}, {None, 4.5}, {None, None} }
arr_int[1][1] = 5; // arr_int = { {1, 2}, {3, 5}, {5, 6} }
// expressions
float[32] d = arr_float32[1][1] * 3.1415; // d = 4.5*3.1415 = 14.13775
```
### 10. [Loops](https://openqasm.com/language/classical.html#for-loops)
Both `for` and `while` loops are supported at the moment. For example:
```qasm simple for loop theme={"dark"}
OPENQASM 3.0;
include "stdgates.inc";
qubit[2] q;
int[32] i;
for int[32] i in [0:2] {
h q[i];
}
```
```qasm complex for loop theme={"dark"}
OPENQASM 3.0;
include "stdgates.inc";
qubit[4] q;
bit[4] c;
int j = 0;
h q;
for int i in [0:2]{
cx q[i], q[i+1];
h q[j];
j += 1;
}
h q[j];
measure q -> c;
```
```qasm simple while loop theme={"dark"}
OPENQASM 3.0;
include "stdgates.inc";
qubit[4] q;
int i = 0;
while (i < 3) {
h q[i];
cx q[i], q[i+1];
i += 1;
}
```
```qasm combined loops theme={"dark"}
OPENQASM 3.0;
include "stdgates.inc";
qubit[2] q;
int i = 0;
while (i < 2) {
for int j in {0, 1} {
h q[j];
}
i += 1;
}
```
### 11. [**Aliasing**](https://openqasm.com/language/types.html#aliasing)
* Aliasing quantum registers is supported and can be used to refer to the same quantum register with different names.
* Aliases are currently supported in global scope of the qasm3 program, with support for function scopes coming soon.
```qasm simple aliasing theme={"dark"}
OPENQASM 3.0;
include "stdgates.inc";
qubit[5] q;
let myqreg0 = q;
let myqreg1 = q[1];
let myqreg2 = q[1:];
let myqreg3 = q[:4];
let myqreg4 = q[1:4];
let myqreg5 = q[1:2:4];
let myqreg6 = q[{0, 1}];
x myqreg0[0];
h myqreg1;
cx myqreg2[0], myqreg2[1];
cx myqreg3[2], myqreg3[3];
ccx myqreg4;
swap myqreg5[0], myqreg5[1];
cz myqreg6;
```
```qasm aliasing in scope theme={"dark"}
OPENQASM 3;
include "stdgates.inc";
qubit[4] q;
bit[4] c;
h q;
measure q -> c;
if (c[0]) {
let alias = q[0:2];
x alias[0];
cx alias[0], alias[1];
}
if (c[1] == 1) {
cx q[1], q[2];
}
if (!c[2]) {
h q[2];
}
```
### 12. [Subroutines](https://openqasm.com/language/subroutines.html)
We support QASM3 subroutines in the QIR converter
Subroutines are supported in QASM3 and can be defined using the `def` keyword and are only allowed in the global scope.
```qasm simple definition theme={"dark"}
OPENQASM 3;
include "stdgates.inc";
def my_function(qubit q) { // void function
h q;
return;
}
```
```qasm definition with return type theme={"dark"}
OPENQASM 3;
include "stdgates.inc";
def my_function(qubit q) -> int[32] {
h q;
return 1;
}
```
Subroutines can be called from within the main program or from other subroutines.
```qasm simple call theme={"dark"}
OPENQASM 3.0;
include "stdgates.inc";
def my_function(qubit a, float[32] b) {
rx(b) a;
float[64] c = 2*b;
rx(c) a;
return;
}
qubit q;
bit c;
float[32] r = 3.14;
my_function(q, r);
```
```qasm call in expression theme={"dark"}
OPENQASM 3;
include "stdgates.inc";
def my_function(qubit q) -> bool{
h q;
return true;
}
qubit q;
bool b = my_function(q);
```
```qasm call from another subroutine theme={"dark"}
OPENQASM 3;
include "stdgates.inc";
def my_function(qubit q) {
h q;
return;
}
def my_function_2(qubit[2] q) {
my_function(q[1]);
return;
}
qubit[2] q;
my_function_2(q);
```
* Quantum arguments of type `qubit` are supported in subroutines.
* Classical arguments are supported for any scalar type and can return values of any scalar type.
* All argument validations mentioned in the OpenQASM3 specification are supported.
```qasm mixed arguments theme={"dark"}
OPENQASM 3;
include "stdgates.inc";
def my_function(qubit q, int[32] a, float[32] b) {
rz(a) q;
rx(b) q;
return;
}
qubit q;
int[32] n = 5;
float[32] b = 3.14;
my_function(q, n, b);
```
```qasm simple return type theme={"dark"}
OPENQASM 3;
include "stdgates.inc";
def my_function(qubit q) -> bool {
h q;
return true;
}
qubit q;
bool b = my_function(q);
```
```qasm testing return values theme={"dark"}
OPENQASM 3;
include "stdgates.inc";
def my_function(qubit q) -> float[32] {
h q;
return 3.14;
}
def my_function_2(qubit q, float[32] r) {
rx(r) q;
return;
}
qubit[2] q;
float[32] r1 = my_function(q[0]);
my_function_2(q[0], r1);
array[float[32], 1, 1] r2 = {{3.14}};
my_function_2(q[1], r2[0,0]);
```
* Add `mutable` and `readonly` arrays as classical arguments in a subroutines
* Support looping statements inside a subroutine - Support switch statements
inside a subroutine - Support for aliasing in a subroutine
### 13. [Switch](https://openqasm.com/language/classical.html#the-switch-statement)
Switch statements in QASM3 are supported in the QIR converter. These are defined according to the OpenQASM3 spec
and support all the features mentioned in the specification.
```qasm simple switch theme={"dark"}
OPENQASM 3.0;
include "stdgates.inc";
const int i = 4;
const int j = 4;
qubit q;
switch(i) {
case 6, j {
x q;
}
default {
z q;
}
}
```
```qasm nested switch theme={"dark"}
OPENQASM 3.0;
include "stdgates.inc";
const int i = 1;
qubit q;
switch(i) {
case 1,3,5,7 {
int j = 4; // definition inside scope
switch(j) {
case 1,3,5,7 {
x q;
}
case 2,4,6,8 {
y q; // this will be executed
}
default {
z q;
}
}
}
case 2,4,6,8 {
y q;
}
default {
z q;
}
}
```
# Squin conversions
Source: https://docs.qbraid.com/v2/qir/user-guide/qir-squin
This module enables conversion from Quantum Intermediate Representation ([PyQIR](https://github.com/qir-alliance/pyqir)) to Squin kernels, allowing you to execute QIR circuits using the [Bloqade](https://github.com/QuEraComputing/bloqade) SDK's Squin execution engine. [Squin](https://bloqade.quera.com/dev/digital/dialects_and_kernels/squin/) provides a high-performance quantum circuit execution environment, and this conversion opens the door to running QIR circuits on Bloqade simulators and hardware backends.
## Installation
```shell theme={"dark"}
pip install 'qbraid-qir[squin]'
```
## Conversions
This section highlights the different ways in which the converter `load()` can be used with various formats and input types. Each conversion method is demonstrated with practical examples below.
### PyQIR String to Squin kernel
Convert PyQIR `IR string` to a Squin kernel:
```python Code theme={"dark"}
from qbraid_qir.squin import load
qir_str = """
; ModuleID = 'bell'
source_filename = "bell"
%Qubit = type opaque
define void @main() #0 {
entry:
call void @__quantum__qis__h__body(%Qubit* null)
call void @__quantum__qis__cnot__body(%Qubit* null, %Qubit* inttoptr (i64 1 to %Qubit*))
ret void
}
declare void @__quantum__qis__h__body(%Qubit*)
declare void @__quantum__qis__cnot__body(%Qubit*, %Qubit*)
attributes #0 = { "entry_point" "output_labeling_schema" "qir_profiles"="custom" "required_num_qubits"="2" "required_num_results"="2" }
!llvm.module.flags = !{!0, !1, !2, !3}
!0 = !{i32 1, !"qir_major_version", i32 1}
!1 = !{i32 7, !"qir_minor_version", i32 0}
!2 = !{i32 1, !"dynamic_qubit_management", i1 false}
!3 = !{i32 1, !"dynamic_result_management", i1 false}
"""
squin_kernel = load(qir_str, kernel_name="bell")
squin_kernel.print()
```
```output Output theme={"dark"}
func.func @bell() -> !py.NoneType {
^0(%bell_self):
│ %0 = func.invoke new() : !py.Qubit maybe_pure=False
│ %1 = func.invoke new() : !py.Qubit maybe_pure=False
│ %2 = func.invoke h(%0) : !py.NoneType maybe_pure=False
│ %3 = func.invoke cx(%0, %1) : !py.NoneType maybe_pure=False
│ %4 = func.const.none() : !py.NoneType
│ func.return %4
} // func.func bell
```
### PyQIR Module to Squin kernel
Convert a PyQIR `Module` object to a Squin kernel:
```python Code theme={"dark"}
from qbraid_qir.squin import load
from pyqir import BasicQisBuilder, SimpleModule
mod = SimpleModule("ghz", num_qubits=3, num_results=3)
qis = BasicQisBuilder(mod.builder)
qis.h(mod.qubits[0])
qis.cx(mod.qubits[0], mod.qubits[1])
qis.cx(mod.qubits[1], mod.qubits[2])
squin_kernel = load(mod._module)
squin_kernel.print()
```
```output Output theme={"dark"}
func.func @main() -> !py.NoneType {
^0(%main_self):
│ %0 = func.invoke new() : !py.Qubit maybe_pure=False
│ %1 = func.invoke new() : !py.Qubit maybe_pure=False
│ %2 = func.invoke new() : !py.Qubit maybe_pure=False
│ %3 = func.invoke h(%0) : !py.NoneType maybe_pure=False
│ %4 = func.invoke cx(%0, %1) : !py.NoneType maybe_pure=False
│ %5 = func.invoke cx(%1, %2) : !py.NoneType maybe_pure=False
│ %6 = func.const.none() : !py.NoneType
│ func.return %6
} // func.func main
```
### Conversion from File
Load PyQIR IR from a `file` (`.ll` for LLVM IR text or `.bc` for LLVM bitcode):
```python Code theme={"dark"}
from qbraid_qir.squin import load
# Load from .ll file (LLVM IR text)
kernel = load("path/to/circuit.ll", kernel_name="my_circuit")
# Load from .bc file (LLVM bitcode)
kernel = load("path/to/circuit.bc", kernel_name="my_circuit")
```
### Integration with OpenQASM 3
Convert `OpenQASM3` programs to Squin kernels using `qbraid-qir`:
```python Code theme={"dark"}
from qbraid_qir.qasm3 import qasm3_to_qir
from qbraid_qir.squin import load
program = """
OPENQASM 3;
include "stdgates.inc";
qubit[2] q;
bit[2] c;
h q[0];
x q[0], q[1];
rx(pi/2) q[0];
"""
module = qasm3_to_qir(program, name="my_program")
squin_kernel = load(str(module))
squin_kernel.print()
```
```output Output theme={"dark"}
func.func @main() -> !py.NoneType {
^0(%main_self):
│ %0 = func.invoke new() : !py.Qubit maybe_pure=False
│ %1 = func.invoke new() : !py.Qubit maybe_pure=False
│ %2 = func.invoke h(%0) : !py.NoneType maybe_pure=False
│ %3 = func.invoke x(%0) : !py.NoneType maybe_pure=False
│ %4 = func.invoke x(%1) : !py.NoneType maybe_pure=False
│ %5 = py.constant.constant 1.5707963267948966 : !py.float
│ %6 = func.invoke rx(%5, %0) : !py.NoneType maybe_pure=False
│ %7 = func.const.none() : !py.NoneType
│ func.return %7
} // func.func main
```
### Integration with CUDA-Q
Convert `CUDA-Q` kernels to Squin kernels
```python Code theme={"dark"}
import cudaq
from qbraid_qir.squin import load
@cudaq.kernel
def bell():
q = cudaq.qvector(2)
h(q[0])
cx(q[0], q[1])
# Generate QIR from kernel
qir_str = cudaq.translate(bell, format="qir-base")
squin_kernel = load(qir_str, kernel_name="bell")
squin_kernel.print()
```
**CUDA-Q** is capable of exporting QIR using multiple profiles (such
as`qir-base, qir-adaptive,` etc.). Currently, the qbraid-qir Squin integration
supports only QIR generated with the **qir-base** profile. Ensure that when
using **cudaq.translate**, you specify **format="qir-base"** for
compatibility.
### Using Qubit Register as Argument
Create a kernel that accepts a qubit register as an argument, enabling composition of kernel functions:
```python Code theme={"dark"}
from qbraid_qir.squin import load
from pyqir import BasicQisBuilder, SimpleModule
mod = SimpleModule("main", num_qubits=3, num_results=3)
qis = BasicQisBuilder(mod.builder)
qis.h(mod.qubits[0])
qis.cx(mod.qubits[0], mod.qubits[1])
squin_kernel = load(
module=mod._module,
kernel_name="bell",
register_as_argument=True,
register_argument_name="qreg"
)
squin_kernel.print()
```
```output Output theme={"dark"}
func.func @bell(qreg : !py.IList[!py.Qubit, Literal(2,int)]) -> !py.NoneType {
^0(%bell_self, %qreg):
│ %0 = py.constant.constant 0 : !py.int
│ %1 = py.indexing.getitem(%qreg : !py.IList[!py.Qubit, Literal(2,int)], %0) : !py.Qubit
│ %2 = py.constant.constant 1 : !py.int
│ %3 = py.indexing.getitem(%qreg : !py.IList[!py.Qubit, Literal(2,int)], %2) : !py.Qubit
│ %4 = func.invoke h(%1) : !py.NoneType maybe_pure=False
│ %5 = func.invoke cx(%1, %3) : !py.NoneType maybe_pure=False
│ %6 = func.const.none() : !py.NoneType
│ func.return %6
} // func.func bell
```
## Supported Gates
The following gates are currently supported for conversion from PyQIR to Squin kernels:
| QIR Gate | Squin Gate | Description |
| ---------------------------- | ------------- | ---------------------- |
| `__quantum__qis__h__body` | `squin.h` | Hadamard gate |
| `__quantum__qis__x__body` | `squin.x` | Pauli-X gate |
| `__quantum__qis__y__body` | `squin.y` | Pauli-Y gate |
| `__quantum__qis__z__body` | `squin.z` | Pauli-Z gate |
| `__quantum__qis__s__body` | `squin.s` | S gate (π/2 phase) |
| `__quantum__qis__t__body` | `squin.t` | T gate (π/4 phase) |
| `__quantum__qis__s__adj` | `squin.s_adj` | S† gate (adjoint S) |
| `__quantum__qis__t__adj` | `squin.t_adj` | T† gate (adjoint T) |
| `__quantum__qis__rx__body` | `squin.rx` | Rotation around X-axis |
| `__quantum__qis__ry__body` | `squin.ry` | Rotation around Y-axis |
| `__quantum__qis__rz__body` | `squin.rz` | Rotation around Z-axis |
| `__quantum__qis__cnot__body` | `squin.cx` | Controlled-NOT gate |
| `__quantum__qis__cz__body` | `squin.cz` | Controlled-Z gate |
## Next Steps
Our current implementation provides comprehensive support for standard QIR gates and circuit conversion. We are actively working on expanding functionality in the following areas:
* **Measurement operations**: Support for measurement operations is planned for a future release.
* **Classical control flow**: Conditional gates and classical control flow are on our roadmap.
* **Custom gates**: We currently support all standard QIR gates listed in the [Supported Gates](#supported-gates) table, with plans to extend support for custom gate definitions.
# Qiskit conversions
Source: https://docs.qbraid.com/v2/qir/user-guide/qiskit-qir
## Installation
Install the `qiskit` extra:
```shell theme={"dark"}
pip install 'qbraid-qir[qiskit]'
```
Requires Qiskit >= 2.0.
## Example Usage
Convert a Qiskit `QuantumCircuit` to QIR:
```python Code theme={"dark"}
from qiskit import QuantumCircuit
from qbraid_qir import dumps
from qbraid_qir.qiskit import qiskit_to_qir
# create a test circuit
qc = QuantumCircuit(2, 2)
qc.h(0)
qc.cx(0, 1)
qc.measure([0, 1], [0, 1])
# convert to QIR
module = qiskit_to_qir(qc, name="bell")
# saves to .ll and .bc files in working directory
dumps(module)
print(module)
```
```output Output theme={"dark"}
; ModuleID = 'bell'
source_filename = "bell"
%Qubit = type opaque
%Result = type opaque
define void @main() #0 {
entry:
call void @__quantum__qis__h__body(%Qubit* inttoptr (i64 0 to %Qubit*))
call void @__quantum__qis__cnot__body(%Qubit* inttoptr (i64 0 to %Qubit*), %Qubit* inttoptr (i64 1 to %Qubit*))
call void @__quantum__qis__mz__body(%Qubit* inttoptr (i64 0 to %Qubit*), %Result* inttoptr (i64 0 to %Result*))
call void @__quantum__qis__mz__body(%Qubit* inttoptr (i64 1 to %Qubit*), %Result* inttoptr (i64 1 to %Result*))
ret void
}
declare void @__quantum__qis__h__body(%Qubit*)
declare void @__quantum__qis__cnot__body(%Qubit*, %Qubit*)
declare void @__quantum__qis__mz__body(%Qubit*, %Result* writeonly) #1
attributes #0 = { "entry_point" "output_labeling_schema" "qir_profiles"="custom" "required_num_qubits"="2" "required_num_results"="2" }
attributes #1 = { "irreversible" }
!llvm.module.flags = !{!0, !1, !2, !3}
!0 = !{i32 1, !"qir_major_version", i32 1}
!1 = !{i32 7, !"qir_minor_version", i32 0}
!2 = !{i32 1, !"dynamic_qubit_management", i1 false}
!3 = !{i32 1, !"dynamic_result_management", i1 false}
```
## Transpilation
If your circuit contains gates not directly supported by QIR, you can set `transpile=True` to automatically decompose them into the supported basis gate set before conversion:
```python theme={"dark"}
module = qiskit_to_qir(qc, name="my-circuit", transpile=True)
```
## Supported Operations
| Category | Gates |
| ---------------- | --------------------------------------------------------- |
| **Single-qubit** | `h`, `x`, `y`, `z`, `s`, `sdg`, `t`, `tdg`, `id`, `reset` |
| **Rotations** | `rx`, `ry`, `rz` |
| **Two-qubit** | `cx`, `cz`, `swap` |
| **Three-qubit** | `ccx` |
| **Measurement** | `measure` |
| **Other** | `barrier`, `delay` |
# qbraid
Source: https://docs.qbraid.com/v2/sdk/api-reference/qbraid
# Interface
Source: https://docs.qbraid.com/v2/sdk/user-guide/interface
Generate random circuits, unitary matrices, and test circuit equivalence.
API Reference:
[qbraid.interface](https://qbraid.github.io/qBraid/api/qbraid.interface.html)
## Generate random circuits
Generate a random quantum circuit object of any registered program type from
`qbraid.NATIVE_REGISTRY`. For example:
```python Input theme={"dark"}
from qbraid import random_circuit
circuit = random_circuit("qiskit") # Swap "cirq", "braket", "qasm3", etc.
print(circuit)
```
```text Sample Output theme={"dark"}
q_0: ─────────────■──────────────■─
│ │
q_1: ─────────────■──────────────X─
┌─────────────────────────┐ │
q_2: ┤ U(3.8035,5.0708,2.3633) ├─X─
└─────────────────────────┘
```
Optionally specify number of qubits, circuit depth, and whether to measure over all qubits.
```python Input theme={"dark"}
circuit = random_circuit("cirq", num_qubits=2, depth=2, measure=True)
print(circuit)
```
```text Sample Output theme={"dark"}
q_0: ───×───Rz(1.34π)───────────M('c_0')───
│
q_1: ───×───U3(0.0, 0.0, 0.0)───M('c_1')───
```
## Generate random unitaries
Generate random unitary matrices of any specified dimension (`dim`):
```python Input theme={"dark"}
from qbraid.interface import random_unitary_matrix
unitary = random_unitary_matrix(2)
print(unitary)
```
```text Sample Output theme={"dark"}
[[-0.46060623-0.33349006j -0.82238991+0.01735275j]
[ 0.48450787-0.66473935j 0.01019327+0.56856822j]]
```
## Check circuit unitary equivalence
Check whether two quantum circuits have equivalent unitary representations, regardless of their types.
All input circuits must be registered in `qbraid.programs.NATIVE_REGISTRY`. Below is an example demonstrating
the comparison between two circuits that each create a Bell state using different quantum programming libraries
(Cirq and Qiskit).
```python theme={"dark"}
import cirq
import qiskit
from qbraid.interface import circuits_allclose
def cirq_bell():
circuit = cirq.Circuit()
q0, q1 = cirq.LineQubit.range(2)
circuit.append(cirq.H(q0))
circuit.append(cirq.CNOT(q0, q1))
return circuit
def qiskit_bell():
circuit = qiskit.QuantumCircuit(2)
circuit.h(0)
circuit.cx(0,1)
return circuit
# Returns True if the unitary matrices of the two circuits are equivalent
print(circuits_allclose(cirq_bell(), qiskit_bell())) # Output: True
```
This function also supports several optional keyword arguments that allow customization of the equivalence checking process:
* `index_contig`: If set to True, maps both circuits to use sequential qubit indexing prior to computing their unitaries. Defaults to False.
* `allow_rev_qubits`: If set to True, allows the function to consider circuits as equivalent even if their qubits are in reversed order. Defaults to False.
* `strict_gphase`: If set to False, ignores differences in global phase between the circuits. Defaults to True.
* `atol`: Sets the absolute tolerance level for the numerical comparison of unitaries, using np.allclose. Defaults to 1e-7.
Here are some examples of how these arguments could be used:
```python theme={"dark"}
# ignore global phase and use an increased error margin
circuits_allclose(circuit0, circuit1, strict_gphase=False, atol=1e-6)
# allow for non-sequential qubit indexing and reversed qubit order
circuits_allclose(circuit2, circuit3, index_contig=True, allow_rev_qubits=True)
```
# Overview
Source: https://docs.qbraid.com/v2/sdk/user-guide/overview
*A platform-agnostic quantum runtime framework.*
The qBraid-SDK is a platform-agnostic quantum runtime framework designed for both quantum software and hardware providers.
This Python-based tool streamlines the full lifecycle management of quantum jobs—from defining program specifications to job
submission, and through to the post-processing and visualization of results.
![Runtime Diagram]()
![Runtime Diagram]() Distinguishing itself through a streamlined and
highly-configurable approach to cross-platform integration, the qBraid-SDK *does not assume a fixed target software framework*.
Instead, it allows providers to dynamically register any desired run input program type as the target, depending on their specific needs.
These program types are interconnected via a graph-based transpiler, where each program type is represented as a node and supported
conversions as edges. The breadth, depth, and connectivity of this `ConversionGraph` can be customized by the provider.
The framework also facilitates the insertion of additional program validations, circuit transformations, and transpiler/compiler steps
into its modular pipeline through a comprehensive `TargetProfile`. This profile encapsulates both device properties (such as number of
qubits, maximum shots, native gate set) and the software requirements (`ProgramSpec`) needed to submit a job, vastly reducing the overhead
and redundancy typically associated with cross-platform integrations in quantum computing.
## Key Features
### 1. Quantum Program Integration
Offers native support for 10+ major quantum programming libraries including 20+ inter-library conversions with the ability to
dynamically register new program types and conversions on the fly. This enables flexible program submissions to cater to the unique capabilities and constraints of your preferred framework, facilitated by a unique conversion map that automatically adapts quantum programs during runtime according to the given specifications.
### 2. Modular Design
* `qbraid.programs`: Extracts and manages metadata from supported quantum program types, with the flexibility to introduce new types.
* `qbraid.transpiler`: Bridges different quantum programming IRs through native and customizable circuit conversions.
* `qbraid.passes`: Ensures quantum programs conform to hardware specifications through essential runtime transformations.
* `qbraid.runtime`: Defines essential abstractions for providers, devices, jobs, and results, integrated through a coherent runtime profile.
* `qbraid.visualization`: Provides tools for visualizing quantum circuits and experimental data, enhancing data interpretation.
### 3. Extensibility and Customization
The framework encourages community contributions and extensions, supporting an evolving ecosystem of program types and conversions, adaptable to specific provider needs. By providing a comprehensive runtime solution, the qBraid-SDK offers significant advantages to *both hardware and software providers*:
* **Reduces Overhead**: Minimizes the effort required to develop client-side applications for securely submitting and managing quantum experiments remotely.
* **Enhances Integration**: Facilitates seamless integration and interoperability of quantum software tools across all layers of the stack.
* **Broad Compatibility**: Supports a diverse range of API complexities, catering to both established players like IBM and AWS as well as emerging providers.
## Installation and Setup
For the best experience, install the qBraid SDK on [lab.qbraid.com](https://lab.qbraid.com/). Login (or create an account) on
[account.qbraid.com](https://account.qbraid.com/) and then follow the steps to [install an environment](/v2/lab/user-guide/environments/#install-environment).
Using the SDK on qBraid Lab means direct, pre-configured access to QPUs from IonQ, Oxford Quantum Circuits, QuEra, Rigetti, IQM, Pasqal, and Quantinuum
as well as on-demand simulators from AWS, IonQ, QuEra, qBraid, Quantinuum, Pasqal, NEC, and Equal-1 (access varies based on account, see [pricing](/v2/home/pricing)).
See [qBraid Quantum Jobs](/v2/lab/user-guide/quantum-jobs) for more.
### Local Installation
The qBraid-SDK, and all of its dependencies, can be installed using [pip](https://pypi.org/project/qbraid/):
```bash theme={"dark"}
pip install qbraid
```
You can also install from source by cloning the [GitHub repository](https://github.com/qBraid/qBraid) and running a
pip install command in the root directory:
```bash theme={"dark"}
git clone https://github.com/qBraid/qBraid.git
cd qBraid
pip install .
```
*Note*: The qBraid-SDK requires Python 3.10 or greater.
To use qBraid runtime locally, you must also install the necessary extras and configure your
account credentials according to the device(s) that you are targeting. Follow the linked,
provider-specific, instructions for the [QbraidProvider](/v2/sdk/user-guide/providers/native),
[BraketProvider](/v2/sdk/user-guide/providers/aws), [QiskitRuntimeProvider](/v2/sdk/user-guide/providers/ibm),
[IonQProvider](/v2/sdk/user-guide/providers/ionq), [OQCProvider](/v2/sdk/user-guide/providers/oqc),
[AzureQuantumProvider](/v2/sdk/user-guide/providers/azure), [QuantinuumProvider](/v2/sdk/user-guide/providers/quantinuum),
[RigettiProvider](/v2/sdk/user-guide/providers/rigetti), and [OriginProvider](/v2/sdk/user-guide/providers/origin) as applicable.
## Quickstart
### Transpiler
Construct a quantum program of any supported program type:
Below, `QPROGRAM_REGISTRY` maps shorthand identifiers for supported quantum programs, each corresponding to a type in the typed
`QPROGRAM` Union. For example, 'qiskit' maps to `qiskit.QuantumCircuit` in `QPROGRAM`. Notably, 'qasm2' and 'qasm3' both represent
raw OpenQASM strings. This arrangement simplifies targeting and transpiling between different quantum programming frameworks.
```python theme={"dark"}
>>> from qbraid import QPROGRAM_REGISTRY
>>> QPROGRAM_REGISTRY
{'cirq': cirq.circuits.circuit.Circuit,
'qiskit': qiskit.circuit.quantumcircuit.QuantumCircuit,
'pennylane': pennylane.tape.tape.QuantumTape,
'pyquil': pyquil.quil.Program,
'pytket': pytket._tket.circuit.Circuit,
'braket': braket.circuits.circuit.Circuit,
'braket_ahs': braket.ahs.analog_hamiltonian_simulation.AnalogHamiltonianSimulation,
'openqasm3': openqasm3.ast.Program,
'pyqir': pyqir.Module,
'cpp_pyqubo': cpp_pyqubo.Model,
'qasm2': str,
'qasm3': str,
'qasm2_kirin': str,
'ionq': qbraid.programs.typer.IonQDict,
'qubo': qbraid.programs.typer.QuboCoefficientsDict,
'bloqade': bloqade.analog.builder.assign.BatchAssign,
'cudaq': cudaq.kernel.kernel_builder.PyKernel,
'qibo': qibo.models.circuit.Circuit,
'stim': stim._stim_sse2.Circuit,
'pulser': pulser.sequence.sequence.Sequence,
'pyqpanda3': pyqpanda3.core.QProg,
'autoqasm': autoqasm.program.program.Program,
'qrisp': qrisp.circuit.quantum_circuit.QuantumCircuit,
'qat': qat.core.wrappers.circuit.Circuit}
```
Pass any registered quantum program along with a target package from
`QPROGRAM_REGISTRY` to "transpile" your circuit to a new program type:
```python Input theme={"dark"}
from qbraid import random_circuit, transpile
from qbraid.interface import circuits_allclose
qiskit_ckt = random_circuit("qiskit")
cirq_ckt = transpile(qiskit_ckt, "cirq")
allclose = circuits_allclose(qiskit_ckt, cirq_ckt)
print(f"{type(qiskit_ckt)}\n{qiskit_ckt}\n")
print(f"{type(cirq_ckt)}\n{cirq_ckt}\n")
print(f"Circuits All Close: {allclose}")
```
```text Output theme={"dark"}
┌────────────┐
q_0: ──■──┤ Rx(3.0353) ├
┌─┴─┐└───┬────┬───┘
q_1: ┤ H ├────┤ √X ├────
└───┘ └────┘
0: ───@───Rx(0.966π)───
│
1: ───H───X^0.5────────
Circuits All Close: True
```
### Conversions
Behind the scenes, the qBraid-SDK uses [rustworkx](https://www.rustworkx.org/) to create a directional graph that maps all
possible conversions between supported program types:
```python theme={"dark"}
from qbraid import ConversionGraph, ExperimentType
# Loads native conversions from QPROGRAM_REGISTRY
graph = ConversionGraph()
# Plot GATE_MODEL nodes and "Conversion" edges
graph.plot(experiment_type=ExperimentType.GATE_MODEL, legend=True)
```
Distinguishing itself through a streamlined and
highly-configurable approach to cross-platform integration, the qBraid-SDK *does not assume a fixed target software framework*.
Instead, it allows providers to dynamically register any desired run input program type as the target, depending on their specific needs.
These program types are interconnected via a graph-based transpiler, where each program type is represented as a node and supported
conversions as edges. The breadth, depth, and connectivity of this `ConversionGraph` can be customized by the provider.
The framework also facilitates the insertion of additional program validations, circuit transformations, and transpiler/compiler steps
into its modular pipeline through a comprehensive `TargetProfile`. This profile encapsulates both device properties (such as number of
qubits, maximum shots, native gate set) and the software requirements (`ProgramSpec`) needed to submit a job, vastly reducing the overhead
and redundancy typically associated with cross-platform integrations in quantum computing.
## Key Features
### 1. Quantum Program Integration
Offers native support for 10+ major quantum programming libraries including 20+ inter-library conversions with the ability to
dynamically register new program types and conversions on the fly. This enables flexible program submissions to cater to the unique capabilities and constraints of your preferred framework, facilitated by a unique conversion map that automatically adapts quantum programs during runtime according to the given specifications.
### 2. Modular Design
* `qbraid.programs`: Extracts and manages metadata from supported quantum program types, with the flexibility to introduce new types.
* `qbraid.transpiler`: Bridges different quantum programming IRs through native and customizable circuit conversions.
* `qbraid.passes`: Ensures quantum programs conform to hardware specifications through essential runtime transformations.
* `qbraid.runtime`: Defines essential abstractions for providers, devices, jobs, and results, integrated through a coherent runtime profile.
* `qbraid.visualization`: Provides tools for visualizing quantum circuits and experimental data, enhancing data interpretation.
### 3. Extensibility and Customization
The framework encourages community contributions and extensions, supporting an evolving ecosystem of program types and conversions, adaptable to specific provider needs. By providing a comprehensive runtime solution, the qBraid-SDK offers significant advantages to *both hardware and software providers*:
* **Reduces Overhead**: Minimizes the effort required to develop client-side applications for securely submitting and managing quantum experiments remotely.
* **Enhances Integration**: Facilitates seamless integration and interoperability of quantum software tools across all layers of the stack.
* **Broad Compatibility**: Supports a diverse range of API complexities, catering to both established players like IBM and AWS as well as emerging providers.
## Installation and Setup
For the best experience, install the qBraid SDK on [lab.qbraid.com](https://lab.qbraid.com/). Login (or create an account) on
[account.qbraid.com](https://account.qbraid.com/) and then follow the steps to [install an environment](/v2/lab/user-guide/environments/#install-environment).
Using the SDK on qBraid Lab means direct, pre-configured access to QPUs from IonQ, Oxford Quantum Circuits, QuEra, Rigetti, IQM, Pasqal, and Quantinuum
as well as on-demand simulators from AWS, IonQ, QuEra, qBraid, Quantinuum, Pasqal, NEC, and Equal-1 (access varies based on account, see [pricing](/v2/home/pricing)).
See [qBraid Quantum Jobs](/v2/lab/user-guide/quantum-jobs) for more.
### Local Installation
The qBraid-SDK, and all of its dependencies, can be installed using [pip](https://pypi.org/project/qbraid/):
```bash theme={"dark"}
pip install qbraid
```
You can also install from source by cloning the [GitHub repository](https://github.com/qBraid/qBraid) and running a
pip install command in the root directory:
```bash theme={"dark"}
git clone https://github.com/qBraid/qBraid.git
cd qBraid
pip install .
```
*Note*: The qBraid-SDK requires Python 3.10 or greater.
To use qBraid runtime locally, you must also install the necessary extras and configure your
account credentials according to the device(s) that you are targeting. Follow the linked,
provider-specific, instructions for the [QbraidProvider](/v2/sdk/user-guide/providers/native),
[BraketProvider](/v2/sdk/user-guide/providers/aws), [QiskitRuntimeProvider](/v2/sdk/user-guide/providers/ibm),
[IonQProvider](/v2/sdk/user-guide/providers/ionq), [OQCProvider](/v2/sdk/user-guide/providers/oqc),
[AzureQuantumProvider](/v2/sdk/user-guide/providers/azure), [QuantinuumProvider](/v2/sdk/user-guide/providers/quantinuum),
[RigettiProvider](/v2/sdk/user-guide/providers/rigetti), and [OriginProvider](/v2/sdk/user-guide/providers/origin) as applicable.
## Quickstart
### Transpiler
Construct a quantum program of any supported program type:
Below, `QPROGRAM_REGISTRY` maps shorthand identifiers for supported quantum programs, each corresponding to a type in the typed
`QPROGRAM` Union. For example, 'qiskit' maps to `qiskit.QuantumCircuit` in `QPROGRAM`. Notably, 'qasm2' and 'qasm3' both represent
raw OpenQASM strings. This arrangement simplifies targeting and transpiling between different quantum programming frameworks.
```python theme={"dark"}
>>> from qbraid import QPROGRAM_REGISTRY
>>> QPROGRAM_REGISTRY
{'cirq': cirq.circuits.circuit.Circuit,
'qiskit': qiskit.circuit.quantumcircuit.QuantumCircuit,
'pennylane': pennylane.tape.tape.QuantumTape,
'pyquil': pyquil.quil.Program,
'pytket': pytket._tket.circuit.Circuit,
'braket': braket.circuits.circuit.Circuit,
'braket_ahs': braket.ahs.analog_hamiltonian_simulation.AnalogHamiltonianSimulation,
'openqasm3': openqasm3.ast.Program,
'pyqir': pyqir.Module,
'cpp_pyqubo': cpp_pyqubo.Model,
'qasm2': str,
'qasm3': str,
'qasm2_kirin': str,
'ionq': qbraid.programs.typer.IonQDict,
'qubo': qbraid.programs.typer.QuboCoefficientsDict,
'bloqade': bloqade.analog.builder.assign.BatchAssign,
'cudaq': cudaq.kernel.kernel_builder.PyKernel,
'qibo': qibo.models.circuit.Circuit,
'stim': stim._stim_sse2.Circuit,
'pulser': pulser.sequence.sequence.Sequence,
'pyqpanda3': pyqpanda3.core.QProg,
'autoqasm': autoqasm.program.program.Program,
'qrisp': qrisp.circuit.quantum_circuit.QuantumCircuit,
'qat': qat.core.wrappers.circuit.Circuit}
```
Pass any registered quantum program along with a target package from
`QPROGRAM_REGISTRY` to "transpile" your circuit to a new program type:
```python Input theme={"dark"}
from qbraid import random_circuit, transpile
from qbraid.interface import circuits_allclose
qiskit_ckt = random_circuit("qiskit")
cirq_ckt = transpile(qiskit_ckt, "cirq")
allclose = circuits_allclose(qiskit_ckt, cirq_ckt)
print(f"{type(qiskit_ckt)}\n{qiskit_ckt}\n")
print(f"{type(cirq_ckt)}\n{cirq_ckt}\n")
print(f"Circuits All Close: {allclose}")
```
```text Output theme={"dark"}
┌────────────┐
q_0: ──■──┤ Rx(3.0353) ├
┌─┴─┐└───┬────┬───┘
q_1: ┤ H ├────┤ √X ├────
└───┘ └────┘
0: ───@───Rx(0.966π)───
│
1: ───H───X^0.5────────
Circuits All Close: True
```
### Conversions
Behind the scenes, the qBraid-SDK uses [rustworkx](https://www.rustworkx.org/) to create a directional graph that maps all
possible conversions between supported program types:
```python theme={"dark"}
from qbraid import ConversionGraph, ExperimentType
# Loads native conversions from QPROGRAM_REGISTRY
graph = ConversionGraph()
# Plot GATE_MODEL nodes and "Conversion" edges
graph.plot(experiment_type=ExperimentType.GATE_MODEL, legend=True)
```
![]() You can use the native conversions supported by qBraid, or define your own custom nodes and/or edges. For example:
```python theme={"dark"}
from unittest.mock import Mock
from qbraid import register_program_type, Conversion
# replace with any program type
register_program_type(Mock, alias="mock")
# replace with your custom conversion function
example_qasm3_to_mock_func = lambda x: x
conversion = Conversion("qasm3", "mock", example_qasm3_to_mock_func)
graph.add_conversion(conversion)
# filter ConversionGraph to include only GATE_MODEL nodes
graph = graph.subplot(ExperimentType.GATE_MODEL)
# using a seed is helpful to ensure reproducibility
graph.plot(seed=20, k=3, legend=True)
```
You can use the native conversions supported by qBraid, or define your own custom nodes and/or edges. For example:
```python theme={"dark"}
from unittest.mock import Mock
from qbraid import register_program_type, Conversion
# replace with any program type
register_program_type(Mock, alias="mock")
# replace with your custom conversion function
example_qasm3_to_mock_func = lambda x: x
conversion = Conversion("qasm3", "mock", example_qasm3_to_mock_func)
graph.add_conversion(conversion)
# filter ConversionGraph to include only GATE_MODEL nodes
graph = graph.subplot(ExperimentType.GATE_MODEL)
# using a seed is helpful to ensure reproducibility
graph.plot(seed=20, k=3, legend=True)
```
![]() ### QbraidProvider
Run experiments using on-demand simulators provided by qBraid using the `qbraid.runtime.QbraidProvider`. You can get a
Python list of device objects using:
```python Input theme={"dark"}
from qbraid import QbraidProvider
provider = QbraidProvider()
devices = provider.get_devices()
print(devices)
```
```python Output theme={"dark"}
[,
,
,
,
,
,
,
,
,
,
,
,
,
,
,
,
,
,
,
,
]
```
Or, instantiate a known device by ID via the `QbraidProvider.get_device()` method,
and submit quantum jobs from any supported program type:
```python theme={"dark"}
device = provider.get_device("qbraid:qbraid:sim:qir-sv")
jobs = device.run([qiskit_ckt, braket_ckt, cirq_ckt, qasm3_str], shots=1000)
results = [job.result() for job in jobs]
print(results[0].data.get_counts())
# {'00': 483, '01': 14, '10': 486, '11': 17}
```
### Async results
All `QuantumJob` subclasses support `async_result()` for non-blocking result retrieval using asyncio.
This is useful in async applications where blocking the event loop is undesirable:
```python theme={"dark"}
result = await job.async_result(timeout=120, poll_interval=5)
print(result.data.get_counts())
```
## Supported Frontends
Featured circuit-building frameworks supported by the qBraid-SDK (non-exhaustive list).
## Citation
If you use qBraid-SDK in your research, we kindly request that you cite it appropriately.
The BibTeX entry below is aligned with the latest stable release. For the most up-to-date
citation details, please refer to [CITATION.cff](https://github.com/qBraid/qBraid/blob/main/CITATION.cff) or
[Zenodo](https://doi.org/10.5281/zenodo.12627596).
```tex theme={"dark"}
@software{Hill_qBraid-SDK_Platform-agnostic_quantum_2026,
author = {Hill, Ryan James and Gupta, Harshit and Young, Ricky and Setia, Kanav},
doi = {10.5281/zenodo.12627596},
license = {Apache-2.0},
month = jul,
title = {{qBraid-SDK: Platform-agnostic quantum runtime framework.}},
url = {https://github.com/qBraid/qBraid},
version = {0.12.2},
year = {2026}
}
```
# Programs
Source: https://docs.qbraid.com/v2/sdk/user-guide/programs
Extract and manage metadata from supported quantum program types, with the flexibility to introduce new types.
In this module, you will learn how to use the qBraid-SDK to interface with quantum circuits across various frontends.
We will demonstrate how to load quantum programs, register new quantum program types, and highlight a few other circuit-level
convenience features.
API Reference:
[qbraid.programs](https://qbraid.github.io/qBraid/api/qbraid.programs.html)
## Quantum Program Registry
The `QPROGRAM_REGISTRY` contains dictionary mappings of shorthand identifiers for "registered" quantum program types.
By default (i.e. without any optional dependencies installed) this simply includes three variations of OpenQASM programs:
```python theme={"dark"}
>>> from qbraid import QPROGRAM_REGISTRY
>>> QPROGRAM_REGISTRY
{'openqasm3': openqasm3.ast.Program,
'qasm2': str,
'qasm3': str}
```
In this example, 'openqasm3' serves as a type alias for an `openqasm3.ast.Program` object, while 'qasm2' and 'qasm3' are aliases
for raw OpenQASM 2 and OpenQASM 3 strings, respectively.
For each of its 10 natively supported program type aliases, the qBraid-SDK will automatically detect whether the corresponding library is installed,
and add that program type along with its type alias to the `QPROGRAM_REGISTRY`. For example, after installing the following optional dependencies,
```bash theme={"dark"}
pip install cirq-core qiskit amazon-braket-sdk pennylane pyquil pytket pyqir
```
the `QPROGRAM_REGISTRY` is automatically updated:
```python theme={"dark"}
>>> from qbraid import QPROGRAM_REGISTRY
>>> QPROGRAM_REGISTRY
{'cirq': cirq.circuits.circuit.Circuit,
'qiskit': qiskit.circuit.quantumcircuit.QuantumCircuit,
'pennylane': pennylane.tape.tape.QuantumTape,
'pyquil': pyquil.quil.Program,
'pytket': pytket._tket.circuit.Circuit,
'braket': braket.circuits.circuit.Circuit,
'openqasm3': openqasm3.ast.Program,
'pyqir': Module,
'qasm2': str,
'qasm3': str}
```
This arrangement simplifies the process of targeting and transpiling between various quantum programming frameworks,
which will be discussed in detail in the transpiler, interface, and runtime tutorials.
### Register New Program Types
You can register new quantum program types using either custom or default type aliases, and overwrite
existing type aliases when necessary. For example:
```python theme={"dark"}
import cirq
import stim
from qbraid import register_program_type
# register new program type with default module alias
register_program_type(stim.Circuit)
# register native program type with custom alias
register_program_type(cirq.Circuit, alias="myalias")
# overwrite existing type alias with new program type
register_program_type(dict, alias="qasm2", overwrite=True)
```
## Load Program
Any quantum program of a natively supported type can be encapsulated within a `qbraid.programs.QbraidProgram`
object. This encapsulation provides a unified framework for circuit manipulation—such as removing idle qubits
and reversing qubit order—and for extracting valuable metadata, including the number of qubits, circuit depth,
and the unitary representation.
As an example, we'll start with a simple qiskit circuit that creates the bell state,
load the quantum circuit object into the qBraid representation, verify the
circuit depth number of qubits, calculate the circuit's unitary representation,
and draw the circuit.
```python Input theme={"dark"}
from qbraid import load_program
from qbraid.visualization import circuit_drawer
qprogram = load_program(qiskit_circuit)
assert qprogram.num_qubits == 2
assert qprogram.depth == 2
assert qprogram.unitary().shape == (4, 4)
circuit_drawer(qprogram.program)
```
```text Output theme={"dark"}
┌───┐
q_0: ┤ H ├──■──
└───┘┌─┴─┐
q_1: ─────┤ X ├
└───┘
```
Now, let's try reversing the qubit order, and drawing the circuit again:
```python Input theme={"dark"}
qprogram.reverse_qubit_order()
circuit_drawer(qprogram.program)
```
```text Ouput theme={"dark"}
┌───┐
q_0: ─────┤ X ├
┌───┐└─┬─┘
q_1: ┤ H ├──■──
└───┘
```
Any quantum program type listed in the `qbraid.NATIVE_REGISTRY` can be loaded and utilized in this manner.
Each `QbraidProgram` object has `num_qubits` and `depth` attributes and `unitary()` method, regardless of the input circuit type.
For example, we could load an Amazon Braket circuit, and repeat similar steps:
```python Input theme={"dark"}
from qbraid import load_program
from qbraid.visualization import circuit_drawer
qprogram = load_program(braket_circuit)
assert qprogram.unitary().shape == ((1 << qprogram.num_qubits),) * 2
circuit_drawer(qprogram.program)
```
```text Output theme={"dark"}
T : │ 0 │ 1 │ 2 │
┌───┐
q0 : ─┤ H ├───●─────────
└───┘ │
┌─┴─┐
q2 : ───────┤ X ├───●───
└───┘ │
┌─┴─┐
q4 : ─────────────┤ X ├─
└───┘
T : │ 0 │ 1 │ 2 │
```
Some wrapped program types support additional methods that can help resolve compatibility issues, such as differences in
qubit indexing rules across frontends. For instance, the `remove_idle_qubits()` method allows you to remap qubit indices
without having to reconstruct the circuit:
```python Input theme={"dark"}
qprogram.remove_idle_qubits()
circuit_drawer(qprogram.program)
```
```text Output theme={"dark"}
T : │ 0 │ 1 │ 2 │
┌───┐
q0 : ─┤ H ├───●─────────
└───┘ │
┌─┴─┐
q1 : ───────┤ X ├───●───
└───┘ │
┌─┴─┐
q2 : ─────────────┤ X ├─
└───┘
T : │ 0 │ 1 │ 2 │
```
Using the `remove_idle_qubits` method, we mapped the qubit indices of the
Amazon Braket circuit from `[0, 2, 4]` to the contiguous `[0, 1, 2]` convention.
# AQTProvider
Source: https://docs.qbraid.com/v2/sdk/user-guide/providers/aqt
Runtime integration for direct access to AQT trapped-ion quantum processors via the arnica cloud.
API Reference:
[qbraid.runtime.aqt](https://qbraid.github.io/qBraid/stubs/qbraid.runtime.aqt.html)
## Overview
The `qbraid.runtime.AQTProvider` provides direct access to
[Alpine Quantum Technologies (AQT)](https://www.aqt.eu/) trapped-ion quantum systems through the
[arnica cloud](https://www.aqt.eu/products/arnica/). You can write quantum circuits in
[Qiskit](https://www.ibm.com/quantum/qiskit) (or any other qBraid-supported framework); the provider
transpiles them to AQT's native gate set and executes them on AQT hardware such as the **IBEX** QPU,
all from within the [qBraid Runtime framework](/v2/sdk/user-guide/runtime/components).
AQT devices are also available through the **qBraid platform** — accessed with
`QbraidProvider` and billed in qBraid credits — as well as through Amazon
Braket and Open Quantum. Each is a separate access point with its own device
ids.
## Getting started
Before you begin, make sure you have:
1. An **AQT arnica** account with machine-to-machine (OIDC client-credentials) access.
2. Your arnica **client ID** and **client secret**.
3. Python >= 3.10
### Set up the qBraid-SDK
Install qBraid with the `aqt` extra from [PyPI](https://pypi.org/project/qbraid/) using pip:
```bash theme={"dark"}
pip install 'qbraid[aqt]'
```
This installs the required dependencies: `aqt-connector` and `qiskit`.
*Note*: The qBraid-SDK requires Python 3.10 or greater. You can check your
Python version by running `python --version` from the command line.
## Authentication
The `AQTProvider` authenticates to the arnica cloud non-interactively using OIDC **client
credentials** (machine-to-machine) — the interactive device/login flow is never triggered. Provide
your credentials via environment variables:
```bash theme={"dark"}
export AQT_CLIENT_ID="your-client-id"
export AQT_CLIENT_SECRET="your-client-secret"
```
Then initialize the provider:
```python theme={"dark"}
from qbraid.runtime.aqt import AQTProvider
provider = AQTProvider()
```
You can also pass credentials — or a pre-obtained access token — directly instead of using
environment variables:
```python theme={"dark"}
# client-credentials
provider = AQTProvider(client_id="your-client-id", client_secret="your-client-secret")
# or a pre-obtained bearer token
provider = AQTProvider(access_token="your-access-token")
```
## List available devices
Use the `AQTProvider` to list the devices to which you have access:
```python theme={"dark"}
from qbraid.runtime.aqt import AQTProvider
provider = AQTProvider()
devices = provider.get_devices()
print(devices)
```
AQT devices are addressed by a `"/"` identifier. Get a specific device by its id:
```python theme={"dark"}
device = provider.get_device("/")
print(device.status())
#
```
Use `get_devices()` to discover the `"/"` ids you have access to — for
example, the **IBEX** QPU is exposed under its arnica workspace and resource.
## Submitting jobs
The `AQTProvider` accepts circuits written in any qBraid-supported framework. `device.run()`
transpiles the circuit to AQT's native basis (`RZ`, `R`, `RXX`) via the `qiskit -> aqt_connector`
conversion, then submits it.
AQT enforces per-job limits: up to **2000 shots** per job and up to **2000
operations** (gates) per circuit. Jobs that exceed either limit are rejected.
The **IBEX** QPU provides **12 qubits**; a circuit wider than the device is
rejected before submission.
### Create a circuit
```python theme={"dark"}
from qiskit import QuantumCircuit
# Bell state circuit
circuit = QuantumCircuit(2)
circuit.h(0)
circuit.cx(0, 1)
circuit.measure_all()
```
### Run a job
Use `device.run()` to transpile and submit a circuit:
```python theme={"dark"}
from qiskit import QuantumCircuit
from qbraid.runtime.aqt import AQTProvider
provider = AQTProvider()
device = provider.get_device("/")
circuit = QuantumCircuit(2)
circuit.h(0)
circuit.cx(0, 1)
circuit.measure_all()
job = device.run(circuit, shots=1000)
print(f"Job ID: {job.id}")
```
### Batch submission
Submit multiple circuits in a single call. All circuits are bundled into one arnica job:
```python theme={"dark"}
from qiskit import QuantumCircuit
from qbraid.runtime.aqt import AQTProvider
provider = AQTProvider()
device = provider.get_device("/")
qc1 = QuantumCircuit(1)
qc1.h(0)
qc1.measure_all()
qc2 = QuantumCircuit(2)
qc2.h(0)
qc2.cx(0, 1)
qc2.measure_all()
job = device.run([qc1, qc2], shots=500)
print(f"Job ID: {job.id}")
```
When submitting a list of circuits, all are executed as a single batch job on
arnica. The returned measurement counts will be a list of dictionaries, one
per circuit.
## Retrieving results
```python theme={"dark"}
result = job.result()
# Measurement counts (little-endian: qubit 0 is the rightmost bit)
print(result.data.get_counts())
# {'00': 512, '11': 488}
# Job metadata
print(f"Device: {result.device_id}")
print(f"Job ID: {result.job_id}")
print(f"Success: {result.success}")
```
### Check job status
```python theme={"dark"}
from qbraid.runtime.enums import JobStatus
status = job.status()
print(status)
#
```
### Cancel a job
```python theme={"dark"}
job.cancel()
```
Cancellation targets queued or ongoing jobs. Jobs already in a terminal state
(`COMPLETED`, `FAILED`, `CANCELLED`) cannot be cancelled.
### Execution time
Retrieve the wall-clock run time (in seconds) for a completed job:
```python theme={"dark"}
print(f"Execution time: {job.execution_time_s()} seconds")
```
`execution_time_s()` is derived from the arnica `timing_data` as the `ongoing`
→ `finished` span (the time the job spent running, excluding queue wait). It
returns `None` until the job has completed, and raises `AQTJobError` if a
completed job's timing data is incomplete.
## Configuration options
The `device.run()` method accepts the following keyword arguments:
| Parameter | Type | Default | Description |
| --------- | ----- | ---------- | --------------------------------------------------- |
| `shots` | `int` | `100` | Number of measurement shots per circuit (max 2000). |
| `name` | `str` | `"qbraid"` | Optional human-readable job label. |
Credentials are configured via environment variables:
| Variable | Description |
| ------------------- | ---------------------------------------------------------- |
| `AQT_CLIENT_ID` | OIDC client ID for the arnica client-credentials flow. |
| `AQT_CLIENT_SECRET` | OIDC client secret for the arnica client-credentials flow. |
## Full example
A complete end-to-end workflow submitting a GHZ state to an AQT device:
```python theme={"dark"}
from qiskit import QuantumCircuit
from qbraid.runtime.aqt import AQTProvider
# 1. Initialize provider (reads AQT_CLIENT_ID / AQT_CLIENT_SECRET from the environment)
provider = AQTProvider()
# 2. Get a device by its "/" id
device = provider.get_device("/")
print(f"Device status: {device.status()}")
# 3. Define a GHZ state circuit
circuit = QuantumCircuit(3)
circuit.h(0)
circuit.cx(0, 1)
circuit.cx(1, 2)
circuit.measure_all()
# 4. Submit the job
job = device.run(circuit, shots=1000)
print(f"Submitted job: {job.id}")
# 5. Retrieve results
result = job.result()
print(f"Counts: {result.data.get_counts()}")
# Expected output (approximate): {'000': ~500, '111': ~500}
```
## Related links
* [Alpine Quantum Technologies (AQT)](https://www.aqt.eu/)
* [AQT arnica Cloud](https://www.aqt.eu/products/arnica/)
* [AQT arnica API Reference](https://arnica.aqt.eu/api/v1/docs)
* [AQT Quantum SDK Connectors](https://www.aqt.eu/quantum-sdk-connectors/)
# BraketProvider
Source: https://docs.qbraid.com/v2/sdk/user-guide/providers/aws
Runtime integration for streamlined access to Amazon Braket supported devices.
API Reference:
[qbraid.runtime.aws](https://qbraid.github.io/qBraid/stubs/qbraid.runtime.aws.html)
## Installation & Setup
To interface with Amazon Braket [supported devices](https://docs.aws.amazon.com/braket/latest/developerguide/braket-devices.html),
install the `braket` extra:
```bash theme={"dark"}
pip install 'qbraid[braket]'
```
Then, follow [instructions](https://github.com/aws/amazon-braket-sdk-python#boto3-and-setting-up-aws-credentials)
to configure your AWS credentials.
## Basic Usage
Submit a Quantum Task to an AWS device using the `BraketProvider`:
```python theme={"dark"}
from qbraid.runtime import BraketProvider
provider = BraketProvider()
provider.get_devices()
# [,
# ,
# ,
# ,
# ,
# ,
# ,
# ,
# ,
# ]
device = provider.get_device("arn:aws:braket:::device/quantum-simulator/amazon/sv1")
type(device)
# qbraid.runtime.aws.device.BraketDevice
device.metadata()
# {'device_id': 'arn:aws:braket:::device/quantum-simulator/amazon/sv1',
# 'device_type': 'SIMULATOR',
# 'num_qubits': 34,
# 'provider_name': 'Amazon Braket',
# 'status': 'ONLINE',
# 'queue_depth': 0}
```
Now that we've instantiated our device, in this case the AWS SV1 simulator, we can construct a quantum circuit and submit a task using the `.run` method:
```python theme={"dark"}
from braket.circuits import Circuit
circuit = Circuit().h(0).cnot(0, 1)
job = device.run(circuit, shots=10)
```
We now have `job` which is of type `BraketQuantumTask`, which inherits from `QuantumJob`. To see the results,
we can do the following:
```python theme={"dark"}
res = job.result()
res.data.get_counts()
# {'00': 6, '11': 4}
res.data.measurements
# array([[0, 0],
# [0, 0],
# [1, 1],
# [1, 1],
# [0, 0],
# [0, 0],
# [0, 0],
# [1, 1],
# [0, 0],
# [0, 0]])
```
See how to visualize these results in the [Visualization](/v2/sdk/user-guide/visualization#plot-experimental-results) section.
## Runtime Options
The `BraketDevice.run()` method accepts additional keyword arguments that are passed through
to the underlying Amazon Braket SDK's `AwsDevice.run()`. These options let you control
device-specific behavior such as qubit rewiring, error mitigation, experimental capabilities, and more.
### Disable Qubit Rewiring
By default, Braket may remap the logical qubits in your circuit to physical qubits on the device.
To force the use of the exact qubits specified in your circuit, disable qubit rewiring:
```python theme={"dark"}
job = device.run(circuit, shots=1000, disable_qubit_rewiring=True)
```
This is required when using [verbatim compilation](https://docs.aws.amazon.com/braket/latest/developerguide/braket-openqasm-verbatim-compilation.html)
or pulse-level gate definitions.
### Error Mitigation (IonQ)
IonQ devices on Braket support error mitigation through debiasing, which creates
variations of your circuit to reduce the effects of hardware noise:
```python theme={"dark"}
from braket.error_mitigation import Debias
device = provider.get_device("arn:aws:braket:us-east-1::device/qpu/ionq/Aria-1")
job = device.run(
circuit,
shots=2500, # Minimum 2500 shots required for debiasing
device_parameters={"errorMitigation": Debias()},
)
```
### Experimental Capabilities
Some devices offer experimental features that must be explicitly enabled. For example,
QuEra Aquila supports tight atom geometries and local detuning, and IQM devices support
dynamic circuits with mid-circuit measurement:
```python theme={"dark"}
device = provider.get_device("arn:aws:braket:us-east-1::device/qpu/quera/Aquila")
job = device.run(
program,
shots=1000,
experimental_capabilities="ALL",
)
```
See [Experimental Capabilities](https://docs.aws.amazon.com/braket/latest/developerguide/braket-experimental-capabilities.html) for a full list of available features per device.
### Parametric Circuits
For OpenQASM programs with input parameters, pass values at runtime:
```python theme={"dark"}
job = device.run(
openqasm_program,
shots=1000,
inputs={"theta": 1.57, "phi": 0.785},
)
```
### Reservation ARN
If you have a [Braket Direct](https://aws.amazon.com/braket/direct/) reservation for
exclusive device access, provide the reservation ARN:
```python theme={"dark"}
job = device.run(
circuit,
shots=1000,
reservation_arn="arn:aws:braket:us-east-1:123456789012:reservation/abc123",
)
```
### Tags
Attach metadata tags to your quantum tasks for tracking and organization:
```python theme={"dark"}
job = device.run(
circuit,
shots=1000,
tags={"experiment": "bell-state", "team": "quantum-research"},
)
```
### Options Reference
| Parameter | Type | Description |
| --------------------------- | ------------------ | ---------------------------------------------- |
| `disable_qubit_rewiring` | `bool` | Force use of exact qubits without remapping |
| `device_parameters` | `dict` | Device-specific config (e.g. error mitigation) |
| `experimental_capabilities` | `str` | Set to `"ALL"` to enable experimental features |
| `inputs` | `dict[str, float]` | Parameter values for parametric circuits |
| `reservation_arn` | `str` | Braket Direct reservation ARN |
| `tags` | `dict[str, str]` | Metadata tags for the quantum task |
### Via qBraid Runtime API
When submitting jobs through the [QbraidProvider](/v2/sdk/user-guide/providers/native), these same
options can be passed via the `runtimeOptions` field. The runtime API forwards them as keyword
arguments to the Braket `device.run()` call:
```python theme={"dark"}
from qbraid.runtime import QbraidProvider
provider = QbraidProvider()
device = provider.get_device("aws:quera:qpu:aquila")
job = device.run(
program,
shots=1000,
runtime_options={"experimental_capabilities": "ALL"},
)
```
```python theme={"dark"}
device = provider.get_device("aws:ionq:qpu:aria-1")
job = device.run(
circuit,
shots=2500,
runtime_options={"device_parameters": {"errorMitigation": "Debias"}},
)
```
# AzureQuantumProvider
Source: https://docs.qbraid.com/v2/sdk/user-guide/providers/azure
Runtime integration for streamlined access to Azure Quantum supported devices.
API Reference:
[qbraid.runtime.azure](https://qbraid.github.io/qBraid/stubs/qbraid.runtime.azure.html)
## Installation & Setup
To interface with Azure Quantum supported devices, install the `azure` extra:
```bash theme={"dark"}
pip install 'qbraid[azure]'
```
Then, follow the [Azure Quantum setup instructions](https://learn.microsoft.com/en-us/azure/quantum/how-to-create-workspace) to create a workspace and get your credentials.
## Authentication Methods
The `AzureQuantumProvider` integrates with Azure Quantum via the `azure-quantum` package. It connects to an [Azure Quantum Workspace](https://learn.microsoft.com/en-us/python/azure-quantum/azure.quantum.workspace), which manages your quantum resources.
### Using a Connection String
You can authenticate using an **Azure connection string**, which provides a direct way to access your workspace. First, retrieve your connection string by following [these instructions](https://learn.microsoft.com/en-us/azure/quantum/how-to-connect-workspace#copy-the-connection-string). Then, use it to initialize a `Workspace` object and pass it to `AzureQuantumProvider`:
```python theme={"dark"}
# Authenticate using a connection string
from azure.quantum import Workspace
from qbraid.runtime import AzureQuantumProvider
connection_string = "[Your connection string here]"
workspace = Workspace.from_connection_string(connection_string)
provider = AzureQuantumProvider(workspace=workspace)
```
### Using Environment Variables
To avoid hardcoding credentials in your code, you can store the connection string as an environment variable instead:
```bash theme={"dark"}
export AZURE_QUANTUM_CONNECTION_STRING="your-connection-string"
```
Then, initialize `AzureQuantumProvider` without passing explicit credentials:
```python theme={"dark"}
from qbraid.runtime import AzureQuantumProvider
provider = AzureQuantumProvider() # Uses the environment variable
```
### Related Content
* [Access Keys - Azure Quantum | Microsoft Learn](https://learn.microsoft.com/en-us/azure/quantum/security-manage-access-keys?tabs=tabid-portal#connect-to-your-azure-quantum-workspace-with-a-connection-string)
* [Connect to your Azure Quantum workspace with the azure-quantum Python package](https://learn.microsoft.com/en-us/azure/quantum/how-to-connect-workspace?tabs=tabid-python1%2Ctabid-python)
* [Authenticate Python apps to Azure services by using the Azure SDK for Python](https://learn.microsoft.com/en-us/azure/developer/python/azure-sdk-authenticate)
## Basic Usage
Submit a Quantum Task to an Azure Quantum device using the `AzureQuantumProvider`:
```python theme={"dark"}
from qbraid.runtime import AzureQuantumProvider
provider = AzureQuantumProvider() # Uses environment variables
# List available devices
provider.get_devices()
# [,
# ,
# ,
# ,
# ]
# Get a specific device
device = provider.get_device("ionq.simulator")
type(device)
# qbraid.runtime.azure.device.AzureDevice
device.metadata()
# {'device_id': 'ionq.simulator',
# 'device_type': 'SIMULATOR',
# 'num_qubits': 29,
# 'provider_name': 'IonQ',
# 'status': 'ONLINE'}
```
Now that we've instantiated our device, in this case the IonQ simulator on Azure Quantum, we can construct a quantum circuit and submit a task using the `.run` method:
```python theme={"dark"}
from qiskit import QuantumCircuit
circuit = QuantumCircuit(2)
circuit.h(0)
circuit.cx(0, 1)
job = device.run(circuit, shots=10)
```
We now have `job` which is of type `AzureQuantumTask`, which inherits from `QuantumJob`. To see the results:
```python theme={"dark"}
res = job.result()
res.data.get_counts()
# {'00': 5, '11': 5}
res.data.measurements
# array([[0, 0],
# [1, 1],
# [0, 0],
# [1, 1],
# [0, 0],
# [1, 1],
# [0, 0],
# [1, 1],
# [0, 0],
# [1, 1]])
```
See how to visualize these results in the [Visualization](/v2/sdk/user-guide/visualization#plot-experimental-results) section.
## Supported Providers
Azure Quantum provides access to quantum hardware and simulators from several providers:
* IonQ
* Quantinuum
* Rigetti
* Pasqal
Each provider may have different requirements and capabilities. Refer to the [Azure Quantum documentation](https://learn.microsoft.com/en-us/azure/quantum/) for more details about specific providers.
## Runtime Options
The `AzureQuantumDevice.run()` and `.submit()` methods accept an `input_params` keyword argument
that is passed through to the Azure Quantum backend. Each hardware provider supports different
options.
### Quantinuum
Quantinuum emulators and hardware support several input parameters for controlling
simulation type, noise models, and compiler optimization.
#### Simulator type
Quantinuum emulators support both state-vector (default) and stabilizer simulation:
```python theme={"dark"}
device = provider.get_device("quantinuum.sim.h2-1e")
# Use the stabilizer simulator (Clifford circuits only)
job = device.run(circuit, shots=100, input_params={"simulator": "stabilizer"})
```
#### Noise model
Disable the emulator's noise model for ideal simulation:
```python theme={"dark"}
job = device.run(circuit, shots=100, input_params={"error-model": False})
```
Customize individual noise parameters:
```python theme={"dark"}
job = device.run(
circuit,
shots=100,
input_params={
"error-params": {
"p1": 4e-5,
"p2": 3e-3,
"p_meas": [3e-3, 3e-3],
"p_init": 4e-5,
"p_crosstalk_meas": 1e-5,
"p_crosstalk_init": 3e-5,
}
},
)
```
#### Compiler options
Control TKET optimization level or disable optimization entirely:
```python theme={"dark"}
# Set optimization level (0, 1, or 2; default is 2)
job = device.run(circuit, shots=100, input_params={"tket-opt-level": 1})
# Disable optimization
job = device.run(circuit, shots=100, input_params={"no-opt": True})
```
See [Quantinuum provider](https://learn.microsoft.com/en-us/azure/quantum/provider-quantinuum) for full details.
### IonQ
IonQ devices on Azure support error mitigation and noise model simulation.
#### Error mitigation
Debiasing is enabled by default on Aria and Forte systems. To explicitly control it:
```python theme={"dark"}
device = provider.get_device("ionq.qpu.aria-1")
# Disable debiasing
job = device.run(circuit, shots=1000, input_params={"error-mitigation": {"debias": False}})
```
#### Noise model simulation
Run on the IonQ simulator with a hardware noise profile:
```python theme={"dark"}
device = provider.get_device("ionq.simulator")
job = device.run(
circuit,
shots=1000,
input_params={
"noise": {
"model": "aria-1",
"seed": 42,
}
},
)
```
Set `"model": "ideal"` for noiseless simulation (up to 29 qubits).
See [IonQ provider](https://learn.microsoft.com/en-us/azure/quantum/provider-ionq) for full details.
### Rigetti
Rigetti devices on Azure support compiler control and parameter substitutions.
#### Skip quilc compilation
When using native Quil or Quil-T programs, you can bypass the quilc compiler:
```python theme={"dark"}
device = provider.get_device("rigetti.qpu.ankaa-3")
job = device.submit(quil_program, shots=100, input_params={"skipQuilc": True})
```
#### Parameter substitutions
For parametrized Quil programs, provide values for declared variables:
```python theme={"dark"}
quil_program = """
DECLARE ro BIT[2]
DECLARE theta REAL[2]
RX(theta[0]) 0
RX(theta[1]) 1
MEASURE 0 ro[0]
MEASURE 1 ro[1]
"""
job = device.submit(
quil_program,
shots=100,
input_params={
"substitutions": {
"theta": [[0.0, 3.14], [1.57, 3.14]]
}
},
)
```
See [Rigetti provider](https://learn.microsoft.com/en-us/azure/quantum/provider-rigetti) for full details.
### Options Reference
| Provider | Parameter | Type | Description |
| ---------- | ------------------ | ------ | -------------------------------------------- |
| Quantinuum | `simulator` | `str` | `"stabilizer"` or `"state-vector"` (default) |
| Quantinuum | `error-model` | `bool` | Enable/disable noise model (default `True`) |
| Quantinuum | `error-params` | `dict` | Custom noise parameters |
| Quantinuum | `tket-opt-level` | `int` | TKET optimization level (0-2) |
| Quantinuum | `no-opt` | `bool` | Disable compiler optimization |
| IonQ | `error-mitigation` | `dict` | `{"debias": True/False}` |
| IonQ | `noise` | `dict` | `{"model": "aria-1", "seed": int}` |
| Rigetti | `skipQuilc` | `bool` | Skip quilc compiler |
| Rigetti | `substitutions` | `dict` | Parameter values for Quil programs |
### Via qBraid Runtime API
When submitting jobs through the [QbraidProvider](/v2/sdk/user-guide/providers/native), these same
options can be passed via the `runtimeOptions` field. The runtime API forwards them as `input_params`
to the Azure `device.run()` or `device.submit()` call:
```python theme={"dark"}
from qbraid.runtime import QbraidProvider
provider = QbraidProvider()
device = provider.get_device("azure:quantinuum:sim:h2-1e")
# Use stabilizer simulator with no noise
job = device.run(
circuit,
shots=100,
runtime_options={"simulator": "stabilizer", "error-model": False},
)
```
```python theme={"dark"}
device = provider.get_device("azure:ionq:sim:simulator")
# Run with hardware noise model
job = device.run(
circuit,
shots=1000,
runtime_options={"noise": {"model": "aria-1", "seed": 42}},
)
```
# QiskitRuntimeProvider
Source: https://docs.qbraid.com/v2/sdk/user-guide/providers/ibm
Runtime integration for streamlined access to IBM Quantum hardware.
API Reference:
[qbraid.runtime.ibm](https://qbraid.github.io/qBraid/stubs/qbraid.runtime.ibm.html)
## Installation & Setup
To interface with IBM Quantum backends, install the `qiskit` extra,
```bash theme={"dark"}
pip install 'qbraid[qiskit]'
```
and configure your [IBM credentials](https://github.com/Qiskit/qiskit-ibm-runtime?tab=readme-ov-file#account-setup).
## Basic Usage
The `QiskitRuntimeProvider` allows you to easily submit jobs to IBM Quantum devices. There are several ways to initialize the provider:
1. Direct authentication with IBM Cloud:
```python theme={"dark"}
from qbraid.runtime import QiskitRuntimeProvider
provider = QiskitRuntimeProvider(
channel="ibm_cloud",
token="MY_IBM_CLOUD_API_KEY",
instance="MY_IBM_CLOUD_CRN"
)
```
2. Authentication with IBM Quantum:
```python theme={"dark"}
provider = QiskitRuntimeProvider(
channel="ibm_quantum",
token="MY_IBM_QUANTUM_TOKEN"
)
```
3. Using environment variables:
```shell theme={"dark"}
export QISKIT_IBM_TOKEN="MY_IBM_CLOUD_API_KEY"
export QISKIT_IBM_INSTANCE="MY_IBM_CLOUD_CRN"
export QISKIT_IBM_CHANNEL="ibm_cloud"
```
4. Using credentials stored in `$HOME/.qiskit/qiskit-ibm.json`
When using environment variables or stored credentials, you can initialize the provider without any arguments:
```python theme={"dark"}
provider = QiskitRuntimeProvider()
```
Once initialized, you can list available devices and access their information:
```python theme={"dark"}
# Get list of available devices
provider.get_devices()
# [,
# ,
# ,
# ,
# ,
# ]
# Select a specific device
device = provider.get_device('ibm_brisbane')
# View device metadata
device.metadata()
# {'device_id': 'ibm_brisbane',
# 'device_type': 'QPU',
# 'num_qubits': 127,
# 'instance': 'ibm-q/open/main',
# 'max_shots': 100000,
# 'status': 'ONLINE',
# 'queue_depth': 37}
```
Our chosen device is the IBM Osaka Backend, which we will now submit a Qiskit job to.
```python theme={"dark"}
from qiskit import QuantumCircuit
circuit = QuantumCircuit(2)
circuit.h(0)
job = device.run(circuit, shots=10)
```
So now we have `job` which is of type `QiskitJob`, which inherits from `QuantumJob`. To see the results, we can do the following:
```python theme={"dark"}
res = job.result()
res.data.get_counts()
# {'00': 6, '11': 4}
res.data.measurements
# array([[1, 1],
# [0, 0],
# [0, 0],
# [1, 1],
# [0, 0],
# [1, 1],
# [0, 0],
# [1, 1],
# [0, 0],
# [0, 0]])
```
See how to visualize these results in the [Visualization](/v2/sdk/user-guide/visualization#plot-experimental-results) section.
# IonQProvider
Source: https://docs.qbraid.com/v2/sdk/user-guide/providers/ionq
Runtime integration for streamlined access to IonQ simulators and QPUs.
API Reference:
[qbraid.runtime.ionq](https://qbraid.github.io/qBraid/stubs/qbraid.runtime.ionq.html)
## Overview
The `qbraid.runtime.IonQProvider` provides support for IonQ's trapped-ion systems. This means that you can write quantum circuits in
Qiskit, Cirq, Amazon Braket, PennyLane, PyTKET, or any other library compatible with [OpenQASM](https://openqasm.com/) (version 2 or 3),
and run them on IonQ's simulators and trapped-ion quantum computers, all from within the [qBraid Runtime framework](/v2/sdk/user-guide/runtime/components).
## Getting started
Before you begin, make sure you have an [IonQ Quantum Cloud](https://cloud.ionq.com/) account and API key.
For help, see IonQ's guide on [creating and managing API keys](https://docs.ionq.com/guides/managing-api-keys).
### Set up the qBraid-SDK
Install qBraid with the `ionq` extra from [PyPI](https://pypi.org/project/qbraid/) using pip:
```bash theme={"dark"}
pip install 'qbraid[ionq]'
```
*Note*: The qBraid-SDK requires Python 3.10 or greater. You can check your
Python version by running `python --version` from the command line.
We encourage doing this inside an environment management system, such as [virtualenv](https://virtualenv.pypa.io/en/latest/) or
[conda](https://docs.conda.io/en/latest/). Alternatively, you can bypass this step by using a pre-configured
[qBraid Lab environment](/v2/lab/user-guide/environments).
See [qBraid-SDK installation and setup](/v2/sdk/user-guide/overview#installation-and-setup) for more.
### Set up your environment
By default, qBraid will look in your local environment for a variable named `IONQ_API_KEY`, so if you've already followed IonQ's guide on
[setting up and managing your API keys](https://docs.ionq.com/guides/managing-api-keys), qBraid will automatically find it.
Alternatively, you can set a "temporary" environment variable from your command line:
```bash theme={"dark"}
export IONQ_API_KEY="your_api_key_here"
```
While we recommend setting an environment variable so that qBraid can find your API key, you can also pass in your API key explicitly
within your Python code, when creating the IonQ Provider object that authenticates your connection to the IonQ Cloud Platform. This might
be necessary if you've named your environment variable something other than `IONQ_API_KEY`, or if you are working from a Python environment
where accessing environment variables is not straightforward. You can import your key explicitly or load it from a file, and pass it into
the `IonQProvider()` object directly:
```python theme={"dark"}
import os
from qbraid.runtime import IonQProvider
# Load your API key from an environment variable named MY_IONQ_API_KEY
my_api_key = os.getenv("MY_IONQ_API_KEY")
provider = IonQProvider(my_api_key)
```
In the examples below, we show `IonQProvider()` initialized with no arguments and assume that qBraid will automatically find your API key,
but you can always use this approach instead.
## List available devices
Use the `IonQProvider` to list all of the devices to which you have access:
```python theme={"dark"}
from qbraid.runtime import IonQProvider
provider = IonQProvider()
devices = provider.get_devices()
```
Running this script should print the results below—something like this:
```python theme={"dark"}
[,
,
,
,
]
```
If this works correctly then your qBraid-SDK installation is correct, your IonQ API key is valid, and you have access to the IonQ devices!
## Submit a circuit to the simulator
First, let’s try running a simple Bell state circuit on the ideal simulator. Here, we'll use 1000 shots, and give the circuit a name that
will show up in the [IonQ Cloud Console](https://cloud.ionq.com/jobs).
Your input OpenQASM program should not include measurement statements.
Measurement will be applied over all qubits at the end of the circuit,
automatically. Mid-circuit measurements and partial measurements are not
supported.
```python theme={"dark"}
from qbraid.runtime import IonQProvider
provider = IonQProvider()
device = provider.get_device("simulator")
# Define a Bell state circuit in qasm
qasm = """
OPENQASM 3.0;
qubit[2] q;
h q[0];
cx q[0], q[1];
"""
job = device.run(qasm, name="Hello many worlds!", shots=1000)
result = job.result()
print(result.data.get_counts())
```
This returns:
```
{'00': 500, '11': 500}
```
As expected, the ideal simulator creates a quantum state with a 50-50 probability of being measured as “00” or “11”.
To view the calculated probabilities for a circuit run on the simulator, use `result.data.get_probabilities()`.
You can return histogram data in decimal format for either of these `result.data` methods using argument `decimal=True`.
### Submit a circuit with noise
Get a list of all noise models supported by the IonQ simulator:
```python theme={"dark"}
print(device.profile.noise_models)
```
Then, to run a noisy simulation, simply specify a noise model and an optional random seed:
```python theme={"dark"}
job = device.run(qasm, shots=1000, noise={"model" : "aria-1", "seed": 42})
```
You can read more about simulation with noise models [here](https://docs.ionq.com/guides/simulation-with-noise-models).
## Submit a circuit to a QPU
You can view your access to IonQ systems in the “Backends” tab of the IonQ Cloud Console. Before submitting to any QPU,
we recommend testing your code on a simulator (including with noise model) and following the other steps in the
[QPU submission checklist](https://docs.ionq.com/guides/qpu-submission-checklist.mdx) to confirm your access and the QPU availability.
To run a circuit on a QPU, use the same setup as before, just with a different device ID:
```python theme={"dark"}
from qbraid.runtime import IonQProvider
provider = IonQProvider()
device = provider.get_device("qpu.aria-1")
```
Verify that the device is `ONLINE`:
```python theme={"dark"}
print(device.status())
```
View device characterization data including the connectivity, fidelity, timings, and more:
```python theme={"dark"}
print(device.profile.characterization)
```
Next, construct your quantum program, ensuring it aligns with the device’s [supported gateset](#supported-gates).
In this example, we'll define GHZ state circuit using OpenQASM 3:
```python theme={"dark"}
qasm = """
OPENQASM 3.0;
qubit[3] q;
h q[0];
cx q[0], q[1];
cx q[0], q[2];
"""
```
### Estimate Cost
You can use the `device.run()` method with the `dry_run=True` option to obtain a cost estimate for the anticipated job
without actually executing the program on a QPU.
```python theme={"dark"}
job = device.run(qasm, name="GHZ (Dry run)", shots=100, dry_run=True)
job.wait_for_final_state()
metadata = job.metadata()
cost_usd = metadata["cost_usd"]
print(f"Cost Estimate (USD): {cost_usd}")
```
If you plan to run your job with [debiasing](https://ionq.com/resources/debiasing-and-sharpening), be sure to include the
`error_mitigation` parameter in the preflight submission to ensure it is accounted for in the cost estimate:
```python theme={"dark"}
job = device.run(..., preflight=True, error_mitigation={"debias": True})
```
### Submit to QPU
When you are ready to submit the job on the QPU, simply set `preflight=False`, or don't specify any `preflight` value.
Optionally include job tags or other metadata for your convenience, specifying up to 10 key-value pairs.
```python theme={"dark"}
job = device.run(qasm, name="GHZ", shots=100, metadata={"key": "str_value"})
```
When submitting jobs to a QPU, your job may need to wait in the queue. You can print and record the job’s unique ID,
which can be used to retrieve the job (including its status and results) at a later time, see [Retrieve a job](#retrieve-a-job).
```python theme={"dark"}
print(job.id)
```
Check the status of your job:
```python theme={"dark"}
print(job.status())
```
Once the job is `COMPLETED`, you can retrieve the results:
```python theme={"dark"}
result = job.result()
counts = result.data.get_counts(decimal=True)
print(f"Counts: {counts}")
print(f"Details: {result.details}")
```
## Submit a multi-circuit job
The flexibility of qBraid-SDK allows you to write your circuit not just in OpenQASM, but in Qiskit, Cirq, Amazon Braket, PyTKET,
or any other [registered program type](/v2/sdk/user-guide/programs#quantum-program-registry) that can be
[transpiled](/v2/sdk/user-guide/transpiler) to qBraid's `qasm2` or `qasm3` format.
In this example, we'll install the `qiskit` and `cirq` extras,
```bash theme={"dark"}
pip install 'qbraid[qiskit,cirq]'
```
and submit a [multi-circuit job](https://docs.ionq.com/api-reference/v0.3/multicircuit-jobs) containing one of each program type:
```python theme={"dark"}
import cirq
from qbraid.runtime import IonQProvider
from qiskit import QuantumCircuit
provider = IonQProvider()
device = provider.get_device("simulator")
# Define a bell state in qiskit
qiskit_bell = QuantumCircuit(2)
qiskit_bell.h(0)
qiskit_bell.cx(0, 1)
# Define a bell state in cirq
cirq_bell = cirq.Circuit()
q0, q1 = cirq.LineQubit.range(2)
cirq_bell.append(cirq.H(q0))
cirq_bell.append(cirq.CNOT(q0, q1))
circuit_batch = [qiskit_bell, cirq_bell]
job = device.run(circuit_batch, shots=1000, noise={"model": "aria-1"})
result = job.result()
counts_batch = result.data.get_counts()
print("\n".join(f"Circuit {i}: {c}" for i, c in enumerate(counts_batch)))
```
This script submits two quantum circuits in a single job. When the job completes, it prints the counts for each circuit:
```bash theme={"dark"}
Circuit 0: {'00': 492, '01': 4, '10': 3, '11': 501}
Circuit 1: {'00': 482, '01': 6, '10': 6, '11': 506}
```
All of the necessary program type conversions are carried out automatically within the `device.run()` method. However, you can also perform
this "transpile" step manually, if needed (e.g. to inspect the ultimate OpenQASM submission format). This can be done as follows:
```python theme={"dark"}
from qbraid import transpile
qasm_batch = [transpile(circuit, "qasm2") for circuit in circuit_batch]
jobs = device.run(qasm_batch, shots=1000, ...)
```
qBraid offers native support for 10 major quantum programming libraries including 20+ inter-library conversions. For more details, including
how to configure your own custom conversions, refer to the [qBraid transpiler documentation](/v2/sdk/user-guide/transpiler).
## Manage jobs
### Retrieve a job
You can retrieve results for a previously run job using its job ID. You can save the job ID after submitting a job
(as in the QPU example above) or copy it from the “ID” column in the “My Jobs” tab on the [IonQ Cloud Console](https://cloud.ionq.com/jobs).
```python theme={"dark"}
from qbraid.runtime import IonQJob, IonQProvider
job_id = "..."
provider = IonQProvider()
job = IonQJob(job_id, provider.session)
result = job.result()
print(result.data.get_counts())
```
### Cancel a job
You can cancel a job while it’s waiting in the queue:
```python theme={"dark"}
job.cancel()
```
## Visualize Results
To plot the results of a job, first, install the qBraid visualization extra:
```bash theme={"dark"}
pip install 'qbraid[visualization]'
```
You can visualize the histogram counts data using `plot_histogram`, or display the probability distribution with `plot_distribution`.
```python theme={"dark"}
from qbraid.visualization import plot_histogram
plot_histogram(counts)
```
The "counts" input may be either a single dictionary or a list of dictionaries for multi-circuit jobs. In the latter case, histogram data
for each circuit will be plotted side-by-side. The X-axis labels will display in decimal if you set `decimal=True` when retrieving measurement
counts with `get_counts()`. If `decimal=False` or left unspecified, the default quantum state labels in hexadecimal will be used.
See [Plot Experimental Results](/v2/sdk/user-guide/visualization#plot-experimental-results) for more.
## Supported gates
For actual execution, gates will be compiled into optimal operations for our trapped ion hardware. For convenience,
IonQ provide a more expressive gateset for programming. However, not all gates supported by the OpenQASM 3 standard library
are accepted by IonQ backends. See full list of [supported gates](https://docs.ionq.com/api-reference/v0.3/writing-quantum-programs#supported-gates).
You can also view a list of the OpenQASM gates supported by a given device directly from an `IonQDevice`. For example:
```python theme={"dark"}
device = provider.get_device("qpu.forte-1")
print(device.profile.basis_gates)
```
Which would return:
```bash theme={"dark"}
{'swap', 'tdg', 't', 'gpi2', 'gpi', 'rz', 'sx', 'z', 's', 'sdg', 'zz', 'cx', 'rx', 'y', 'h', 'ry', 'x', 'sxdg'}
```
Note: the returned gateset includes both the abstract QIS and IonQ-native gates supported by the device; however, circuits must be constructed
using either exclusively QIS gates or exclusively native gates—you cannot mix the two within a single circuit. In the next section, we’ll
explore using IonQ native gates in greater detail.
## Native Gates
Building and submitting circuits using IonQ's hardware-native gateset enables you to bypass our compiler and optimizer, providing more control
and transparency than the default abstract gateset (though often at the cost of performance and convenience).
Before working with native gates in qBraid, we recommend reviewing our guides on [Getting Started with Native Gates](https://docs.ionq.com/guides/getting-started-with-native-gates)
and the [IonQ Native Gates API](https://docs.ionq.com/api-reference/v0.3/native-gates-api).
This is an advanced-level feature. Using the hardware-native gate interface
without a thorough understanding of quantum circuits is likely to result in
less-optimal circuit structure and worse algorithmic performance overall than
using our abstract gate interface.
IonQ's native gates are incorporated as a natural extension of the OpenQASM standard library within the `qbraid[ionq]` runtime integration.
qBraid supports the following IonQ native gates:
* `gpi(phi)`
* `gpi2(phi)`
* `ms(phi0, phi1, theta=0.25)` for Aria systems
* `zz(theta)` for Forte systems
For more details about these gate definitions and parameters, refer to the [native gates guide](https://docs.ionq.com/guides/getting-started-with-native-gates#introducing-the-native-gates).
The parameters in the IonQ native gate specification are always defined in
*turns*, not in radians. One turn is 2π radians.
Native gate circuits can then be built and executed as follows:
```python theme={"dark"}
from qbraid.runtime import IonQProvider
provider = IonQProvider(api_key="YOUR_API_KEY")
device = provider.get_device("simulator")
qasm = """
OPENQASM 3.0;
qubit[3] q;
gpi(0.5) q[0];
gpi2(0) q[1];
ms(0,0.5) q[1], q[2];
"""
job = device.run(qasm, shots=1000)
```
Each quantum circuit submitted to the IonQ Cloud must use a consistent gateset
throughout--you cannot mix and match native gates and abstract gates in the
same circuit.
The `qbraid[ionq]` runtime integration does not currently support automatic transpilation from abstract to native gates, but we may add this
capability in the future. For now, we recommend following this general procedure (also described in IonQ's main [native gates guide](https://docs.ionq.com/guides/getting-started-with-native-gates#converting-to-native-gates))
or using a different SDK.
***
## Additional resources
*Great work!* You successfully ran your first quantum circuits - *what next?*
Explore more resources for using qBraid:
* [API Reference](https://qbraid.github.io/qBraid/)
* [Source Code on GitHub](https://github.com/qBraid/qBraid)
* [Example Notebooks on GitHub](https://github.com/qBraid/qbraid-lab-demo)
Find examples for using IonQ systems with other quantum programming libraries:
* [IonQ Runtime Provider Notebook on GitHub](https://github.com/qBraid/qbraid-lab-demo/blob/main/Provider-Jobs/qbraid_runtime_ionq_provider.ipynb)
* [IonQ Samples Library on GitHub](https://github.com/ionq-samples/getting-started)
# QbraidProvider
Source: https://docs.qbraid.com/v2/sdk/user-guide/providers/native
Runtime integration for streamlined access to quantum devices supported by qBraid.
API Reference:
[qbraid.runtime.native](https://qbraid.github.io/qBraid/stubs/qbraid.runtime.native.html)
## Installation & Setup
To interface with the qBraid QIR simulator or any of the 10+ quantum devices supported by qBraid's managed access,
install the relevant `qbraid` runtime extra(s) based on your device(s) of choice:
```bash theme={"dark"}
pip install qbraid
```
qbraid versions \<0.11 are *not* compatible with qBraid API V2. See [migration guide](/v2/api-reference/rest/migration).
To ensure compatibility with the new platform, use **qbraid** ≥ 0.11.0.
Next, obtain your qBraid API key:
1. Login or create an account at [account.qbraid.com](https://account.qbraid.com/).
2. Navigate to **Account** > **API Keys** in the left-sidebar, and then click "Create API Key".
See also: [Account - API Keys](/v2/account/api-keys)
### Save account to disk
Once you have your API key, you can save it locally in a configuration file `~/.qbraid/qbraidrc`,
where `~` corresponds to your home (`$HOME`) directory:
Account credentials are saved in plain text, so only do so if you are using a
trusted device.
```python theme={"dark"}
from qbraid.runtime import QbraidProvider
provider = QbraidProvider(api_key='API_KEY')
provider.save_config()
```
Once the account is saved on disk, you can instantiate the provider without any arguments:
```python theme={"dark"}
provider = QbraidProvider()
```
### Load account from environment variables
Alternatively, the qBraid-SDK can discover credentials from environment variables:
```bash theme={"dark"}
export QBRAID_API_KEY='QBRAID_API_KEY'
```
## Basic Usage
Given a device "QRN" (qBraid Resource Name), a `QbraidDevice` object can be created as follows:
```python theme={"dark"}
from qbraid import QbraidProvider
provider = QbraidProvider()
provider.get_devices()
# []
device = provider.get_device('qbraid:qbraid:sim:qir-sv')
type(device)
#
```
From here, class methods are available to get information about the device, execute quantum programs,
access the wrapped device object directly, and more.
```python theme={"dark"}
device.metadata()
# {'device_id': 'qbraid:qbraid:sim:qir-sv',
# 'device_type': 'SIMULATOR',
# 'num_qubits': 30,
# 'status': 'ONLINE',
# 'queue_depth': 0}
```
Then you can submit quantum jobs to the device.
```python theme={"dark"}
run_input = [qiskit_circuit, braket_circuit, cirq_circuit, qasm3_str]
jobs = device.run(run_input, shots=100)
results = [job.result() for job in jobs]
print(results[0].data.get_counts())
# {'00': 50, '01': 2, '10': 47, '11': 1}
```
See how to visualize these results in the [Visualization](/v2/sdk/user-guide/visualization#plot-experimental-results) section.
## Runtime Options
When submitting jobs through the `QbraidProvider`, you can pass provider-specific options using
the `runtime_options` keyword argument. These options are forwarded directly to the underlying
cloud provider's submission API, giving you access to device-specific features without
needing to configure provider credentials yourself.
```python theme={"dark"}
job = device.run(circuit, shots=100, runtime_options={"key": "value"})
```
The `runtime_options` dictionary is passed through as-is to the provider backend:
* **Amazon Braket** devices: options are unpacked as keyword arguments to the Braket `device.run()` call
* **Azure Quantum** devices: options are passed as `input_params` to the Azure `device.run()` or `device.submit()` call
* **qBraid** devices: options are merged into the job submission payload
### qBraid Simulator Examples
Pass a `seed` to make a simulation reproducible. Two runs of the same circuit with the same
seed return identical measurement counts:
```python theme={"dark"}
device = provider.get_device("qbraid:qbraid:sim:qir-sv")
job = device.run(circuit, shots=100, runtime_options={"seed": 42})
print(job.result().data.get_counts())
# {'00': 48, '11': 52}
```
Submitting the same circuit again with `"seed": 42` returns those same counts. Change the
seed, or leave it out, and the simulator draws a fresh sample on every run.
This is useful for tutorials and course material where the output in the text should match
what the reader sees, for regression tests that assert on exact counts, and for sharing a
result someone else can reproduce.
### Amazon Braket Examples
Enable experimental capabilities on supported devices:
```python theme={"dark"}
device = provider.get_device("aws:quera:qpu:aquila")
job = device.run(
program,
shots=1000,
runtime_options={"experimental_capabilities": "ALL"},
)
```
Disable qubit rewiring for verbatim compilation on Rigetti:
```python theme={"dark"}
device = provider.get_device("aws:rigetti:qpu:cepheus-1-108q")
job = device.run(
circuit,
shots=1000,
runtime_options={"disable_qubit_rewiring": True},
)
```
See [BraketProvider - Runtime Options](/v2/sdk/user-guide/providers/aws#runtime-options) for the full list of supported options.
### Azure Quantum Examples
Use the stabilizer simulator on Quantinuum emulators:
```python theme={"dark"}
device = provider.get_device("azure:quantinuum:sim:h2-1e")
job = device.run(
circuit,
shots=100,
runtime_options={"simulator": "stabilizer"},
)
```
Disable noise model and compiler optimization:
```python theme={"dark"}
job = device.run(
circuit,
shots=100,
runtime_options={"error-model": False, "no-opt": True},
)
```
See [AzureQuantumProvider - Runtime Options](/v2/sdk/user-guide/providers/azure#runtime-options) for provider-specific options.
### IonQ Examples
Run with a hardware noise profile on the IonQ simulator:
```python theme={"dark"}
device = provider.get_device("ionq:ionq:sim:simulator")
job = device.run(
circuit,
shots=1000,
runtime_options={"noise": {"model": "aria-1", "seed": 42}},
)
```
"Noise" options include: `ideal`, `harmony`, `harmony-1`, `harmony-2`, `aria-1`, `aria-2`, `forte-1`, `forte-enterprise-1`
## Next Steps
See [Job Execution](/v2/sdk/user-guide/providers/native/jobs) for single job submission, group jobs, and cross-device workflows.
# Device calibrations and connectivity
Source: https://docs.qbraid.com/v2/sdk/user-guide/providers/native/calibrations
Fetch live coupling maps and calibration data for QPUs on qBraid, plot connectivity graphs, and use the data to place circuits on the best-calibrated qubits before submitting.
Requires the latest `qbraid` pre-release: `pip install --upgrade --pre
qbraid`. Calibration data is refreshed from each hardware provider roughly
hourly.
Superconducting QPUs are not uniform: qubits differ in readout fidelity, and
two-qubit gates only exist between physically coupled pairs, each with its own
error rate. The [QbraidProvider](/v2/sdk/user-guide/providers/native) exposes
both facts programmatically, so you can inspect a device before you submit to
it, and place your circuit on the qubits where it will perform best.
## Fetching calibration data
Every `QbraidDevice` has two entry points:
```python theme={"dark"}
from qbraid.runtime import QbraidProvider
provider = QbraidProvider()
device = provider.get_device("rigetti:rigetti:qpu:cepheus-1-108q")
device.coupling_map
# ((0, 1), (0, 9), (1, 2), (1, 10), (2, 3), ...) 193 physical qubit pairs
calibration = device.get_calibrations()
calibration.last_calibrated
# '2026-07-21T20:05:45+00:00'
```
`coupling_map` is the device's physical connectivity: sorted, deduplicated
`(source, target)` qubit pairs, derived from the calibrated two-qubit gate
edges. It is cached on the device instance, since hardware topology does not
change between calibrations.
`get_calibrations()` returns the full live snapshot and always fetches fresh
data. The two most useful fields:
```python theme={"dark"}
# Per-edge two-qubit gate error, keyed by gate name
calibration.edges["gateError"]["cz"][0]
# EdgeEntry(source=0, target=1, value=0.0246)
# Per-qubit metrics
calibration.qubits["0"]
# QubitCalibration(readout_error=0.04, gate_error={'rb': 0.0019}, ...)
```
Both return `None` for devices without published calibration data, such as
simulators.
### Devices with calibration data
| Physical device | Qubits | Edges | Example device IDs |
| ---------------------- | ------ | ----- | ---------------------------------------------------------------------- |
| Rigetti Cepheus-1-108Q | 107 | 193 | `rigetti:rigetti:qpu:cepheus-1-108q`, `aws:rigetti:qpu:cepheus-1-108q` |
| IQM Garnet | 20 | 30 | `aws:iqm:qpu:garnet` |
| IQM Emerald | 54 | 85 | `aws:iqm:qpu:emerald` |
| AQT Ibex-Q1 | 12 | 0 | `aws:aqt:qpu:ibex-q1` |
All device IDs that map to the same physical hardware share one calibration
snapshot, so `rigetti:rigetti:qpu:cepheus-1-108q` and
`aws:rigetti:qpu:cepheus-1-108q` return identical data.
A device can have calibration data with an empty edge list. AQT's Ibex-Q1 is a
trapped-ion system with all-to-all connectivity, so there are no discrete
coupling edges to report: `coupling_map` returns an empty tuple, not `None`.
For IonQ trapped-ion devices, see `device.profile.characterization` instead.
You can also query the underlying REST endpoint directly, which works for any
device ID including those not available for direct submission:
```bash theme={"dark"}
curl -H "X-API-Key: $QBRAID_API_KEY" \
https://api.qbraid.com/api/v1/devices/rigetti:rigetti:qpu:cepheus-1-108q/calibrations
```
## Plotting the connectivity graph
The `qbraid.visualization` module renders the graph in one call, colored by
live calibration data. Edges are colored by two-qubit gate error and nodes by
readout error, on a single-hue scale where darker is better, matching the
topology view in qBraid Lab:
```python theme={"dark"}
from qbraid.visualization import plot_connectivity_graph
plot_connectivity_graph(device)
```
The dotted outline is a qubit in the lattice footprint with no working
couplings. Light qubits and edges are the ones to avoid.
The layout comes from the device document's `topology` config, so square
lattices (Rigetti) and clipped lattices (IQM) both render their true physical
geometry; devices without a lattice config fall back to a force-directed
layout. To build a custom plot, the `lattice_positions` helper maps qubit ids
to grid coordinates from the same config:
```python theme={"dark"}
from qbraid.visualization import lattice_positions
topology = device.client.get_device(device.id).topology
# {'type': 'square-lattice', 'rows': 12, 'cols': 9}
positions = lattice_positions(topology, range(108))
# {0: (0, 0), 1: (1, 0), ..., 107: (8, -11)}
```
The same call works unchanged on any device with calibration data. IQM's
Garnet renders its clipped diamond lattice:
```python theme={"dark"}
garnet = provider.get_device("aws:iqm:qpu:garnet")
plot_connectivity_graph(garnet)
```
## Choosing the best qubits
With the calibration data in hand, qubit selection becomes a graph problem.
Build a weighted graph from the coupling map, then the single best-calibrated
pair is one line:
```python theme={"dark"}
import networkx as nx
calibration = device.get_calibrations()
edge_error = {
(e.source, e.target): e.value
for e in calibration.edges["gateError"]["cz"]
}
graph = nx.Graph()
for q0, q1 in device.coupling_map:
graph.add_edge(q0, q1, error=edge_error.get((q0, q1), edge_error.get((q1, q0))))
```
```python theme={"dark"}
best_edge = min(edge_error, key=edge_error.get)
# (88, 89), CZ error 0.0037 -- 2.3x better than the device median
```
The lowest CZ error is not always the best place to run. Readout error varies
by an order of magnitude across the lattice, and on some snapshots the best-CZ
edge sits on a qubit with weak readout. For two-qubit circuits, score edges on
the product of CZ, readout, and single-qubit fidelities; see [Scoring
edges](/v2/sdk/user-guide/providers/native/rigetti#scoring-edges) for a worked
example where the two rankings disagree on hardware.
For a linear circuit on `n` qubits, search for the connected chain that
minimizes the summed two-qubit error:
```python theme={"dark"}
def best_chain(graph, length):
"""Find the simple path of `length` qubits minimizing summed edge error."""
best = (float("inf"), None)
def extend(path, total):
nonlocal best
if total >= best[0]:
return
if len(path) == length:
best = (total, list(path))
return
for nbr in graph.neighbors(path[-1]):
if nbr not in path:
path.append(nbr)
extend(path, total + graph.edges[path[-2], nbr]["error"])
path.pop()
for start in graph.nodes:
extend([start], 0.0)
return best
total, chain = best_chain(graph, 5)
# chain = [88, 89, 98, 97, 96], summed CZ error 0.0214
```
Calibrations shift with every refresh, so re-run the selection shortly before
you submit. The best chain this hour is not always the best chain tonight.
## Running on the qubits you chose
### Rigetti direct: hand-placed native gates
On the [Rigetti direct path](/v2/sdk/user-guide/providers/native/rigetti),
programs that bypass quilc must already use
[native gates](/v2/sdk/user-guide/providers/native/rigetti#native-gates) on
physical qubits, which is exactly what the coupling map enables. A Bell pair
on the best-calibrated edge:
```python theme={"dark"}
import pyquil
q0, q1 = best_edge # (88, 89)
program = pyquil.Program(f"""
DECLARE ro BIT[2]
RX(pi/2) {q0}
RX(pi/2) {q1}
CZ {q0} {q1}
RX(-pi/2) {q1}
MEASURE {q0} ro[0]
MEASURE {q1} ro[1]
""")
job = device.run(program, shots=100)
job.wait_for_final_state()
job.result().data.get_counts()
# {'00': 44, '11': 44, '01': 7, '10': 5} -- run on Cepheus-1-108Q, 2026-07-21
```
The correlated outcomes (`00` and `11`) came back at 88 percent on hardware,
consistent with the roughly 0.4 percent CZ error and few-percent readout error
of the chosen pair.
This program contains no timing instruction, so it takes the **compiled**
path. The placement survives because its qubits already fit the topology,
which makes quilc default to identity (`NAIVE`) rewiring; quilc is not
obligated to keep it in general. To make placement a guarantee rather than a
default, add a clock-aligned delay to take the direct path, or pin the
compiled path with `PRAGMA INITIAL_REWIRING "NAIVE"`. See [Pinning the
circuit](/v2/sdk/user-guide/providers/native/rigetti#pinning-the-circuit).
### Qiskit: constrain transpilation to the real topology
If you would rather let a transpiler do the routing, feed the coupling map to
Qiskit and pin your circuit to the chain you selected. This works for any
gate-model device on qBraid:
```python theme={"dark"}
from qiskit import QuantumCircuit, transpile
from qiskit.transpiler import CouplingMap
ghz = QuantumCircuit(5, 5)
ghz.h(0)
for i in range(4):
ghz.cx(i, i + 1)
ghz.measure(range(5), range(5))
coupling = CouplingMap(
[list(edge) for edge in garnet.coupling_map]
+ [[b, a] for a, b in garnet.coupling_map]
)
total, chain = best_chain(garnet_graph, 5) # [6, 11, 16, 15, 10] on Garnet
transpiled = transpile(
ghz,
coupling_map=coupling,
initial_layout=chain,
basis_gates=["r", "cz"],
optimization_level=3,
)
job = garnet.run(transpiled, shots=1000)
```
Every two-qubit gate in the transpiled circuit now acts on a physically
coupled, well-calibrated pair, and no SWAP overhead is silently inserted for
qubits you did not choose.
Transpile against the coupling map of the exact device ID you will submit to.
Vendor-routed and direct device IDs share hardware and calibrations, but a
circuit laid out for one device will not fit another.
## Related links
* [QbraidProvider](/v2/sdk/user-guide/providers/native): setup and credentials
* [Rigetti Cepheus-1-108Q](/v2/sdk/user-guide/providers/native/rigetti): native
gates, Quil-T timing, and the two compilation paths
* [Job execution](/v2/sdk/user-guide/providers/native/jobs): single, batch, and
group submission
* [Visualization](/v2/sdk/user-guide/visualization): histograms and other
built-in plotting utilities
# Job Execution
Source: https://docs.qbraid.com/v2/sdk/user-guide/providers/native/jobs
Submit single quantum jobs, batch multiple circuits to one device, or group jobs across providers.
API Reference:
[qbraid.runtime.native](https://qbraid.github.io/qBraid/stubs/qbraid.runtime.native.html)
This page covers how to submit quantum jobs through the `QbraidProvider` — from single
one-off submissions, to batching multiple circuits in a single job, to grouped workflows
that span multiple devices and providers.
For provider setup and authentication, see [QbraidProvider - Usage](/v2/sdk/user-guide/providers/native).
## Single Job Submission
Submit a quantum program to any qBraid-supported device and retrieve results:
```python theme={"dark"}
from qbraid.runtime import QbraidProvider
provider = QbraidProvider()
device = provider.get_device("qbraid:qbraid:sim:qir-sv")
# Define a quantum program (QASM, Qiskit, Cirq, Braket, etc.)
bell = """
OPENQASM 3.0;
include "stdgates.inc";
qubit[2] q;
bit[2] c;
h q[0];
cx q[0], q[1];
c = measure q;
"""
# Submit and wait for results
job = device.run(bell, shots=100)
result = job.result()
print(result.data.get_counts())
# {'00': 52, '11': 48}
```
For async applications, you can use [`async_result()`](/v2/sdk/user-guide/overview#async-results) to await job completion without blocking the event loop:
```python theme={"dark"}
result = await job.async_result(timeout=120, poll_interval=5)
print(result.data.get_counts())
```
You can also submit multiple programs at once — each is executed as a separate job:
```python theme={"dark"}
programs = [bell_circuit, ghz_circuit, qft_circuit]
jobs = device.run(programs, shots=100)
results = [job.result() for job in jobs]
```
## Group Jobs
### Why Group?
When running related quantum experiments — parameter sweeps, algorithm comparisons,
cross-device benchmarks — you often end up with many independent jobs that are logically
part of the same workflow. Without grouping, these jobs are scattered across your job history
with no way to track or retrieve them together.
**`GroupJobSession`** solves this by grouping any number of jobs under a single group ID.
Key benefits:
* **Cross-device, cross-provider**: submit jobs to different backends (AWS SV1, IonQ, qBraid simulators) within the same group
* **Unified tracking**: all jobs share a group QRN visible in the qBraid dashboard
* **Aggregated results**: retrieve all results at once with `group.results()`
* **Lifecycle management**: auto-close with TTL, cancellation, completion callbacks
### Context Manager
The simplest way to use group jobs. All jobs submitted inside the `with` block are
automatically tagged with the group ID. The group closes when the block exits.
```python theme={"dark"}
from qbraid.runtime import GroupJobSession, QbraidProvider
provider = QbraidProvider()
bell = """
OPENQASM 3.0;
include "stdgates.inc";
qubit[2] q;
bit[2] c;
h q[0];
cx q[0], q[1];
c = measure q;
"""
# All jobs inside this block belong to the same group
with GroupJobSession(name="Bell State Sweep") as group:
# Submit to different devices within the same group
sv1 = provider.get_device("aws:aws:sim:sv1")
job1 = sv1.run(bell, shots=100)
tn1 = provider.get_device("aws:aws:sim:tn1")
job2 = tn1.run(bell, shots=100)
print(f"Group ID: {group.group_id}")
print(f"Jobs in group: {len(group.jobs)}")
# Group ID: group:abc-123456
# Jobs in group: 2
```
### Manual Open / Close
For interactive workflows like Jupyter notebooks, you can open and close the group
manually across multiple cells.
```python theme={"dark"}
from qbraid.runtime import GroupJobSession, QbraidProvider
provider = QbraidProvider()
# Create and open the group manually
group = GroupJobSession(name="Notebook Experiment")
group.open()
# Cell 2: submit jobs (can be in separate notebook cells)
device = provider.get_device("qbraid:qbraid:sim:qir-sv")
job1 = device.run(circuit_1, shots=100)
job2 = device.run(circuit_2, shots=100)
# Cell 3: close when done submitting
group.close()
```
### Auto-Close with TTL
Set a time-to-live so the group automatically closes after a duration, even if you
forget to call `close()` or your kernel crashes. Defaults to 1 hour (3600s) if not specified.
```python theme={"dark"}
# Group auto-closes after 60 seconds (default: 3600s / 1 hour)
with GroupJobSession(name="Quick Sweep", max_ttl=60) as group:
device = provider.get_device("aws:aws:sim:sv1")
job = device.run(bell, shots=10)
print(f"TTL: {group.max_ttl}s")
```
The `max_ttl` parameter accepts values from 1 to 86400 seconds (24 hours). If
not specified, the backend defaults to 3600 seconds (1 hour).
### Retrieving Results
After closing a group, retrieve all job results at once. `group.results()` blocks until
every job reaches a terminal state (completed, failed, or cancelled).
```python Submission theme={"dark"}
with GroupJobSession(name="Result Demo") as group:
device = provider.get_device("qbraid:qbraid:sim:qir-sv")
job1 = device.run(bell, shots=100)
job2 = device.run(bell, shots=100)
# Wait for all jobs and collect results
results = group.results(timeout=300)
print(results)
for job_id, result in results.results.items():
print(f"{job_id}: {result.data.get_counts()}")
```
```text Results theme={"dark"}
GroupResult(group_id='group:ghi-345678', total=2, successful=2, failed=0)
job:aaa-111: {'00': 48, '11': 52}
job:bbb-222: {'00': 51, '11': 49}
```
You can also filter results by outcome:
```python theme={"dark"}
# Only successful results
successful = results.successful()
# Only failed results
failed = results.failed()
```
### Completion Callback
Register a callback that fires automatically when all jobs complete. The callback
runs at context exit, after the group is closed.
```python Callback Setup theme={"dark"}
def analyze(results):
"""Process results when all jobs finish."""
for job_id, result in results.items():
counts = result.data.get_counts()
print(f"{job_id}: {counts}")
with GroupJobSession(name="With Callback") as group:
device = provider.get_device("qbraid:qbraid:sim:qir-sv")
device.run(bell, shots=100)
device.run(bell, shots=100)
# Callback fires automatically when the context exits
group.on_all_complete(analyze, timeout=600)
```
```text Callback Output theme={"dark"}
job:ccc-333: {'00': 47, '11': 53}
job:ddd-444: {'00': 50, '11': 50}
```
### Cancellation
Cancel a group and all its non-terminal jobs:
```python theme={"dark"}
group = GroupJobSession(name="Cancellable")
group.open()
device = provider.get_device("aws:aws:sim:sv1")
job1 = device.run(bell, shots=1000)
job2 = device.run(bell, shots=1000)
# Cancel the entire group and reset the session
group.cancel()
print(group.status())
# GroupStatus.CANCELLED
```
## Batch Jobs
Submit multiple circuits as a **single job** to a device that supports batched execution.
Unlike [group jobs](#group-jobs), which coordinate independent jobs across devices, batch
jobs send all circuits in one request and return a unified result.
### Submitting a Batch
Pass a list of programs with `as_batch=True` to submit them as a single job:
```python theme={"dark"}
from qiskit import QuantumCircuit
from qbraid.runtime import QbraidProvider
provider = QbraidProvider()
device = provider.get_device("qbraid:equal1:sim:bell-1")
# Define multiple circuits
bell = QuantumCircuit(2, 2)
bell.h(0)
bell.cx(0, 1)
bell.measure([0, 1], [0, 1])
ghz = QuantumCircuit(3, 3)
ghz.h(0)
ghz.cx(0, 1)
ghz.cx(1, 2)
ghz.measure([0, 1, 2], [0, 1, 2])
x_gate = QuantumCircuit(1, 1)
x_gate.x(0)
x_gate.measure(0, 0)
# Submit all three circuits as a single batch job
job = device.run([bell, ghz, x_gate], shots=1000, as_batch=True)
print(type(job))
#
```
A batch submission returns a single `QbraidJob`, not a list. All circuits share the same
job ID, device, and shot count.
`as_batch=True` requires a device that supports batch execution. You can check
this via the device profile's `batch_job_support` flag. Passing
`as_batch=True` to an unsupported device raises a `ValueError`.
### Retrieving Batch Results
Calling `job.result()` on a batch job returns a `BatchResult` object:
```python Retrieval theme={"dark"}
result = job.result()
print(type(result))
print(result.num_circuits)
```
```text Output theme={"dark"}
3
```
`BatchResult` provides two ways to access measurement data:
**Aggregate access** — indexed by circuit position:
```python Aggregate theme={"dark"}
# All circuit counts as a list
all_counts = result.data.get_counts()
for i, counts in enumerate(all_counts):
print(f"Circuit {i}: {counts}")
```
```text Output theme={"dark"}
Circuit 0: {'00': 512, '11': 488}
Circuit 1: {'000': 498, '111': 502}
Circuit 2: {'1': 1000}
```
**Per-circuit access** — each circuit's `Result` is a full object with its own status and metadata:
```python Per-Circuit theme={"dark"}
for i, circuit_result in enumerate(result.results):
print(f"Circuit {i}: status={circuit_result.success}, counts={circuit_result.data.get_counts()}")
```
```text Output theme={"dark"}
Circuit 0: status=True, counts={'00': 512, '11': 488}
Circuit 1: status=True, counts={'000': 498, '111': 502}
Circuit 2: status=True, counts={'1': 1000}
```
### BatchResult Properties
| Property | Type | Description |
| -------------- | -------------- | ----------------------------------------------------------------------- |
| `num_circuits` | `int` | Number of circuits in the batch |
| `results` | `list[Result]` | Per-circuit `Result` objects |
| `data` | `ResultData` | Aggregated data — `get_counts()` and `get_probabilities()` return lists |
| `details` | `list[dict]` | Per-circuit metadata (e.g. `compiledOutput`) |
| `success` | `bool` | Whether the overall job completed successfully |
| `device_id` | `str` | Device QRN |
| `job_id` | `str` | Job QRN |
### Per-Circuit Error Handling
In a batch job, individual circuits can fail while others succeed. Failed circuits
carry their own error message, accessible through their per-circuit result:
```python theme={"dark"}
result = job.result()
for i, circuit_result in enumerate(result.results):
if not circuit_result.success:
print(f"Circuit {i} failed: {circuit_result.details.get('statusMsg')}")
else:
print(f"Circuit {i}: {circuit_result.data.get_counts()}")
```
### Batch Jobs vs Group Jobs
| | Batch Jobs | Group Jobs |
| --------------------- | ----------------------------------------------- | ------------------------------------ |
| **Scope** | Multiple circuits, one device | Multiple jobs, any device |
| **Submission** | `device.run(programs, as_batch=True)` | `GroupJobSession` context |
| **Return type** | Single `QbraidJob` → `BatchResult` | Multiple `QbraidJob` → `GroupResult` |
| **Use case** | Parameterized circuits, algorithm variants | Cross-device benchmarks, sweeps |
| **Supported devices** | Devices with `device.profile.batch_job_support` | All devices |
# Rigetti Cepheus-1-108Q
Source: https://docs.qbraid.com/v2/sdk/user-guide/providers/native/rigetti
Submitting gate-model and timing-aware programs to Rigetti's Cepheus-1-108Q through the QbraidProvider, from any qBraid-supported framework.
Device ID: `rigetti:rigetti:qpu:cepheus-1-108q` · 108 qubits
· superconducting · accessed through
[`QbraidProvider`](/v2/sdk/user-guide/providers/native)
Cepheus-1-108Q is Rigetti's 108-qubit superconducting processor, available on qBraid with no
Rigetti account of your own. You write a circuit in whichever framework you already use, hand it
to `device.run()`, and qBraid handles conversion, compilation, submission and results.
This page covers the one thing about Cepheus that surprises people: **it has two different
compilation paths, and which one your program takes depends on whether it contains timing
instructions.** Everything else follows from that.
This is the **direct** Rigetti device, billed per minute of execution. Cepheus-1-108Q is also
offered through Amazon Braket (`aws:rigetti:qpu:cepheus-1-108q`), which is billed per task +
per shot and has different compilation behavior. If you are working with delays or other
timing operations, you want the direct device documented here, since Braket has no gate-level delay.
For direct QCS access using your own Rigetti credentials, see
[RigettiProvider](/v2/sdk/user-guide/providers/rigetti) instead.
## Quick start
A plain gate-model circuit needs nothing special. Write it however you like and submit:
```python theme={"dark"}
from qbraid.runtime import QbraidProvider
from qiskit import QuantumCircuit
provider = QbraidProvider()
device = provider.get_device("rigetti:rigetti:qpu:cepheus-1-108q")
circuit = QuantumCircuit(2, 2)
circuit.h(0)
circuit.cx(0, 1)
circuit.measure([0, 1], [0, 1])
job = device.run(circuit, shots=10)
job.wait_for_final_state()
print(job.result().data.get_counts())
# {'00': 2, '01': 1, '11': 7}
```
`H` and `CX` are not gates Cepheus can execute. You did not have to care, because this program
took the **compiled path**.
## The two compilation paths
Whether your program is compiled for you, or has to arrive ready to run, depends entirely on
whether it contains **Quil-T** instructions: Rigetti's timing and pulse-level operations, of
which `DELAY` is the one most people meet first.
| Your program | Path | Compiler | You must write |
| :------------------------------------------- | :----------- | :------------------------------------------------------- | :-------------------- |
| Gates only | **compiled** | [quilc](https://github.com/quil-lang/quilc) nativizes it | any gates you like |
| Contains a delay or other Quil-T instruction | **direct** | quilc is skipped | **native gates only** |
The reason is not a qBraid limitation. quilc is a gate-model compiler, and as Rigetti's docs put
it plainly:
> Quil-T instructions are not supported by quilc or the QVM.
So a program containing `DELAY` cannot go through quilc at all. qBraid detects Quil-T
automatically and routes such programs straight to the QCS translation service, which does accept
timing instructions. Nothing is dropped and you do not set a flag. But because quilc is what
would normally have nativized your gates, **that job is now yours**.
If a program contains a delay and uses a non-native gate, it fails at translation. Rigetti
names the instruction it could not execute:
```
Translation failed for quantum processor 'Cepheus-1-108Q': ... message:
"input program error: Failed to schedule Quil program: at instruction 0 ("X 0"):
this instruction must be replaced or decomposed prior to compilation"
```
This is the single most common error on this device: your timing program reached the QPU with a
gate it cannot execute, here `X 0`. See [Native gates](#native-gates) below.
## Native gates
When you take the direct path, these are the only instructions Cepheus-1-108Q accepts. The set
comes from the device's own ISA:
| Instruction | Accepts | Notes |
| :---------- | :------------------- | :---------------------------------- |
| `RX(θ)` | **only ±π/2 and ±π** | any other angle has no calibration |
| `RZ(θ)` | **any angle** | parametric, so no angle restriction |
| `CZ` | — | the only two-qubit gate |
| `I` | — | identity |
| `MEASURE` | — | readout |
The `RX` restriction is the one that catches people, and it follows from the calibrations: Rigetti
publishes `DEFCAL`s for `RX` at exactly four angles (`±π/2` and `±π`), while `RZ` is defined
parametrically (`DEFCAL RZ(%theta)`) and so takes any angle. A pulse only exists for those `RX`
angles, which is why `RX(0)`, `RX(2π)` and `RX(π/4)` are rejected.
`RX(π)` is an `X`; `RX(π/2)` is a half rotation. Arbitrary single-qubit rotations are built from
these plus `RZ`, which is exactly the decomposition quilc performs for you on the compiled path.
Reaching for `X`? Use `RX(π)`: same operation, and it is native:
```python theme={"dark"}
circuit.rx(np.pi, 0) # native
circuit.x(0) # NOT native: fails at translation if the program has a delay
```
### Nativizing a Qiskit circuit automatically
For anything beyond a few gates, let Qiskit do the decomposition. The basis
choice is the whole trick: use `["rz", "sx", "x", "cz"]`, because `sx` and `x`
map exactly onto the calibrated `RX(π/2)` and `RX(π)` pulses. The seemingly
natural `["rx", "rz", "cz"]` basis does not work, since Qiskit then emits
`RX` at arbitrary angles, which the QPU rejects. Delays pass through
transpilation untouched:
```python theme={"dark"}
from qiskit import QuantumCircuit, transpile
qc = QuantumCircuit(2, 2)
qc.h(0)
qc.cx(0, 1)
qc.delay(50, 0, unit="us")
qc.ry(0.7, 1)
qc.measure([0, 1], [0, 1])
native = transpile(qc, basis_gates=["rz", "sx", "x", "cz"], optimization_level=3)
job = device.run(native, shots=100) # conversion to Quil happens automatically
```
Every gate in the transpiled circuit now lands on a calibrated pulse, so the
program passes translation on the direct path with the delay intact. To
inspect the exact Quil that will run, convert it yourself first:
`qbraid.transpile(native, "pyquil")`.
## Choosing qubits with calibration data
Cepheus is not uniform. On a recent calibration snapshot, two-qubit CZ error ranged from 0.4% on
the best edge to 50% on the worst, and readout error varied by an order of magnitude across the
lattice. Which physical qubits your program lands on is worth controlling, and the
[calibrations API](/v2/sdk/user-guide/providers/native/calibrations) provides the data to control
it with.
What happens to the qubit indices you wrote depends, once again, on the compilation path:
* **Compiled path:** quilc is free to move your circuit. If the indices you wrote already satisfy
the device's connectivity, quilc's default is `NAIVE` rewiring, which keeps them where they
are. If they do not, it falls back to `PARTIAL` rewiring, which chooses a placement using the
gate fidelities Rigetti publishes in the device ISA. An unpinned circuit therefore already gets
fidelity-aware placement; manual selection is for when you want it deterministic, or want to
fold in metrics quilc does not weigh the way you do.
* **Direct path:** no rewiring of any kind. A Quil-T program executes on exactly the physical
qubits it names, which makes it the strongest placement guarantee available.
### Scoring edges
`device.get_calibrations()` reports readout error and single-qubit randomized-benchmarking error
per qubit, plus two-qubit gate error per edge. Fold all three into the score, because the edge
with the lowest CZ error is often not the best place to run:
```python theme={"dark"}
calibration = device.get_calibrations()
qubits = calibration.qubits
def score(edge):
"""Estimated success probability of a two-qubit circuit on this edge."""
a, b = qubits[str(edge.source)], qubits[str(edge.target)]
return (
(1 - edge.value)
* (1 - a.readout_error) * (1 - b.readout_error)
* (1 - a.gate_error["rb"]) ** 4 * (1 - b.gate_error["rb"]) ** 4
)
best = max(calibration.edges["gateError"]["cz"], key=score)
q0, q1 = best.source, best.target
```
On the snapshot used for the run below, the readout-aware score mattered: the edge with the
lowest raw CZ error (0.40%) sat on a qubit with weak readout, and the score selected a different
edge, (92, 101), with a slightly higher CZ error (0.89%) but readout errors of 1.4% and 1.0%. For
chains longer than a pair, and for plotting the graph you are choosing from, see
[Choosing the best qubits](/v2/sdk/user-guide/providers/native/calibrations#choosing-the-best-qubits).
### Pinning the circuit
Three ways to make the placement stick, in decreasing order of guarantee:
```python pyQuil, direct path theme={"dark"}
# A clock-aligned DELAY makes this Quil-T, so quilc is bypassed and the
# program runs on exactly the qubits it names. Native gates required.
from pyquil import Program
program = Program(f"""DECLARE ro BIT[2]
RZ(pi/2) {q0}
RX(pi/2) {q0}
RZ(pi/2) {q0}
RZ(pi/2) {q1}
RX(pi/2) {q1}
RZ(pi/2) {q1}
CZ {q0} {q1}
RZ(pi/2) {q1}
RX(pi/2) {q1}
RZ(pi/2) {q1}
DELAY {q1} 3.2e-8
MEASURE {q0} ro[0]
MEASURE {q1} ro[1]
""")
job = device.run(program, shots=1000)
```
```python Qiskit, direct path theme={"dark"}
# Physical indices survive conversion when the circuit has a single
# register: qubit i maps to physical qubit i. The 32 ns delay makes the
# converted program Quil-T, same guarantee as the pyQuil version.
from qiskit import QuantumCircuit, transpile
qc = QuantumCircuit(max(q0, q1) + 1, 2)
qc.h(q0)
qc.cx(q0, q1)
qc.delay(32, q1, unit="ns")
qc.measure(q0, 0)
qc.measure(q1, 1)
native = transpile(qc, basis_gates=["rz", "sx", "x", "cz"], optimization_level=3)
job = device.run(native, shots=1000)
```
```python pyQuil, compiled path theme={"dark"}
# PRAGMA INITIAL_REWIRING pins placement without leaving the compiled
# path: quilc still nativizes your gates but keeps the identity mapping,
# inserting SWAPs only if you request a pair that is not coupled. Must be
# the first instruction. For a hard no-touch guarantee on a region, wrap
# it in PRAGMA PRESERVE_BLOCK ... PRAGMA END_PRESERVE_BLOCK instead.
from pyquil import Program
program = Program(f"""PRAGMA INITIAL_REWIRING "NAIVE"
DECLARE ro BIT[2]
H {q0}
CNOT {q0} {q1}
MEASURE {q0} ro[0]
MEASURE {q1} ro[1]
""")
job = device.run(program, shots=1000)
```
`DELAY` durations must line up with the QPU's sequencer clock, or translation
rejects the program with `duration not aligned to sequencer clock: 1e-8`. A 10
ns delay is rejected; 32 ns is accepted. When using a delay purely as a Quil-T
marker, 3.2e-8 seconds is a safe choice.
Run on hardware, the Bell pair on the score-selected edge (92, 101) returned
```python theme={"dark"}
job.result().data.get_counts()
# {'00': 480, '11': 423, '01': 58, '10': 39}
```
a correlated fraction of 90.3% at 1000 shots, against roughly 95% predicted from the calibration
data alone. The gap is decoherence and crosstalk the snapshot does not capture, which is the
right way to read these scores: a ranking, not a forecast.
Calibration data is refreshed roughly hourly and the ranking moves with it, so
select your qubits shortly before you submit, not once per project.
## Timing operations
A delay is what makes a program Quil-T. This is a T1 (energy relaxation) measurement: excite the
qubit, wait, and see whether it is still excited:
```python Qiskit theme={"dark"}
import numpy as np
from qbraid.runtime import QbraidProvider
from qiskit import QuantumCircuit
provider = QbraidProvider()
device = provider.get_device("rigetti:rigetti:qpu:cepheus-1-108q")
circuit = QuantumCircuit(1, 1)
circuit.rx(np.pi, 0) # native, NOT circuit.x(0)
circuit.delay(500, 0, unit="us") # makes this a Quil-T program
circuit.measure(0, 0)
job = device.run(circuit, shots=10)
job.wait_for_final_state()
print(job.result().data.get_counts())
# {'0': 9, '1': 1} -- mostly relaxed to |0> during the 500 us delay
```
```python pyQuil theme={"dark"}
from pyquil import Program
from qbraid.runtime import QbraidProvider
provider = QbraidProvider()
device = provider.get_device("rigetti:rigetti:qpu:cepheus-1-108q")
program = Program(
"DECLARE ro BIT[1]",
"RX(pi) 0", # native, NOT "X 0"
"DELAY 0 0.0005", # 0.0005 seconds = 500 us
"MEASURE 0 ro[0]",
)
job = device.run(program, shots=10)
job.wait_for_final_state()
print(job.result().data.get_counts())
# {'0': 9, '1': 1}
```
Both submit the same thing. In Quil, `DELAY 0 0.0005` delays qubit 0 by 0.0005 **seconds**;
Qiskit's `delay(500, 0, unit="us")` converts to exactly that.
Relaxation is probabilistic, so your counts will differ run to run. A stray `'1'` at 500 us is
the physics, not a bug. That variation is exactly what a T1 sweep measures.
Passing each instruction as its own string, as above, sidesteps a common trap: pyQuil rejects a
flat instruction that starts with whitespace (`expected a command or a gate`), so an indented
triple-quoted block of plain instructions fails even though it looks fine.
The exception is a block that is *meant* to be indented, such as a `DEFCAL` or `DEFFRAME` body. Those
must arrive as **one** string, indentation included; passed as separate arguments they fail with
`failed to parse arguments for DEFCAL`. See
[prepend\_default\_calibrations](#prepend_default_calibrations) for that shape.
To sweep T1, vary the delay and submit one job per point:
```python theme={"dark"}
delays_us = [0, 50, 100, 200, 400, 800]
jobs = []
for t in delays_us:
circuit = QuantumCircuit(1, 1)
circuit.rx(np.pi, 0)
circuit.delay(t, 0, unit="us") # keep this even at t=0 -- see below
circuit.measure(0, 0)
jobs.append((t, device.run(circuit, shots=1000)))
for t, job in jobs:
job.wait_for_final_state()
counts = job.result().data.get_counts()
p_excited = counts.get("1", 0) / sum(counts.values())
print(f"{t:>4} us -> P(1) = {p_excited:.3f}")
```
Keep the `delay` call at `t = 0` rather than skipping it. A circuit with no
delay is not a Quil-T program, so your zero point would be nativized by quilc
while every other point bypasses it, leaving a baseline compiled differently
from the data it anchors. `delay(0)` emits `DELAY 0 0` and keeps every point
on the same path.
Cepheus-1-108Q is billed **per minute of execution**, prorated with no
minimum. A delay is execution time, so a long delay costs more than a short
one. Individual jobs on this device typically run for tens to hundreds of
milliseconds. See [Pricing](/v2/home/pricing).
## Which framework?
The device itself accepts three run input types: **pyQuil**, **OpenQASM 2** and **OpenQASM 3**.
Qiskit appears throughout this page only because it is the most widely used, not because it is
special. It is converted to QASM like anything else.
That means **any framework qBraid can convert to QASM works here**, not just the two shown. Cirq,
Amazon Braket, PennyLane, pytket and the rest all reach `qasm2`/`qasm3` on the
[ConversionGraph](/v2/sdk/user-guide/transpiler), and `device.run()` handles the conversion:
```python Cirq theme={"dark"}
import cirq
q = cirq.LineQubit.range(2)
circuit = cirq.Circuit([cirq.H(q[0]), cirq.CNOT(q[0], q[1]), cirq.measure(*q, key="m")])
job = device.run(circuit, shots=10)
```
```python Braket theme={"dark"}
from braket.circuits import Circuit
# .measure() is required here -- see the note below
circuit = Circuit().h(0).cnot(0, 1).measure(0).measure(1)
job = device.run(circuit, shots=10)
```
```python PennyLane theme={"dark"}
import pennylane as qml
with qml.tape.QuantumTape() as circuit:
qml.Hadamard(wires=0)
qml.CNOT(wires=[0, 1])
qml.sample(wires=[0, 1])
job = device.run(circuit, shots=10)
```
If your framework has a path to `qasm2` or `qasm3` on the ConversionGraph, it will run on Cepheus.
Write in whichever one you already use.
**Measure explicitly.** Some frameworks measure implicitly when run on their own simulators, and
that implicitness does not survive conversion. An Amazon Braket circuit written as
`Circuit().h(0).cnot(0, 1)` converts to QASM with no `measure` statement, so the program reaches
the QPU with nothing to read out. It runs, then fails when the results are parsed:
```
No declared registers found in ro_sources. ro_sources keys: []
```
Add the measurements yourself and the job returns counts as expected.
`QPROGRAM_REGISTRY` is the authoritative answer to "what type do I pass?". It maps each
framework to the exact program type `device.run()` accepts, which is not always the object you
would guess (PennyLane, for instance, takes a `QuantumTape` rather than a `QNode`):
```python theme={"dark"}
from qbraid.programs import QPROGRAM_REGISTRY
print(QPROGRAM_REGISTRY["pennylane"]) #
print(QPROGRAM_REGISTRY["cirq"]) #
print(sorted(QPROGRAM_REGISTRY)) # every framework qBraid knows
```
### When to reach for pyQuil
The one thing QASM cannot express is **Quil-T beyond a simple delay**: `FENCE`, `PULSE`,
frame-level `DELAY 0 "rf" 1e-6`, or your own `DEFCAL` calibrations. Those have no vocabulary in
Qiskit or QASM, so there is nothing for the transpiler to convert. pyQuil is Rigetti's native
language, so nothing is translated and those features have first-class syntax.
An ordinary `delay` is the exception: it converts cleanly from Qiskit, so a T1 or T2 experiment
does not require pyQuil.
Not sure which path your program will take? Ask before you spend a job:
```python theme={"dark"}
from qbraid.runtime.rigetti.device import contains_quil_t
from pyquil import Program
contains_quil_t(Program("RX(pi) 0\nDELAY 0 0.0005")) # True -> direct path, native gates required
contains_quil_t(Program("H 0\nCNOT 0 1")) # False -> compiled path, quilc handles it
```
## Runtime options
Rigetti's [translation service](https://docs.rigetti.com/qcs/guides/the-lifecycle-of-a-program),
the stage that turns your native-gate program into pulses, takes two options, passed as a dict
through `runtime_options`. Unrecognized keys are silently ignored.
| Option | Type | Default | Effect |
| :----------------------------- | :---- | :------ | :---------------------------------------------------------------- |
| `passive_reset_delay_seconds` | float | Rigetti | How long to wait for qubits to relax to \|0⟩ before each shot. |
| `prepend_default_calibrations` | bool | `True` | If `False`, Rigetti's default calibrations are **not** prepended. |
### passive\_reset\_delay\_seconds
Between shots, qubits are left to relax back to |0⟩ on their own, a **passive** reset. This
option sets how long the QPU waits for that.
Rigetti documents it as "the delay between passive resets, in seconds" and does not publish a
default or a recommended range, so the figures below are **measurements from a single run on one
qubit**, included to show the shape of the trade-off. Treat them as illustrative; your own numbers
will differ with the qubit, the calibration and the day.
**The delay is paid once per shot, and you are billed for it.** The same 20-shot program, changing
nothing else:
| `passive_reset_delay_seconds` | Execution observed | Cost observed |
| :---------------------------- | :----------------- | :------------ |
| `0.000001` (1 µs) | 15 ms | \~3 credits |
| `0.01` (10 ms) | 215 ms | \~43 credits |
The 200 ms difference is exactly 20 shots × 10 ms, which is the part that generalizes: **the delay
is per shot**, and this device is billed [per minute of execution](/v2/home/pricing). Multiply by
your shot count before raising it.
What the wait buys is a cleaner starting state. Relaxation is what clears the previous shot.
Measuring a qubit at shot start, after a program that deliberately leaves it excited:
| Reset before each shot | Still excited at shot start (observed) |
| :--------------------- | :---------------------------------------- |
| 1 µs | \~5% (the previous shot bleeding through) |
| 1 ms | \~1.5% (indistinguishable from baseline) |
A control that never excited the qubit read 0%, so the 5% was leftover state rather than readout
error. Again: one qubit, one run. The effect is the point, not the percentages.
So the trade runs both ways:
* **Raise it** for circuits sensitive to initialization, where a few percent of shots starting in
the wrong state would matter.
* **Lower it** to finish sooner and pay less. The floor is what your circuit can tolerate.
```python theme={"dark"}
job = device.run(
circuit,
shots=1000,
runtime_options={"passive_reset_delay_seconds": 0.0001}, # 100 us
)
```
The translation service rejects delays above roughly **67 ms**, reporting
`waveform duration of 1e-1s exceeds maximum allowed duration of
6.7108864e-2s`. That ceiling comes from the service's own error rather than
published documentation, so do not rely on the exact figure.
### prepend\_default\_calibrations
By default Rigetti prepends its calibration set to every program: the `DEFFRAME` and `DEFCAL` definitions that
give `RX`, `RZ`, `CZ` and `MEASURE` their actual pulse shapes. Those definitions are the only
reason a gate means anything on hardware.
**Leave this one alone.** It enables nothing, and setting it to `False` only breaks things.
To **override a calibration**, include your own `DEFCAL` and keep this option at its default.
Your definition is used in place of Rigetti's. A `DEFCAL` that turns `RX(pi)` into a no-op shows
this plainly: the qubit is left in |0⟩ rather than excited.
```python theme={"dark"}
from pyquil import Program
# A DEFCAL body must be indented, so pass the block as ONE string --
# not as separate arguments (see the note under Timing operations).
program = Program(
"""DEFCAL RX(pi) 0:
NOP
DECLARE ro BIT[1]
RX(pi) 0
DELAY 0 0
MEASURE 0 ro[0]
"""
)
job = device.run(program, shots=20) # no runtime_options needed
job.wait_for_final_state()
print(job.result().data.get_counts())
# {'0': 19, '1': 1} -- the RX did nothing.
# Without the custom DEFCAL the same program reads {'0': 1, '1': 19}.
```
Setting `prepend_default_calibrations=False` only *removes* the defaults. Your program must then
carry a complete calibration set of its own, and there is no practical way to do that here:
Rigetti's set defines frames across far more qubits than Cepheus exposes, so submitting it is
rejected before it reaches the QPU.
```
ProgramValidationError: Number of qubits in the circuit (300) exceeds the device's capacity (108)
```
Without a calibration set, translation fails instead, with Rigetti's reason:
```
input program error: program has no defined frames
```
Custom `DEFFRAME`s are constrained regardless: only `INITIAL-FREQUENCY` and
`CHANNEL-DELAY` may differ from Rigetti's defaults. Changing anything else,
such as `SAMPLE-RATE` or `HARDWARE-OBJECT`, is rejected (`frame 0
"Transmon-0_charge_tx" differs from Rigetti-provided definition`). Rigetti
restricts the flag that lifts this to [certain
users](https://docs.rs/qcs/latest/qcs/qpu/translation/struct.TranslationOptions.html),
and it is not enabled for qBraid. Treat the default frames as fixed and
confine your customization to `DEFCAL`s.
## Troubleshooting
Every failure at the translation stage arrives as a `RigettiJobError` naming the processor,
followed by Rigetti's own reason, which is the part that tells you what to fix:
```
Translation failed for quantum processor 'Cepheus-1-108Q': ... message:
"input program error: Failed to schedule Quil program: at instruction 0 ("X 0"):
this instruction must be replaced or decomposed prior to compilation"
```
Read to the end of the line. Rigetti names the offending instruction, here `X 0`, which is not
native.
| Rigetti's reason | What happened |
| :------------------------------------------------------- | :------------------------------------------------------------------------------------------------------------------------------------------------------------------------------------------------------------------------------------------------------------- |
| `at instruction N (...): must be replaced or decomposed` | A non-native gate reached the QPU, because your program contains a delay and so skipped quilc. Replace `X` with `RX(π)`, `H`/`CX` with `RX`/`RZ`/`CZ` decompositions, or drop the delay to get the compiled path back. Also covers `RX` at a non-native angle. |
| `program has no defined frames` | You set `prepend_default_calibrations=False` without supplying a calibration set. Drop the option; see [above](#prepend_default_calibrations). |
| `duration not aligned to sequencer clock` | A `DELAY` duration the hardware clock cannot represent, such as 10 ns. Use a coarser value; 32 ns (`3.2e-8`) is a safe marker delay. See [Pinning the circuit](#pinning-the-circuit). |
| `waveform duration ... exceeds maximum allowed duration` | `passive_reset_delay_seconds` is above the 67.1 ms cap. |
| `frame ... differs from Rigetti-provided definition` | A `DEFFRAME` of yours changes something other than `INITIAL-FREQUENCY` or `CHANNEL-DELAY`. |
Failures elsewhere in the pipeline:
| Message | Cause |
| :-------------------------------------------------------------------- | :-------------------------------------------------------------------------------------------------------------------------------------------- |
| `quilc failed to compile the program ...` | The gate-model path could not nativize your circuit. The message carries quilc's own reason. |
| `Number of qubits in the circuit (300) exceeds the device's capacity` | You are submitting Rigetti's full calibration set. See [prepend\_default\_calibrations](#prepend_default_calibrations). |
| Delay silently missing from results | You are on `aws:rigetti:qpu:cepheus-1-108q`, not the direct device. Braket has no gate-level delay. Use `rigetti:rigetti:qpu:cepheus-1-108q`. |
## Related links
* [Pricing](/v2/home/pricing): Cepheus-1-108Q is billed per minute of execution
* [Device calibrations](/v2/sdk/user-guide/providers/native/calibrations): coupling maps, calibration data, and best-chain search
* [QbraidProvider](/v2/sdk/user-guide/providers/native): installation, authentication, runtime options
* [RigettiProvider](/v2/sdk/user-guide/providers/rigetti): direct QCS access with your own credentials
* [Rigetti: Quil-T](https://pyquil-docs.rigetti.com/en/stable/quilt.html): the timing/pulse extension to Quil
* [Rigetti: Getting started with Quil-T](https://pyquil-docs.rigetti.com/en/stable/quilt_getting_started.html): why Quil-T programs must be nativized by hand
* [Rigetti: The Quil compiler](https://pyquil-docs.rigetti.com/en/stable/compiler.html): what quilc does, and qubit rewiring
* [Rigetti: The lifecycle of a program](https://docs.rigetti.com/qcs/guides/the-lifecycle-of-a-program): compilation vs translation on QCS
* [Rigetti: TranslationOptions](https://docs.rs/qcs/latest/qcs/qpu/translation/struct.TranslationOptions.html): the full set of translation options
* [quilc](https://github.com/quil-lang/quilc): the open-source Quil compiler
# OQCProvider
Source: https://docs.qbraid.com/v2/sdk/user-guide/providers/oqc
Runtime integration for streamlined access to OQC simulators and QPUs.
API Reference:
[qbraid.runtime.oqc](https://qbraid.github.io/qBraid/stubs/qbraid.runtime.oqc.html)
This page offers a high-level guide on using qBraid's `OQCProvider`, `OQCDevice`, and `OQCJob` classes to submit and manage jobs on Oxford Quantum Circuits (OQC) QPUs and simulators.
## Installation & Setup
To interface with OQC devices, install the `oqc` extra:
```bash theme={"dark"}
pip install 'qbraid[oqc]'
```
You wil also need an [OQC access token](https://docs.oqc.app/account_management.html#access-tokens) to authenticate your connection to OQC's cloud services.
To obtain an access token, log in or create an account at [https://cloud.oqc.app/](https://cloud.oqc.app/), and follow the instructions on the "My Account" page to "Add Auth Token".
## Initializing the Provider
Begin by importing the `OQCProvider` and initializing it with your API token.
This token authenticates your access to the OQC cloud platform:
```python theme={"dark"}
from qbraid.runtime import OQCProvider
provider = OQCProvider("")
```
By default, the endpoint URL is set to `"https://cloud.oqc.app/"`. If needed, you can specify a custom endpoint:
```python theme={"dark"}
provider = OQCProvider(token="", url="https://example.cloud.oqc.app/")
```
## Listing Available Devices
Fetch a list of devices accessible through the provider. This provides an overview of the QPUs and simulators available to you:
```python theme={"dark"}
provider.get_devices()
# [,
# ]
```
## Accessing Device Details
Retrieve a specific device using its unique ID and examine details such as its profile, status, and scheduling information:
```python theme={"dark"}
device = provider.get_device("qpu:jp:3:673b1ad43c")
print(f"Profile: {device.profile}")
print(f"Status: {device.status().name}")
if not device.profile.simulator:
print(f"Queue Depth: {device.queue_depth()}")
print(f"Next Window: {device.get_next_window()}")
print(f"All Metadata: {device.metadata()}")
```
## Metrics, Optimizations, and Other Configuration Options
Tune your job submission with a variety of parameters, including shot count, repetition period, result formatting, and program optimizations.
These options allow precise control over job execution and output. Below is a detailed breakdown of each parameter:
* `shots`: The number of times the circuit is ran. The default value is 1000.
* `repetition_period`: The length of time in between shots. The default value is 200e-6 seconds and OQC strongly recommends that you use the default unless you thoroughly understand the potential impact.
* `results_format`: The two options for this are `'raw'` and `'binary'`.
* `metrics`: The type of metrics you want to be recorded. The only metrics related to a task are its optimized circuit and the corresponding instruction count. So, there are four options:
1. `'default'`: Returns both metrics.
2. `'empty'`: Returns no metrics.
3. `'optimized_circuit'`: Returns the optimized qasm2 circuit.
4. `'optimized_instruction_count'`: Returns the instruction count of the optimized circuit.
* `optimizations`: These are the optimizations you want to perform on the input program(s). OQC uses the [tKet optimization compiler](https://oqc.tech/oqc-integrates-tket), as it is integrated into their compiler pipeline. Documention on these are in the [pytket.passes documentation](https://tket.quantinuum.com/api-docs/passes.html), and below are the instructions to access them through `OQCDevice.run()`:
| Option | TKET pass |
| :----------------------------- | :------------------------------------ |
| `'clifford_simplify'` | `CliffordSimp` |
| `'context_simplify'` | `ContextSimp` |
| `'decompose_controlled_gates'` | `DecomposeArbitrarilyControlledGates` |
| `'default_mapping_pass'` | `DefaultMappingPass` |
| `'empty'` | `Empty` |
| `'full_peephole_optimise'` | `FullPeepholeOptimise` |
| `'globalise_phased_x'` | `GlobalisePhasedX` |
| `'kak_decomposition'` | `KAKDecomposition` |
| `'one'` | `One` |
| `'peephole_optimise_2q'` | `PeepholeOptimise2Q` |
| `'remove_barriers'` | `RemoveBarriers` |
| `'remove_discarded'` | `RemoveDiscarded` |
| `'remove_redundancies'` | `RemoveRedundancies` |
| `'simplify_measured'` | `SimplifyMeasured` |
| `'three_qubit_squash'` | `ThreeQubitSquash` |
| `'two'` | `Two` |
## Program Submission Specifications and Device Compatibility
* Any program type compatible with OpenQASM 3 (i.e. can be converted to OpenQASM 3 via `qbraid.transpile(program, "qasm3")`) can be passed directly to the `OQCDevice.run()` method.
* All `include` statements will be removed from transpiled OpenQASM 3 program upon submission, as they are not recognized by OQC.
* The default supported gates for all OQC devices include the entire OpenQASM 3 `stdgates.inc` gate set plus the `ecr` gate.
* For QPUs, submissions do not need to use "native gates."
* The Lucy Simulator is noiseless and does not support error mitigation.
* OpenQASM 3 programs with classical control operations are *not supported*.
* OpenQASM 3 programs containing pulse-level descriptions of gates and measurements (e.g. OpenPulse grammar) are *supported*.
## Bell Circuit Job Example
Submit an OpenQASM 3 bell circuit to the Lucy Simulator device:
```python theme={"dark"}
from qbraid.runtime import OQCProvider
# Token loaded automatically from "OQC_AUTH_TOKEN" environment variable
provider = OQCProvider()
device = provider.get_device("qpu:uk:2:d865b5a184")
program = """
OPENQASM 3;
qubit[2] q;
bit[2] c;
h q[0];
h q[1];
cx q[0], q[1];
c = measure q;
"""
job = device.run(
program,
shots=1000,
repetition_period=100e-6,
metrics='optimized_circuit',
optimizations='default_mapping_pass'
)
print(job.id)
```
## Monitor Job Status
Inspect the job status, metrics, timings, and other metadata:
```python theme={"dark"}
>>> job.status()
>>> job.metadata()
{'status': ,
'allow_support_access': False,
'created_at': 'Wed, 27 Nov 2024 18:32:46 GMT',
'qpu_id': 'qpu:uk:2:d865b5a184',
'tag': None,
'shots': 1000,
'repetition_period': 0.0001,
'results_format': 'binary',
'metrics': 'optimized_circuit',
'active_calibrations': [],
'optimizations': 'default_mapping_pass',
'error_mitigation': None,
'errors': None,
'timings': {'RECEIVER_DEQUEUED': '2024-11-27 18:32:47.142509+00:00',
'RECEIVER_ENQUEUED': '2024-11-27 18:32:47.371945+00:00',
'RECEIVER_FROM_COMPILER': '2024-11-27 18:32:47.371836+00:00',
'RECEIVER_TO_COMPILER': '2024-11-27 18:32:47.142769+00:00',
'SERVER_DEQUEUED': '2024-11-27 18:32:47.384944+00:00',
'SERVER_ENQUEUED': '2024-11-27 18:32:47.123478+00:00',
'SERVER_RECEIVED': '2024-11-27 18:32:47.079319+00:00'}}
>>> job.metrics()
{'optimized_circuit': 'OPENQASM 3;\nqubit[2] q;\nbit[2] c;\nh q[0];\nh q[1];\ncx q[0], q[1];\nc = measure q;\n',
'optimized_instruction_count': None}
```
## Gather Job Results
Retrieve and analyze the results of your job:
```python theme={"dark"}
result = job.result()
result.data.get_counts()
# {'00': 250, '01': 235, '10': 264, '11': 251}
```
To plot the histogram counts and probability distribution, refer to the [Plot Experimental Results](/v2/sdk/user-guide/visualization#plot-experimental-results) section in the visualization guide.
# OriginProvider
Source: https://docs.qbraid.com/v2/sdk/user-guide/providers/origin
Runtime integration for access to OriginQ quantum simulators and processors via QCloud.
API Reference:
[qbraid.runtime.origin](https://qbraid.github.io/qBraid/stubs/qbraid.runtime.origin.html)
## Overview
The `qbraid.runtime.OriginProvider` provides support for OriginQ's quantum computing systems
through the [OriginQ QCloud](https://qcloud.originqc.com.cn/) platform. This means you can write quantum programs using
[PyQPanda3](https://pyqpanda-toturial.readthedocs.io/), and run them on OriginQ's cloud-based simulators and quantum processors,
all from within the [qBraid Runtime framework](/v2/sdk/user-guide/runtime/components).
## Getting started
Before you begin, make sure you have:
1. An **OriginQ QCloud** account and API key.
2. Python >= 3.10
### Set up the qBraid-SDK
Install qBraid with the `origin` extra from [PyPI](https://pypi.org/project/qbraid/) using pip:
```bash theme={"dark"}
pip install 'qbraid[origin]'
```
This installs the required dependency: `pyqpanda3`.
*Note*: The qBraid-SDK requires Python 3.10 or greater. You can check your
Python version by running `python --version` from the command line.
## Authentication
By default, qBraid will look for an environment variable named `ORIGIN_API_KEY`.
Set it from your command line:
```bash theme={"dark"}
export ORIGIN_API_KEY="your_api_key_here"
```
Alternatively, you can pass your API key directly when creating the provider:
```python theme={"dark"}
from qbraid.runtime.origin import OriginProvider
provider = OriginProvider(api_key="your_api_key_here")
```
In the examples below, we initialize `OriginProvider()` with no arguments and assume that qBraid
will automatically find your API key from the environment.
## List available devices
Use the `OriginProvider` to list all devices to which you have access:
```python theme={"dark"}
from qbraid.runtime.origin import OriginProvider
provider = OriginProvider()
devices = provider.get_devices()
print(devices)
```
You can also filter to show only hardware (QPU) devices:
```python theme={"dark"}
devices = provider.get_devices(hardware_only=True)
```
Get a specific device by its ID:
```python theme={"dark"}
device = provider.get_device("full_amplitude")
print(device.status())
#
```
### Available simulators
OriginQ provides several cloud-based quantum simulators:
| Simulator ID | Max Qubits | Description |
| ------------------- | ---------- | ----------------------------- |
| `full_amplitude` | 35 | Full amplitude simulation. |
| `partial_amplitude` | 68 | Partial amplitude simulation. |
| `single_amplitude` | 200 | Single amplitude simulation. |
## Submitting jobs
The `OriginProvider` accepts quantum programs as PyQPanda3 `QProg` objects.
### Create a program
```python theme={"dark"}
from pyqpanda3.core import QProg, H, CNOT, measure
# Bell state circuit
prog = QProg(2)
q = prog.qubits()
prog << H(q[0]) << CNOT(q[0], q[1]) << measure(0, 0) << measure(1, 1)
```
### Run a job
Use `device.run()` to submit a program:
```python theme={"dark"}
from pyqpanda3.core import QProg, H, CNOT, measure
from qbraid.runtime.origin import OriginProvider
provider = OriginProvider()
device = provider.get_device("full_amplitude")
prog = QProg(2)
q = prog.qubits()
prog << H(q[0]) << CNOT(q[0], q[1]) << measure(0, 0) << measure(1, 1)
job = device.run(prog, shots=1000)
print(f"Job ID: {job.id}")
```
### Batch submission
Submit multiple programs in a single call:
```python theme={"dark"}
from pyqpanda3.core import QProg, H, X, measure
from qbraid.runtime.origin import OriginProvider
provider = OriginProvider()
device = provider.get_device("full_amplitude")
prog1 = QProg(1)
prog1 << H(prog1.qubits()[0]) << measure(0, 0)
prog2 = QProg(1)
prog2 << X(prog2.qubits()[0]) << measure(0, 0)
jobs = device.run([prog1, prog2], shots=500)
for job in jobs:
print(f"Job ID: {job.id}")
```
For simulator backends, batch inputs are submitted as individual jobs. For QPU
backends, batch inputs are submitted as a single job using the native batch
API.
## Retrieving results
```python theme={"dark"}
result = job.result()
# Measurement probabilities
print(result.data.get_probabilities())
# {'00': 0.5, '11': 0.5}
# Measurement counts (when available)
print(result.data.measurement_counts)
# Job metadata
print(f"Device: {result.device_id}")
print(f"Job ID: {result.job_id}")
print(f"Success: {result.success}")
```
Depending on the backend, results may be returned as probabilities,
measurement counts, or both. Use `result.data.get_probabilities()` to retrieve
probability distributions and `result.data.measurement_counts` for shot-based
counts.
### Check job status
```python theme={"dark"}
from qbraid.runtime.enums import JobStatus
status = job.status()
print(status)
#
```
Job cancellation is not supported by the OriginQ provider. Calling
`job.cancel()` will raise an error.
## Full example
A complete end-to-end workflow targeting the full amplitude simulator:
```python theme={"dark"}
import os
from pyqpanda3.core import QProg, H, CNOT, measure
from qbraid.runtime.origin import OriginProvider
# 1. Set credentials (or export as env var beforehand)
os.environ["ORIGIN_API_KEY"] = "your_api_key_here"
# 2. Initialize provider
provider = OriginProvider()
# 3. Get the target device
device = provider.get_device("full_amplitude")
print(f"Device status: {device.status()}")
# 4. Define a GHZ state circuit
prog = QProg(3)
q = prog.qubits()
prog << H(q[0]) << CNOT(q[0], q[1]) << CNOT(q[1], q[2])
prog << measure(0, 0) << measure(1, 1) << measure(2, 2)
# 5. Submit the job
job = device.run(prog, shots=1000)
print(f"Submitted job: {job.id}")
# 6. Retrieve results
result = job.result()
print(f"Probabilities: {result.data.get_probabilities()}")
# Expected output (approximate): {'000': 0.5, '111': 0.5}
```
## Related links
* [OriginQ QCloud Platform](https://qcloud.originqc.com.cn/)
* [PyQPanda3 Documentation](https://pyqpanda-toturial.readthedocs.io/)
# PasqalProvider
Source: https://docs.qbraid.com/v2/sdk/user-guide/providers/pasqal
Runtime integration for running Pulser sequences on Pasqal neutral-atom QPUs and emulators.
API Reference:
[qbraid.runtime.pasqal](https://qbraid.github.io/qBraid/stubs/qbraid.runtime.pasqal.html)
## Overview
The `qbraid.runtime.PasqalProvider` provides support for Pasqal's neutral-atom quantum computers and emulators via
[Pasqal Cloud Services](https://docs.pasqal.com/cloud/). Unlike gate-model providers, Pasqal devices run *analog*
quantum programs: pulse sequences built with [Pulser](https://pulser.readthedocs.io/), Pasqal's open-source framework
for programming neutral-atom arrays. You write a `pulser.Sequence`, and qBraid serializes it, submits it as a Pasqal
Cloud batch, and returns measurement counts—all from within the
[qBraid Runtime framework](/v2/sdk/user-guide/runtime/components).
## Getting started
Before you begin, you'll need a [Pasqal Cloud](https://portal.pasqal.cloud/) account and a **project ID**. Jobs
(batches) are billed and organized per project—you can find your project ID in the Pasqal Cloud portal.
### Set up the qBraid-SDK
Install qBraid with the `pasqal` extra from [PyPI](https://pypi.org/project/qbraid/) using pip:
```bash theme={"dark"}
pip install 'qbraid[pasqal]'
```
This installs the [pasqal-cloud](https://github.com/pasqal-io/pasqal-cloud) client and
[pulser-core](https://pypi.org/project/pulser-core/) alongside qBraid.
*Note*: The qBraid-SDK requires Python 3.10 or greater. You can check your
Python version by running `python --version` from the command line.
We encourage doing this inside an environment management system, such as [virtualenv](https://virtualenv.pypa.io/en/latest/) or
[conda](https://docs.conda.io/en/latest/). Alternatively, you can bypass this step by using a pre-configured
[qBraid Lab environment](/v2/lab/user-guide/environments).
See [qBraid-SDK installation and setup](/v2/sdk/user-guide/overview#installation-and-setup) for more.
### Set up your environment
By default, qBraid will look in your local environment for variables named `PASQAL_USERNAME`, `PASQAL_PASSWORD`,
and `PASQAL_PROJECT_ID`:
```bash theme={"dark"}
export PASQAL_USERNAME="your_username_here"
export PASQAL_PASSWORD="your_password_here"
export PASQAL_PROJECT_ID="your_project_id_here"
```
Alternatively, you can pass your credentials explicitly when creating the provider object:
```python theme={"dark"}
from qbraid.runtime import PasqalProvider
provider = PasqalProvider(
username="me@example.com",
password="...",
project_id="...",
)
```
If you provide a `username` but leave `password` unset, `pasqal-cloud` will prompt for it interactively. For
machine-to-machine authentication with a pre-issued token, you can pass a custom `pasqal_cloud.TokenProvider`
via the `token_provider` argument instead.
In the examples below, we show `PasqalProvider()` initialized with no arguments and assume that qBraid will
automatically find your credentials in the environment.
## List available devices
Use the `PasqalProvider` to list the available Pasqal devices:
```python theme={"dark"}
from qbraid.runtime import PasqalProvider
provider = PasqalProvider()
devices = provider.get_devices()
```
Running this script should print something like this:
```python theme={"dark"}
[,
,
,
,
,
,
]
```
If this works correctly, then your qBraid-SDK installation is correct and your Pasqal credentials are valid!
Device IDs starting with `EMU_` are emulators; the rest are QPUs:
| Device ID | Type | Description |
| -------------- | -------- | --------------------------------------------------- |
| `FRESNEL` | QPU | Pasqal's neutral-atom quantum processor |
| `FRESNEL_CAN1` | QPU | FRESNEL-class QPU (Canada) |
| `EMU_FREE` | Emulator | Free-tier emulator (limited resources) |
| `EMU_FRESNEL` | Emulator | Emulates the FRESNEL QPU, including its constraints |
| `EMU_SV` | Emulator | State-vector emulator |
| `EMU_MPS` | Emulator | Matrix-product-state emulator |
| `EMU_TN` | Emulator | Tensor-network emulator |
You can confirm whether a device is a simulator, and inspect its runtime profile, directly from the device object:
```python theme={"dark"}
device = provider.get_device("EMU_FREE")
print(device.profile.simulator) # True
print(device.profile.experiment_type) # ExperimentType.ANALOG
```
## Build a Pulser sequence
Pasqal devices execute Pulser sequences rather than gate-model circuits. A sequence specifies a *register* (the
positions of the atoms, in µm) and a series of *pulses* applied through the device's channels. For an introduction,
see the [Pulser documentation](https://pulser.readthedocs.io/).
Here, we place two atoms 10 µm apart and drive them with a single constant global pulse:
```python theme={"dark"}
from pulser import Pulse, Register, Sequence
from pulser.devices import AnalogDevice
register = Register({"q0": (0, 0), "q1": (0, 10)})
sequence = Sequence(register, AnalogDevice)
sequence.declare_channel("rydberg_global", "rydberg_global")
pulse = Pulse.ConstantPulse(duration=1000, amplitude=5.0, detuning=0, phase=0)
sequence.add(pulse, "rydberg_global")
sequence.measure("ground-rydberg")
```
Remember to end your sequence with a `measure()` call. Measurement in the
`"ground-rydberg"` basis maps each atom to a classical bit: `1` if the atom
was excited to the Rydberg state, `0` otherwise.
## Submit a sequence to an emulator
Let's run the sequence on `EMU_FREE` with 100 shots:
```python theme={"dark"}
from qbraid.runtime import PasqalProvider
provider = PasqalProvider()
device = provider.get_device("EMU_FREE")
job = device.run(sequence, shots=100)
print(job.id) # the Pasqal Cloud batch ID, e.g. 'c2bbfadf-e2d1-...'
print(job.status()) # JobStatus.QUEUED
```
Each submission creates a Pasqal Cloud *batch*, and `job.id` is the batch ID—you can use it to look the job up
later, both through qBraid and in the Pasqal Cloud portal. Calling `job.result()` blocks until the batch reaches
a terminal state, then returns the measurement counts:
```python theme={"dark"}
result = job.result()
print(result.data.get_counts())
```
This returns a dictionary of bitstring counts, for example:
```
{'00': 38, '11': 13, '10': 29, '01': 20}
```
Since this is an analog experiment, the result data is a qBraid `AnalogResultData` instance, keyed by
measurement bitstrings in register order (`q0`, `q1`, ...).
## Submit a multi-sequence batch
You can submit several sequences in a single batch by passing a list to `device.run()`. Each sequence becomes its
own job within the Pasqal Cloud batch, and the results are returned as a list of counts dictionaries in
submission order. Given two sequences `sequence_a` and `sequence_b`, built as in the example above:
```python theme={"dark"}
batch_job = device.run([sequence_a, sequence_b], shots=50)
batch_result = batch_job.result()
counts_list = batch_result.data.get_counts()
print("\n".join(f"Sequence {i}: {c}" for i, c in enumerate(counts_list)))
```
```
Sequence 0: {'10': 12, '00': 19, '01': 14, '11': 5}
Sequence 1: {'10': 11, '00': 19, '11': 7, '01': 13}
```
## Submit a sequence to a QPU
Submitting to a QPU follows the exact same pattern—just use a QPU device ID:
```python theme={"dark"}
device = provider.get_device("FRESNEL")
job = device.run(sequence, shots=100)
```
Build your sequence against a Pulser device specification that matches the
target QPU's constraints (register geometry, channels, pulse limits), and test
it on an emulator first—`EMU_FRESNEL` mirrors the FRESNEL QPU's constraints.
QPU access is subject to your Pasqal Cloud project's permissions and quota.
QPU jobs may wait in the queue, so record `job.id` and retrieve the job later rather than blocking on
`job.result()`.
## Manage jobs
### Retrieve a job
You can retrieve a previously submitted job from its batch ID:
```python theme={"dark"}
from qbraid.runtime import PasqalJob, PasqalProvider
provider = PasqalProvider()
job = PasqalJob("your_batch_id_here", sdk=provider.sdk)
print(job.status())
result = job.result()
print(result.data.get_counts())
```
### Cancel a job
You can cancel a job (batch) while it's waiting in the queue:
```python theme={"dark"}
job.cancel()
```
## Visualize results
To plot the results of a job, first, install the qBraid visualization extra:
```bash theme={"dark"}
pip install 'qbraid[visualization]'
```
You can then visualize the measurement counts using `plot_histogram`, or display the probability distribution
with `plot_distribution`:
```python theme={"dark"}
from qbraid.visualization import plot_histogram
counts = result.data.get_counts()
plot_histogram(counts)
```
The "counts" input may be either a single dictionary or a list of dictionaries for multi-sequence batches.
See [Plot Experimental Results](/v2/sdk/user-guide/visualization#plot-experimental-results) for more.
***
## Additional resources
*Great work!* You successfully ran your first analog quantum program - *what next?*
Explore more resources for using qBraid:
* [API Reference](https://qbraid.github.io/qBraid/)
* [Source Code on GitHub](https://github.com/qBraid/qBraid)
* [Example Notebooks on GitHub](https://github.com/qBraid/qbraid-lab-demo)
And for going deeper with Pasqal and Pulser:
* [Pasqal Runtime Provider Notebook on GitHub](https://github.com/qBraid/qbraid-lab-demo/blob/main/Provider-Jobs/qbraid_runtime_pasqal_provider.ipynb)
* [Pulser on Pasqal Devices Notebook on GitHub](https://github.com/qBraid/qbraid-lab-demo/blob/main/qBraid-Runtime/qbraid_pulser_pasqal.ipynb)
* [Pasqal Cloud documentation](https://docs.pasqal.com/cloud/)
* [Pulser documentation](https://pulser.readthedocs.io/)
* [pasqal-cloud on GitHub](https://github.com/pasqal-io/pasqal-cloud)
# QuantinuumProvider
Source: https://docs.qbraid.com/v2/sdk/user-guide/providers/quantinuum
Runtime integration for access to Quantinuum trapped-ion quantum processors via Quantinuum Nexus.
API Reference:
[qbraid.runtime.quantinuum](https://qbraid.github.io/qBraid/stubs/qbraid.runtime.quantinuum.html)
## Overview
The `qbraid.runtime.QuantinuumProvider` provides support for Quantinuum's trapped-ion quantum systems
through the [Quantinuum Nexus](https://nexus.quantinuum.com/) platform. This means you can write quantum circuits using
[pytket](https://tket.quantinuum.com/), compile and execute them on Quantinuum's H-series processors and emulators,
all from within the [qBraid Runtime framework](/v2/sdk/user-guide/runtime/components).
## Getting started
Before you begin, make sure you have:
1. A **Quantinuum Nexus** account with valid credentials.
2. The **qnexus** CLI tool installed and authenticated (see [Authentication](#authentication) below).
3. Python >= 3.10
### Set up the qBraid-SDK
Install qBraid with the `quantinuum` extra from [PyPI](https://pypi.org/project/qbraid/) using pip:
```bash theme={"dark"}
pip install 'qbraid[quantinuum]'
```
This installs the required dependencies: `pytket`, `pytket-quantinuum`, and `qnexus`.
*Note*: The qBraid-SDK requires Python 3.10 or greater. You can check your
Python version by running `python --version` from the command line.
## Authentication
The `QuantinuumProvider` authenticates through the `qnexus` library. Before using the provider, you must
log in using the `qnexus` CLI:
```bash theme={"dark"}
qnx login
```
This opens a browser-based authentication flow and stores your credentials locally. Once authenticated,
the provider will automatically use your stored credentials — no API keys or environment variables are needed.
Then initialize the provider:
```python theme={"dark"}
from qbraid.runtime.quantinuum import QuantinuumProvider
provider = QuantinuumProvider()
```
## List available devices
Use the `QuantinuumProvider` to list all devices to which you have access:
```python theme={"dark"}
from qbraid.runtime.quantinuum import QuantinuumProvider
provider = QuantinuumProvider()
devices = provider.get_devices()
print(devices)
```
Get a specific device by its ID:
```python theme={"dark"}
device = provider.get_device("H1-1")
print(device.status())
#
```
Devices with an "E" suffix (e.g., `H1-1E`) are emulators (simulators) that
model the behavior of the corresponding hardware device.
## Submitting jobs
The `QuantinuumProvider` accepts quantum programs written as pytket `Circuit` objects.
### Create a circuit
```python theme={"dark"}
from pytket.circuit import Circuit
# Bell state circuit
circuit = Circuit(2)
circuit.H(0)
circuit.CX(0, 1)
circuit.measure_all()
```
### Run a job
Use `device.run()` to compile and submit a circuit:
```python theme={"dark"}
from pytket.circuit import Circuit
from qbraid.runtime.quantinuum import QuantinuumProvider
provider = QuantinuumProvider()
device = provider.get_device("H1-1E")
circuit = Circuit(2)
circuit.H(0)
circuit.CX(0, 1)
circuit.measure_all()
job = device.run(circuit, shots=1000)
print(f"Job ID: {job.id}")
```
### Batch submission
Submit multiple circuits in a single call. All circuits are bundled into one Nexus job:
```python theme={"dark"}
from pytket.circuit import Circuit
from qbraid.runtime.quantinuum import QuantinuumProvider
provider = QuantinuumProvider()
device = provider.get_device("H1-1E")
circuits = [
Circuit(1).H(0).measure_all(),
Circuit(1).X(0).measure_all(),
Circuit(2).H(0).CX(0, 1).measure_all(),
]
job = device.run(circuits, shots=500)
print(f"Job ID: {job.id}")
```
When submitting a list of circuits, all circuits are compiled and executed as
a single batch job on Quantinuum Nexus. The returned `measurement_counts` will
be a list of dictionaries, one per circuit.
## Retrieving results
```python theme={"dark"}
result = job.result()
# Measurement counts
print(result.data.measurement_counts)
# {'00': 512, '11': 488}
# Job metadata
print(f"Device: {result.device_id}")
print(f"Job ID: {result.job_id}")
print(f"Success: {result.success}")
```
### Check job status
```python theme={"dark"}
from qbraid.runtime.enums import JobStatus
status = job.status()
print(status)
#
```
### Cancel a job
```python theme={"dark"}
job.cancel()
```
Cancellation is best-effort. Jobs already in a terminal state (`COMPLETED`,
`FAILED`, `CANCELLED`) cannot be cancelled.
### Execution time
You can retrieve the wall-clock execution time (in seconds) for a completed job:
```python theme={"dark"}
print(f"Execution time: {job.execution_time_s()} seconds")
```
## Configuration options
The `device.run()` method accepts additional keyword arguments to control compilation and project scoping:
| Parameter | Type | Default | Description |
| -------------------- | ----- | ---------- | ------------------------------------------------- |
| `shots` | `int` | `1000` | Number of measurement shots per circuit. |
| `project_name` | `str` | `"qbraid"` | Nexus project name to scope compile/execute jobs. |
| `optimisation_level` | `int` | `1` | pytket optimization level (0-2). |
The `project_name` and `optimisation_level` parameters can also be set via environment variables:
| Variable | Description |
| ------------------------------- | ---------------------------------- |
| `QUANTINUUM_NEXUS_PROJECT_NAME` | Default Nexus project name. |
| `QUANTINUUM_NEXUS_OPT_LEVEL` | Default pytket optimization level. |
## Full example
A complete end-to-end workflow targeting a Quantinuum emulator:
```python theme={"dark"}
from pytket.circuit import Circuit
from qbraid.runtime.quantinuum import QuantinuumProvider
# 1. Initialize provider (assumes qnx login was run)
provider = QuantinuumProvider()
# 2. Get an emulator device
device = provider.get_device("H1-1E")
print(f"Device status: {device.status()}")
# 3. Define a GHZ state circuit
circuit = Circuit(3)
circuit.H(0)
circuit.CX(0, 1)
circuit.CX(1, 2)
circuit.measure_all()
# 4. Submit the job
job = device.run(circuit, shots=1000, optimisation_level=2)
print(f"Submitted job: {job.id}")
# 5. Retrieve results
result = job.result()
print(f"Counts: {result.data.measurement_counts}")
# Expected output (approximate): {'000': ~500, '111': ~500}
```
## Related links
* [Quantinuum Nexus](https://nexus.quantinuum.com/)
* [pytket Documentation](https://tket.quantinuum.com/)
* [pytket-quantinuum Extension](https://tket.quantinuum.com/extensions/pytket-quantinuum/)
# RigettiProvider
Source: https://docs.qbraid.com/v2/sdk/user-guide/providers/rigetti
Runtime integration for direct access to Rigetti quantum processors via QCS.
API Reference:
[qbraid.runtime.rigetti](https://qbraid.github.io/qBraid/stubs/qbraid.runtime.rigetti.html)
On-demand access to Rigetti quantum systems (Ankaa, Cepheus) is restricted.
You must contact [Rigetti](https://www.rigetti.com/contact) to request access
credentials before using this provider.
## Prerequisites
Before getting started, ensure you have:
1. A **Rigetti QCS account** with an active refresh token (contact Rigetti to obtain access).
2. The **Forest SDK** installed locally — specifically the `quilc` compiler. The `qvm` simulator is optional.
3. Python > 3.10 and \< 3.13
### Install the Forest SDK
The `quilc` compiler is required to compile Quil programs into the native gate set of the target QPU. Install it for your platform:
* **macOS / Linux**: Download from [qcs.rigetti.com/sdk-downloads](https://qcs.rigetti.com/sdk-downloads)
* **Docker**: `docker run --rm -p 5555:5555 rigetti/quilc -S`
Verify the installation:
```bash theme={"dark"}
quilc --version
```
## Installation & Setup
Install the `rigetti` extra:
```bash theme={"dark"}
pip install 'qbraid[rigetti]'
```
This installs the required dependencies: `pyquil` and `qcs-sdk-python`.
## Authentication
The `RigettiProvider` authenticates with Rigetti QCS using an **OAuth refresh token**. Set it as an environment variable (required):
```bash theme={"dark"}
export RIGETTI_REFRESH_TOKEN="your-refresh-token"
```
Then initialize the provider:
```python theme={"dark"}
from qbraid.runtime.rigetti import RigettiProvider
provider = RigettiProvider()
```
### Optional Environment Variables
| Variable | Description | Default |
| -------------------- | ----------------------- | ------------------------------ |
| `RIGETTI_CLIENT_ID` | Custom OAuth client ID | Rigetti default |
| `RIGETTI_ISSUER` | Custom OAuth issuer URL | Rigetti default |
| `QCS_GRPC_ENDPOINT` | QCS gRPC API endpoint | `https://grpc.qcs.rigetti.com` |
| `QCS_QUILC_ENDPOINT` | quilc compiler endpoint | `tcp://127.0.0.1:5555` |
| `QCS_QVM_ENDPOINT` | QVM simulator endpoint | `http://127.0.0.1:5000` |
### Provider Setup
After initializing the provider, call `setup()` to manage the local quilc compiler process. This ensures quilc is running and ready to compile programs:
```python theme={"dark"}
provider = RigettiProvider()
# Start a local quilc process (default behavior)
provider.setup()
# Or, point to an existing quilc endpoint
provider.setup(quilc_endpoint="tcp://my-quilc-host:5555")
```
The `setup()` method accepts the following keyword arguments:
| Parameter | Type | Default | Description |
| ---------------- | ------ | ------- | ------------------------------------------------------- |
| `quilc_endpoint` | `str` | `None` | Pre-existing quilc endpoint. Skips local process start. |
| `qvm_endpoint` | `str` | `None` | Pre-existing QVM endpoint. Skips local process start. |
| `grpc_endpoint` | `str` | `None` | Override for the QCS gRPC endpoint. |
| `start_quilc` | `bool` | `True` | Auto-start local quilc if not already running. |
| `start_qvm` | `bool` | `False` | Auto-start local QVM if not already running. |
## Getting Available Devices
List all quantum processors available through your QCS account:
```python theme={"dark"}
from qbraid.runtime.rigetti import RigettiProvider
provider = RigettiProvider()
provider.setup()
devices = provider.get_devices()
print(devices)
# [RigettiDevice('ankaa-3'), RigettiDevice('cepheus-108')]
```
Get a specific device by its processor ID:
```python theme={"dark"}
device = provider.get_device("ankaa-3")
print(device.status())
#
# Get the list of live qubit IDs on the device
qubits = device.live_qubits()
print(f"Live qubits ({len(qubits)}): {qubits[:10]}...")
```
## Submitting Jobs
The `RigettiProvider` accepts programs written in [Quil](https://quil-lang.github.io/) using the `pyquil` library. Programs are compiled via `quilc` before submission to the QPU.
### Create a Program
```python theme={"dark"}
from pyquil import Program
# Bell state circuit
program = Program("""
DECLARE ro BIT[2]
H 0
CNOT 0 1
MEASURE 0 ro[0]
MEASURE 1 ro[1]
""")
```
### Run a Job
Use `device.run()` to compile and submit in one step:
```python theme={"dark"}
from pyquil import Program
from qbraid.runtime.rigetti import RigettiProvider
provider = RigettiProvider()
provider.setup()
device = provider.get_device("ankaa-3")
program = Program("""
DECLARE ro BIT[2]
H 0
CNOT 0 1
MEASURE 0 ro[0]
MEASURE 1 ro[1]
""")
job = device.run(program, shots=1000)
print(f"Job ID: {job.id}")
```
### Batch Submission
Submit multiple programs in a single call:
```python theme={"dark"}
from pyquil import Program
from qbraid.runtime.rigetti import RigettiProvider
provider = RigettiProvider()
provider.setup()
device = provider.get_device("ankaa-3")
programs = [
Program("DECLARE ro BIT[1]\nH 0\nMEASURE 0 ro[0]"),
Program("DECLARE ro BIT[1]\nX 0\nMEASURE 0 ro[0]"),
Program("DECLARE ro BIT[1]\nH 0\nS 0\nMEASURE 0 ro[0]"),
]
jobs = device.run(programs, shots=500)
for job in jobs:
print(f"Job ID: {job.id}")
```
## Retrieving Results
```python theme={"dark"}
result = job.result()
# Measurement counts as a dictionary
print(result.data.measurement_counts)
# {'00': 512, '11': 488}
# Job metadata
print(f"Device: {result.device_id}")
print(f"Job ID: {result.job_id}")
print(f"Success: {result.success}")
print(f"Duration (us): {result.execution_duration_microseconds}")
```
### Check Job Status
```python theme={"dark"}
from qbraid.runtime.enums import JobStatus
status = job.status()
print(status)
#
```
### Cancel a Job
```python theme={"dark"}
job.cancel()
```
Cancellation is best-effort. Jobs already in a terminal state (`COMPLETED`,
`FAILED`, `CANCELLED`) cannot be cancelled.
## Runtime Options
The `device.run()` method accepts an optional `runtime_options` dict to control compilation
and translation behavior:
```python theme={"dark"}
job = device.run(
program,
shots=1000,
runtime_options={
"compiler_timeout": 60,
"prepend_default_calibrations": True,
"passive_reset_delay_seconds": 1.0,
},
)
```
### Options Reference
| Parameter | Type | Description |
| ------------------------------------ | ------- | ------------------------------------------------------------------------------ |
| `compiler_timeout` | `float` | quilc compilation timeout in seconds. |
| `prepend_default_calibrations` | `bool` | Prepend default calibration pulses during translation. |
| `passive_reset_delay_seconds` | `float` | Delay between passive resets. |
| `allow_unchecked_pointer_arithmetic` | `bool` | Disable runtime memory bounds checking (authorized access). |
| `allow_frame_redefinition` | `bool` | Allow frame definitions that differ from Rigetti defaults (authorized access). |
## Full Example
A complete end-to-end workflow targeting the Ankaa-3 processor:
```python theme={"dark"}
import os
from pyquil import Program
from qbraid.runtime.rigetti import RigettiProvider
# 1. Set credentials (or export as env var beforehand)
os.environ["RIGETTI_REFRESH_TOKEN"] = "your-refresh-token"
# 2. Initialize provider and start quilc
provider = RigettiProvider()
provider.setup()
# 3. Get the target device
device = provider.get_device("ankaa-3")
print(f"Device status: {device.status()}")
print(f"Number of qubits: {len(device.live_qubits())}")
# 4. Define a GHZ state circuit
program = Program("""
DECLARE ro BIT[3]
H 0
CNOT 0 1
CNOT 1 2
MEASURE 0 ro[0]
MEASURE 1 ro[1]
MEASURE 2 ro[2]
""")
# 5. Submit the job
job = device.run(program, shots=1000)
print(f"Submitted job: {job.id}")
# 6. Retrieve results
result = job.result()
print(f"Counts: {result.data.measurement_counts}")
# Expected output (approximate): {'000': ~500, '111': ~500}
```
## Related Links
* [Rigetti QCS Documentation](https://docs.rigetti.com/)
* [PyQuil Documentation](https://pyquil-docs.rigetti.com/)
* [Quil Language Specification](https://quil-lang.github.io/)
* [Forest SDK Downloads](https://qcs.rigetti.com/sdk-downloads)
# Runtime Components
Source: https://docs.qbraid.com/v2/sdk/user-guide/runtime/components
Universal building blocks for constructing client-side quantum software pipelines.
## Runtime Overview
The qBraid Runtime framework defines essential abstractions for sessions, providers, devices, jobs, and results,
integrating them into a complete client-side software pipeline. Leveraging device and domain-specific requirements
outlined by each provider, it generates coherent target "profiles," program "specs," and compilation "schemes".
These elements, referred to as Universal Pipeline Components (UPCs), form the foundational building blocks for constructing scalable
quantum software pipelines. Each UPC plays a unique and distinct role, utilizing quantum and/or classical resources. Collectively,
these components optimize the management of the entire quantum job lifecycle—from defining quantum programs to dispatching jobs to
remote servers to post-processing results—and ensure the efficient production of outputs for diverse computational tasks.
### QbraidProvider
Run experiments using on-demand simulators provided by qBraid using the `qbraid.runtime.QbraidProvider`. You can get a
Python list of device objects using:
```python Input theme={"dark"}
from qbraid import QbraidProvider
provider = QbraidProvider()
devices = provider.get_devices()
print(devices)
```
```python Output theme={"dark"}
[,
,
,
,
,
,
,
,
,
,
,
,
,
,
,
,
,
,
,
,
]
```
Or, instantiate a known device by ID via the `QbraidProvider.get_device()` method,
and submit quantum jobs from any supported program type:
```python theme={"dark"}
device = provider.get_device("qbraid:qbraid:sim:qir-sv")
jobs = device.run([qiskit_ckt, braket_ckt, cirq_ckt, qasm3_str], shots=1000)
results = [job.result() for job in jobs]
print(results[0].data.get_counts())
# {'00': 483, '01': 14, '10': 486, '11': 17}
```
### Async results
All `QuantumJob` subclasses support `async_result()` for non-blocking result retrieval using asyncio.
This is useful in async applications where blocking the event loop is undesirable:
```python theme={"dark"}
result = await job.async_result(timeout=120, poll_interval=5)
print(result.data.get_counts())
```
## Supported Frontends
Featured circuit-building frameworks supported by the qBraid-SDK (non-exhaustive list).
## Citation
If you use qBraid-SDK in your research, we kindly request that you cite it appropriately.
The BibTeX entry below is aligned with the latest stable release. For the most up-to-date
citation details, please refer to [CITATION.cff](https://github.com/qBraid/qBraid/blob/main/CITATION.cff) or
[Zenodo](https://doi.org/10.5281/zenodo.12627596).
```tex theme={"dark"}
@software{Hill_qBraid-SDK_Platform-agnostic_quantum_2026,
author = {Hill, Ryan James and Gupta, Harshit and Young, Ricky and Setia, Kanav},
doi = {10.5281/zenodo.12627596},
license = {Apache-2.0},
month = jul,
title = {{qBraid-SDK: Platform-agnostic quantum runtime framework.}},
url = {https://github.com/qBraid/qBraid},
version = {0.12.2},
year = {2026}
}
```
# Programs
Source: https://docs.qbraid.com/v2/sdk/user-guide/programs
Extract and manage metadata from supported quantum program types, with the flexibility to introduce new types.
In this module, you will learn how to use the qBraid-SDK to interface with quantum circuits across various frontends.
We will demonstrate how to load quantum programs, register new quantum program types, and highlight a few other circuit-level
convenience features.
API Reference:
[qbraid.programs](https://qbraid.github.io/qBraid/api/qbraid.programs.html)
## Quantum Program Registry
The `QPROGRAM_REGISTRY` contains dictionary mappings of shorthand identifiers for "registered" quantum program types.
By default (i.e. without any optional dependencies installed) this simply includes three variations of OpenQASM programs:
```python theme={"dark"}
>>> from qbraid import QPROGRAM_REGISTRY
>>> QPROGRAM_REGISTRY
{'openqasm3': openqasm3.ast.Program,
'qasm2': str,
'qasm3': str}
```
In this example, 'openqasm3' serves as a type alias for an `openqasm3.ast.Program` object, while 'qasm2' and 'qasm3' are aliases
for raw OpenQASM 2 and OpenQASM 3 strings, respectively.
For each of its 10 natively supported program type aliases, the qBraid-SDK will automatically detect whether the corresponding library is installed,
and add that program type along with its type alias to the `QPROGRAM_REGISTRY`. For example, after installing the following optional dependencies,
```bash theme={"dark"}
pip install cirq-core qiskit amazon-braket-sdk pennylane pyquil pytket pyqir
```
the `QPROGRAM_REGISTRY` is automatically updated:
```python theme={"dark"}
>>> from qbraid import QPROGRAM_REGISTRY
>>> QPROGRAM_REGISTRY
{'cirq': cirq.circuits.circuit.Circuit,
'qiskit': qiskit.circuit.quantumcircuit.QuantumCircuit,
'pennylane': pennylane.tape.tape.QuantumTape,
'pyquil': pyquil.quil.Program,
'pytket': pytket._tket.circuit.Circuit,
'braket': braket.circuits.circuit.Circuit,
'openqasm3': openqasm3.ast.Program,
'pyqir': Module,
'qasm2': str,
'qasm3': str}
```
This arrangement simplifies the process of targeting and transpiling between various quantum programming frameworks,
which will be discussed in detail in the transpiler, interface, and runtime tutorials.
### Register New Program Types
You can register new quantum program types using either custom or default type aliases, and overwrite
existing type aliases when necessary. For example:
```python theme={"dark"}
import cirq
import stim
from qbraid import register_program_type
# register new program type with default module alias
register_program_type(stim.Circuit)
# register native program type with custom alias
register_program_type(cirq.Circuit, alias="myalias")
# overwrite existing type alias with new program type
register_program_type(dict, alias="qasm2", overwrite=True)
```
## Load Program
Any quantum program of a natively supported type can be encapsulated within a `qbraid.programs.QbraidProgram`
object. This encapsulation provides a unified framework for circuit manipulation—such as removing idle qubits
and reversing qubit order—and for extracting valuable metadata, including the number of qubits, circuit depth,
and the unitary representation.
As an example, we'll start with a simple qiskit circuit that creates the bell state,
load the quantum circuit object into the qBraid representation, verify the
circuit depth number of qubits, calculate the circuit's unitary representation,
and draw the circuit.
```python Input theme={"dark"}
from qbraid import load_program
from qbraid.visualization import circuit_drawer
qprogram = load_program(qiskit_circuit)
assert qprogram.num_qubits == 2
assert qprogram.depth == 2
assert qprogram.unitary().shape == (4, 4)
circuit_drawer(qprogram.program)
```
```text Output theme={"dark"}
┌───┐
q_0: ┤ H ├──■──
└───┘┌─┴─┐
q_1: ─────┤ X ├
└───┘
```
Now, let's try reversing the qubit order, and drawing the circuit again:
```python Input theme={"dark"}
qprogram.reverse_qubit_order()
circuit_drawer(qprogram.program)
```
```text Ouput theme={"dark"}
┌───┐
q_0: ─────┤ X ├
┌───┐└─┬─┘
q_1: ┤ H ├──■──
└───┘
```
Any quantum program type listed in the `qbraid.NATIVE_REGISTRY` can be loaded and utilized in this manner.
Each `QbraidProgram` object has `num_qubits` and `depth` attributes and `unitary()` method, regardless of the input circuit type.
For example, we could load an Amazon Braket circuit, and repeat similar steps:
```python Input theme={"dark"}
from qbraid import load_program
from qbraid.visualization import circuit_drawer
qprogram = load_program(braket_circuit)
assert qprogram.unitary().shape == ((1 << qprogram.num_qubits),) * 2
circuit_drawer(qprogram.program)
```
```text Output theme={"dark"}
T : │ 0 │ 1 │ 2 │
┌───┐
q0 : ─┤ H ├───●─────────
└───┘ │
┌─┴─┐
q2 : ───────┤ X ├───●───
└───┘ │
┌─┴─┐
q4 : ─────────────┤ X ├─
└───┘
T : │ 0 │ 1 │ 2 │
```
Some wrapped program types support additional methods that can help resolve compatibility issues, such as differences in
qubit indexing rules across frontends. For instance, the `remove_idle_qubits()` method allows you to remap qubit indices
without having to reconstruct the circuit:
```python Input theme={"dark"}
qprogram.remove_idle_qubits()
circuit_drawer(qprogram.program)
```
```text Output theme={"dark"}
T : │ 0 │ 1 │ 2 │
┌───┐
q0 : ─┤ H ├───●─────────
└───┘ │
┌─┴─┐
q1 : ───────┤ X ├───●───
└───┘ │
┌─┴─┐
q2 : ─────────────┤ X ├─
└───┘
T : │ 0 │ 1 │ 2 │
```
Using the `remove_idle_qubits` method, we mapped the qubit indices of the
Amazon Braket circuit from `[0, 2, 4]` to the contiguous `[0, 1, 2]` convention.
# AQTProvider
Source: https://docs.qbraid.com/v2/sdk/user-guide/providers/aqt
Runtime integration for direct access to AQT trapped-ion quantum processors via the arnica cloud.
API Reference:
[qbraid.runtime.aqt](https://qbraid.github.io/qBraid/stubs/qbraid.runtime.aqt.html)
## Overview
The `qbraid.runtime.AQTProvider` provides direct access to
[Alpine Quantum Technologies (AQT)](https://www.aqt.eu/) trapped-ion quantum systems through the
[arnica cloud](https://www.aqt.eu/products/arnica/). You can write quantum circuits in
[Qiskit](https://www.ibm.com/quantum/qiskit) (or any other qBraid-supported framework); the provider
transpiles them to AQT's native gate set and executes them on AQT hardware such as the **IBEX** QPU,
all from within the [qBraid Runtime framework](/v2/sdk/user-guide/runtime/components).
AQT devices are also available through the **qBraid platform** — accessed with
`QbraidProvider` and billed in qBraid credits — as well as through Amazon
Braket and Open Quantum. Each is a separate access point with its own device
ids.
## Getting started
Before you begin, make sure you have:
1. An **AQT arnica** account with machine-to-machine (OIDC client-credentials) access.
2. Your arnica **client ID** and **client secret**.
3. Python >= 3.10
### Set up the qBraid-SDK
Install qBraid with the `aqt` extra from [PyPI](https://pypi.org/project/qbraid/) using pip:
```bash theme={"dark"}
pip install 'qbraid[aqt]'
```
This installs the required dependencies: `aqt-connector` and `qiskit`.
*Note*: The qBraid-SDK requires Python 3.10 or greater. You can check your
Python version by running `python --version` from the command line.
## Authentication
The `AQTProvider` authenticates to the arnica cloud non-interactively using OIDC **client
credentials** (machine-to-machine) — the interactive device/login flow is never triggered. Provide
your credentials via environment variables:
```bash theme={"dark"}
export AQT_CLIENT_ID="your-client-id"
export AQT_CLIENT_SECRET="your-client-secret"
```
Then initialize the provider:
```python theme={"dark"}
from qbraid.runtime.aqt import AQTProvider
provider = AQTProvider()
```
You can also pass credentials — or a pre-obtained access token — directly instead of using
environment variables:
```python theme={"dark"}
# client-credentials
provider = AQTProvider(client_id="your-client-id", client_secret="your-client-secret")
# or a pre-obtained bearer token
provider = AQTProvider(access_token="your-access-token")
```
## List available devices
Use the `AQTProvider` to list the devices to which you have access:
```python theme={"dark"}
from qbraid.runtime.aqt import AQTProvider
provider = AQTProvider()
devices = provider.get_devices()
print(devices)
```
AQT devices are addressed by a `"/"` identifier. Get a specific device by its id:
```python theme={"dark"}
device = provider.get_device("/")
print(device.status())
#
```
Use `get_devices()` to discover the `"/"` ids you have access to — for
example, the **IBEX** QPU is exposed under its arnica workspace and resource.
## Submitting jobs
The `AQTProvider` accepts circuits written in any qBraid-supported framework. `device.run()`
transpiles the circuit to AQT's native basis (`RZ`, `R`, `RXX`) via the `qiskit -> aqt_connector`
conversion, then submits it.
AQT enforces per-job limits: up to **2000 shots** per job and up to **2000
operations** (gates) per circuit. Jobs that exceed either limit are rejected.
The **IBEX** QPU provides **12 qubits**; a circuit wider than the device is
rejected before submission.
### Create a circuit
```python theme={"dark"}
from qiskit import QuantumCircuit
# Bell state circuit
circuit = QuantumCircuit(2)
circuit.h(0)
circuit.cx(0, 1)
circuit.measure_all()
```
### Run a job
Use `device.run()` to transpile and submit a circuit:
```python theme={"dark"}
from qiskit import QuantumCircuit
from qbraid.runtime.aqt import AQTProvider
provider = AQTProvider()
device = provider.get_device("/")
circuit = QuantumCircuit(2)
circuit.h(0)
circuit.cx(0, 1)
circuit.measure_all()
job = device.run(circuit, shots=1000)
print(f"Job ID: {job.id}")
```
### Batch submission
Submit multiple circuits in a single call. All circuits are bundled into one arnica job:
```python theme={"dark"}
from qiskit import QuantumCircuit
from qbraid.runtime.aqt import AQTProvider
provider = AQTProvider()
device = provider.get_device("/")
qc1 = QuantumCircuit(1)
qc1.h(0)
qc1.measure_all()
qc2 = QuantumCircuit(2)
qc2.h(0)
qc2.cx(0, 1)
qc2.measure_all()
job = device.run([qc1, qc2], shots=500)
print(f"Job ID: {job.id}")
```
When submitting a list of circuits, all are executed as a single batch job on
arnica. The returned measurement counts will be a list of dictionaries, one
per circuit.
## Retrieving results
```python theme={"dark"}
result = job.result()
# Measurement counts (little-endian: qubit 0 is the rightmost bit)
print(result.data.get_counts())
# {'00': 512, '11': 488}
# Job metadata
print(f"Device: {result.device_id}")
print(f"Job ID: {result.job_id}")
print(f"Success: {result.success}")
```
### Check job status
```python theme={"dark"}
from qbraid.runtime.enums import JobStatus
status = job.status()
print(status)
#
```
### Cancel a job
```python theme={"dark"}
job.cancel()
```
Cancellation targets queued or ongoing jobs. Jobs already in a terminal state
(`COMPLETED`, `FAILED`, `CANCELLED`) cannot be cancelled.
### Execution time
Retrieve the wall-clock run time (in seconds) for a completed job:
```python theme={"dark"}
print(f"Execution time: {job.execution_time_s()} seconds")
```
`execution_time_s()` is derived from the arnica `timing_data` as the `ongoing`
→ `finished` span (the time the job spent running, excluding queue wait). It
returns `None` until the job has completed, and raises `AQTJobError` if a
completed job's timing data is incomplete.
## Configuration options
The `device.run()` method accepts the following keyword arguments:
| Parameter | Type | Default | Description |
| --------- | ----- | ---------- | --------------------------------------------------- |
| `shots` | `int` | `100` | Number of measurement shots per circuit (max 2000). |
| `name` | `str` | `"qbraid"` | Optional human-readable job label. |
Credentials are configured via environment variables:
| Variable | Description |
| ------------------- | ---------------------------------------------------------- |
| `AQT_CLIENT_ID` | OIDC client ID for the arnica client-credentials flow. |
| `AQT_CLIENT_SECRET` | OIDC client secret for the arnica client-credentials flow. |
## Full example
A complete end-to-end workflow submitting a GHZ state to an AQT device:
```python theme={"dark"}
from qiskit import QuantumCircuit
from qbraid.runtime.aqt import AQTProvider
# 1. Initialize provider (reads AQT_CLIENT_ID / AQT_CLIENT_SECRET from the environment)
provider = AQTProvider()
# 2. Get a device by its "/" id
device = provider.get_device("/")
print(f"Device status: {device.status()}")
# 3. Define a GHZ state circuit
circuit = QuantumCircuit(3)
circuit.h(0)
circuit.cx(0, 1)
circuit.cx(1, 2)
circuit.measure_all()
# 4. Submit the job
job = device.run(circuit, shots=1000)
print(f"Submitted job: {job.id}")
# 5. Retrieve results
result = job.result()
print(f"Counts: {result.data.get_counts()}")
# Expected output (approximate): {'000': ~500, '111': ~500}
```
## Related links
* [Alpine Quantum Technologies (AQT)](https://www.aqt.eu/)
* [AQT arnica Cloud](https://www.aqt.eu/products/arnica/)
* [AQT arnica API Reference](https://arnica.aqt.eu/api/v1/docs)
* [AQT Quantum SDK Connectors](https://www.aqt.eu/quantum-sdk-connectors/)
# BraketProvider
Source: https://docs.qbraid.com/v2/sdk/user-guide/providers/aws
Runtime integration for streamlined access to Amazon Braket supported devices.
API Reference:
[qbraid.runtime.aws](https://qbraid.github.io/qBraid/stubs/qbraid.runtime.aws.html)
## Installation & Setup
To interface with Amazon Braket [supported devices](https://docs.aws.amazon.com/braket/latest/developerguide/braket-devices.html),
install the `braket` extra:
```bash theme={"dark"}
pip install 'qbraid[braket]'
```
Then, follow [instructions](https://github.com/aws/amazon-braket-sdk-python#boto3-and-setting-up-aws-credentials)
to configure your AWS credentials.
## Basic Usage
Submit a Quantum Task to an AWS device using the `BraketProvider`:
```python theme={"dark"}
from qbraid.runtime import BraketProvider
provider = BraketProvider()
provider.get_devices()
# [,
# ,
# ,
# ,
# ,
# ,
# ,
# ,
# ,
# ]
device = provider.get_device("arn:aws:braket:::device/quantum-simulator/amazon/sv1")
type(device)
# qbraid.runtime.aws.device.BraketDevice
device.metadata()
# {'device_id': 'arn:aws:braket:::device/quantum-simulator/amazon/sv1',
# 'device_type': 'SIMULATOR',
# 'num_qubits': 34,
# 'provider_name': 'Amazon Braket',
# 'status': 'ONLINE',
# 'queue_depth': 0}
```
Now that we've instantiated our device, in this case the AWS SV1 simulator, we can construct a quantum circuit and submit a task using the `.run` method:
```python theme={"dark"}
from braket.circuits import Circuit
circuit = Circuit().h(0).cnot(0, 1)
job = device.run(circuit, shots=10)
```
We now have `job` which is of type `BraketQuantumTask`, which inherits from `QuantumJob`. To see the results,
we can do the following:
```python theme={"dark"}
res = job.result()
res.data.get_counts()
# {'00': 6, '11': 4}
res.data.measurements
# array([[0, 0],
# [0, 0],
# [1, 1],
# [1, 1],
# [0, 0],
# [0, 0],
# [0, 0],
# [1, 1],
# [0, 0],
# [0, 0]])
```
See how to visualize these results in the [Visualization](/v2/sdk/user-guide/visualization#plot-experimental-results) section.
## Runtime Options
The `BraketDevice.run()` method accepts additional keyword arguments that are passed through
to the underlying Amazon Braket SDK's `AwsDevice.run()`. These options let you control
device-specific behavior such as qubit rewiring, error mitigation, experimental capabilities, and more.
### Disable Qubit Rewiring
By default, Braket may remap the logical qubits in your circuit to physical qubits on the device.
To force the use of the exact qubits specified in your circuit, disable qubit rewiring:
```python theme={"dark"}
job = device.run(circuit, shots=1000, disable_qubit_rewiring=True)
```
This is required when using [verbatim compilation](https://docs.aws.amazon.com/braket/latest/developerguide/braket-openqasm-verbatim-compilation.html)
or pulse-level gate definitions.
### Error Mitigation (IonQ)
IonQ devices on Braket support error mitigation through debiasing, which creates
variations of your circuit to reduce the effects of hardware noise:
```python theme={"dark"}
from braket.error_mitigation import Debias
device = provider.get_device("arn:aws:braket:us-east-1::device/qpu/ionq/Aria-1")
job = device.run(
circuit,
shots=2500, # Minimum 2500 shots required for debiasing
device_parameters={"errorMitigation": Debias()},
)
```
### Experimental Capabilities
Some devices offer experimental features that must be explicitly enabled. For example,
QuEra Aquila supports tight atom geometries and local detuning, and IQM devices support
dynamic circuits with mid-circuit measurement:
```python theme={"dark"}
device = provider.get_device("arn:aws:braket:us-east-1::device/qpu/quera/Aquila")
job = device.run(
program,
shots=1000,
experimental_capabilities="ALL",
)
```
See [Experimental Capabilities](https://docs.aws.amazon.com/braket/latest/developerguide/braket-experimental-capabilities.html) for a full list of available features per device.
### Parametric Circuits
For OpenQASM programs with input parameters, pass values at runtime:
```python theme={"dark"}
job = device.run(
openqasm_program,
shots=1000,
inputs={"theta": 1.57, "phi": 0.785},
)
```
### Reservation ARN
If you have a [Braket Direct](https://aws.amazon.com/braket/direct/) reservation for
exclusive device access, provide the reservation ARN:
```python theme={"dark"}
job = device.run(
circuit,
shots=1000,
reservation_arn="arn:aws:braket:us-east-1:123456789012:reservation/abc123",
)
```
### Tags
Attach metadata tags to your quantum tasks for tracking and organization:
```python theme={"dark"}
job = device.run(
circuit,
shots=1000,
tags={"experiment": "bell-state", "team": "quantum-research"},
)
```
### Options Reference
| Parameter | Type | Description |
| --------------------------- | ------------------ | ---------------------------------------------- |
| `disable_qubit_rewiring` | `bool` | Force use of exact qubits without remapping |
| `device_parameters` | `dict` | Device-specific config (e.g. error mitigation) |
| `experimental_capabilities` | `str` | Set to `"ALL"` to enable experimental features |
| `inputs` | `dict[str, float]` | Parameter values for parametric circuits |
| `reservation_arn` | `str` | Braket Direct reservation ARN |
| `tags` | `dict[str, str]` | Metadata tags for the quantum task |
### Via qBraid Runtime API
When submitting jobs through the [QbraidProvider](/v2/sdk/user-guide/providers/native), these same
options can be passed via the `runtimeOptions` field. The runtime API forwards them as keyword
arguments to the Braket `device.run()` call:
```python theme={"dark"}
from qbraid.runtime import QbraidProvider
provider = QbraidProvider()
device = provider.get_device("aws:quera:qpu:aquila")
job = device.run(
program,
shots=1000,
runtime_options={"experimental_capabilities": "ALL"},
)
```
```python theme={"dark"}
device = provider.get_device("aws:ionq:qpu:aria-1")
job = device.run(
circuit,
shots=2500,
runtime_options={"device_parameters": {"errorMitigation": "Debias"}},
)
```
# AzureQuantumProvider
Source: https://docs.qbraid.com/v2/sdk/user-guide/providers/azure
Runtime integration for streamlined access to Azure Quantum supported devices.
API Reference:
[qbraid.runtime.azure](https://qbraid.github.io/qBraid/stubs/qbraid.runtime.azure.html)
## Installation & Setup
To interface with Azure Quantum supported devices, install the `azure` extra:
```bash theme={"dark"}
pip install 'qbraid[azure]'
```
Then, follow the [Azure Quantum setup instructions](https://learn.microsoft.com/en-us/azure/quantum/how-to-create-workspace) to create a workspace and get your credentials.
## Authentication Methods
The `AzureQuantumProvider` integrates with Azure Quantum via the `azure-quantum` package. It connects to an [Azure Quantum Workspace](https://learn.microsoft.com/en-us/python/azure-quantum/azure.quantum.workspace), which manages your quantum resources.
### Using a Connection String
You can authenticate using an **Azure connection string**, which provides a direct way to access your workspace. First, retrieve your connection string by following [these instructions](https://learn.microsoft.com/en-us/azure/quantum/how-to-connect-workspace#copy-the-connection-string). Then, use it to initialize a `Workspace` object and pass it to `AzureQuantumProvider`:
```python theme={"dark"}
# Authenticate using a connection string
from azure.quantum import Workspace
from qbraid.runtime import AzureQuantumProvider
connection_string = "[Your connection string here]"
workspace = Workspace.from_connection_string(connection_string)
provider = AzureQuantumProvider(workspace=workspace)
```
### Using Environment Variables
To avoid hardcoding credentials in your code, you can store the connection string as an environment variable instead:
```bash theme={"dark"}
export AZURE_QUANTUM_CONNECTION_STRING="your-connection-string"
```
Then, initialize `AzureQuantumProvider` without passing explicit credentials:
```python theme={"dark"}
from qbraid.runtime import AzureQuantumProvider
provider = AzureQuantumProvider() # Uses the environment variable
```
### Related Content
* [Access Keys - Azure Quantum | Microsoft Learn](https://learn.microsoft.com/en-us/azure/quantum/security-manage-access-keys?tabs=tabid-portal#connect-to-your-azure-quantum-workspace-with-a-connection-string)
* [Connect to your Azure Quantum workspace with the azure-quantum Python package](https://learn.microsoft.com/en-us/azure/quantum/how-to-connect-workspace?tabs=tabid-python1%2Ctabid-python)
* [Authenticate Python apps to Azure services by using the Azure SDK for Python](https://learn.microsoft.com/en-us/azure/developer/python/azure-sdk-authenticate)
## Basic Usage
Submit a Quantum Task to an Azure Quantum device using the `AzureQuantumProvider`:
```python theme={"dark"}
from qbraid.runtime import AzureQuantumProvider
provider = AzureQuantumProvider() # Uses environment variables
# List available devices
provider.get_devices()
# [,
# ,
# ,
# ,
# ]
# Get a specific device
device = provider.get_device("ionq.simulator")
type(device)
# qbraid.runtime.azure.device.AzureDevice
device.metadata()
# {'device_id': 'ionq.simulator',
# 'device_type': 'SIMULATOR',
# 'num_qubits': 29,
# 'provider_name': 'IonQ',
# 'status': 'ONLINE'}
```
Now that we've instantiated our device, in this case the IonQ simulator on Azure Quantum, we can construct a quantum circuit and submit a task using the `.run` method:
```python theme={"dark"}
from qiskit import QuantumCircuit
circuit = QuantumCircuit(2)
circuit.h(0)
circuit.cx(0, 1)
job = device.run(circuit, shots=10)
```
We now have `job` which is of type `AzureQuantumTask`, which inherits from `QuantumJob`. To see the results:
```python theme={"dark"}
res = job.result()
res.data.get_counts()
# {'00': 5, '11': 5}
res.data.measurements
# array([[0, 0],
# [1, 1],
# [0, 0],
# [1, 1],
# [0, 0],
# [1, 1],
# [0, 0],
# [1, 1],
# [0, 0],
# [1, 1]])
```
See how to visualize these results in the [Visualization](/v2/sdk/user-guide/visualization#plot-experimental-results) section.
## Supported Providers
Azure Quantum provides access to quantum hardware and simulators from several providers:
* IonQ
* Quantinuum
* Rigetti
* Pasqal
Each provider may have different requirements and capabilities. Refer to the [Azure Quantum documentation](https://learn.microsoft.com/en-us/azure/quantum/) for more details about specific providers.
## Runtime Options
The `AzureQuantumDevice.run()` and `.submit()` methods accept an `input_params` keyword argument
that is passed through to the Azure Quantum backend. Each hardware provider supports different
options.
### Quantinuum
Quantinuum emulators and hardware support several input parameters for controlling
simulation type, noise models, and compiler optimization.
#### Simulator type
Quantinuum emulators support both state-vector (default) and stabilizer simulation:
```python theme={"dark"}
device = provider.get_device("quantinuum.sim.h2-1e")
# Use the stabilizer simulator (Clifford circuits only)
job = device.run(circuit, shots=100, input_params={"simulator": "stabilizer"})
```
#### Noise model
Disable the emulator's noise model for ideal simulation:
```python theme={"dark"}
job = device.run(circuit, shots=100, input_params={"error-model": False})
```
Customize individual noise parameters:
```python theme={"dark"}
job = device.run(
circuit,
shots=100,
input_params={
"error-params": {
"p1": 4e-5,
"p2": 3e-3,
"p_meas": [3e-3, 3e-3],
"p_init": 4e-5,
"p_crosstalk_meas": 1e-5,
"p_crosstalk_init": 3e-5,
}
},
)
```
#### Compiler options
Control TKET optimization level or disable optimization entirely:
```python theme={"dark"}
# Set optimization level (0, 1, or 2; default is 2)
job = device.run(circuit, shots=100, input_params={"tket-opt-level": 1})
# Disable optimization
job = device.run(circuit, shots=100, input_params={"no-opt": True})
```
See [Quantinuum provider](https://learn.microsoft.com/en-us/azure/quantum/provider-quantinuum) for full details.
### IonQ
IonQ devices on Azure support error mitigation and noise model simulation.
#### Error mitigation
Debiasing is enabled by default on Aria and Forte systems. To explicitly control it:
```python theme={"dark"}
device = provider.get_device("ionq.qpu.aria-1")
# Disable debiasing
job = device.run(circuit, shots=1000, input_params={"error-mitigation": {"debias": False}})
```
#### Noise model simulation
Run on the IonQ simulator with a hardware noise profile:
```python theme={"dark"}
device = provider.get_device("ionq.simulator")
job = device.run(
circuit,
shots=1000,
input_params={
"noise": {
"model": "aria-1",
"seed": 42,
}
},
)
```
Set `"model": "ideal"` for noiseless simulation (up to 29 qubits).
See [IonQ provider](https://learn.microsoft.com/en-us/azure/quantum/provider-ionq) for full details.
### Rigetti
Rigetti devices on Azure support compiler control and parameter substitutions.
#### Skip quilc compilation
When using native Quil or Quil-T programs, you can bypass the quilc compiler:
```python theme={"dark"}
device = provider.get_device("rigetti.qpu.ankaa-3")
job = device.submit(quil_program, shots=100, input_params={"skipQuilc": True})
```
#### Parameter substitutions
For parametrized Quil programs, provide values for declared variables:
```python theme={"dark"}
quil_program = """
DECLARE ro BIT[2]
DECLARE theta REAL[2]
RX(theta[0]) 0
RX(theta[1]) 1
MEASURE 0 ro[0]
MEASURE 1 ro[1]
"""
job = device.submit(
quil_program,
shots=100,
input_params={
"substitutions": {
"theta": [[0.0, 3.14], [1.57, 3.14]]
}
},
)
```
See [Rigetti provider](https://learn.microsoft.com/en-us/azure/quantum/provider-rigetti) for full details.
### Options Reference
| Provider | Parameter | Type | Description |
| ---------- | ------------------ | ------ | -------------------------------------------- |
| Quantinuum | `simulator` | `str` | `"stabilizer"` or `"state-vector"` (default) |
| Quantinuum | `error-model` | `bool` | Enable/disable noise model (default `True`) |
| Quantinuum | `error-params` | `dict` | Custom noise parameters |
| Quantinuum | `tket-opt-level` | `int` | TKET optimization level (0-2) |
| Quantinuum | `no-opt` | `bool` | Disable compiler optimization |
| IonQ | `error-mitigation` | `dict` | `{"debias": True/False}` |
| IonQ | `noise` | `dict` | `{"model": "aria-1", "seed": int}` |
| Rigetti | `skipQuilc` | `bool` | Skip quilc compiler |
| Rigetti | `substitutions` | `dict` | Parameter values for Quil programs |
### Via qBraid Runtime API
When submitting jobs through the [QbraidProvider](/v2/sdk/user-guide/providers/native), these same
options can be passed via the `runtimeOptions` field. The runtime API forwards them as `input_params`
to the Azure `device.run()` or `device.submit()` call:
```python theme={"dark"}
from qbraid.runtime import QbraidProvider
provider = QbraidProvider()
device = provider.get_device("azure:quantinuum:sim:h2-1e")
# Use stabilizer simulator with no noise
job = device.run(
circuit,
shots=100,
runtime_options={"simulator": "stabilizer", "error-model": False},
)
```
```python theme={"dark"}
device = provider.get_device("azure:ionq:sim:simulator")
# Run with hardware noise model
job = device.run(
circuit,
shots=1000,
runtime_options={"noise": {"model": "aria-1", "seed": 42}},
)
```
# QiskitRuntimeProvider
Source: https://docs.qbraid.com/v2/sdk/user-guide/providers/ibm
Runtime integration for streamlined access to IBM Quantum hardware.
API Reference:
[qbraid.runtime.ibm](https://qbraid.github.io/qBraid/stubs/qbraid.runtime.ibm.html)
## Installation & Setup
To interface with IBM Quantum backends, install the `qiskit` extra,
```bash theme={"dark"}
pip install 'qbraid[qiskit]'
```
and configure your [IBM credentials](https://github.com/Qiskit/qiskit-ibm-runtime?tab=readme-ov-file#account-setup).
## Basic Usage
The `QiskitRuntimeProvider` allows you to easily submit jobs to IBM Quantum devices. There are several ways to initialize the provider:
1. Direct authentication with IBM Cloud:
```python theme={"dark"}
from qbraid.runtime import QiskitRuntimeProvider
provider = QiskitRuntimeProvider(
channel="ibm_cloud",
token="MY_IBM_CLOUD_API_KEY",
instance="MY_IBM_CLOUD_CRN"
)
```
2. Authentication with IBM Quantum:
```python theme={"dark"}
provider = QiskitRuntimeProvider(
channel="ibm_quantum",
token="MY_IBM_QUANTUM_TOKEN"
)
```
3. Using environment variables:
```shell theme={"dark"}
export QISKIT_IBM_TOKEN="MY_IBM_CLOUD_API_KEY"
export QISKIT_IBM_INSTANCE="MY_IBM_CLOUD_CRN"
export QISKIT_IBM_CHANNEL="ibm_cloud"
```
4. Using credentials stored in `$HOME/.qiskit/qiskit-ibm.json`
When using environment variables or stored credentials, you can initialize the provider without any arguments:
```python theme={"dark"}
provider = QiskitRuntimeProvider()
```
Once initialized, you can list available devices and access their information:
```python theme={"dark"}
# Get list of available devices
provider.get_devices()
# [,
# ,
# ,
# ,
# ,
# ]
# Select a specific device
device = provider.get_device('ibm_brisbane')
# View device metadata
device.metadata()
# {'device_id': 'ibm_brisbane',
# 'device_type': 'QPU',
# 'num_qubits': 127,
# 'instance': 'ibm-q/open/main',
# 'max_shots': 100000,
# 'status': 'ONLINE',
# 'queue_depth': 37}
```
Our chosen device is the IBM Osaka Backend, which we will now submit a Qiskit job to.
```python theme={"dark"}
from qiskit import QuantumCircuit
circuit = QuantumCircuit(2)
circuit.h(0)
job = device.run(circuit, shots=10)
```
So now we have `job` which is of type `QiskitJob`, which inherits from `QuantumJob`. To see the results, we can do the following:
```python theme={"dark"}
res = job.result()
res.data.get_counts()
# {'00': 6, '11': 4}
res.data.measurements
# array([[1, 1],
# [0, 0],
# [0, 0],
# [1, 1],
# [0, 0],
# [1, 1],
# [0, 0],
# [1, 1],
# [0, 0],
# [0, 0]])
```
See how to visualize these results in the [Visualization](/v2/sdk/user-guide/visualization#plot-experimental-results) section.
# IonQProvider
Source: https://docs.qbraid.com/v2/sdk/user-guide/providers/ionq
Runtime integration for streamlined access to IonQ simulators and QPUs.
API Reference:
[qbraid.runtime.ionq](https://qbraid.github.io/qBraid/stubs/qbraid.runtime.ionq.html)
## Overview
The `qbraid.runtime.IonQProvider` provides support for IonQ's trapped-ion systems. This means that you can write quantum circuits in
Qiskit, Cirq, Amazon Braket, PennyLane, PyTKET, or any other library compatible with [OpenQASM](https://openqasm.com/) (version 2 or 3),
and run them on IonQ's simulators and trapped-ion quantum computers, all from within the [qBraid Runtime framework](/v2/sdk/user-guide/runtime/components).
## Getting started
Before you begin, make sure you have an [IonQ Quantum Cloud](https://cloud.ionq.com/) account and API key.
For help, see IonQ's guide on [creating and managing API keys](https://docs.ionq.com/guides/managing-api-keys).
### Set up the qBraid-SDK
Install qBraid with the `ionq` extra from [PyPI](https://pypi.org/project/qbraid/) using pip:
```bash theme={"dark"}
pip install 'qbraid[ionq]'
```
*Note*: The qBraid-SDK requires Python 3.10 or greater. You can check your
Python version by running `python --version` from the command line.
We encourage doing this inside an environment management system, such as [virtualenv](https://virtualenv.pypa.io/en/latest/) or
[conda](https://docs.conda.io/en/latest/). Alternatively, you can bypass this step by using a pre-configured
[qBraid Lab environment](/v2/lab/user-guide/environments).
See [qBraid-SDK installation and setup](/v2/sdk/user-guide/overview#installation-and-setup) for more.
### Set up your environment
By default, qBraid will look in your local environment for a variable named `IONQ_API_KEY`, so if you've already followed IonQ's guide on
[setting up and managing your API keys](https://docs.ionq.com/guides/managing-api-keys), qBraid will automatically find it.
Alternatively, you can set a "temporary" environment variable from your command line:
```bash theme={"dark"}
export IONQ_API_KEY="your_api_key_here"
```
While we recommend setting an environment variable so that qBraid can find your API key, you can also pass in your API key explicitly
within your Python code, when creating the IonQ Provider object that authenticates your connection to the IonQ Cloud Platform. This might
be necessary if you've named your environment variable something other than `IONQ_API_KEY`, or if you are working from a Python environment
where accessing environment variables is not straightforward. You can import your key explicitly or load it from a file, and pass it into
the `IonQProvider()` object directly:
```python theme={"dark"}
import os
from qbraid.runtime import IonQProvider
# Load your API key from an environment variable named MY_IONQ_API_KEY
my_api_key = os.getenv("MY_IONQ_API_KEY")
provider = IonQProvider(my_api_key)
```
In the examples below, we show `IonQProvider()` initialized with no arguments and assume that qBraid will automatically find your API key,
but you can always use this approach instead.
## List available devices
Use the `IonQProvider` to list all of the devices to which you have access:
```python theme={"dark"}
from qbraid.runtime import IonQProvider
provider = IonQProvider()
devices = provider.get_devices()
```
Running this script should print the results below—something like this:
```python theme={"dark"}
[,
,
,
,
]
```
If this works correctly then your qBraid-SDK installation is correct, your IonQ API key is valid, and you have access to the IonQ devices!
## Submit a circuit to the simulator
First, let’s try running a simple Bell state circuit on the ideal simulator. Here, we'll use 1000 shots, and give the circuit a name that
will show up in the [IonQ Cloud Console](https://cloud.ionq.com/jobs).
Your input OpenQASM program should not include measurement statements.
Measurement will be applied over all qubits at the end of the circuit,
automatically. Mid-circuit measurements and partial measurements are not
supported.
```python theme={"dark"}
from qbraid.runtime import IonQProvider
provider = IonQProvider()
device = provider.get_device("simulator")
# Define a Bell state circuit in qasm
qasm = """
OPENQASM 3.0;
qubit[2] q;
h q[0];
cx q[0], q[1];
"""
job = device.run(qasm, name="Hello many worlds!", shots=1000)
result = job.result()
print(result.data.get_counts())
```
This returns:
```
{'00': 500, '11': 500}
```
As expected, the ideal simulator creates a quantum state with a 50-50 probability of being measured as “00” or “11”.
To view the calculated probabilities for a circuit run on the simulator, use `result.data.get_probabilities()`.
You can return histogram data in decimal format for either of these `result.data` methods using argument `decimal=True`.
### Submit a circuit with noise
Get a list of all noise models supported by the IonQ simulator:
```python theme={"dark"}
print(device.profile.noise_models)
```
Then, to run a noisy simulation, simply specify a noise model and an optional random seed:
```python theme={"dark"}
job = device.run(qasm, shots=1000, noise={"model" : "aria-1", "seed": 42})
```
You can read more about simulation with noise models [here](https://docs.ionq.com/guides/simulation-with-noise-models).
## Submit a circuit to a QPU
You can view your access to IonQ systems in the “Backends” tab of the IonQ Cloud Console. Before submitting to any QPU,
we recommend testing your code on a simulator (including with noise model) and following the other steps in the
[QPU submission checklist](https://docs.ionq.com/guides/qpu-submission-checklist.mdx) to confirm your access and the QPU availability.
To run a circuit on a QPU, use the same setup as before, just with a different device ID:
```python theme={"dark"}
from qbraid.runtime import IonQProvider
provider = IonQProvider()
device = provider.get_device("qpu.aria-1")
```
Verify that the device is `ONLINE`:
```python theme={"dark"}
print(device.status())
```
View device characterization data including the connectivity, fidelity, timings, and more:
```python theme={"dark"}
print(device.profile.characterization)
```
Next, construct your quantum program, ensuring it aligns with the device’s [supported gateset](#supported-gates).
In this example, we'll define GHZ state circuit using OpenQASM 3:
```python theme={"dark"}
qasm = """
OPENQASM 3.0;
qubit[3] q;
h q[0];
cx q[0], q[1];
cx q[0], q[2];
"""
```
### Estimate Cost
You can use the `device.run()` method with the `dry_run=True` option to obtain a cost estimate for the anticipated job
without actually executing the program on a QPU.
```python theme={"dark"}
job = device.run(qasm, name="GHZ (Dry run)", shots=100, dry_run=True)
job.wait_for_final_state()
metadata = job.metadata()
cost_usd = metadata["cost_usd"]
print(f"Cost Estimate (USD): {cost_usd}")
```
If you plan to run your job with [debiasing](https://ionq.com/resources/debiasing-and-sharpening), be sure to include the
`error_mitigation` parameter in the preflight submission to ensure it is accounted for in the cost estimate:
```python theme={"dark"}
job = device.run(..., preflight=True, error_mitigation={"debias": True})
```
### Submit to QPU
When you are ready to submit the job on the QPU, simply set `preflight=False`, or don't specify any `preflight` value.
Optionally include job tags or other metadata for your convenience, specifying up to 10 key-value pairs.
```python theme={"dark"}
job = device.run(qasm, name="GHZ", shots=100, metadata={"key": "str_value"})
```
When submitting jobs to a QPU, your job may need to wait in the queue. You can print and record the job’s unique ID,
which can be used to retrieve the job (including its status and results) at a later time, see [Retrieve a job](#retrieve-a-job).
```python theme={"dark"}
print(job.id)
```
Check the status of your job:
```python theme={"dark"}
print(job.status())
```
Once the job is `COMPLETED`, you can retrieve the results:
```python theme={"dark"}
result = job.result()
counts = result.data.get_counts(decimal=True)
print(f"Counts: {counts}")
print(f"Details: {result.details}")
```
## Submit a multi-circuit job
The flexibility of qBraid-SDK allows you to write your circuit not just in OpenQASM, but in Qiskit, Cirq, Amazon Braket, PyTKET,
or any other [registered program type](/v2/sdk/user-guide/programs#quantum-program-registry) that can be
[transpiled](/v2/sdk/user-guide/transpiler) to qBraid's `qasm2` or `qasm3` format.
In this example, we'll install the `qiskit` and `cirq` extras,
```bash theme={"dark"}
pip install 'qbraid[qiskit,cirq]'
```
and submit a [multi-circuit job](https://docs.ionq.com/api-reference/v0.3/multicircuit-jobs) containing one of each program type:
```python theme={"dark"}
import cirq
from qbraid.runtime import IonQProvider
from qiskit import QuantumCircuit
provider = IonQProvider()
device = provider.get_device("simulator")
# Define a bell state in qiskit
qiskit_bell = QuantumCircuit(2)
qiskit_bell.h(0)
qiskit_bell.cx(0, 1)
# Define a bell state in cirq
cirq_bell = cirq.Circuit()
q0, q1 = cirq.LineQubit.range(2)
cirq_bell.append(cirq.H(q0))
cirq_bell.append(cirq.CNOT(q0, q1))
circuit_batch = [qiskit_bell, cirq_bell]
job = device.run(circuit_batch, shots=1000, noise={"model": "aria-1"})
result = job.result()
counts_batch = result.data.get_counts()
print("\n".join(f"Circuit {i}: {c}" for i, c in enumerate(counts_batch)))
```
This script submits two quantum circuits in a single job. When the job completes, it prints the counts for each circuit:
```bash theme={"dark"}
Circuit 0: {'00': 492, '01': 4, '10': 3, '11': 501}
Circuit 1: {'00': 482, '01': 6, '10': 6, '11': 506}
```
All of the necessary program type conversions are carried out automatically within the `device.run()` method. However, you can also perform
this "transpile" step manually, if needed (e.g. to inspect the ultimate OpenQASM submission format). This can be done as follows:
```python theme={"dark"}
from qbraid import transpile
qasm_batch = [transpile(circuit, "qasm2") for circuit in circuit_batch]
jobs = device.run(qasm_batch, shots=1000, ...)
```
qBraid offers native support for 10 major quantum programming libraries including 20+ inter-library conversions. For more details, including
how to configure your own custom conversions, refer to the [qBraid transpiler documentation](/v2/sdk/user-guide/transpiler).
## Manage jobs
### Retrieve a job
You can retrieve results for a previously run job using its job ID. You can save the job ID after submitting a job
(as in the QPU example above) or copy it from the “ID” column in the “My Jobs” tab on the [IonQ Cloud Console](https://cloud.ionq.com/jobs).
```python theme={"dark"}
from qbraid.runtime import IonQJob, IonQProvider
job_id = "..."
provider = IonQProvider()
job = IonQJob(job_id, provider.session)
result = job.result()
print(result.data.get_counts())
```
### Cancel a job
You can cancel a job while it’s waiting in the queue:
```python theme={"dark"}
job.cancel()
```
## Visualize Results
To plot the results of a job, first, install the qBraid visualization extra:
```bash theme={"dark"}
pip install 'qbraid[visualization]'
```
You can visualize the histogram counts data using `plot_histogram`, or display the probability distribution with `plot_distribution`.
```python theme={"dark"}
from qbraid.visualization import plot_histogram
plot_histogram(counts)
```
The "counts" input may be either a single dictionary or a list of dictionaries for multi-circuit jobs. In the latter case, histogram data
for each circuit will be plotted side-by-side. The X-axis labels will display in decimal if you set `decimal=True` when retrieving measurement
counts with `get_counts()`. If `decimal=False` or left unspecified, the default quantum state labels in hexadecimal will be used.
See [Plot Experimental Results](/v2/sdk/user-guide/visualization#plot-experimental-results) for more.
## Supported gates
For actual execution, gates will be compiled into optimal operations for our trapped ion hardware. For convenience,
IonQ provide a more expressive gateset for programming. However, not all gates supported by the OpenQASM 3 standard library
are accepted by IonQ backends. See full list of [supported gates](https://docs.ionq.com/api-reference/v0.3/writing-quantum-programs#supported-gates).
You can also view a list of the OpenQASM gates supported by a given device directly from an `IonQDevice`. For example:
```python theme={"dark"}
device = provider.get_device("qpu.forte-1")
print(device.profile.basis_gates)
```
Which would return:
```bash theme={"dark"}
{'swap', 'tdg', 't', 'gpi2', 'gpi', 'rz', 'sx', 'z', 's', 'sdg', 'zz', 'cx', 'rx', 'y', 'h', 'ry', 'x', 'sxdg'}
```
Note: the returned gateset includes both the abstract QIS and IonQ-native gates supported by the device; however, circuits must be constructed
using either exclusively QIS gates or exclusively native gates—you cannot mix the two within a single circuit. In the next section, we’ll
explore using IonQ native gates in greater detail.
## Native Gates
Building and submitting circuits using IonQ's hardware-native gateset enables you to bypass our compiler and optimizer, providing more control
and transparency than the default abstract gateset (though often at the cost of performance and convenience).
Before working with native gates in qBraid, we recommend reviewing our guides on [Getting Started with Native Gates](https://docs.ionq.com/guides/getting-started-with-native-gates)
and the [IonQ Native Gates API](https://docs.ionq.com/api-reference/v0.3/native-gates-api).
This is an advanced-level feature. Using the hardware-native gate interface
without a thorough understanding of quantum circuits is likely to result in
less-optimal circuit structure and worse algorithmic performance overall than
using our abstract gate interface.
IonQ's native gates are incorporated as a natural extension of the OpenQASM standard library within the `qbraid[ionq]` runtime integration.
qBraid supports the following IonQ native gates:
* `gpi(phi)`
* `gpi2(phi)`
* `ms(phi0, phi1, theta=0.25)` for Aria systems
* `zz(theta)` for Forte systems
For more details about these gate definitions and parameters, refer to the [native gates guide](https://docs.ionq.com/guides/getting-started-with-native-gates#introducing-the-native-gates).
The parameters in the IonQ native gate specification are always defined in
*turns*, not in radians. One turn is 2π radians.
Native gate circuits can then be built and executed as follows:
```python theme={"dark"}
from qbraid.runtime import IonQProvider
provider = IonQProvider(api_key="YOUR_API_KEY")
device = provider.get_device("simulator")
qasm = """
OPENQASM 3.0;
qubit[3] q;
gpi(0.5) q[0];
gpi2(0) q[1];
ms(0,0.5) q[1], q[2];
"""
job = device.run(qasm, shots=1000)
```
Each quantum circuit submitted to the IonQ Cloud must use a consistent gateset
throughout--you cannot mix and match native gates and abstract gates in the
same circuit.
The `qbraid[ionq]` runtime integration does not currently support automatic transpilation from abstract to native gates, but we may add this
capability in the future. For now, we recommend following this general procedure (also described in IonQ's main [native gates guide](https://docs.ionq.com/guides/getting-started-with-native-gates#converting-to-native-gates))
or using a different SDK.
***
## Additional resources
*Great work!* You successfully ran your first quantum circuits - *what next?*
Explore more resources for using qBraid:
* [API Reference](https://qbraid.github.io/qBraid/)
* [Source Code on GitHub](https://github.com/qBraid/qBraid)
* [Example Notebooks on GitHub](https://github.com/qBraid/qbraid-lab-demo)
Find examples for using IonQ systems with other quantum programming libraries:
* [IonQ Runtime Provider Notebook on GitHub](https://github.com/qBraid/qbraid-lab-demo/blob/main/Provider-Jobs/qbraid_runtime_ionq_provider.ipynb)
* [IonQ Samples Library on GitHub](https://github.com/ionq-samples/getting-started)
# QbraidProvider
Source: https://docs.qbraid.com/v2/sdk/user-guide/providers/native
Runtime integration for streamlined access to quantum devices supported by qBraid.
API Reference:
[qbraid.runtime.native](https://qbraid.github.io/qBraid/stubs/qbraid.runtime.native.html)
## Installation & Setup
To interface with the qBraid QIR simulator or any of the 10+ quantum devices supported by qBraid's managed access,
install the relevant `qbraid` runtime extra(s) based on your device(s) of choice:
```bash theme={"dark"}
pip install qbraid
```
qbraid versions \<0.11 are *not* compatible with qBraid API V2. See [migration guide](/v2/api-reference/rest/migration).
To ensure compatibility with the new platform, use **qbraid** ≥ 0.11.0.
Next, obtain your qBraid API key:
1. Login or create an account at [account.qbraid.com](https://account.qbraid.com/).
2. Navigate to **Account** > **API Keys** in the left-sidebar, and then click "Create API Key".
See also: [Account - API Keys](/v2/account/api-keys)
### Save account to disk
Once you have your API key, you can save it locally in a configuration file `~/.qbraid/qbraidrc`,
where `~` corresponds to your home (`$HOME`) directory:
Account credentials are saved in plain text, so only do so if you are using a
trusted device.
```python theme={"dark"}
from qbraid.runtime import QbraidProvider
provider = QbraidProvider(api_key='API_KEY')
provider.save_config()
```
Once the account is saved on disk, you can instantiate the provider without any arguments:
```python theme={"dark"}
provider = QbraidProvider()
```
### Load account from environment variables
Alternatively, the qBraid-SDK can discover credentials from environment variables:
```bash theme={"dark"}
export QBRAID_API_KEY='QBRAID_API_KEY'
```
## Basic Usage
Given a device "QRN" (qBraid Resource Name), a `QbraidDevice` object can be created as follows:
```python theme={"dark"}
from qbraid import QbraidProvider
provider = QbraidProvider()
provider.get_devices()
# []
device = provider.get_device('qbraid:qbraid:sim:qir-sv')
type(device)
#
```
From here, class methods are available to get information about the device, execute quantum programs,
access the wrapped device object directly, and more.
```python theme={"dark"}
device.metadata()
# {'device_id': 'qbraid:qbraid:sim:qir-sv',
# 'device_type': 'SIMULATOR',
# 'num_qubits': 30,
# 'status': 'ONLINE',
# 'queue_depth': 0}
```
Then you can submit quantum jobs to the device.
```python theme={"dark"}
run_input = [qiskit_circuit, braket_circuit, cirq_circuit, qasm3_str]
jobs = device.run(run_input, shots=100)
results = [job.result() for job in jobs]
print(results[0].data.get_counts())
# {'00': 50, '01': 2, '10': 47, '11': 1}
```
See how to visualize these results in the [Visualization](/v2/sdk/user-guide/visualization#plot-experimental-results) section.
## Runtime Options
When submitting jobs through the `QbraidProvider`, you can pass provider-specific options using
the `runtime_options` keyword argument. These options are forwarded directly to the underlying
cloud provider's submission API, giving you access to device-specific features without
needing to configure provider credentials yourself.
```python theme={"dark"}
job = device.run(circuit, shots=100, runtime_options={"key": "value"})
```
The `runtime_options` dictionary is passed through as-is to the provider backend:
* **Amazon Braket** devices: options are unpacked as keyword arguments to the Braket `device.run()` call
* **Azure Quantum** devices: options are passed as `input_params` to the Azure `device.run()` or `device.submit()` call
* **qBraid** devices: options are merged into the job submission payload
### qBraid Simulator Examples
Pass a `seed` to make a simulation reproducible. Two runs of the same circuit with the same
seed return identical measurement counts:
```python theme={"dark"}
device = provider.get_device("qbraid:qbraid:sim:qir-sv")
job = device.run(circuit, shots=100, runtime_options={"seed": 42})
print(job.result().data.get_counts())
# {'00': 48, '11': 52}
```
Submitting the same circuit again with `"seed": 42` returns those same counts. Change the
seed, or leave it out, and the simulator draws a fresh sample on every run.
This is useful for tutorials and course material where the output in the text should match
what the reader sees, for regression tests that assert on exact counts, and for sharing a
result someone else can reproduce.
### Amazon Braket Examples
Enable experimental capabilities on supported devices:
```python theme={"dark"}
device = provider.get_device("aws:quera:qpu:aquila")
job = device.run(
program,
shots=1000,
runtime_options={"experimental_capabilities": "ALL"},
)
```
Disable qubit rewiring for verbatim compilation on Rigetti:
```python theme={"dark"}
device = provider.get_device("aws:rigetti:qpu:cepheus-1-108q")
job = device.run(
circuit,
shots=1000,
runtime_options={"disable_qubit_rewiring": True},
)
```
See [BraketProvider - Runtime Options](/v2/sdk/user-guide/providers/aws#runtime-options) for the full list of supported options.
### Azure Quantum Examples
Use the stabilizer simulator on Quantinuum emulators:
```python theme={"dark"}
device = provider.get_device("azure:quantinuum:sim:h2-1e")
job = device.run(
circuit,
shots=100,
runtime_options={"simulator": "stabilizer"},
)
```
Disable noise model and compiler optimization:
```python theme={"dark"}
job = device.run(
circuit,
shots=100,
runtime_options={"error-model": False, "no-opt": True},
)
```
See [AzureQuantumProvider - Runtime Options](/v2/sdk/user-guide/providers/azure#runtime-options) for provider-specific options.
### IonQ Examples
Run with a hardware noise profile on the IonQ simulator:
```python theme={"dark"}
device = provider.get_device("ionq:ionq:sim:simulator")
job = device.run(
circuit,
shots=1000,
runtime_options={"noise": {"model": "aria-1", "seed": 42}},
)
```
"Noise" options include: `ideal`, `harmony`, `harmony-1`, `harmony-2`, `aria-1`, `aria-2`, `forte-1`, `forte-enterprise-1`
## Next Steps
See [Job Execution](/v2/sdk/user-guide/providers/native/jobs) for single job submission, group jobs, and cross-device workflows.
# Device calibrations and connectivity
Source: https://docs.qbraid.com/v2/sdk/user-guide/providers/native/calibrations
Fetch live coupling maps and calibration data for QPUs on qBraid, plot connectivity graphs, and use the data to place circuits on the best-calibrated qubits before submitting.
Requires the latest `qbraid` pre-release: `pip install --upgrade --pre
qbraid`. Calibration data is refreshed from each hardware provider roughly
hourly.
Superconducting QPUs are not uniform: qubits differ in readout fidelity, and
two-qubit gates only exist between physically coupled pairs, each with its own
error rate. The [QbraidProvider](/v2/sdk/user-guide/providers/native) exposes
both facts programmatically, so you can inspect a device before you submit to
it, and place your circuit on the qubits where it will perform best.
## Fetching calibration data
Every `QbraidDevice` has two entry points:
```python theme={"dark"}
from qbraid.runtime import QbraidProvider
provider = QbraidProvider()
device = provider.get_device("rigetti:rigetti:qpu:cepheus-1-108q")
device.coupling_map
# ((0, 1), (0, 9), (1, 2), (1, 10), (2, 3), ...) 193 physical qubit pairs
calibration = device.get_calibrations()
calibration.last_calibrated
# '2026-07-21T20:05:45+00:00'
```
`coupling_map` is the device's physical connectivity: sorted, deduplicated
`(source, target)` qubit pairs, derived from the calibrated two-qubit gate
edges. It is cached on the device instance, since hardware topology does not
change between calibrations.
`get_calibrations()` returns the full live snapshot and always fetches fresh
data. The two most useful fields:
```python theme={"dark"}
# Per-edge two-qubit gate error, keyed by gate name
calibration.edges["gateError"]["cz"][0]
# EdgeEntry(source=0, target=1, value=0.0246)
# Per-qubit metrics
calibration.qubits["0"]
# QubitCalibration(readout_error=0.04, gate_error={'rb': 0.0019}, ...)
```
Both return `None` for devices without published calibration data, such as
simulators.
### Devices with calibration data
| Physical device | Qubits | Edges | Example device IDs |
| ---------------------- | ------ | ----- | ---------------------------------------------------------------------- |
| Rigetti Cepheus-1-108Q | 107 | 193 | `rigetti:rigetti:qpu:cepheus-1-108q`, `aws:rigetti:qpu:cepheus-1-108q` |
| IQM Garnet | 20 | 30 | `aws:iqm:qpu:garnet` |
| IQM Emerald | 54 | 85 | `aws:iqm:qpu:emerald` |
| AQT Ibex-Q1 | 12 | 0 | `aws:aqt:qpu:ibex-q1` |
All device IDs that map to the same physical hardware share one calibration
snapshot, so `rigetti:rigetti:qpu:cepheus-1-108q` and
`aws:rigetti:qpu:cepheus-1-108q` return identical data.
A device can have calibration data with an empty edge list. AQT's Ibex-Q1 is a
trapped-ion system with all-to-all connectivity, so there are no discrete
coupling edges to report: `coupling_map` returns an empty tuple, not `None`.
For IonQ trapped-ion devices, see `device.profile.characterization` instead.
You can also query the underlying REST endpoint directly, which works for any
device ID including those not available for direct submission:
```bash theme={"dark"}
curl -H "X-API-Key: $QBRAID_API_KEY" \
https://api.qbraid.com/api/v1/devices/rigetti:rigetti:qpu:cepheus-1-108q/calibrations
```
## Plotting the connectivity graph
The `qbraid.visualization` module renders the graph in one call, colored by
live calibration data. Edges are colored by two-qubit gate error and nodes by
readout error, on a single-hue scale where darker is better, matching the
topology view in qBraid Lab:
```python theme={"dark"}
from qbraid.visualization import plot_connectivity_graph
plot_connectivity_graph(device)
```
The dotted outline is a qubit in the lattice footprint with no working
couplings. Light qubits and edges are the ones to avoid.
The layout comes from the device document's `topology` config, so square
lattices (Rigetti) and clipped lattices (IQM) both render their true physical
geometry; devices without a lattice config fall back to a force-directed
layout. To build a custom plot, the `lattice_positions` helper maps qubit ids
to grid coordinates from the same config:
```python theme={"dark"}
from qbraid.visualization import lattice_positions
topology = device.client.get_device(device.id).topology
# {'type': 'square-lattice', 'rows': 12, 'cols': 9}
positions = lattice_positions(topology, range(108))
# {0: (0, 0), 1: (1, 0), ..., 107: (8, -11)}
```
The same call works unchanged on any device with calibration data. IQM's
Garnet renders its clipped diamond lattice:
```python theme={"dark"}
garnet = provider.get_device("aws:iqm:qpu:garnet")
plot_connectivity_graph(garnet)
```
## Choosing the best qubits
With the calibration data in hand, qubit selection becomes a graph problem.
Build a weighted graph from the coupling map, then the single best-calibrated
pair is one line:
```python theme={"dark"}
import networkx as nx
calibration = device.get_calibrations()
edge_error = {
(e.source, e.target): e.value
for e in calibration.edges["gateError"]["cz"]
}
graph = nx.Graph()
for q0, q1 in device.coupling_map:
graph.add_edge(q0, q1, error=edge_error.get((q0, q1), edge_error.get((q1, q0))))
```
```python theme={"dark"}
best_edge = min(edge_error, key=edge_error.get)
# (88, 89), CZ error 0.0037 -- 2.3x better than the device median
```
The lowest CZ error is not always the best place to run. Readout error varies
by an order of magnitude across the lattice, and on some snapshots the best-CZ
edge sits on a qubit with weak readout. For two-qubit circuits, score edges on
the product of CZ, readout, and single-qubit fidelities; see [Scoring
edges](/v2/sdk/user-guide/providers/native/rigetti#scoring-edges) for a worked
example where the two rankings disagree on hardware.
For a linear circuit on `n` qubits, search for the connected chain that
minimizes the summed two-qubit error:
```python theme={"dark"}
def best_chain(graph, length):
"""Find the simple path of `length` qubits minimizing summed edge error."""
best = (float("inf"), None)
def extend(path, total):
nonlocal best
if total >= best[0]:
return
if len(path) == length:
best = (total, list(path))
return
for nbr in graph.neighbors(path[-1]):
if nbr not in path:
path.append(nbr)
extend(path, total + graph.edges[path[-2], nbr]["error"])
path.pop()
for start in graph.nodes:
extend([start], 0.0)
return best
total, chain = best_chain(graph, 5)
# chain = [88, 89, 98, 97, 96], summed CZ error 0.0214
```
Calibrations shift with every refresh, so re-run the selection shortly before
you submit. The best chain this hour is not always the best chain tonight.
## Running on the qubits you chose
### Rigetti direct: hand-placed native gates
On the [Rigetti direct path](/v2/sdk/user-guide/providers/native/rigetti),
programs that bypass quilc must already use
[native gates](/v2/sdk/user-guide/providers/native/rigetti#native-gates) on
physical qubits, which is exactly what the coupling map enables. A Bell pair
on the best-calibrated edge:
```python theme={"dark"}
import pyquil
q0, q1 = best_edge # (88, 89)
program = pyquil.Program(f"""
DECLARE ro BIT[2]
RX(pi/2) {q0}
RX(pi/2) {q1}
CZ {q0} {q1}
RX(-pi/2) {q1}
MEASURE {q0} ro[0]
MEASURE {q1} ro[1]
""")
job = device.run(program, shots=100)
job.wait_for_final_state()
job.result().data.get_counts()
# {'00': 44, '11': 44, '01': 7, '10': 5} -- run on Cepheus-1-108Q, 2026-07-21
```
The correlated outcomes (`00` and `11`) came back at 88 percent on hardware,
consistent with the roughly 0.4 percent CZ error and few-percent readout error
of the chosen pair.
This program contains no timing instruction, so it takes the **compiled**
path. The placement survives because its qubits already fit the topology,
which makes quilc default to identity (`NAIVE`) rewiring; quilc is not
obligated to keep it in general. To make placement a guarantee rather than a
default, add a clock-aligned delay to take the direct path, or pin the
compiled path with `PRAGMA INITIAL_REWIRING "NAIVE"`. See [Pinning the
circuit](/v2/sdk/user-guide/providers/native/rigetti#pinning-the-circuit).
### Qiskit: constrain transpilation to the real topology
If you would rather let a transpiler do the routing, feed the coupling map to
Qiskit and pin your circuit to the chain you selected. This works for any
gate-model device on qBraid:
```python theme={"dark"}
from qiskit import QuantumCircuit, transpile
from qiskit.transpiler import CouplingMap
ghz = QuantumCircuit(5, 5)
ghz.h(0)
for i in range(4):
ghz.cx(i, i + 1)
ghz.measure(range(5), range(5))
coupling = CouplingMap(
[list(edge) for edge in garnet.coupling_map]
+ [[b, a] for a, b in garnet.coupling_map]
)
total, chain = best_chain(garnet_graph, 5) # [6, 11, 16, 15, 10] on Garnet
transpiled = transpile(
ghz,
coupling_map=coupling,
initial_layout=chain,
basis_gates=["r", "cz"],
optimization_level=3,
)
job = garnet.run(transpiled, shots=1000)
```
Every two-qubit gate in the transpiled circuit now acts on a physically
coupled, well-calibrated pair, and no SWAP overhead is silently inserted for
qubits you did not choose.
Transpile against the coupling map of the exact device ID you will submit to.
Vendor-routed and direct device IDs share hardware and calibrations, but a
circuit laid out for one device will not fit another.
## Related links
* [QbraidProvider](/v2/sdk/user-guide/providers/native): setup and credentials
* [Rigetti Cepheus-1-108Q](/v2/sdk/user-guide/providers/native/rigetti): native
gates, Quil-T timing, and the two compilation paths
* [Job execution](/v2/sdk/user-guide/providers/native/jobs): single, batch, and
group submission
* [Visualization](/v2/sdk/user-guide/visualization): histograms and other
built-in plotting utilities
# Job Execution
Source: https://docs.qbraid.com/v2/sdk/user-guide/providers/native/jobs
Submit single quantum jobs, batch multiple circuits to one device, or group jobs across providers.
API Reference:
[qbraid.runtime.native](https://qbraid.github.io/qBraid/stubs/qbraid.runtime.native.html)
This page covers how to submit quantum jobs through the `QbraidProvider` — from single
one-off submissions, to batching multiple circuits in a single job, to grouped workflows
that span multiple devices and providers.
For provider setup and authentication, see [QbraidProvider - Usage](/v2/sdk/user-guide/providers/native).
## Single Job Submission
Submit a quantum program to any qBraid-supported device and retrieve results:
```python theme={"dark"}
from qbraid.runtime import QbraidProvider
provider = QbraidProvider()
device = provider.get_device("qbraid:qbraid:sim:qir-sv")
# Define a quantum program (QASM, Qiskit, Cirq, Braket, etc.)
bell = """
OPENQASM 3.0;
include "stdgates.inc";
qubit[2] q;
bit[2] c;
h q[0];
cx q[0], q[1];
c = measure q;
"""
# Submit and wait for results
job = device.run(bell, shots=100)
result = job.result()
print(result.data.get_counts())
# {'00': 52, '11': 48}
```
For async applications, you can use [`async_result()`](/v2/sdk/user-guide/overview#async-results) to await job completion without blocking the event loop:
```python theme={"dark"}
result = await job.async_result(timeout=120, poll_interval=5)
print(result.data.get_counts())
```
You can also submit multiple programs at once — each is executed as a separate job:
```python theme={"dark"}
programs = [bell_circuit, ghz_circuit, qft_circuit]
jobs = device.run(programs, shots=100)
results = [job.result() for job in jobs]
```
## Group Jobs
### Why Group?
When running related quantum experiments — parameter sweeps, algorithm comparisons,
cross-device benchmarks — you often end up with many independent jobs that are logically
part of the same workflow. Without grouping, these jobs are scattered across your job history
with no way to track or retrieve them together.
**`GroupJobSession`** solves this by grouping any number of jobs under a single group ID.
Key benefits:
* **Cross-device, cross-provider**: submit jobs to different backends (AWS SV1, IonQ, qBraid simulators) within the same group
* **Unified tracking**: all jobs share a group QRN visible in the qBraid dashboard
* **Aggregated results**: retrieve all results at once with `group.results()`
* **Lifecycle management**: auto-close with TTL, cancellation, completion callbacks
### Context Manager
The simplest way to use group jobs. All jobs submitted inside the `with` block are
automatically tagged with the group ID. The group closes when the block exits.
```python theme={"dark"}
from qbraid.runtime import GroupJobSession, QbraidProvider
provider = QbraidProvider()
bell = """
OPENQASM 3.0;
include "stdgates.inc";
qubit[2] q;
bit[2] c;
h q[0];
cx q[0], q[1];
c = measure q;
"""
# All jobs inside this block belong to the same group
with GroupJobSession(name="Bell State Sweep") as group:
# Submit to different devices within the same group
sv1 = provider.get_device("aws:aws:sim:sv1")
job1 = sv1.run(bell, shots=100)
tn1 = provider.get_device("aws:aws:sim:tn1")
job2 = tn1.run(bell, shots=100)
print(f"Group ID: {group.group_id}")
print(f"Jobs in group: {len(group.jobs)}")
# Group ID: group:abc-123456
# Jobs in group: 2
```
### Manual Open / Close
For interactive workflows like Jupyter notebooks, you can open and close the group
manually across multiple cells.
```python theme={"dark"}
from qbraid.runtime import GroupJobSession, QbraidProvider
provider = QbraidProvider()
# Create and open the group manually
group = GroupJobSession(name="Notebook Experiment")
group.open()
# Cell 2: submit jobs (can be in separate notebook cells)
device = provider.get_device("qbraid:qbraid:sim:qir-sv")
job1 = device.run(circuit_1, shots=100)
job2 = device.run(circuit_2, shots=100)
# Cell 3: close when done submitting
group.close()
```
### Auto-Close with TTL
Set a time-to-live so the group automatically closes after a duration, even if you
forget to call `close()` or your kernel crashes. Defaults to 1 hour (3600s) if not specified.
```python theme={"dark"}
# Group auto-closes after 60 seconds (default: 3600s / 1 hour)
with GroupJobSession(name="Quick Sweep", max_ttl=60) as group:
device = provider.get_device("aws:aws:sim:sv1")
job = device.run(bell, shots=10)
print(f"TTL: {group.max_ttl}s")
```
The `max_ttl` parameter accepts values from 1 to 86400 seconds (24 hours). If
not specified, the backend defaults to 3600 seconds (1 hour).
### Retrieving Results
After closing a group, retrieve all job results at once. `group.results()` blocks until
every job reaches a terminal state (completed, failed, or cancelled).
```python Submission theme={"dark"}
with GroupJobSession(name="Result Demo") as group:
device = provider.get_device("qbraid:qbraid:sim:qir-sv")
job1 = device.run(bell, shots=100)
job2 = device.run(bell, shots=100)
# Wait for all jobs and collect results
results = group.results(timeout=300)
print(results)
for job_id, result in results.results.items():
print(f"{job_id}: {result.data.get_counts()}")
```
```text Results theme={"dark"}
GroupResult(group_id='group:ghi-345678', total=2, successful=2, failed=0)
job:aaa-111: {'00': 48, '11': 52}
job:bbb-222: {'00': 51, '11': 49}
```
You can also filter results by outcome:
```python theme={"dark"}
# Only successful results
successful = results.successful()
# Only failed results
failed = results.failed()
```
### Completion Callback
Register a callback that fires automatically when all jobs complete. The callback
runs at context exit, after the group is closed.
```python Callback Setup theme={"dark"}
def analyze(results):
"""Process results when all jobs finish."""
for job_id, result in results.items():
counts = result.data.get_counts()
print(f"{job_id}: {counts}")
with GroupJobSession(name="With Callback") as group:
device = provider.get_device("qbraid:qbraid:sim:qir-sv")
device.run(bell, shots=100)
device.run(bell, shots=100)
# Callback fires automatically when the context exits
group.on_all_complete(analyze, timeout=600)
```
```text Callback Output theme={"dark"}
job:ccc-333: {'00': 47, '11': 53}
job:ddd-444: {'00': 50, '11': 50}
```
### Cancellation
Cancel a group and all its non-terminal jobs:
```python theme={"dark"}
group = GroupJobSession(name="Cancellable")
group.open()
device = provider.get_device("aws:aws:sim:sv1")
job1 = device.run(bell, shots=1000)
job2 = device.run(bell, shots=1000)
# Cancel the entire group and reset the session
group.cancel()
print(group.status())
# GroupStatus.CANCELLED
```
## Batch Jobs
Submit multiple circuits as a **single job** to a device that supports batched execution.
Unlike [group jobs](#group-jobs), which coordinate independent jobs across devices, batch
jobs send all circuits in one request and return a unified result.
### Submitting a Batch
Pass a list of programs with `as_batch=True` to submit them as a single job:
```python theme={"dark"}
from qiskit import QuantumCircuit
from qbraid.runtime import QbraidProvider
provider = QbraidProvider()
device = provider.get_device("qbraid:equal1:sim:bell-1")
# Define multiple circuits
bell = QuantumCircuit(2, 2)
bell.h(0)
bell.cx(0, 1)
bell.measure([0, 1], [0, 1])
ghz = QuantumCircuit(3, 3)
ghz.h(0)
ghz.cx(0, 1)
ghz.cx(1, 2)
ghz.measure([0, 1, 2], [0, 1, 2])
x_gate = QuantumCircuit(1, 1)
x_gate.x(0)
x_gate.measure(0, 0)
# Submit all three circuits as a single batch job
job = device.run([bell, ghz, x_gate], shots=1000, as_batch=True)
print(type(job))
#
```
A batch submission returns a single `QbraidJob`, not a list. All circuits share the same
job ID, device, and shot count.
`as_batch=True` requires a device that supports batch execution. You can check
this via the device profile's `batch_job_support` flag. Passing
`as_batch=True` to an unsupported device raises a `ValueError`.
### Retrieving Batch Results
Calling `job.result()` on a batch job returns a `BatchResult` object:
```python Retrieval theme={"dark"}
result = job.result()
print(type(result))
print(result.num_circuits)
```
```text Output theme={"dark"}
3
```
`BatchResult` provides two ways to access measurement data:
**Aggregate access** — indexed by circuit position:
```python Aggregate theme={"dark"}
# All circuit counts as a list
all_counts = result.data.get_counts()
for i, counts in enumerate(all_counts):
print(f"Circuit {i}: {counts}")
```
```text Output theme={"dark"}
Circuit 0: {'00': 512, '11': 488}
Circuit 1: {'000': 498, '111': 502}
Circuit 2: {'1': 1000}
```
**Per-circuit access** — each circuit's `Result` is a full object with its own status and metadata:
```python Per-Circuit theme={"dark"}
for i, circuit_result in enumerate(result.results):
print(f"Circuit {i}: status={circuit_result.success}, counts={circuit_result.data.get_counts()}")
```
```text Output theme={"dark"}
Circuit 0: status=True, counts={'00': 512, '11': 488}
Circuit 1: status=True, counts={'000': 498, '111': 502}
Circuit 2: status=True, counts={'1': 1000}
```
### BatchResult Properties
| Property | Type | Description |
| -------------- | -------------- | ----------------------------------------------------------------------- |
| `num_circuits` | `int` | Number of circuits in the batch |
| `results` | `list[Result]` | Per-circuit `Result` objects |
| `data` | `ResultData` | Aggregated data — `get_counts()` and `get_probabilities()` return lists |
| `details` | `list[dict]` | Per-circuit metadata (e.g. `compiledOutput`) |
| `success` | `bool` | Whether the overall job completed successfully |
| `device_id` | `str` | Device QRN |
| `job_id` | `str` | Job QRN |
### Per-Circuit Error Handling
In a batch job, individual circuits can fail while others succeed. Failed circuits
carry their own error message, accessible through their per-circuit result:
```python theme={"dark"}
result = job.result()
for i, circuit_result in enumerate(result.results):
if not circuit_result.success:
print(f"Circuit {i} failed: {circuit_result.details.get('statusMsg')}")
else:
print(f"Circuit {i}: {circuit_result.data.get_counts()}")
```
### Batch Jobs vs Group Jobs
| | Batch Jobs | Group Jobs |
| --------------------- | ----------------------------------------------- | ------------------------------------ |
| **Scope** | Multiple circuits, one device | Multiple jobs, any device |
| **Submission** | `device.run(programs, as_batch=True)` | `GroupJobSession` context |
| **Return type** | Single `QbraidJob` → `BatchResult` | Multiple `QbraidJob` → `GroupResult` |
| **Use case** | Parameterized circuits, algorithm variants | Cross-device benchmarks, sweeps |
| **Supported devices** | Devices with `device.profile.batch_job_support` | All devices |
# Rigetti Cepheus-1-108Q
Source: https://docs.qbraid.com/v2/sdk/user-guide/providers/native/rigetti
Submitting gate-model and timing-aware programs to Rigetti's Cepheus-1-108Q through the QbraidProvider, from any qBraid-supported framework.
Device ID: `rigetti:rigetti:qpu:cepheus-1-108q` · 108 qubits
· superconducting · accessed through
[`QbraidProvider`](/v2/sdk/user-guide/providers/native)
Cepheus-1-108Q is Rigetti's 108-qubit superconducting processor, available on qBraid with no
Rigetti account of your own. You write a circuit in whichever framework you already use, hand it
to `device.run()`, and qBraid handles conversion, compilation, submission and results.
This page covers the one thing about Cepheus that surprises people: **it has two different
compilation paths, and which one your program takes depends on whether it contains timing
instructions.** Everything else follows from that.
This is the **direct** Rigetti device, billed per minute of execution. Cepheus-1-108Q is also
offered through Amazon Braket (`aws:rigetti:qpu:cepheus-1-108q`), which is billed per task +
per shot and has different compilation behavior. If you are working with delays or other
timing operations, you want the direct device documented here, since Braket has no gate-level delay.
For direct QCS access using your own Rigetti credentials, see
[RigettiProvider](/v2/sdk/user-guide/providers/rigetti) instead.
## Quick start
A plain gate-model circuit needs nothing special. Write it however you like and submit:
```python theme={"dark"}
from qbraid.runtime import QbraidProvider
from qiskit import QuantumCircuit
provider = QbraidProvider()
device = provider.get_device("rigetti:rigetti:qpu:cepheus-1-108q")
circuit = QuantumCircuit(2, 2)
circuit.h(0)
circuit.cx(0, 1)
circuit.measure([0, 1], [0, 1])
job = device.run(circuit, shots=10)
job.wait_for_final_state()
print(job.result().data.get_counts())
# {'00': 2, '01': 1, '11': 7}
```
`H` and `CX` are not gates Cepheus can execute. You did not have to care, because this program
took the **compiled path**.
## The two compilation paths
Whether your program is compiled for you, or has to arrive ready to run, depends entirely on
whether it contains **Quil-T** instructions: Rigetti's timing and pulse-level operations, of
which `DELAY` is the one most people meet first.
| Your program | Path | Compiler | You must write |
| :------------------------------------------- | :----------- | :------------------------------------------------------- | :-------------------- |
| Gates only | **compiled** | [quilc](https://github.com/quil-lang/quilc) nativizes it | any gates you like |
| Contains a delay or other Quil-T instruction | **direct** | quilc is skipped | **native gates only** |
The reason is not a qBraid limitation. quilc is a gate-model compiler, and as Rigetti's docs put
it plainly:
> Quil-T instructions are not supported by quilc or the QVM.
So a program containing `DELAY` cannot go through quilc at all. qBraid detects Quil-T
automatically and routes such programs straight to the QCS translation service, which does accept
timing instructions. Nothing is dropped and you do not set a flag. But because quilc is what
would normally have nativized your gates, **that job is now yours**.
If a program contains a delay and uses a non-native gate, it fails at translation. Rigetti
names the instruction it could not execute:
```
Translation failed for quantum processor 'Cepheus-1-108Q': ... message:
"input program error: Failed to schedule Quil program: at instruction 0 ("X 0"):
this instruction must be replaced or decomposed prior to compilation"
```
This is the single most common error on this device: your timing program reached the QPU with a
gate it cannot execute, here `X 0`. See [Native gates](#native-gates) below.
## Native gates
When you take the direct path, these are the only instructions Cepheus-1-108Q accepts. The set
comes from the device's own ISA:
| Instruction | Accepts | Notes |
| :---------- | :------------------- | :---------------------------------- |
| `RX(θ)` | **only ±π/2 and ±π** | any other angle has no calibration |
| `RZ(θ)` | **any angle** | parametric, so no angle restriction |
| `CZ` | — | the only two-qubit gate |
| `I` | — | identity |
| `MEASURE` | — | readout |
The `RX` restriction is the one that catches people, and it follows from the calibrations: Rigetti
publishes `DEFCAL`s for `RX` at exactly four angles (`±π/2` and `±π`), while `RZ` is defined
parametrically (`DEFCAL RZ(%theta)`) and so takes any angle. A pulse only exists for those `RX`
angles, which is why `RX(0)`, `RX(2π)` and `RX(π/4)` are rejected.
`RX(π)` is an `X`; `RX(π/2)` is a half rotation. Arbitrary single-qubit rotations are built from
these plus `RZ`, which is exactly the decomposition quilc performs for you on the compiled path.
Reaching for `X`? Use `RX(π)`: same operation, and it is native:
```python theme={"dark"}
circuit.rx(np.pi, 0) # native
circuit.x(0) # NOT native: fails at translation if the program has a delay
```
### Nativizing a Qiskit circuit automatically
For anything beyond a few gates, let Qiskit do the decomposition. The basis
choice is the whole trick: use `["rz", "sx", "x", "cz"]`, because `sx` and `x`
map exactly onto the calibrated `RX(π/2)` and `RX(π)` pulses. The seemingly
natural `["rx", "rz", "cz"]` basis does not work, since Qiskit then emits
`RX` at arbitrary angles, which the QPU rejects. Delays pass through
transpilation untouched:
```python theme={"dark"}
from qiskit import QuantumCircuit, transpile
qc = QuantumCircuit(2, 2)
qc.h(0)
qc.cx(0, 1)
qc.delay(50, 0, unit="us")
qc.ry(0.7, 1)
qc.measure([0, 1], [0, 1])
native = transpile(qc, basis_gates=["rz", "sx", "x", "cz"], optimization_level=3)
job = device.run(native, shots=100) # conversion to Quil happens automatically
```
Every gate in the transpiled circuit now lands on a calibrated pulse, so the
program passes translation on the direct path with the delay intact. To
inspect the exact Quil that will run, convert it yourself first:
`qbraid.transpile(native, "pyquil")`.
## Choosing qubits with calibration data
Cepheus is not uniform. On a recent calibration snapshot, two-qubit CZ error ranged from 0.4% on
the best edge to 50% on the worst, and readout error varied by an order of magnitude across the
lattice. Which physical qubits your program lands on is worth controlling, and the
[calibrations API](/v2/sdk/user-guide/providers/native/calibrations) provides the data to control
it with.
What happens to the qubit indices you wrote depends, once again, on the compilation path:
* **Compiled path:** quilc is free to move your circuit. If the indices you wrote already satisfy
the device's connectivity, quilc's default is `NAIVE` rewiring, which keeps them where they
are. If they do not, it falls back to `PARTIAL` rewiring, which chooses a placement using the
gate fidelities Rigetti publishes in the device ISA. An unpinned circuit therefore already gets
fidelity-aware placement; manual selection is for when you want it deterministic, or want to
fold in metrics quilc does not weigh the way you do.
* **Direct path:** no rewiring of any kind. A Quil-T program executes on exactly the physical
qubits it names, which makes it the strongest placement guarantee available.
### Scoring edges
`device.get_calibrations()` reports readout error and single-qubit randomized-benchmarking error
per qubit, plus two-qubit gate error per edge. Fold all three into the score, because the edge
with the lowest CZ error is often not the best place to run:
```python theme={"dark"}
calibration = device.get_calibrations()
qubits = calibration.qubits
def score(edge):
"""Estimated success probability of a two-qubit circuit on this edge."""
a, b = qubits[str(edge.source)], qubits[str(edge.target)]
return (
(1 - edge.value)
* (1 - a.readout_error) * (1 - b.readout_error)
* (1 - a.gate_error["rb"]) ** 4 * (1 - b.gate_error["rb"]) ** 4
)
best = max(calibration.edges["gateError"]["cz"], key=score)
q0, q1 = best.source, best.target
```
On the snapshot used for the run below, the readout-aware score mattered: the edge with the
lowest raw CZ error (0.40%) sat on a qubit with weak readout, and the score selected a different
edge, (92, 101), with a slightly higher CZ error (0.89%) but readout errors of 1.4% and 1.0%. For
chains longer than a pair, and for plotting the graph you are choosing from, see
[Choosing the best qubits](/v2/sdk/user-guide/providers/native/calibrations#choosing-the-best-qubits).
### Pinning the circuit
Three ways to make the placement stick, in decreasing order of guarantee:
```python pyQuil, direct path theme={"dark"}
# A clock-aligned DELAY makes this Quil-T, so quilc is bypassed and the
# program runs on exactly the qubits it names. Native gates required.
from pyquil import Program
program = Program(f"""DECLARE ro BIT[2]
RZ(pi/2) {q0}
RX(pi/2) {q0}
RZ(pi/2) {q0}
RZ(pi/2) {q1}
RX(pi/2) {q1}
RZ(pi/2) {q1}
CZ {q0} {q1}
RZ(pi/2) {q1}
RX(pi/2) {q1}
RZ(pi/2) {q1}
DELAY {q1} 3.2e-8
MEASURE {q0} ro[0]
MEASURE {q1} ro[1]
""")
job = device.run(program, shots=1000)
```
```python Qiskit, direct path theme={"dark"}
# Physical indices survive conversion when the circuit has a single
# register: qubit i maps to physical qubit i. The 32 ns delay makes the
# converted program Quil-T, same guarantee as the pyQuil version.
from qiskit import QuantumCircuit, transpile
qc = QuantumCircuit(max(q0, q1) + 1, 2)
qc.h(q0)
qc.cx(q0, q1)
qc.delay(32, q1, unit="ns")
qc.measure(q0, 0)
qc.measure(q1, 1)
native = transpile(qc, basis_gates=["rz", "sx", "x", "cz"], optimization_level=3)
job = device.run(native, shots=1000)
```
```python pyQuil, compiled path theme={"dark"}
# PRAGMA INITIAL_REWIRING pins placement without leaving the compiled
# path: quilc still nativizes your gates but keeps the identity mapping,
# inserting SWAPs only if you request a pair that is not coupled. Must be
# the first instruction. For a hard no-touch guarantee on a region, wrap
# it in PRAGMA PRESERVE_BLOCK ... PRAGMA END_PRESERVE_BLOCK instead.
from pyquil import Program
program = Program(f"""PRAGMA INITIAL_REWIRING "NAIVE"
DECLARE ro BIT[2]
H {q0}
CNOT {q0} {q1}
MEASURE {q0} ro[0]
MEASURE {q1} ro[1]
""")
job = device.run(program, shots=1000)
```
`DELAY` durations must line up with the QPU's sequencer clock, or translation
rejects the program with `duration not aligned to sequencer clock: 1e-8`. A 10
ns delay is rejected; 32 ns is accepted. When using a delay purely as a Quil-T
marker, 3.2e-8 seconds is a safe choice.
Run on hardware, the Bell pair on the score-selected edge (92, 101) returned
```python theme={"dark"}
job.result().data.get_counts()
# {'00': 480, '11': 423, '01': 58, '10': 39}
```
a correlated fraction of 90.3% at 1000 shots, against roughly 95% predicted from the calibration
data alone. The gap is decoherence and crosstalk the snapshot does not capture, which is the
right way to read these scores: a ranking, not a forecast.
Calibration data is refreshed roughly hourly and the ranking moves with it, so
select your qubits shortly before you submit, not once per project.
## Timing operations
A delay is what makes a program Quil-T. This is a T1 (energy relaxation) measurement: excite the
qubit, wait, and see whether it is still excited:
```python Qiskit theme={"dark"}
import numpy as np
from qbraid.runtime import QbraidProvider
from qiskit import QuantumCircuit
provider = QbraidProvider()
device = provider.get_device("rigetti:rigetti:qpu:cepheus-1-108q")
circuit = QuantumCircuit(1, 1)
circuit.rx(np.pi, 0) # native, NOT circuit.x(0)
circuit.delay(500, 0, unit="us") # makes this a Quil-T program
circuit.measure(0, 0)
job = device.run(circuit, shots=10)
job.wait_for_final_state()
print(job.result().data.get_counts())
# {'0': 9, '1': 1} -- mostly relaxed to |0> during the 500 us delay
```
```python pyQuil theme={"dark"}
from pyquil import Program
from qbraid.runtime import QbraidProvider
provider = QbraidProvider()
device = provider.get_device("rigetti:rigetti:qpu:cepheus-1-108q")
program = Program(
"DECLARE ro BIT[1]",
"RX(pi) 0", # native, NOT "X 0"
"DELAY 0 0.0005", # 0.0005 seconds = 500 us
"MEASURE 0 ro[0]",
)
job = device.run(program, shots=10)
job.wait_for_final_state()
print(job.result().data.get_counts())
# {'0': 9, '1': 1}
```
Both submit the same thing. In Quil, `DELAY 0 0.0005` delays qubit 0 by 0.0005 **seconds**;
Qiskit's `delay(500, 0, unit="us")` converts to exactly that.
Relaxation is probabilistic, so your counts will differ run to run. A stray `'1'` at 500 us is
the physics, not a bug. That variation is exactly what a T1 sweep measures.
Passing each instruction as its own string, as above, sidesteps a common trap: pyQuil rejects a
flat instruction that starts with whitespace (`expected a command or a gate`), so an indented
triple-quoted block of plain instructions fails even though it looks fine.
The exception is a block that is *meant* to be indented, such as a `DEFCAL` or `DEFFRAME` body. Those
must arrive as **one** string, indentation included; passed as separate arguments they fail with
`failed to parse arguments for DEFCAL`. See
[prepend\_default\_calibrations](#prepend_default_calibrations) for that shape.
To sweep T1, vary the delay and submit one job per point:
```python theme={"dark"}
delays_us = [0, 50, 100, 200, 400, 800]
jobs = []
for t in delays_us:
circuit = QuantumCircuit(1, 1)
circuit.rx(np.pi, 0)
circuit.delay(t, 0, unit="us") # keep this even at t=0 -- see below
circuit.measure(0, 0)
jobs.append((t, device.run(circuit, shots=1000)))
for t, job in jobs:
job.wait_for_final_state()
counts = job.result().data.get_counts()
p_excited = counts.get("1", 0) / sum(counts.values())
print(f"{t:>4} us -> P(1) = {p_excited:.3f}")
```
Keep the `delay` call at `t = 0` rather than skipping it. A circuit with no
delay is not a Quil-T program, so your zero point would be nativized by quilc
while every other point bypasses it, leaving a baseline compiled differently
from the data it anchors. `delay(0)` emits `DELAY 0 0` and keeps every point
on the same path.
Cepheus-1-108Q is billed **per minute of execution**, prorated with no
minimum. A delay is execution time, so a long delay costs more than a short
one. Individual jobs on this device typically run for tens to hundreds of
milliseconds. See [Pricing](/v2/home/pricing).
## Which framework?
The device itself accepts three run input types: **pyQuil**, **OpenQASM 2** and **OpenQASM 3**.
Qiskit appears throughout this page only because it is the most widely used, not because it is
special. It is converted to QASM like anything else.
That means **any framework qBraid can convert to QASM works here**, not just the two shown. Cirq,
Amazon Braket, PennyLane, pytket and the rest all reach `qasm2`/`qasm3` on the
[ConversionGraph](/v2/sdk/user-guide/transpiler), and `device.run()` handles the conversion:
```python Cirq theme={"dark"}
import cirq
q = cirq.LineQubit.range(2)
circuit = cirq.Circuit([cirq.H(q[0]), cirq.CNOT(q[0], q[1]), cirq.measure(*q, key="m")])
job = device.run(circuit, shots=10)
```
```python Braket theme={"dark"}
from braket.circuits import Circuit
# .measure() is required here -- see the note below
circuit = Circuit().h(0).cnot(0, 1).measure(0).measure(1)
job = device.run(circuit, shots=10)
```
```python PennyLane theme={"dark"}
import pennylane as qml
with qml.tape.QuantumTape() as circuit:
qml.Hadamard(wires=0)
qml.CNOT(wires=[0, 1])
qml.sample(wires=[0, 1])
job = device.run(circuit, shots=10)
```
If your framework has a path to `qasm2` or `qasm3` on the ConversionGraph, it will run on Cepheus.
Write in whichever one you already use.
**Measure explicitly.** Some frameworks measure implicitly when run on their own simulators, and
that implicitness does not survive conversion. An Amazon Braket circuit written as
`Circuit().h(0).cnot(0, 1)` converts to QASM with no `measure` statement, so the program reaches
the QPU with nothing to read out. It runs, then fails when the results are parsed:
```
No declared registers found in ro_sources. ro_sources keys: []
```
Add the measurements yourself and the job returns counts as expected.
`QPROGRAM_REGISTRY` is the authoritative answer to "what type do I pass?". It maps each
framework to the exact program type `device.run()` accepts, which is not always the object you
would guess (PennyLane, for instance, takes a `QuantumTape` rather than a `QNode`):
```python theme={"dark"}
from qbraid.programs import QPROGRAM_REGISTRY
print(QPROGRAM_REGISTRY["pennylane"]) #
print(QPROGRAM_REGISTRY["cirq"]) #
print(sorted(QPROGRAM_REGISTRY)) # every framework qBraid knows
```
### When to reach for pyQuil
The one thing QASM cannot express is **Quil-T beyond a simple delay**: `FENCE`, `PULSE`,
frame-level `DELAY 0 "rf" 1e-6`, or your own `DEFCAL` calibrations. Those have no vocabulary in
Qiskit or QASM, so there is nothing for the transpiler to convert. pyQuil is Rigetti's native
language, so nothing is translated and those features have first-class syntax.
An ordinary `delay` is the exception: it converts cleanly from Qiskit, so a T1 or T2 experiment
does not require pyQuil.
Not sure which path your program will take? Ask before you spend a job:
```python theme={"dark"}
from qbraid.runtime.rigetti.device import contains_quil_t
from pyquil import Program
contains_quil_t(Program("RX(pi) 0\nDELAY 0 0.0005")) # True -> direct path, native gates required
contains_quil_t(Program("H 0\nCNOT 0 1")) # False -> compiled path, quilc handles it
```
## Runtime options
Rigetti's [translation service](https://docs.rigetti.com/qcs/guides/the-lifecycle-of-a-program),
the stage that turns your native-gate program into pulses, takes two options, passed as a dict
through `runtime_options`. Unrecognized keys are silently ignored.
| Option | Type | Default | Effect |
| :----------------------------- | :---- | :------ | :---------------------------------------------------------------- |
| `passive_reset_delay_seconds` | float | Rigetti | How long to wait for qubits to relax to \|0⟩ before each shot. |
| `prepend_default_calibrations` | bool | `True` | If `False`, Rigetti's default calibrations are **not** prepended. |
### passive\_reset\_delay\_seconds
Between shots, qubits are left to relax back to |0⟩ on their own, a **passive** reset. This
option sets how long the QPU waits for that.
Rigetti documents it as "the delay between passive resets, in seconds" and does not publish a
default or a recommended range, so the figures below are **measurements from a single run on one
qubit**, included to show the shape of the trade-off. Treat them as illustrative; your own numbers
will differ with the qubit, the calibration and the day.
**The delay is paid once per shot, and you are billed for it.** The same 20-shot program, changing
nothing else:
| `passive_reset_delay_seconds` | Execution observed | Cost observed |
| :---------------------------- | :----------------- | :------------ |
| `0.000001` (1 µs) | 15 ms | \~3 credits |
| `0.01` (10 ms) | 215 ms | \~43 credits |
The 200 ms difference is exactly 20 shots × 10 ms, which is the part that generalizes: **the delay
is per shot**, and this device is billed [per minute of execution](/v2/home/pricing). Multiply by
your shot count before raising it.
What the wait buys is a cleaner starting state. Relaxation is what clears the previous shot.
Measuring a qubit at shot start, after a program that deliberately leaves it excited:
| Reset before each shot | Still excited at shot start (observed) |
| :--------------------- | :---------------------------------------- |
| 1 µs | \~5% (the previous shot bleeding through) |
| 1 ms | \~1.5% (indistinguishable from baseline) |
A control that never excited the qubit read 0%, so the 5% was leftover state rather than readout
error. Again: one qubit, one run. The effect is the point, not the percentages.
So the trade runs both ways:
* **Raise it** for circuits sensitive to initialization, where a few percent of shots starting in
the wrong state would matter.
* **Lower it** to finish sooner and pay less. The floor is what your circuit can tolerate.
```python theme={"dark"}
job = device.run(
circuit,
shots=1000,
runtime_options={"passive_reset_delay_seconds": 0.0001}, # 100 us
)
```
The translation service rejects delays above roughly **67 ms**, reporting
`waveform duration of 1e-1s exceeds maximum allowed duration of
6.7108864e-2s`. That ceiling comes from the service's own error rather than
published documentation, so do not rely on the exact figure.
### prepend\_default\_calibrations
By default Rigetti prepends its calibration set to every program: the `DEFFRAME` and `DEFCAL` definitions that
give `RX`, `RZ`, `CZ` and `MEASURE` their actual pulse shapes. Those definitions are the only
reason a gate means anything on hardware.
**Leave this one alone.** It enables nothing, and setting it to `False` only breaks things.
To **override a calibration**, include your own `DEFCAL` and keep this option at its default.
Your definition is used in place of Rigetti's. A `DEFCAL` that turns `RX(pi)` into a no-op shows
this plainly: the qubit is left in |0⟩ rather than excited.
```python theme={"dark"}
from pyquil import Program
# A DEFCAL body must be indented, so pass the block as ONE string --
# not as separate arguments (see the note under Timing operations).
program = Program(
"""DEFCAL RX(pi) 0:
NOP
DECLARE ro BIT[1]
RX(pi) 0
DELAY 0 0
MEASURE 0 ro[0]
"""
)
job = device.run(program, shots=20) # no runtime_options needed
job.wait_for_final_state()
print(job.result().data.get_counts())
# {'0': 19, '1': 1} -- the RX did nothing.
# Without the custom DEFCAL the same program reads {'0': 1, '1': 19}.
```
Setting `prepend_default_calibrations=False` only *removes* the defaults. Your program must then
carry a complete calibration set of its own, and there is no practical way to do that here:
Rigetti's set defines frames across far more qubits than Cepheus exposes, so submitting it is
rejected before it reaches the QPU.
```
ProgramValidationError: Number of qubits in the circuit (300) exceeds the device's capacity (108)
```
Without a calibration set, translation fails instead, with Rigetti's reason:
```
input program error: program has no defined frames
```
Custom `DEFFRAME`s are constrained regardless: only `INITIAL-FREQUENCY` and
`CHANNEL-DELAY` may differ from Rigetti's defaults. Changing anything else,
such as `SAMPLE-RATE` or `HARDWARE-OBJECT`, is rejected (`frame 0
"Transmon-0_charge_tx" differs from Rigetti-provided definition`). Rigetti
restricts the flag that lifts this to [certain
users](https://docs.rs/qcs/latest/qcs/qpu/translation/struct.TranslationOptions.html),
and it is not enabled for qBraid. Treat the default frames as fixed and
confine your customization to `DEFCAL`s.
## Troubleshooting
Every failure at the translation stage arrives as a `RigettiJobError` naming the processor,
followed by Rigetti's own reason, which is the part that tells you what to fix:
```
Translation failed for quantum processor 'Cepheus-1-108Q': ... message:
"input program error: Failed to schedule Quil program: at instruction 0 ("X 0"):
this instruction must be replaced or decomposed prior to compilation"
```
Read to the end of the line. Rigetti names the offending instruction, here `X 0`, which is not
native.
| Rigetti's reason | What happened |
| :------------------------------------------------------- | :------------------------------------------------------------------------------------------------------------------------------------------------------------------------------------------------------------------------------------------------------------- |
| `at instruction N (...): must be replaced or decomposed` | A non-native gate reached the QPU, because your program contains a delay and so skipped quilc. Replace `X` with `RX(π)`, `H`/`CX` with `RX`/`RZ`/`CZ` decompositions, or drop the delay to get the compiled path back. Also covers `RX` at a non-native angle. |
| `program has no defined frames` | You set `prepend_default_calibrations=False` without supplying a calibration set. Drop the option; see [above](#prepend_default_calibrations). |
| `duration not aligned to sequencer clock` | A `DELAY` duration the hardware clock cannot represent, such as 10 ns. Use a coarser value; 32 ns (`3.2e-8`) is a safe marker delay. See [Pinning the circuit](#pinning-the-circuit). |
| `waveform duration ... exceeds maximum allowed duration` | `passive_reset_delay_seconds` is above the 67.1 ms cap. |
| `frame ... differs from Rigetti-provided definition` | A `DEFFRAME` of yours changes something other than `INITIAL-FREQUENCY` or `CHANNEL-DELAY`. |
Failures elsewhere in the pipeline:
| Message | Cause |
| :-------------------------------------------------------------------- | :-------------------------------------------------------------------------------------------------------------------------------------------- |
| `quilc failed to compile the program ...` | The gate-model path could not nativize your circuit. The message carries quilc's own reason. |
| `Number of qubits in the circuit (300) exceeds the device's capacity` | You are submitting Rigetti's full calibration set. See [prepend\_default\_calibrations](#prepend_default_calibrations). |
| Delay silently missing from results | You are on `aws:rigetti:qpu:cepheus-1-108q`, not the direct device. Braket has no gate-level delay. Use `rigetti:rigetti:qpu:cepheus-1-108q`. |
## Related links
* [Pricing](/v2/home/pricing): Cepheus-1-108Q is billed per minute of execution
* [Device calibrations](/v2/sdk/user-guide/providers/native/calibrations): coupling maps, calibration data, and best-chain search
* [QbraidProvider](/v2/sdk/user-guide/providers/native): installation, authentication, runtime options
* [RigettiProvider](/v2/sdk/user-guide/providers/rigetti): direct QCS access with your own credentials
* [Rigetti: Quil-T](https://pyquil-docs.rigetti.com/en/stable/quilt.html): the timing/pulse extension to Quil
* [Rigetti: Getting started with Quil-T](https://pyquil-docs.rigetti.com/en/stable/quilt_getting_started.html): why Quil-T programs must be nativized by hand
* [Rigetti: The Quil compiler](https://pyquil-docs.rigetti.com/en/stable/compiler.html): what quilc does, and qubit rewiring
* [Rigetti: The lifecycle of a program](https://docs.rigetti.com/qcs/guides/the-lifecycle-of-a-program): compilation vs translation on QCS
* [Rigetti: TranslationOptions](https://docs.rs/qcs/latest/qcs/qpu/translation/struct.TranslationOptions.html): the full set of translation options
* [quilc](https://github.com/quil-lang/quilc): the open-source Quil compiler
# OQCProvider
Source: https://docs.qbraid.com/v2/sdk/user-guide/providers/oqc
Runtime integration for streamlined access to OQC simulators and QPUs.
API Reference:
[qbraid.runtime.oqc](https://qbraid.github.io/qBraid/stubs/qbraid.runtime.oqc.html)
This page offers a high-level guide on using qBraid's `OQCProvider`, `OQCDevice`, and `OQCJob` classes to submit and manage jobs on Oxford Quantum Circuits (OQC) QPUs and simulators.
## Installation & Setup
To interface with OQC devices, install the `oqc` extra:
```bash theme={"dark"}
pip install 'qbraid[oqc]'
```
You wil also need an [OQC access token](https://docs.oqc.app/account_management.html#access-tokens) to authenticate your connection to OQC's cloud services.
To obtain an access token, log in or create an account at [https://cloud.oqc.app/](https://cloud.oqc.app/), and follow the instructions on the "My Account" page to "Add Auth Token".
## Initializing the Provider
Begin by importing the `OQCProvider` and initializing it with your API token.
This token authenticates your access to the OQC cloud platform:
```python theme={"dark"}
from qbraid.runtime import OQCProvider
provider = OQCProvider("")
```
By default, the endpoint URL is set to `"https://cloud.oqc.app/"`. If needed, you can specify a custom endpoint:
```python theme={"dark"}
provider = OQCProvider(token="", url="https://example.cloud.oqc.app/")
```
## Listing Available Devices
Fetch a list of devices accessible through the provider. This provides an overview of the QPUs and simulators available to you:
```python theme={"dark"}
provider.get_devices()
# [,
# ]
```
## Accessing Device Details
Retrieve a specific device using its unique ID and examine details such as its profile, status, and scheduling information:
```python theme={"dark"}
device = provider.get_device("qpu:jp:3:673b1ad43c")
print(f"Profile: {device.profile}")
print(f"Status: {device.status().name}")
if not device.profile.simulator:
print(f"Queue Depth: {device.queue_depth()}")
print(f"Next Window: {device.get_next_window()}")
print(f"All Metadata: {device.metadata()}")
```
## Metrics, Optimizations, and Other Configuration Options
Tune your job submission with a variety of parameters, including shot count, repetition period, result formatting, and program optimizations.
These options allow precise control over job execution and output. Below is a detailed breakdown of each parameter:
* `shots`: The number of times the circuit is ran. The default value is 1000.
* `repetition_period`: The length of time in between shots. The default value is 200e-6 seconds and OQC strongly recommends that you use the default unless you thoroughly understand the potential impact.
* `results_format`: The two options for this are `'raw'` and `'binary'`.
* `metrics`: The type of metrics you want to be recorded. The only metrics related to a task are its optimized circuit and the corresponding instruction count. So, there are four options:
1. `'default'`: Returns both metrics.
2. `'empty'`: Returns no metrics.
3. `'optimized_circuit'`: Returns the optimized qasm2 circuit.
4. `'optimized_instruction_count'`: Returns the instruction count of the optimized circuit.
* `optimizations`: These are the optimizations you want to perform on the input program(s). OQC uses the [tKet optimization compiler](https://oqc.tech/oqc-integrates-tket), as it is integrated into their compiler pipeline. Documention on these are in the [pytket.passes documentation](https://tket.quantinuum.com/api-docs/passes.html), and below are the instructions to access them through `OQCDevice.run()`:
| Option | TKET pass |
| :----------------------------- | :------------------------------------ |
| `'clifford_simplify'` | `CliffordSimp` |
| `'context_simplify'` | `ContextSimp` |
| `'decompose_controlled_gates'` | `DecomposeArbitrarilyControlledGates` |
| `'default_mapping_pass'` | `DefaultMappingPass` |
| `'empty'` | `Empty` |
| `'full_peephole_optimise'` | `FullPeepholeOptimise` |
| `'globalise_phased_x'` | `GlobalisePhasedX` |
| `'kak_decomposition'` | `KAKDecomposition` |
| `'one'` | `One` |
| `'peephole_optimise_2q'` | `PeepholeOptimise2Q` |
| `'remove_barriers'` | `RemoveBarriers` |
| `'remove_discarded'` | `RemoveDiscarded` |
| `'remove_redundancies'` | `RemoveRedundancies` |
| `'simplify_measured'` | `SimplifyMeasured` |
| `'three_qubit_squash'` | `ThreeQubitSquash` |
| `'two'` | `Two` |
## Program Submission Specifications and Device Compatibility
* Any program type compatible with OpenQASM 3 (i.e. can be converted to OpenQASM 3 via `qbraid.transpile(program, "qasm3")`) can be passed directly to the `OQCDevice.run()` method.
* All `include` statements will be removed from transpiled OpenQASM 3 program upon submission, as they are not recognized by OQC.
* The default supported gates for all OQC devices include the entire OpenQASM 3 `stdgates.inc` gate set plus the `ecr` gate.
* For QPUs, submissions do not need to use "native gates."
* The Lucy Simulator is noiseless and does not support error mitigation.
* OpenQASM 3 programs with classical control operations are *not supported*.
* OpenQASM 3 programs containing pulse-level descriptions of gates and measurements (e.g. OpenPulse grammar) are *supported*.
## Bell Circuit Job Example
Submit an OpenQASM 3 bell circuit to the Lucy Simulator device:
```python theme={"dark"}
from qbraid.runtime import OQCProvider
# Token loaded automatically from "OQC_AUTH_TOKEN" environment variable
provider = OQCProvider()
device = provider.get_device("qpu:uk:2:d865b5a184")
program = """
OPENQASM 3;
qubit[2] q;
bit[2] c;
h q[0];
h q[1];
cx q[0], q[1];
c = measure q;
"""
job = device.run(
program,
shots=1000,
repetition_period=100e-6,
metrics='optimized_circuit',
optimizations='default_mapping_pass'
)
print(job.id)
```
## Monitor Job Status
Inspect the job status, metrics, timings, and other metadata:
```python theme={"dark"}
>>> job.status()
>>> job.metadata()
{'status': ,
'allow_support_access': False,
'created_at': 'Wed, 27 Nov 2024 18:32:46 GMT',
'qpu_id': 'qpu:uk:2:d865b5a184',
'tag': None,
'shots': 1000,
'repetition_period': 0.0001,
'results_format': 'binary',
'metrics': 'optimized_circuit',
'active_calibrations': [],
'optimizations': 'default_mapping_pass',
'error_mitigation': None,
'errors': None,
'timings': {'RECEIVER_DEQUEUED': '2024-11-27 18:32:47.142509+00:00',
'RECEIVER_ENQUEUED': '2024-11-27 18:32:47.371945+00:00',
'RECEIVER_FROM_COMPILER': '2024-11-27 18:32:47.371836+00:00',
'RECEIVER_TO_COMPILER': '2024-11-27 18:32:47.142769+00:00',
'SERVER_DEQUEUED': '2024-11-27 18:32:47.384944+00:00',
'SERVER_ENQUEUED': '2024-11-27 18:32:47.123478+00:00',
'SERVER_RECEIVED': '2024-11-27 18:32:47.079319+00:00'}}
>>> job.metrics()
{'optimized_circuit': 'OPENQASM 3;\nqubit[2] q;\nbit[2] c;\nh q[0];\nh q[1];\ncx q[0], q[1];\nc = measure q;\n',
'optimized_instruction_count': None}
```
## Gather Job Results
Retrieve and analyze the results of your job:
```python theme={"dark"}
result = job.result()
result.data.get_counts()
# {'00': 250, '01': 235, '10': 264, '11': 251}
```
To plot the histogram counts and probability distribution, refer to the [Plot Experimental Results](/v2/sdk/user-guide/visualization#plot-experimental-results) section in the visualization guide.
# OriginProvider
Source: https://docs.qbraid.com/v2/sdk/user-guide/providers/origin
Runtime integration for access to OriginQ quantum simulators and processors via QCloud.
API Reference:
[qbraid.runtime.origin](https://qbraid.github.io/qBraid/stubs/qbraid.runtime.origin.html)
## Overview
The `qbraid.runtime.OriginProvider` provides support for OriginQ's quantum computing systems
through the [OriginQ QCloud](https://qcloud.originqc.com.cn/) platform. This means you can write quantum programs using
[PyQPanda3](https://pyqpanda-toturial.readthedocs.io/), and run them on OriginQ's cloud-based simulators and quantum processors,
all from within the [qBraid Runtime framework](/v2/sdk/user-guide/runtime/components).
## Getting started
Before you begin, make sure you have:
1. An **OriginQ QCloud** account and API key.
2. Python >= 3.10
### Set up the qBraid-SDK
Install qBraid with the `origin` extra from [PyPI](https://pypi.org/project/qbraid/) using pip:
```bash theme={"dark"}
pip install 'qbraid[origin]'
```
This installs the required dependency: `pyqpanda3`.
*Note*: The qBraid-SDK requires Python 3.10 or greater. You can check your
Python version by running `python --version` from the command line.
## Authentication
By default, qBraid will look for an environment variable named `ORIGIN_API_KEY`.
Set it from your command line:
```bash theme={"dark"}
export ORIGIN_API_KEY="your_api_key_here"
```
Alternatively, you can pass your API key directly when creating the provider:
```python theme={"dark"}
from qbraid.runtime.origin import OriginProvider
provider = OriginProvider(api_key="your_api_key_here")
```
In the examples below, we initialize `OriginProvider()` with no arguments and assume that qBraid
will automatically find your API key from the environment.
## List available devices
Use the `OriginProvider` to list all devices to which you have access:
```python theme={"dark"}
from qbraid.runtime.origin import OriginProvider
provider = OriginProvider()
devices = provider.get_devices()
print(devices)
```
You can also filter to show only hardware (QPU) devices:
```python theme={"dark"}
devices = provider.get_devices(hardware_only=True)
```
Get a specific device by its ID:
```python theme={"dark"}
device = provider.get_device("full_amplitude")
print(device.status())
#
```
### Available simulators
OriginQ provides several cloud-based quantum simulators:
| Simulator ID | Max Qubits | Description |
| ------------------- | ---------- | ----------------------------- |
| `full_amplitude` | 35 | Full amplitude simulation. |
| `partial_amplitude` | 68 | Partial amplitude simulation. |
| `single_amplitude` | 200 | Single amplitude simulation. |
## Submitting jobs
The `OriginProvider` accepts quantum programs as PyQPanda3 `QProg` objects.
### Create a program
```python theme={"dark"}
from pyqpanda3.core import QProg, H, CNOT, measure
# Bell state circuit
prog = QProg(2)
q = prog.qubits()
prog << H(q[0]) << CNOT(q[0], q[1]) << measure(0, 0) << measure(1, 1)
```
### Run a job
Use `device.run()` to submit a program:
```python theme={"dark"}
from pyqpanda3.core import QProg, H, CNOT, measure
from qbraid.runtime.origin import OriginProvider
provider = OriginProvider()
device = provider.get_device("full_amplitude")
prog = QProg(2)
q = prog.qubits()
prog << H(q[0]) << CNOT(q[0], q[1]) << measure(0, 0) << measure(1, 1)
job = device.run(prog, shots=1000)
print(f"Job ID: {job.id}")
```
### Batch submission
Submit multiple programs in a single call:
```python theme={"dark"}
from pyqpanda3.core import QProg, H, X, measure
from qbraid.runtime.origin import OriginProvider
provider = OriginProvider()
device = provider.get_device("full_amplitude")
prog1 = QProg(1)
prog1 << H(prog1.qubits()[0]) << measure(0, 0)
prog2 = QProg(1)
prog2 << X(prog2.qubits()[0]) << measure(0, 0)
jobs = device.run([prog1, prog2], shots=500)
for job in jobs:
print(f"Job ID: {job.id}")
```
For simulator backends, batch inputs are submitted as individual jobs. For QPU
backends, batch inputs are submitted as a single job using the native batch
API.
## Retrieving results
```python theme={"dark"}
result = job.result()
# Measurement probabilities
print(result.data.get_probabilities())
# {'00': 0.5, '11': 0.5}
# Measurement counts (when available)
print(result.data.measurement_counts)
# Job metadata
print(f"Device: {result.device_id}")
print(f"Job ID: {result.job_id}")
print(f"Success: {result.success}")
```
Depending on the backend, results may be returned as probabilities,
measurement counts, or both. Use `result.data.get_probabilities()` to retrieve
probability distributions and `result.data.measurement_counts` for shot-based
counts.
### Check job status
```python theme={"dark"}
from qbraid.runtime.enums import JobStatus
status = job.status()
print(status)
#
```
Job cancellation is not supported by the OriginQ provider. Calling
`job.cancel()` will raise an error.
## Full example
A complete end-to-end workflow targeting the full amplitude simulator:
```python theme={"dark"}
import os
from pyqpanda3.core import QProg, H, CNOT, measure
from qbraid.runtime.origin import OriginProvider
# 1. Set credentials (or export as env var beforehand)
os.environ["ORIGIN_API_KEY"] = "your_api_key_here"
# 2. Initialize provider
provider = OriginProvider()
# 3. Get the target device
device = provider.get_device("full_amplitude")
print(f"Device status: {device.status()}")
# 4. Define a GHZ state circuit
prog = QProg(3)
q = prog.qubits()
prog << H(q[0]) << CNOT(q[0], q[1]) << CNOT(q[1], q[2])
prog << measure(0, 0) << measure(1, 1) << measure(2, 2)
# 5. Submit the job
job = device.run(prog, shots=1000)
print(f"Submitted job: {job.id}")
# 6. Retrieve results
result = job.result()
print(f"Probabilities: {result.data.get_probabilities()}")
# Expected output (approximate): {'000': 0.5, '111': 0.5}
```
## Related links
* [OriginQ QCloud Platform](https://qcloud.originqc.com.cn/)
* [PyQPanda3 Documentation](https://pyqpanda-toturial.readthedocs.io/)
# PasqalProvider
Source: https://docs.qbraid.com/v2/sdk/user-guide/providers/pasqal
Runtime integration for running Pulser sequences on Pasqal neutral-atom QPUs and emulators.
API Reference:
[qbraid.runtime.pasqal](https://qbraid.github.io/qBraid/stubs/qbraid.runtime.pasqal.html)
## Overview
The `qbraid.runtime.PasqalProvider` provides support for Pasqal's neutral-atom quantum computers and emulators via
[Pasqal Cloud Services](https://docs.pasqal.com/cloud/). Unlike gate-model providers, Pasqal devices run *analog*
quantum programs: pulse sequences built with [Pulser](https://pulser.readthedocs.io/), Pasqal's open-source framework
for programming neutral-atom arrays. You write a `pulser.Sequence`, and qBraid serializes it, submits it as a Pasqal
Cloud batch, and returns measurement counts—all from within the
[qBraid Runtime framework](/v2/sdk/user-guide/runtime/components).
## Getting started
Before you begin, you'll need a [Pasqal Cloud](https://portal.pasqal.cloud/) account and a **project ID**. Jobs
(batches) are billed and organized per project—you can find your project ID in the Pasqal Cloud portal.
### Set up the qBraid-SDK
Install qBraid with the `pasqal` extra from [PyPI](https://pypi.org/project/qbraid/) using pip:
```bash theme={"dark"}
pip install 'qbraid[pasqal]'
```
This installs the [pasqal-cloud](https://github.com/pasqal-io/pasqal-cloud) client and
[pulser-core](https://pypi.org/project/pulser-core/) alongside qBraid.
*Note*: The qBraid-SDK requires Python 3.10 or greater. You can check your
Python version by running `python --version` from the command line.
We encourage doing this inside an environment management system, such as [virtualenv](https://virtualenv.pypa.io/en/latest/) or
[conda](https://docs.conda.io/en/latest/). Alternatively, you can bypass this step by using a pre-configured
[qBraid Lab environment](/v2/lab/user-guide/environments).
See [qBraid-SDK installation and setup](/v2/sdk/user-guide/overview#installation-and-setup) for more.
### Set up your environment
By default, qBraid will look in your local environment for variables named `PASQAL_USERNAME`, `PASQAL_PASSWORD`,
and `PASQAL_PROJECT_ID`:
```bash theme={"dark"}
export PASQAL_USERNAME="your_username_here"
export PASQAL_PASSWORD="your_password_here"
export PASQAL_PROJECT_ID="your_project_id_here"
```
Alternatively, you can pass your credentials explicitly when creating the provider object:
```python theme={"dark"}
from qbraid.runtime import PasqalProvider
provider = PasqalProvider(
username="me@example.com",
password="...",
project_id="...",
)
```
If you provide a `username` but leave `password` unset, `pasqal-cloud` will prompt for it interactively. For
machine-to-machine authentication with a pre-issued token, you can pass a custom `pasqal_cloud.TokenProvider`
via the `token_provider` argument instead.
In the examples below, we show `PasqalProvider()` initialized with no arguments and assume that qBraid will
automatically find your credentials in the environment.
## List available devices
Use the `PasqalProvider` to list the available Pasqal devices:
```python theme={"dark"}
from qbraid.runtime import PasqalProvider
provider = PasqalProvider()
devices = provider.get_devices()
```
Running this script should print something like this:
```python theme={"dark"}
[,
,
,
,
,
,
]
```
If this works correctly, then your qBraid-SDK installation is correct and your Pasqal credentials are valid!
Device IDs starting with `EMU_` are emulators; the rest are QPUs:
| Device ID | Type | Description |
| -------------- | -------- | --------------------------------------------------- |
| `FRESNEL` | QPU | Pasqal's neutral-atom quantum processor |
| `FRESNEL_CAN1` | QPU | FRESNEL-class QPU (Canada) |
| `EMU_FREE` | Emulator | Free-tier emulator (limited resources) |
| `EMU_FRESNEL` | Emulator | Emulates the FRESNEL QPU, including its constraints |
| `EMU_SV` | Emulator | State-vector emulator |
| `EMU_MPS` | Emulator | Matrix-product-state emulator |
| `EMU_TN` | Emulator | Tensor-network emulator |
You can confirm whether a device is a simulator, and inspect its runtime profile, directly from the device object:
```python theme={"dark"}
device = provider.get_device("EMU_FREE")
print(device.profile.simulator) # True
print(device.profile.experiment_type) # ExperimentType.ANALOG
```
## Build a Pulser sequence
Pasqal devices execute Pulser sequences rather than gate-model circuits. A sequence specifies a *register* (the
positions of the atoms, in µm) and a series of *pulses* applied through the device's channels. For an introduction,
see the [Pulser documentation](https://pulser.readthedocs.io/).
Here, we place two atoms 10 µm apart and drive them with a single constant global pulse:
```python theme={"dark"}
from pulser import Pulse, Register, Sequence
from pulser.devices import AnalogDevice
register = Register({"q0": (0, 0), "q1": (0, 10)})
sequence = Sequence(register, AnalogDevice)
sequence.declare_channel("rydberg_global", "rydberg_global")
pulse = Pulse.ConstantPulse(duration=1000, amplitude=5.0, detuning=0, phase=0)
sequence.add(pulse, "rydberg_global")
sequence.measure("ground-rydberg")
```
Remember to end your sequence with a `measure()` call. Measurement in the
`"ground-rydberg"` basis maps each atom to a classical bit: `1` if the atom
was excited to the Rydberg state, `0` otherwise.
## Submit a sequence to an emulator
Let's run the sequence on `EMU_FREE` with 100 shots:
```python theme={"dark"}
from qbraid.runtime import PasqalProvider
provider = PasqalProvider()
device = provider.get_device("EMU_FREE")
job = device.run(sequence, shots=100)
print(job.id) # the Pasqal Cloud batch ID, e.g. 'c2bbfadf-e2d1-...'
print(job.status()) # JobStatus.QUEUED
```
Each submission creates a Pasqal Cloud *batch*, and `job.id` is the batch ID—you can use it to look the job up
later, both through qBraid and in the Pasqal Cloud portal. Calling `job.result()` blocks until the batch reaches
a terminal state, then returns the measurement counts:
```python theme={"dark"}
result = job.result()
print(result.data.get_counts())
```
This returns a dictionary of bitstring counts, for example:
```
{'00': 38, '11': 13, '10': 29, '01': 20}
```
Since this is an analog experiment, the result data is a qBraid `AnalogResultData` instance, keyed by
measurement bitstrings in register order (`q0`, `q1`, ...).
## Submit a multi-sequence batch
You can submit several sequences in a single batch by passing a list to `device.run()`. Each sequence becomes its
own job within the Pasqal Cloud batch, and the results are returned as a list of counts dictionaries in
submission order. Given two sequences `sequence_a` and `sequence_b`, built as in the example above:
```python theme={"dark"}
batch_job = device.run([sequence_a, sequence_b], shots=50)
batch_result = batch_job.result()
counts_list = batch_result.data.get_counts()
print("\n".join(f"Sequence {i}: {c}" for i, c in enumerate(counts_list)))
```
```
Sequence 0: {'10': 12, '00': 19, '01': 14, '11': 5}
Sequence 1: {'10': 11, '00': 19, '11': 7, '01': 13}
```
## Submit a sequence to a QPU
Submitting to a QPU follows the exact same pattern—just use a QPU device ID:
```python theme={"dark"}
device = provider.get_device("FRESNEL")
job = device.run(sequence, shots=100)
```
Build your sequence against a Pulser device specification that matches the
target QPU's constraints (register geometry, channels, pulse limits), and test
it on an emulator first—`EMU_FRESNEL` mirrors the FRESNEL QPU's constraints.
QPU access is subject to your Pasqal Cloud project's permissions and quota.
QPU jobs may wait in the queue, so record `job.id` and retrieve the job later rather than blocking on
`job.result()`.
## Manage jobs
### Retrieve a job
You can retrieve a previously submitted job from its batch ID:
```python theme={"dark"}
from qbraid.runtime import PasqalJob, PasqalProvider
provider = PasqalProvider()
job = PasqalJob("your_batch_id_here", sdk=provider.sdk)
print(job.status())
result = job.result()
print(result.data.get_counts())
```
### Cancel a job
You can cancel a job (batch) while it's waiting in the queue:
```python theme={"dark"}
job.cancel()
```
## Visualize results
To plot the results of a job, first, install the qBraid visualization extra:
```bash theme={"dark"}
pip install 'qbraid[visualization]'
```
You can then visualize the measurement counts using `plot_histogram`, or display the probability distribution
with `plot_distribution`:
```python theme={"dark"}
from qbraid.visualization import plot_histogram
counts = result.data.get_counts()
plot_histogram(counts)
```
The "counts" input may be either a single dictionary or a list of dictionaries for multi-sequence batches.
See [Plot Experimental Results](/v2/sdk/user-guide/visualization#plot-experimental-results) for more.
***
## Additional resources
*Great work!* You successfully ran your first analog quantum program - *what next?*
Explore more resources for using qBraid:
* [API Reference](https://qbraid.github.io/qBraid/)
* [Source Code on GitHub](https://github.com/qBraid/qBraid)
* [Example Notebooks on GitHub](https://github.com/qBraid/qbraid-lab-demo)
And for going deeper with Pasqal and Pulser:
* [Pasqal Runtime Provider Notebook on GitHub](https://github.com/qBraid/qbraid-lab-demo/blob/main/Provider-Jobs/qbraid_runtime_pasqal_provider.ipynb)
* [Pulser on Pasqal Devices Notebook on GitHub](https://github.com/qBraid/qbraid-lab-demo/blob/main/qBraid-Runtime/qbraid_pulser_pasqal.ipynb)
* [Pasqal Cloud documentation](https://docs.pasqal.com/cloud/)
* [Pulser documentation](https://pulser.readthedocs.io/)
* [pasqal-cloud on GitHub](https://github.com/pasqal-io/pasqal-cloud)
# QuantinuumProvider
Source: https://docs.qbraid.com/v2/sdk/user-guide/providers/quantinuum
Runtime integration for access to Quantinuum trapped-ion quantum processors via Quantinuum Nexus.
API Reference:
[qbraid.runtime.quantinuum](https://qbraid.github.io/qBraid/stubs/qbraid.runtime.quantinuum.html)
## Overview
The `qbraid.runtime.QuantinuumProvider` provides support for Quantinuum's trapped-ion quantum systems
through the [Quantinuum Nexus](https://nexus.quantinuum.com/) platform. This means you can write quantum circuits using
[pytket](https://tket.quantinuum.com/), compile and execute them on Quantinuum's H-series processors and emulators,
all from within the [qBraid Runtime framework](/v2/sdk/user-guide/runtime/components).
## Getting started
Before you begin, make sure you have:
1. A **Quantinuum Nexus** account with valid credentials.
2. The **qnexus** CLI tool installed and authenticated (see [Authentication](#authentication) below).
3. Python >= 3.10
### Set up the qBraid-SDK
Install qBraid with the `quantinuum` extra from [PyPI](https://pypi.org/project/qbraid/) using pip:
```bash theme={"dark"}
pip install 'qbraid[quantinuum]'
```
This installs the required dependencies: `pytket`, `pytket-quantinuum`, and `qnexus`.
*Note*: The qBraid-SDK requires Python 3.10 or greater. You can check your
Python version by running `python --version` from the command line.
## Authentication
The `QuantinuumProvider` authenticates through the `qnexus` library. Before using the provider, you must
log in using the `qnexus` CLI:
```bash theme={"dark"}
qnx login
```
This opens a browser-based authentication flow and stores your credentials locally. Once authenticated,
the provider will automatically use your stored credentials — no API keys or environment variables are needed.
Then initialize the provider:
```python theme={"dark"}
from qbraid.runtime.quantinuum import QuantinuumProvider
provider = QuantinuumProvider()
```
## List available devices
Use the `QuantinuumProvider` to list all devices to which you have access:
```python theme={"dark"}
from qbraid.runtime.quantinuum import QuantinuumProvider
provider = QuantinuumProvider()
devices = provider.get_devices()
print(devices)
```
Get a specific device by its ID:
```python theme={"dark"}
device = provider.get_device("H1-1")
print(device.status())
#
```
Devices with an "E" suffix (e.g., `H1-1E`) are emulators (simulators) that
model the behavior of the corresponding hardware device.
## Submitting jobs
The `QuantinuumProvider` accepts quantum programs written as pytket `Circuit` objects.
### Create a circuit
```python theme={"dark"}
from pytket.circuit import Circuit
# Bell state circuit
circuit = Circuit(2)
circuit.H(0)
circuit.CX(0, 1)
circuit.measure_all()
```
### Run a job
Use `device.run()` to compile and submit a circuit:
```python theme={"dark"}
from pytket.circuit import Circuit
from qbraid.runtime.quantinuum import QuantinuumProvider
provider = QuantinuumProvider()
device = provider.get_device("H1-1E")
circuit = Circuit(2)
circuit.H(0)
circuit.CX(0, 1)
circuit.measure_all()
job = device.run(circuit, shots=1000)
print(f"Job ID: {job.id}")
```
### Batch submission
Submit multiple circuits in a single call. All circuits are bundled into one Nexus job:
```python theme={"dark"}
from pytket.circuit import Circuit
from qbraid.runtime.quantinuum import QuantinuumProvider
provider = QuantinuumProvider()
device = provider.get_device("H1-1E")
circuits = [
Circuit(1).H(0).measure_all(),
Circuit(1).X(0).measure_all(),
Circuit(2).H(0).CX(0, 1).measure_all(),
]
job = device.run(circuits, shots=500)
print(f"Job ID: {job.id}")
```
When submitting a list of circuits, all circuits are compiled and executed as
a single batch job on Quantinuum Nexus. The returned `measurement_counts` will
be a list of dictionaries, one per circuit.
## Retrieving results
```python theme={"dark"}
result = job.result()
# Measurement counts
print(result.data.measurement_counts)
# {'00': 512, '11': 488}
# Job metadata
print(f"Device: {result.device_id}")
print(f"Job ID: {result.job_id}")
print(f"Success: {result.success}")
```
### Check job status
```python theme={"dark"}
from qbraid.runtime.enums import JobStatus
status = job.status()
print(status)
#
```
### Cancel a job
```python theme={"dark"}
job.cancel()
```
Cancellation is best-effort. Jobs already in a terminal state (`COMPLETED`,
`FAILED`, `CANCELLED`) cannot be cancelled.
### Execution time
You can retrieve the wall-clock execution time (in seconds) for a completed job:
```python theme={"dark"}
print(f"Execution time: {job.execution_time_s()} seconds")
```
## Configuration options
The `device.run()` method accepts additional keyword arguments to control compilation and project scoping:
| Parameter | Type | Default | Description |
| -------------------- | ----- | ---------- | ------------------------------------------------- |
| `shots` | `int` | `1000` | Number of measurement shots per circuit. |
| `project_name` | `str` | `"qbraid"` | Nexus project name to scope compile/execute jobs. |
| `optimisation_level` | `int` | `1` | pytket optimization level (0-2). |
The `project_name` and `optimisation_level` parameters can also be set via environment variables:
| Variable | Description |
| ------------------------------- | ---------------------------------- |
| `QUANTINUUM_NEXUS_PROJECT_NAME` | Default Nexus project name. |
| `QUANTINUUM_NEXUS_OPT_LEVEL` | Default pytket optimization level. |
## Full example
A complete end-to-end workflow targeting a Quantinuum emulator:
```python theme={"dark"}
from pytket.circuit import Circuit
from qbraid.runtime.quantinuum import QuantinuumProvider
# 1. Initialize provider (assumes qnx login was run)
provider = QuantinuumProvider()
# 2. Get an emulator device
device = provider.get_device("H1-1E")
print(f"Device status: {device.status()}")
# 3. Define a GHZ state circuit
circuit = Circuit(3)
circuit.H(0)
circuit.CX(0, 1)
circuit.CX(1, 2)
circuit.measure_all()
# 4. Submit the job
job = device.run(circuit, shots=1000, optimisation_level=2)
print(f"Submitted job: {job.id}")
# 5. Retrieve results
result = job.result()
print(f"Counts: {result.data.measurement_counts}")
# Expected output (approximate): {'000': ~500, '111': ~500}
```
## Related links
* [Quantinuum Nexus](https://nexus.quantinuum.com/)
* [pytket Documentation](https://tket.quantinuum.com/)
* [pytket-quantinuum Extension](https://tket.quantinuum.com/extensions/pytket-quantinuum/)
# RigettiProvider
Source: https://docs.qbraid.com/v2/sdk/user-guide/providers/rigetti
Runtime integration for direct access to Rigetti quantum processors via QCS.
API Reference:
[qbraid.runtime.rigetti](https://qbraid.github.io/qBraid/stubs/qbraid.runtime.rigetti.html)
On-demand access to Rigetti quantum systems (Ankaa, Cepheus) is restricted.
You must contact [Rigetti](https://www.rigetti.com/contact) to request access
credentials before using this provider.
## Prerequisites
Before getting started, ensure you have:
1. A **Rigetti QCS account** with an active refresh token (contact Rigetti to obtain access).
2. The **Forest SDK** installed locally — specifically the `quilc` compiler. The `qvm` simulator is optional.
3. Python > 3.10 and \< 3.13
### Install the Forest SDK
The `quilc` compiler is required to compile Quil programs into the native gate set of the target QPU. Install it for your platform:
* **macOS / Linux**: Download from [qcs.rigetti.com/sdk-downloads](https://qcs.rigetti.com/sdk-downloads)
* **Docker**: `docker run --rm -p 5555:5555 rigetti/quilc -S`
Verify the installation:
```bash theme={"dark"}
quilc --version
```
## Installation & Setup
Install the `rigetti` extra:
```bash theme={"dark"}
pip install 'qbraid[rigetti]'
```
This installs the required dependencies: `pyquil` and `qcs-sdk-python`.
## Authentication
The `RigettiProvider` authenticates with Rigetti QCS using an **OAuth refresh token**. Set it as an environment variable (required):
```bash theme={"dark"}
export RIGETTI_REFRESH_TOKEN="your-refresh-token"
```
Then initialize the provider:
```python theme={"dark"}
from qbraid.runtime.rigetti import RigettiProvider
provider = RigettiProvider()
```
### Optional Environment Variables
| Variable | Description | Default |
| -------------------- | ----------------------- | ------------------------------ |
| `RIGETTI_CLIENT_ID` | Custom OAuth client ID | Rigetti default |
| `RIGETTI_ISSUER` | Custom OAuth issuer URL | Rigetti default |
| `QCS_GRPC_ENDPOINT` | QCS gRPC API endpoint | `https://grpc.qcs.rigetti.com` |
| `QCS_QUILC_ENDPOINT` | quilc compiler endpoint | `tcp://127.0.0.1:5555` |
| `QCS_QVM_ENDPOINT` | QVM simulator endpoint | `http://127.0.0.1:5000` |
### Provider Setup
After initializing the provider, call `setup()` to manage the local quilc compiler process. This ensures quilc is running and ready to compile programs:
```python theme={"dark"}
provider = RigettiProvider()
# Start a local quilc process (default behavior)
provider.setup()
# Or, point to an existing quilc endpoint
provider.setup(quilc_endpoint="tcp://my-quilc-host:5555")
```
The `setup()` method accepts the following keyword arguments:
| Parameter | Type | Default | Description |
| ---------------- | ------ | ------- | ------------------------------------------------------- |
| `quilc_endpoint` | `str` | `None` | Pre-existing quilc endpoint. Skips local process start. |
| `qvm_endpoint` | `str` | `None` | Pre-existing QVM endpoint. Skips local process start. |
| `grpc_endpoint` | `str` | `None` | Override for the QCS gRPC endpoint. |
| `start_quilc` | `bool` | `True` | Auto-start local quilc if not already running. |
| `start_qvm` | `bool` | `False` | Auto-start local QVM if not already running. |
## Getting Available Devices
List all quantum processors available through your QCS account:
```python theme={"dark"}
from qbraid.runtime.rigetti import RigettiProvider
provider = RigettiProvider()
provider.setup()
devices = provider.get_devices()
print(devices)
# [RigettiDevice('ankaa-3'), RigettiDevice('cepheus-108')]
```
Get a specific device by its processor ID:
```python theme={"dark"}
device = provider.get_device("ankaa-3")
print(device.status())
#
# Get the list of live qubit IDs on the device
qubits = device.live_qubits()
print(f"Live qubits ({len(qubits)}): {qubits[:10]}...")
```
## Submitting Jobs
The `RigettiProvider` accepts programs written in [Quil](https://quil-lang.github.io/) using the `pyquil` library. Programs are compiled via `quilc` before submission to the QPU.
### Create a Program
```python theme={"dark"}
from pyquil import Program
# Bell state circuit
program = Program("""
DECLARE ro BIT[2]
H 0
CNOT 0 1
MEASURE 0 ro[0]
MEASURE 1 ro[1]
""")
```
### Run a Job
Use `device.run()` to compile and submit in one step:
```python theme={"dark"}
from pyquil import Program
from qbraid.runtime.rigetti import RigettiProvider
provider = RigettiProvider()
provider.setup()
device = provider.get_device("ankaa-3")
program = Program("""
DECLARE ro BIT[2]
H 0
CNOT 0 1
MEASURE 0 ro[0]
MEASURE 1 ro[1]
""")
job = device.run(program, shots=1000)
print(f"Job ID: {job.id}")
```
### Batch Submission
Submit multiple programs in a single call:
```python theme={"dark"}
from pyquil import Program
from qbraid.runtime.rigetti import RigettiProvider
provider = RigettiProvider()
provider.setup()
device = provider.get_device("ankaa-3")
programs = [
Program("DECLARE ro BIT[1]\nH 0\nMEASURE 0 ro[0]"),
Program("DECLARE ro BIT[1]\nX 0\nMEASURE 0 ro[0]"),
Program("DECLARE ro BIT[1]\nH 0\nS 0\nMEASURE 0 ro[0]"),
]
jobs = device.run(programs, shots=500)
for job in jobs:
print(f"Job ID: {job.id}")
```
## Retrieving Results
```python theme={"dark"}
result = job.result()
# Measurement counts as a dictionary
print(result.data.measurement_counts)
# {'00': 512, '11': 488}
# Job metadata
print(f"Device: {result.device_id}")
print(f"Job ID: {result.job_id}")
print(f"Success: {result.success}")
print(f"Duration (us): {result.execution_duration_microseconds}")
```
### Check Job Status
```python theme={"dark"}
from qbraid.runtime.enums import JobStatus
status = job.status()
print(status)
#
```
### Cancel a Job
```python theme={"dark"}
job.cancel()
```
Cancellation is best-effort. Jobs already in a terminal state (`COMPLETED`,
`FAILED`, `CANCELLED`) cannot be cancelled.
## Runtime Options
The `device.run()` method accepts an optional `runtime_options` dict to control compilation
and translation behavior:
```python theme={"dark"}
job = device.run(
program,
shots=1000,
runtime_options={
"compiler_timeout": 60,
"prepend_default_calibrations": True,
"passive_reset_delay_seconds": 1.0,
},
)
```
### Options Reference
| Parameter | Type | Description |
| ------------------------------------ | ------- | ------------------------------------------------------------------------------ |
| `compiler_timeout` | `float` | quilc compilation timeout in seconds. |
| `prepend_default_calibrations` | `bool` | Prepend default calibration pulses during translation. |
| `passive_reset_delay_seconds` | `float` | Delay between passive resets. |
| `allow_unchecked_pointer_arithmetic` | `bool` | Disable runtime memory bounds checking (authorized access). |
| `allow_frame_redefinition` | `bool` | Allow frame definitions that differ from Rigetti defaults (authorized access). |
## Full Example
A complete end-to-end workflow targeting the Ankaa-3 processor:
```python theme={"dark"}
import os
from pyquil import Program
from qbraid.runtime.rigetti import RigettiProvider
# 1. Set credentials (or export as env var beforehand)
os.environ["RIGETTI_REFRESH_TOKEN"] = "your-refresh-token"
# 2. Initialize provider and start quilc
provider = RigettiProvider()
provider.setup()
# 3. Get the target device
device = provider.get_device("ankaa-3")
print(f"Device status: {device.status()}")
print(f"Number of qubits: {len(device.live_qubits())}")
# 4. Define a GHZ state circuit
program = Program("""
DECLARE ro BIT[3]
H 0
CNOT 0 1
CNOT 1 2
MEASURE 0 ro[0]
MEASURE 1 ro[1]
MEASURE 2 ro[2]
""")
# 5. Submit the job
job = device.run(program, shots=1000)
print(f"Submitted job: {job.id}")
# 6. Retrieve results
result = job.result()
print(f"Counts: {result.data.measurement_counts}")
# Expected output (approximate): {'000': ~500, '111': ~500}
```
## Related Links
* [Rigetti QCS Documentation](https://docs.rigetti.com/)
* [PyQuil Documentation](https://pyquil-docs.rigetti.com/)
* [Quil Language Specification](https://quil-lang.github.io/)
* [Forest SDK Downloads](https://qcs.rigetti.com/sdk-downloads)
# Runtime Components
Source: https://docs.qbraid.com/v2/sdk/user-guide/runtime/components
Universal building blocks for constructing client-side quantum software pipelines.
## Runtime Overview
The qBraid Runtime framework defines essential abstractions for sessions, providers, devices, jobs, and results,
integrating them into a complete client-side software pipeline. Leveraging device and domain-specific requirements
outlined by each provider, it generates coherent target "profiles," program "specs," and compilation "schemes".
These elements, referred to as Universal Pipeline Components (UPCs), form the foundational building blocks for constructing scalable
quantum software pipelines. Each UPC plays a unique and distinct role, utilizing quantum and/or classical resources. Collectively,
these components optimize the management of the entire quantum job lifecycle—from defining quantum programs to dispatching jobs to
remote servers to post-processing results—and ensure the efficient production of outputs for diverse computational tasks.
![Runtime Architecture]()
![Runtime Architecture]() Distinguishing itself through a streamlined and highly-configurable approach to cross-platform integration,
qBraid Runtime does not adhere to a fixed circuit-building library, or quantum program representation. Instead,
it empowers providers to dynamically register any desired input program type as the target based on their specific needs.
This flexibility is extended by the framework's modular pipeline, which facilitates any number of additional program
validation, transpilation, and compilation steps.
Unlike existing runtime frameworks that focus their automation and abstractions primarily on quantum components—such as
adapting the input quantum program to the supported operations and connectivity of the target device—qBraid Runtime adds an
*extra* layer of functionalities. This layer considers the ultimate IR needed to encode the quantum program and securely submit
it to a remote API. By addressing the full scope of client-side software requirements necessary for secure submission and
management of quantum jobs, qBraid Runtime significantly streamlines the development process, enhancing the agility with which
quantum hardware providers can construct a complete stack and facilitate access to their devices.
## Building Pipelines
The `qbraid.runtime` module provides the following Universal Pipeline Components (UPCs):
* [TargetProfile](/v2/sdk/user-guide/runtime/new-provider#targetprofile): Specifies domain and device-specific runtime instructions to tailor quantum executions to particular hardware configurations.
* [QuantumProvider](/v2/sdk/user-guide/runtime/new-provider#quantumprovider): Converts device metadata into accessible Python objects, facilitating interaction with diverse quantum computing resources.
* [QuantumDevice](/v2/sdk/user-guide/runtime/new-provider#quantumdevice): Describes the unique parameters and operational settings necessary for executing quantum programs on specific hardware.
* [QuantumJob](/v2/sdk/user-guide/runtime/new-provider#quantumjob): Represents the transitional states of quantum programs, managing both ongoing and completed quantum computations.
* [Result](/v2/sdk/user-guide/visualization#plot-experimental-results): Captures and structures the output from quantum computations, including histograms and raw data, for analysis and interpretation.
In the subsequent sections, we will demonstrate how these UPCs enable quantum software and hardware providers to configure a
comprehensive client-side quantum software pipeline using just three essential REST API endpoints:
1. `GET` `/devices` (or similar) - To retrieve metadata about available quantum devices.
2. `POST` `/jobs` (or similar) - To submit a quantum job for execution on a specified device.
3. `GET` `/jobs` (or similar) - To retrieve the status and results of an executed quantum job.
## Quantum Job Submission Process
When a `QuantumDevice.run` method is called, the following steps are performed to process a quantum program and submit it as a job to a remote API:
1. **Transpile**: Performs a "program type conversion" according to the `ProgramSpec`(s) specified by the device's `TargetProfile`
2. **Transform**: Applies any device-specific passes (e.g., gate decompositions to map the circuit to a `TargetProfile.basis_gates` set).
3. **Validate**: Verify that the run input satisfies all criteria for submitting to the given device (e.g., ensuring the number of qubits in the circuit does not exceed the device's capacity).
4. **Prepare**: Serializes the run input or converts it to any lower-level IR required for submission to the remote API (e.g., string, JSON, or bytecode format).
5. **Submit**: Sends `POST` request (or equivalent) with program and all runtime parameters to the remote API, and returns a `QuantumJob` instance.
For a server-side view of how this flow integrates with the qBraid API, see the [API overview](/v2/api-reference/user-guide/overview#quantum-job-flow).
# Writing a New Provider
Source: https://docs.qbraid.com/v2/sdk/user-guide/runtime/new-provider
A step-by-step guide to implementing a new provider class.
## Overview
To integrate a quantum device or simulator with qBraid Runtime, you'll need to create a custom provider class. A provider includes a
collection of devices and runtime specifications. Each `QuantumProvider` should implement a `get_devices` method to retrieve
`QuantumDevice` objects, which describe the device's supported operations, the program types accepted as run input, and other
dynamic runtime instructions. Finally, devices must implement a `submit()` method to execute or
queue programs, returning a `QuantumJob` object. This standardization allows users and APIs to uniformly submit jobs and retrieve
results, ensuring compatibility across different providers and devices.
Here are the high-level components required to establish a complete runtime implementation:
Implement a `QuantumProvider` subclass that manages authentication and
remote access to the available device(s).
Implement a `QuantumDevice` subclass and its `submit()` method. Optionally
incorporate a custom `ConversionScheme` to broaden the range of quantum
program types that can be accepted as run input.
Implement a `QuantumJob` subclass that handles interactions with a running
job. Process and present data collected from job executions in unified
`Result` class.
## QuantumProvider
The provider class is responsible for managing interactions with various quantum services and for converting device metadata
into accessible Python objects.
For a simple provider implementation example, see qbraid.runtime.ionq.provider.py ↗
### Server Requests
Creating a provider class requires the following REST API endpoints:
1. `GET` `/devices` (or similar) - To retrieve metadata about available quantum devices.
2. `POST` `/job` (or similar) - To submit a quantum job for execution on a specified device.
3. `GET` `/job` (or similar) - To retrieve the status and results of an executed quantum job.
If you already have a Python client for interacting with your REST API server, you can skip this section and go directly to
[Provider Setup](/v2/sdk/user-guide/runtime/new-provider#provider-setup).
For those who need to set up a Python client, the `qbraid.runtime.Session`, a subclass of [requests.Session](https://requests.readthedocs.io/en/latest/user/advanced/#session-objects),
is designed to manage secure HTTP connections to custom endpoints. It ensures encrypted and authenticated communication for quantum
providers and offers customizations for management of headers and secret keys, configurable retries for `5xx` errors, and more.
Below is a minimal example demonstrating how one could set up authenticated requests to the previously mentioned endpoints:
```python theme={"dark"}
from typing import Any
from qbraid.runtime import Session
class MySession(Session):
def __init__(self, api_key: str):
super().__init__(
base_url="https://api.example.com/fake-endpoint",
headers={"Content-Type": "application/json"},
auth_headers={"apiKey": api_key},
)
self.api_key = api_key
def get_device(self, device_id: str) -> dict[str, Any]:
devices = self.get_devices(device_id=device_id)
if not devices:
raise ValueError(f"Device {device_id} not found")
return devices[0]
def get_devices(self, **kwargs) -> list[dict[str, Any]]:
return self.get("/devices", **kwargs).json()
def create_job(self, data: dict[str, Any]) -> dict[str, Any]:
return self.post("/jobs", json=data).json()
def get_job(self, job_id: str) -> dict[str, Any]:
return self.get(f"/jobs/{job_id}").json()
```
In the above example, `base_url` corresponds to your API endpoint. The qBraid `Session` class distinguishes between `headers`
and `auth_headers`, ensuring that values in `auth_headers` are masked in all responses to safeguard against the inadvertent
exposure of secret keys.
The qBraid `Session` class offers additional customizable options such as the total number of retries for requests, the number
of connection retries, the backoff factor between retry attempts, and more. For further details, refer to the linked
API Reference below.
API Reference:
qbraid.runtime.Session ↗
### TargetProfile
The `qbraid.runtime.TargetProfile` encapsulates the configuration settings and runtime protocol(s) for a quantum device, presenting
them as a read-only dictionary. This class plays a crucial role in orchestrating the processes required for the submission of
quantum jobs in the current environment.
Specifically, the `TargetProfile` class specifies domain and device-specific instructions to tailor quantum programs to the
intermediate representation (IR) required for submission through the provider's API and execution on the quantum backend. This
includes compilation steps, type conversions, data mappings, and other essential runtime transformations.
Below is an example implementation of a TargetProfile:
```python theme={"dark"}
from unittest.mock import Mock
from qbraid.programs import ProgramSpec, ExperimentType
from qbraid.runtime import DeviceType, TargetProfile
profile = TargetProfile(
device_id="abc123",
num_qubits=7,
device_type=DeviceType.QPU,
experiment_type=ExperimentType.GATE_MODEL,
program_spec=ProgramSpec(Mock, alias="mock"),
basis_gates=["h", "x", "z", "cx", "s", "t"],
provider_name="myprovider",
)
```
API Reference:
qbraid.runtime.TargetProfile ↗
### Provider Setup
Each `QuantumProvider` subclass must implement both a `get_device` and a `get_devices` method. These methods process raw device data,
adapting it into a `TargetProfile` for each device, and return either a single `QuantumDevice` object or a list of them. In this example,
we use the `MySession` class to handle API requests; however, this is illustrative and not mandatory. API interactions can also be managed
directly through other means.
In cases where the API data does not directly conform to the format needed to instantiate a `TargetProfile`, additional mappings and
adaptations will typically be necessary. Below is an example implementation of a provider using `MySession` to construct a `MyDevice`
object. We will explore implementations of `QuantumDevice` subclasses in the next section.
```python theme={"dark"}
from qbraid.runtime import QuantumProvider, TargetProfile
class MyProvider(QuantumProvider):
def __init__(self, api_key: str):
super().__init__()
self.session = MySession(api_key)
def _build_profile(self, data: dict[str, Any]) -> TargetProfile:
return TargetProfile(**data)
def get_device(self, device_id: str) -> MyDevice:
data = self.get_device(device_id=device_id)
profile = self._build_profile(data)
return MyDevice(profile, self.session)
def get_devices(self, **kwargs) -> list[MyDevice]:
data = self.session.get_devices(**kwargs)
profiles = [self._build_profile(item) for item in data]
return [MyDevice(profile, self.session) for profile in profiles]
```
API Reference:
qbraid.runtime.QuantumProvider ↗
## QuantumDevice
The `qbraid.runtime.QuantumDevice` class describes the unique parameters and operational settings necessary for executing quantum
programs on specific hardware.
API Reference:
qbraid.runtime.QuantumDevice ↗
The device objects are the core component of the providers. These objects are how users can interface between
quantum computing frameworks and hardware/simulators to execute circuits. Any `QuantumDevice` subclass must
implement both a `status` and `submit` method.
A minimum working example could look like:
```python theme={"dark"}
from qbraid.runtime import DeviceStatus, QuantumDevice
class MyDevice(QuantumDevice):
def __init__(self, profile: TargetProfile, session: MySession):
super.__init__(profile=profile)
self.session = session
def status(self) -> DeviceStatus:
data = self.session.get_device(self.id)
status = data.get("status")
if status == "online":
return DeviceStatus.ONLINE
return DeviceStatus.OFFLINE
def transform(self, run_input: Mock) -> str:
program_ir = str(run_input)
return program_ir
def submit(self, run_input: str, shots=1000) -> MyJob:
job_data = {"target": self.id, "inpput": run_input, "shots": shots}
job_data = self.session.create_job(job_data)
job_id = job_data["job_id"]
return MyJob(job_id, session=self.session, device=self, shots=shots)
```
## QuantumJob
The `qbraid.runtime.QuantumJob` class represents the transitional states of quantum programs, managing both ongoing and completed
quantum computations.
API Reference:
qbraid.runtime.QuantumJob ↗
```python theme={"dark"}
from qbraid.runtime import Result, GateModeResultData, JobStatus, QuantumJob
class MyJob(QuantumJob):
def __init__(self, job_id: str, session: MySession, **kwargs):
super().__init__(job_id=job_id, **kwargs)
self.session = session
def status(self):
data = self.session.get_job(self.id)
status = data.get("status")
if status == "completed":
return JobStatus.COMPLETED
if status == "failed":
return JobStatus.FAILED
return JobStatus.QUEUED
def result(self) -> Result:
self.wait_for_final_state()
job_data = self.session.get_job(self.id)
success = job_data.pop("status") == "completed"
counts = job_data.pop("counts")
result_data = GateModeResultData(measurement_counts=counts)
return Result(
device_id=self.device.id,
job_id=self.id,
success=success,
data=result_data,
**job_data
)
```
API Reference:
qbraid.runtime.Result ↗
Distinguishing itself through a streamlined and highly-configurable approach to cross-platform integration,
qBraid Runtime does not adhere to a fixed circuit-building library, or quantum program representation. Instead,
it empowers providers to dynamically register any desired input program type as the target based on their specific needs.
This flexibility is extended by the framework's modular pipeline, which facilitates any number of additional program
validation, transpilation, and compilation steps.
Unlike existing runtime frameworks that focus their automation and abstractions primarily on quantum components—such as
adapting the input quantum program to the supported operations and connectivity of the target device—qBraid Runtime adds an
*extra* layer of functionalities. This layer considers the ultimate IR needed to encode the quantum program and securely submit
it to a remote API. By addressing the full scope of client-side software requirements necessary for secure submission and
management of quantum jobs, qBraid Runtime significantly streamlines the development process, enhancing the agility with which
quantum hardware providers can construct a complete stack and facilitate access to their devices.
## Building Pipelines
The `qbraid.runtime` module provides the following Universal Pipeline Components (UPCs):
* [TargetProfile](/v2/sdk/user-guide/runtime/new-provider#targetprofile): Specifies domain and device-specific runtime instructions to tailor quantum executions to particular hardware configurations.
* [QuantumProvider](/v2/sdk/user-guide/runtime/new-provider#quantumprovider): Converts device metadata into accessible Python objects, facilitating interaction with diverse quantum computing resources.
* [QuantumDevice](/v2/sdk/user-guide/runtime/new-provider#quantumdevice): Describes the unique parameters and operational settings necessary for executing quantum programs on specific hardware.
* [QuantumJob](/v2/sdk/user-guide/runtime/new-provider#quantumjob): Represents the transitional states of quantum programs, managing both ongoing and completed quantum computations.
* [Result](/v2/sdk/user-guide/visualization#plot-experimental-results): Captures and structures the output from quantum computations, including histograms and raw data, for analysis and interpretation.
In the subsequent sections, we will demonstrate how these UPCs enable quantum software and hardware providers to configure a
comprehensive client-side quantum software pipeline using just three essential REST API endpoints:
1. `GET` `/devices` (or similar) - To retrieve metadata about available quantum devices.
2. `POST` `/jobs` (or similar) - To submit a quantum job for execution on a specified device.
3. `GET` `/jobs` (or similar) - To retrieve the status and results of an executed quantum job.
## Quantum Job Submission Process
When a `QuantumDevice.run` method is called, the following steps are performed to process a quantum program and submit it as a job to a remote API:
1. **Transpile**: Performs a "program type conversion" according to the `ProgramSpec`(s) specified by the device's `TargetProfile`
2. **Transform**: Applies any device-specific passes (e.g., gate decompositions to map the circuit to a `TargetProfile.basis_gates` set).
3. **Validate**: Verify that the run input satisfies all criteria for submitting to the given device (e.g., ensuring the number of qubits in the circuit does not exceed the device's capacity).
4. **Prepare**: Serializes the run input or converts it to any lower-level IR required for submission to the remote API (e.g., string, JSON, or bytecode format).
5. **Submit**: Sends `POST` request (or equivalent) with program and all runtime parameters to the remote API, and returns a `QuantumJob` instance.
For a server-side view of how this flow integrates with the qBraid API, see the [API overview](/v2/api-reference/user-guide/overview#quantum-job-flow).
# Writing a New Provider
Source: https://docs.qbraid.com/v2/sdk/user-guide/runtime/new-provider
A step-by-step guide to implementing a new provider class.
## Overview
To integrate a quantum device or simulator with qBraid Runtime, you'll need to create a custom provider class. A provider includes a
collection of devices and runtime specifications. Each `QuantumProvider` should implement a `get_devices` method to retrieve
`QuantumDevice` objects, which describe the device's supported operations, the program types accepted as run input, and other
dynamic runtime instructions. Finally, devices must implement a `submit()` method to execute or
queue programs, returning a `QuantumJob` object. This standardization allows users and APIs to uniformly submit jobs and retrieve
results, ensuring compatibility across different providers and devices.
Here are the high-level components required to establish a complete runtime implementation:
Implement a `QuantumProvider` subclass that manages authentication and
remote access to the available device(s).
Implement a `QuantumDevice` subclass and its `submit()` method. Optionally
incorporate a custom `ConversionScheme` to broaden the range of quantum
program types that can be accepted as run input.
Implement a `QuantumJob` subclass that handles interactions with a running
job. Process and present data collected from job executions in unified
`Result` class.
## QuantumProvider
The provider class is responsible for managing interactions with various quantum services and for converting device metadata
into accessible Python objects.
For a simple provider implementation example, see qbraid.runtime.ionq.provider.py ↗
### Server Requests
Creating a provider class requires the following REST API endpoints:
1. `GET` `/devices` (or similar) - To retrieve metadata about available quantum devices.
2. `POST` `/job` (or similar) - To submit a quantum job for execution on a specified device.
3. `GET` `/job` (or similar) - To retrieve the status and results of an executed quantum job.
If you already have a Python client for interacting with your REST API server, you can skip this section and go directly to
[Provider Setup](/v2/sdk/user-guide/runtime/new-provider#provider-setup).
For those who need to set up a Python client, the `qbraid.runtime.Session`, a subclass of [requests.Session](https://requests.readthedocs.io/en/latest/user/advanced/#session-objects),
is designed to manage secure HTTP connections to custom endpoints. It ensures encrypted and authenticated communication for quantum
providers and offers customizations for management of headers and secret keys, configurable retries for `5xx` errors, and more.
Below is a minimal example demonstrating how one could set up authenticated requests to the previously mentioned endpoints:
```python theme={"dark"}
from typing import Any
from qbraid.runtime import Session
class MySession(Session):
def __init__(self, api_key: str):
super().__init__(
base_url="https://api.example.com/fake-endpoint",
headers={"Content-Type": "application/json"},
auth_headers={"apiKey": api_key},
)
self.api_key = api_key
def get_device(self, device_id: str) -> dict[str, Any]:
devices = self.get_devices(device_id=device_id)
if not devices:
raise ValueError(f"Device {device_id} not found")
return devices[0]
def get_devices(self, **kwargs) -> list[dict[str, Any]]:
return self.get("/devices", **kwargs).json()
def create_job(self, data: dict[str, Any]) -> dict[str, Any]:
return self.post("/jobs", json=data).json()
def get_job(self, job_id: str) -> dict[str, Any]:
return self.get(f"/jobs/{job_id}").json()
```
In the above example, `base_url` corresponds to your API endpoint. The qBraid `Session` class distinguishes between `headers`
and `auth_headers`, ensuring that values in `auth_headers` are masked in all responses to safeguard against the inadvertent
exposure of secret keys.
The qBraid `Session` class offers additional customizable options such as the total number of retries for requests, the number
of connection retries, the backoff factor between retry attempts, and more. For further details, refer to the linked
API Reference below.
API Reference:
qbraid.runtime.Session ↗
### TargetProfile
The `qbraid.runtime.TargetProfile` encapsulates the configuration settings and runtime protocol(s) for a quantum device, presenting
them as a read-only dictionary. This class plays a crucial role in orchestrating the processes required for the submission of
quantum jobs in the current environment.
Specifically, the `TargetProfile` class specifies domain and device-specific instructions to tailor quantum programs to the
intermediate representation (IR) required for submission through the provider's API and execution on the quantum backend. This
includes compilation steps, type conversions, data mappings, and other essential runtime transformations.
Below is an example implementation of a TargetProfile:
```python theme={"dark"}
from unittest.mock import Mock
from qbraid.programs import ProgramSpec, ExperimentType
from qbraid.runtime import DeviceType, TargetProfile
profile = TargetProfile(
device_id="abc123",
num_qubits=7,
device_type=DeviceType.QPU,
experiment_type=ExperimentType.GATE_MODEL,
program_spec=ProgramSpec(Mock, alias="mock"),
basis_gates=["h", "x", "z", "cx", "s", "t"],
provider_name="myprovider",
)
```
API Reference:
qbraid.runtime.TargetProfile ↗
### Provider Setup
Each `QuantumProvider` subclass must implement both a `get_device` and a `get_devices` method. These methods process raw device data,
adapting it into a `TargetProfile` for each device, and return either a single `QuantumDevice` object or a list of them. In this example,
we use the `MySession` class to handle API requests; however, this is illustrative and not mandatory. API interactions can also be managed
directly through other means.
In cases where the API data does not directly conform to the format needed to instantiate a `TargetProfile`, additional mappings and
adaptations will typically be necessary. Below is an example implementation of a provider using `MySession` to construct a `MyDevice`
object. We will explore implementations of `QuantumDevice` subclasses in the next section.
```python theme={"dark"}
from qbraid.runtime import QuantumProvider, TargetProfile
class MyProvider(QuantumProvider):
def __init__(self, api_key: str):
super().__init__()
self.session = MySession(api_key)
def _build_profile(self, data: dict[str, Any]) -> TargetProfile:
return TargetProfile(**data)
def get_device(self, device_id: str) -> MyDevice:
data = self.get_device(device_id=device_id)
profile = self._build_profile(data)
return MyDevice(profile, self.session)
def get_devices(self, **kwargs) -> list[MyDevice]:
data = self.session.get_devices(**kwargs)
profiles = [self._build_profile(item) for item in data]
return [MyDevice(profile, self.session) for profile in profiles]
```
API Reference:
qbraid.runtime.QuantumProvider ↗
## QuantumDevice
The `qbraid.runtime.QuantumDevice` class describes the unique parameters and operational settings necessary for executing quantum
programs on specific hardware.
API Reference:
qbraid.runtime.QuantumDevice ↗
The device objects are the core component of the providers. These objects are how users can interface between
quantum computing frameworks and hardware/simulators to execute circuits. Any `QuantumDevice` subclass must
implement both a `status` and `submit` method.
A minimum working example could look like:
```python theme={"dark"}
from qbraid.runtime import DeviceStatus, QuantumDevice
class MyDevice(QuantumDevice):
def __init__(self, profile: TargetProfile, session: MySession):
super.__init__(profile=profile)
self.session = session
def status(self) -> DeviceStatus:
data = self.session.get_device(self.id)
status = data.get("status")
if status == "online":
return DeviceStatus.ONLINE
return DeviceStatus.OFFLINE
def transform(self, run_input: Mock) -> str:
program_ir = str(run_input)
return program_ir
def submit(self, run_input: str, shots=1000) -> MyJob:
job_data = {"target": self.id, "inpput": run_input, "shots": shots}
job_data = self.session.create_job(job_data)
job_id = job_data["job_id"]
return MyJob(job_id, session=self.session, device=self, shots=shots)
```
## QuantumJob
The `qbraid.runtime.QuantumJob` class represents the transitional states of quantum programs, managing both ongoing and completed
quantum computations.
API Reference:
qbraid.runtime.QuantumJob ↗
```python theme={"dark"}
from qbraid.runtime import Result, GateModeResultData, JobStatus, QuantumJob
class MyJob(QuantumJob):
def __init__(self, job_id: str, session: MySession, **kwargs):
super().__init__(job_id=job_id, **kwargs)
self.session = session
def status(self):
data = self.session.get_job(self.id)
status = data.get("status")
if status == "completed":
return JobStatus.COMPLETED
if status == "failed":
return JobStatus.FAILED
return JobStatus.QUEUED
def result(self) -> Result:
self.wait_for_final_state()
job_data = self.session.get_job(self.id)
success = job_data.pop("status") == "completed"
counts = job_data.pop("counts")
result_data = GateModeResultData(measurement_counts=counts)
return Result(
device_id=self.device.id,
job_id=self.id,
success=success,
data=result_data,
**job_data
)
```
API Reference:
qbraid.runtime.Result ↗
qbraid.runtime.GateModelResultData ↗
qbraid.runtime.AhsResultData ↗
qbraid.runtime.AnnealingResultData ↗
# Runtime Options
Source: https://docs.qbraid.com/v2/sdk/user-guide/runtime/options
Settings applied at the device level that control the behavior of a device.run call
## Overview
Every `QuantumDevice` has a set of runtime options that control the behavior of the `device.run()` call.
These options govern which steps in the [job submission pipeline](/v2/sdk/user-guide/runtime/components#quantum-job-submission-process)
are enabled, and can be updated using `device.set_options()`.
The four default options correspond to the pipeline steps that precede job submission:
| Option | Default | Type | Description |
| ----------- | ----------------------- | -------------------------- | ------------------------------------------------------------------------ |
| `transpile` | `True` | `bool` | Convert the program to the device's target program type |
| `transform` | `True` | `bool` | Apply device-specific passes (e.g. gate decomposition, topology mapping) |
| `validate` | `ValidationLevel.RAISE` | `ValidationLevel` or `int` | Verify the program satisfies device constraints |
| `prepare` | `True` | `bool` | Serialize the program to the submission IR format |
```python theme={"dark"}
device.set_options(transform=False)
device.set_options(validate=False)
```
Each option corresponds to a step in the `apply_runtime_profile` pipeline invoked by `device.run()`:
```
run_input ─> transpile ─> transform ─> validate ─> prepare ─> submit
```
Disabling an option skips that step entirely. For example, setting `transform=False` means the program
will not undergo any device-specific gate set transformations before validation.
API Reference:
qbraid.runtime.RuntimeOptions ↗
## Transform
The `QuantumDevice.transform` step applies device-specific transformations to the program. This is where
gate decompositions, topology mapping, and other hardware-aware compilation passes are performed. The base
class implementation is a no-op — each provider overrides `transform()` with its own logic.
Setting `transform=False` skips this step:
```python theme={"dark"}
device.set_options(transform=False)
```
### IonQ
The `IonQDevice.transform` method decomposes the input OpenQASM program into the IonQ native gate set.
It loads the program, applies gate mappings (single-qubit, two-qubit, and three-qubit), and falls back to
`pyqasm.unroll()` if the initial transformation fails:
```python theme={"dark"}
from qbraid.runtime import QbraidProvider
provider = QbraidProvider()
device = provider.get_device("ionq:ionq:sim:simulator")
# By default, transform=True, so the circuit is automatically
# decomposed into the IonQ native gate set (gpi, gpi2, ms, zz, etc.)
job = device.run(qasm_program, shots=100)
```
To skip the IonQ gate decomposition and submit the program as-is:
```python theme={"dark"}
device.set_options(transform=False)
job = device.run(qasm_program, shots=100)
```
### IBM
The `QiskitBackend.transform` method runs the program through a Qiskit `PassManager`
to produce an ISA (Instruction Set Architecture) circuit compatible with the target backend.
By default, it uses `generate_preset_pass_manager(backend=...)`, but you can supply your own:
```python theme={"dark"}
from qiskit.transpiler import PassManager
device.set_options(pass_manager=my_custom_pass_manager)
```
See the [Provider-Specific Options](#provider-specific-options) section for more details on the `pass_manager` option.
### AWS
The `BraketDevice.transform` method applies provider-aware transformations. For IonQ devices accessed
through Amazon Braket, it routes the circuit through pytket for an expanded gate set, then applies
Braket-specific transformations. For other Braket-supported devices, it applies standard device transformations
through the `load_program` interface.
## Validate
The validate step verifies that the run input satisfies all criteria for submission to the target device. This
includes checks such as ensuring the number of qubits in the circuit does not exceed the device's capacity, and
that the program conforms to the device's `ProgramSpec`.
Validation behavior is controlled by the `ValidationLevel` enum:
| Level | Value | Behavior |
| ----------------------- | ----- | --------------------------------------------------- |
| `ValidationLevel.NONE` | `0` | No validation is performed |
| `ValidationLevel.WARN` | `1` | Warnings are issued if validation fails |
| `ValidationLevel.RAISE` | `2` | Exceptions are raised if validation fails (default) |
API Reference:
qbraid.runtime.ValidationLevel ↗
### Validation in action
By default, validation is set to `RAISE`. If a program violates device constraints, a
`ProgramValidationError` is raised:
```python theme={"dark"}
from qbraid.runtime import QbraidProvider
provider = QbraidProvider()
device = provider.get_device("aws:rigetti:qpu:cepheus-1-108q")
job = device.run(program, shots=100)
# ProgramValidationError: Number of qubits in the circuit (100) exceeds the device's capacity (84).
```
### Disabling validation
To skip validation entirely, set the validation level to `NONE`. You can use either the enum or
pass `False` as a shorthand:
```python theme={"dark"}
from qbraid.runtime import ValidationLevel
# Using the enum
device.set_options(validate=ValidationLevel.NONE)
# Or using the bool shorthand
device.set_options(validate=False)
job = device.run(program, shots=100)
```
### Downgrading to warnings
To receive warnings instead of errors, set the validation level to `WARN`:
```python theme={"dark"}
device.set_options(validate=ValidationLevel.WARN)
job = device.run(program, shots=100)
# UserWarning: Number of qubits in the circuit (100) exceeds the device's capacity (84).
```
### Re-enabling validation
To restore the default strict validation behavior:
```python theme={"dark"}
# Using the enum
device.set_options(validate=ValidationLevel.RAISE)
# Or using the bool shorthand
device.set_options(validate=True)
```
## Prepare
The prepare step serializes the quantum program into the intermediate representation (IR) required
for submission to the target device's API. This might produce a JSON payload, an OpenQASM string,
bytecode, or any other format expected by the provider.
The base class implementation delegates to `ProgramSpec.serialize()`, which is defined per-provider.
For example, Pasqal Pulser sequences are serialized into a JSON-based abstract representation, and
OpenQASM programs may be wrapped into a `Program` object with format and data fields.
Setting `prepare=False` skips this step, leaving the program in its current in-memory representation:
```python theme={"dark"}
device.set_options(prepare=False)
```
This can be useful during debugging or when you want to inspect the transformed program before
it gets serialized:
```python theme={"dark"}
# Disable prepare and submit to inspect the post-transform program
device.set_options(prepare=False)
# apply_runtime_profile runs transpile, transform, and validate
# but skips serialization
processed = device.apply_runtime_profile(program)
print(type(processed)) # Still a circuit object, not serialized IR
```
## Provider-Specific Options
Providers can extend the default options with their own fields. These additional options
are merged into the device's configuration at initialization and follow the same `set_options` interface.
### IBM `pass_manager`
The `QiskitBackend` adds a `pass_manager` option that accepts a Qiskit `PassManager` instance (or `None`).
When set, the custom pass manager is used during the transform step instead of the default preset pass manager:
```python theme={"dark"}
from qiskit.transpiler import PassManager
from qiskit.transpiler.passes import Optimize1qGates, CXCancellation
# Create a custom pass manager
custom_pm = PassManager([Optimize1qGates(), CXCancellation()])
device.set_options(pass_manager=custom_pm)
job = device.run(circuit, shots=100)
```
Reset to the default behavior by setting `pass_manager` back to `None`:
```python theme={"dark"}
device.set_options(pass_manager=None)
```
The `pass_manager` option includes a built-in validator that only accepts `None` or a `PassManager` instance.
Attempting to set it to any other type raises a `ValueError`.
## Advanced: RuntimeOptions
Under the hood, device options are managed by the `RuntimeOptions` class, a dataclass-like container
with dictionary-style access, dynamic field support, and custom validators. While `device.set_options()`
is the primary interface for users, understanding `RuntimeOptions` can be useful when
[writing a new provider](/v2/sdk/user-guide/runtime/new-provider).
### Initializing with custom fields
```python theme={"dark"}
from qbraid.runtime.options import RuntimeOptions
options = RuntimeOptions(transpile=True, custom_field=42)
options["custom_field"]
# 42
```
### Adding dynamic fields
Fields can be added at any time using attribute or dictionary syntax:
```python theme={"dark"}
options["new_field"] = "hello"
options.another_field = 99
print(options)
# RuntimeOptions(transpile=True, custom_field=42, new_field='hello', another_field=99)
```
### Removing dynamic fields
Dynamic (non-default) fields can be deleted. Default fields cannot be removed:
```python theme={"dark"}
del options["new_field"] # OK - dynamic field
del options["another_field"] # OK - dynamic field
del options["transpile"] # KeyError: Cannot delete default field 'transpile'.
```
### Setting validators
Validators are callables that return `True` for valid values. Once set, every update to the field is
checked against the validator:
```python theme={"dark"}
options = RuntimeOptions(threshold=0.5)
options.set_validator("threshold", lambda x: isinstance(x, float) and 0 <= x <= 1)
options.threshold = 0.8 # OK
options.threshold = 1.5 # ValueError: Value '1.5' is not valid for field 'threshold'.
options.threshold = "abc" # ValueError
```
If a validator already exists and the current value does not satisfy the new validator, a `ValueError`
is raised. You must update or delete the field first before replacing the validator:
```python theme={"dark"}
options = RuntimeOptions(count=5)
options.set_validator("count", lambda x: x > 0)
# This will raise because the current value 5 does not satisfy the new validator
options.set_validator("count", lambda x: x > 10)
# ValueError: Existing value '5' for field 'count' is not valid for the new validator.
```
### Merging options
Providers use `merge()` to combine custom options with the device defaults. The `override_validators`
parameter controls whether validators from the merged options replace existing ones:
```python theme={"dark"}
defaults = RuntimeOptions(transform=True, validate=2)
custom = RuntimeOptions(validate=0)
defaults.merge(custom, override_validators=False)
defaults["validate"]
# 0
```
This is what happens internally when you pass `options` to a `QuantumDevice` constructor, as
shown in the [IBM `pass_manager` example](#ibm-pass_manager).
# Transforms
Source: https://docs.qbraid.com/v2/sdk/user-guide/transforms
Adapt quantum programs to specific hardware requirements.
In the qBraid-SDK, a "transpile" action refers to converting a quantum program from one type to another,
such as from Qiskit to Amazon Braket. In contrast, a "transform" action involves modifying a quantum program to meet specific
requirements dictated by the target device or API through which the program will be executed.
Let's delve into the various "transforms" employed to prepare a quantum program for execution on an IonQ backend.
We begin by constructing a simple Qiskit circuit that executes a controlled Y rotation:
```python theme={"dark"}
import numpy as np
from qiskit import QuantumCircuit
circuit = QuantumCircuit(2, 2)
circuit.cry(np.pi/4, 0, 1)
circuit.measure_all()
```
We then connect to the `IonQProvider` and retrieve the specifications for the IonQ Harmony device:
```python theme={"dark"}
from qbraid.runtime import IonQProvider
provider = IonQProvider()
device = provider.get_device("qpu.harmony")
device.profile.get("program_spec")
#
device.profile.get("basis_gates")
# { "x","y","z","rx","ry","rz","h","cx","s","sdg","t","tdg","sx","sxdg","swap" }
```
By reviewing the device's `TargetProfile`, we understand that in order to run a program on IonQ Harmony,
qBraid runtime requires that it be expressed as an `openqasm3.ast.Program` and utilize only the gates from
its defined basis gate set. Consequently, our first step is to transpile our `qiskit` program to the `openqasm3`
program type:
```python theme={"dark"}
from qbraid import transpile
qasm3_program = transpile(circuit, 'openqasm3')
type(qasm3_program)
# openqasm3.ast.Program
```
Next, we load the program into a qBraid `QuantumProgram` object and examine its string representation:
```python Input theme={"dark"}
from qbraid import load_program
qprogram = load_program(qasm3_program)
print(qprogram.program)
```
```qasm Output theme={"dark"}
OPENQASM 3.0;
include "stdgates.inc";
bit[2] c;
bit[2] meas;
qubit[2] q;
cry(pi / 4) q[0], q[1];
barrier q[0], q[1];
meas[0] = measure q[0];
meas[1] = measure q[1];
```
We can now apply a "transform" to this program, using our device object as argument,
ensuring it is represented exclusively in terms of gates supported by IonQ Harmony:
```python Input theme={"dark"}
program.transform(device)
print(program.program)
```
```qasm Output theme={"dark"}
OPENQASM 3.0;
bit[2] b;
qubit[2] q;
ry(0.39269908169872414) q[1];
cx q[0], q[1];
ry(-0.39269908169872414) q[1];
cx q[0], q[1];
b[0] = measure q[0];
b[1] = measure q[1];
```
Device-specific transforms are a crucial component of the qBraid runtime framework, applied as the final step
before a program is executed on a quantum backend.
We've just demonstrated how one can utilize these transforms independently, outside of a runtime protocol, which
may be beneficial for testing or local simulations. However, for qBraid runtime end-users, these steps are automatically
performed behind the scenes whenever the `QuantumDevice.run` method is invoked.
# Transpiler
Source: https://docs.qbraid.com/v2/sdk/user-guide/transpiler
Graph-based approach to quantum program type conversions.
The qBraid-SDK transpiler allows converting quantum programs from one type to another, for any two program types for which
a "conversion path" exists. Registered program types are interconnected via a directed graph, where each program type is
represented as a node and supported conversions as edges. The breadth, depth, and connectivity of this `ConversionGraph`
can be customized by the user.
API Reference:
[qbraid.transpiler](https://qbraid.github.io/qBraid/api/qbraid.transpiler.html)
## Conversion Graph
To view what conversions are available, you can plot the `ConversionGraph`:
```python theme={"dark"}
from qbraid import ConversionGraph
graph = ConversionGraph()
len(graph.nodes()) # 10
len(graph.edges()) # 25
graph.plot(legend=True)
```
![]() Gray arrows denote conversions implemented and managed by qBraid. Red arrows represent conversions implemented
by external packages or extensions. These are automatically incorporated into the conversion graph upon
installing the specified 'extra'.
You can use the native conversions supported by qBraid, or define your own custom nodes and/or edges. For example:
```python theme={"dark"}
from unittest.mock import Mock
from qbraid import register_program_type, Conversion
# replace with any program type
register_program_type(Mock, alias="mock")
# replace with your custom conversion function
example_qasm3_to_mock_func = lambda x: x
conversion = Conversion("qasm3", "mock", example_qasm3_to_mock_func)
graph.add_conversion(conversion)
# using a seed is helpful to ensure reproducibility
graph.plot(seed=20, k=3, legend=True)
```
Gray arrows denote conversions implemented and managed by qBraid. Red arrows represent conversions implemented
by external packages or extensions. These are automatically incorporated into the conversion graph upon
installing the specified 'extra'.
You can use the native conversions supported by qBraid, or define your own custom nodes and/or edges. For example:
```python theme={"dark"}
from unittest.mock import Mock
from qbraid import register_program_type, Conversion
# replace with any program type
register_program_type(Mock, alias="mock")
# replace with your custom conversion function
example_qasm3_to_mock_func = lambda x: x
conversion = Conversion("qasm3", "mock", example_qasm3_to_mock_func)
graph.add_conversion(conversion)
# using a seed is helpful to ensure reproducibility
graph.plot(seed=20, k=3, legend=True)
```
![]() Blue arrows indicate conversions added by the user during their current session.
Check if a conversion is supported between two given program types, and if so, what "conversion path(s)" would be used:
```python theme={"dark"}
graph.has_path("qiskit", "braket") # True
for p in graph.all_paths("qiskit", "braket"): print(p)
# qiskit -> braket
# qiskit -> qasm3 -> braket
# qiskit -> qasm2 -> qasm3 -> braket
# qiskit -> qasm2 -> pytket -> braket
# qiskit -> qasm2 -> cirq -> braket
graph.shortest_path("qiskit", "braket") # qiskit -> braket
```
Scope the conversions available to the transpiler by specifying your own `conversions` list:
```python theme={"dark"}
from qbraid import ConversionGraph, Conversion
from qbraid.transpiler.conversions.qiskit import qiskit_to_braket
conv = Conversion("qiskit", "braket", qiskit_to_braket)
graph = ConversionGraph(conversions=[conv])
graph.all_paths("qiskit", "braket")
# ["qiskit -> qasm3 -> braket"]
```
## Conversion Scheme
The `ConversionScheme` data class details information about conversion configurations, such as numbers of nodes and edges, as well as max depth.
```python theme={"dark"}
from qbraid import ConversionGraph, ConversionScheme
scheme = ConversionScheme(max_path_attempts=3, max_path_depth=None)
custom_graph = ConversionGraph(...)
scheme.update_scheme(conversion_graph=custom_graph)
scheme.to_dict()
```
## Transpile
Using the `qbraid.transpile` function, simply pass in the name of the target package from one of `qbraid.QPROGRAM_ALIASES`. For example, use input `"cirq"` to return a `cirq.Circuit`:
```python theme={"dark"}
from qiskit import QuantumCircuit
def bell():
circuit = QuantumCircuit(2)
circuit.h(0)
circuit.cx(0,1)
return circuit
qiskit_circuit = bell()
```
```python Input theme={"dark"}
from qbraid import transpile
cirq_circuit = transpile(qiskit_circuit, "cirq")
print(cirq_circuit)
```
```text Output theme={"dark"}
q_0: ───H───@───
│
q_1: ───────X───
```
This time, using the same origin circuit, we'll input `"pyquil"` to return a `pyquil.quil.Program`:
```python Input theme={"dark"}
pyquil_program = transpile(qiskit_circuit, "pyquil")
print(pyquil_program)
```
```text Output theme={"dark"}
H 0
CNOT 0 1
```
See also:
* Transpiler Demo Notebook: General Usage
# Visualization
Source: https://docs.qbraid.com/v2/sdk/user-guide/visualization
Draw circuit diagrams and plot experimental results, conversion graphs, and more.
API Reference:
[qbraid.visualization](https://qbraid.github.io/qBraid/api/qbraid.visualization.html)
## Draw Circuit Diagrams
qBraid's `circuit_drawer` function takes in any type of supported quantum circuit and draws the corresponding visualization.
Here's an example using `braket` and `cirq`:
```python theme={"dark"}
from qbraid import random_circuit
from qbraid.visualization import circuit_drawer
circuit = random_circuit("braket")
circuit_drawer(circuit)
# T : |0| 1 |2|
#
# q0 : -C-C---S-
# | |
# q1 : -Z-|-Z---
# |
# q2 : -Z-X-----
#
# T : |0| 1 |2|
circuit = random_circuit("cirq")
circuit_drawer(circuit)
# 0: ───────────×───Z───
# │
# 1: ───iSwap───×───────
# │
# 2: ───iSwap───Y───H───
```
### Draw OpenQASM 3 circuits
The `circuit_drawer` function accepts a string of OpenQASM 3 code and returns a matplotlib figure of the circuit:
```python theme={"dark"}
from qbraid.visualization import circuit_drawer
program = """
OPENQASM 3;
include "stdgates.inc";
qubit[2] q;
h q[0];
cx q[0], q[1];
"""
circuit_drawer(program)
```
**Note**: The above is the equivalent to calling `pyqasm.draw(..., output="mpl")`
## Plot Experimental Results
Gather the measurement counts and plot the histogram data for any `Result` constructed from `ResultData` of type `qbraid.runtime.GateModelResultData`:
```python theme={"dark"}
from qbraid.visualization import plot_histogram
counts = result.data.get_counts()
# {'00': 483, '01': 14, '10': 486, '11': 17}
plot_histogram(counts)
```
Or, using the same measurement counts data, plot the probability distribution:
```python theme={"dark"}
from qbraid.visualization plot_distribution
plot_distribution(counts)
```
Or, plot a batch of measurement counts for any `list[qbraid.runtime.GateModeResultData]`:
```python theme={"dark"}
batch_jobs = device.run_batch([circuit0, circuit1], shots=1000)
batch_results = [job.result() for job in batch_jobs]
batch_counts = [result.data.get_counts() for result in batch_results]
# e.g. [{'0': 136, '1': 864}, {'0': 166, '1': 834}]
plot_histogram(batch_counts)
```
Using the qBraid runtime job and results primitives, experimental data is returned in a standardized format,
facilitating straightforward comparisons and benchmarking of results across different providers and backends.
## Plot Transpiler Conversions
Plot all supported conversions between registered program types available through the `qbraid.transpiler`:
```python theme={"dark"}
from qbraid import ConversionGraph
from qbraid.visualization import plot_conversion_graph
graph = ConversionGraph()
plot_conversion_graph(graph, legend=True)
```
## Plot Runtime Conversion Scheme
Plot the runtime conversion scheme for any `qbraid.runtime.QuantumDevice`.
The `QuantumDevice.scheme` defines the `qbraid.transpiler.ConversionScheme` that will be used to carry out the "transpile" step of the [Quantum Job Submission Process](/v2/sdk/user-guide/runtime/components#quantum-job-submission-process).
```python theme={"dark"}
from qbraid import QbraidProvider
from qbraid.visualization import plot_runtime_conversion_scheme
provider = QbraidProvider()
device = provider.get_device("qbraid:qbraid:sim:qir-sv")
print(device.scheme)
```
By setting the maximum path depth to 1, we ensure the `ConversionGraph` includes only program types (nodes) that are directly connected to the target program type by a single conversion step (edge).
```python theme={"dark"}
device.update_scheme(max_path_depth=1)
plot_runtime_conversion_scheme(device)
```
By setting the maximum path depth to 2, we can see how the `ConversionGraph` is expanded to include program types (nodes) that are at most two conversion steps (edges) away from the target program type.
```python theme={"dark"}
device.update_scheme(max_path_depth=2)
plot_runtime_conversion_scheme(device)
```
# qBraid VS Code
Source: https://docs.qbraid.com/v2/vscode/user-guide/code-editor
Directly connect to an online VS Code environment with pre-installed quantum extensions.
## Overview
qBraid VS Code is a cloud-hosted deployment of Visual Studio Code, designed for quantum computing and available to all qBraid users. It offers a browser-based coding environment with direct access to quantum resources, pre-configured environments, and seamless integration with qBraid Lab. Users can develop, run, and manage quantum and classical code from anywhere, without the need for local setup or installation.
## How to Launch
Blue arrows indicate conversions added by the user during their current session.
Check if a conversion is supported between two given program types, and if so, what "conversion path(s)" would be used:
```python theme={"dark"}
graph.has_path("qiskit", "braket") # True
for p in graph.all_paths("qiskit", "braket"): print(p)
# qiskit -> braket
# qiskit -> qasm3 -> braket
# qiskit -> qasm2 -> qasm3 -> braket
# qiskit -> qasm2 -> pytket -> braket
# qiskit -> qasm2 -> cirq -> braket
graph.shortest_path("qiskit", "braket") # qiskit -> braket
```
Scope the conversions available to the transpiler by specifying your own `conversions` list:
```python theme={"dark"}
from qbraid import ConversionGraph, Conversion
from qbraid.transpiler.conversions.qiskit import qiskit_to_braket
conv = Conversion("qiskit", "braket", qiskit_to_braket)
graph = ConversionGraph(conversions=[conv])
graph.all_paths("qiskit", "braket")
# ["qiskit -> qasm3 -> braket"]
```
## Conversion Scheme
The `ConversionScheme` data class details information about conversion configurations, such as numbers of nodes and edges, as well as max depth.
```python theme={"dark"}
from qbraid import ConversionGraph, ConversionScheme
scheme = ConversionScheme(max_path_attempts=3, max_path_depth=None)
custom_graph = ConversionGraph(...)
scheme.update_scheme(conversion_graph=custom_graph)
scheme.to_dict()
```
## Transpile
Using the `qbraid.transpile` function, simply pass in the name of the target package from one of `qbraid.QPROGRAM_ALIASES`. For example, use input `"cirq"` to return a `cirq.Circuit`:
```python theme={"dark"}
from qiskit import QuantumCircuit
def bell():
circuit = QuantumCircuit(2)
circuit.h(0)
circuit.cx(0,1)
return circuit
qiskit_circuit = bell()
```
```python Input theme={"dark"}
from qbraid import transpile
cirq_circuit = transpile(qiskit_circuit, "cirq")
print(cirq_circuit)
```
```text Output theme={"dark"}
q_0: ───H───@───
│
q_1: ───────X───
```
This time, using the same origin circuit, we'll input `"pyquil"` to return a `pyquil.quil.Program`:
```python Input theme={"dark"}
pyquil_program = transpile(qiskit_circuit, "pyquil")
print(pyquil_program)
```
```text Output theme={"dark"}
H 0
CNOT 0 1
```
See also:
* Transpiler Demo Notebook: General Usage
# Visualization
Source: https://docs.qbraid.com/v2/sdk/user-guide/visualization
Draw circuit diagrams and plot experimental results, conversion graphs, and more.
API Reference:
[qbraid.visualization](https://qbraid.github.io/qBraid/api/qbraid.visualization.html)
## Draw Circuit Diagrams
qBraid's `circuit_drawer` function takes in any type of supported quantum circuit and draws the corresponding visualization.
Here's an example using `braket` and `cirq`:
```python theme={"dark"}
from qbraid import random_circuit
from qbraid.visualization import circuit_drawer
circuit = random_circuit("braket")
circuit_drawer(circuit)
# T : |0| 1 |2|
#
# q0 : -C-C---S-
# | |
# q1 : -Z-|-Z---
# |
# q2 : -Z-X-----
#
# T : |0| 1 |2|
circuit = random_circuit("cirq")
circuit_drawer(circuit)
# 0: ───────────×───Z───
# │
# 1: ───iSwap───×───────
# │
# 2: ───iSwap───Y───H───
```
### Draw OpenQASM 3 circuits
The `circuit_drawer` function accepts a string of OpenQASM 3 code and returns a matplotlib figure of the circuit:
```python theme={"dark"}
from qbraid.visualization import circuit_drawer
program = """
OPENQASM 3;
include "stdgates.inc";
qubit[2] q;
h q[0];
cx q[0], q[1];
"""
circuit_drawer(program)
```
**Note**: The above is the equivalent to calling `pyqasm.draw(..., output="mpl")`
## Plot Experimental Results
Gather the measurement counts and plot the histogram data for any `Result` constructed from `ResultData` of type `qbraid.runtime.GateModelResultData`:
```python theme={"dark"}
from qbraid.visualization import plot_histogram
counts = result.data.get_counts()
# {'00': 483, '01': 14, '10': 486, '11': 17}
plot_histogram(counts)
```
Or, using the same measurement counts data, plot the probability distribution:
```python theme={"dark"}
from qbraid.visualization plot_distribution
plot_distribution(counts)
```
Or, plot a batch of measurement counts for any `list[qbraid.runtime.GateModeResultData]`:
```python theme={"dark"}
batch_jobs = device.run_batch([circuit0, circuit1], shots=1000)
batch_results = [job.result() for job in batch_jobs]
batch_counts = [result.data.get_counts() for result in batch_results]
# e.g. [{'0': 136, '1': 864}, {'0': 166, '1': 834}]
plot_histogram(batch_counts)
```
Using the qBraid runtime job and results primitives, experimental data is returned in a standardized format,
facilitating straightforward comparisons and benchmarking of results across different providers and backends.
## Plot Transpiler Conversions
Plot all supported conversions between registered program types available through the `qbraid.transpiler`:
```python theme={"dark"}
from qbraid import ConversionGraph
from qbraid.visualization import plot_conversion_graph
graph = ConversionGraph()
plot_conversion_graph(graph, legend=True)
```
## Plot Runtime Conversion Scheme
Plot the runtime conversion scheme for any `qbraid.runtime.QuantumDevice`.
The `QuantumDevice.scheme` defines the `qbraid.transpiler.ConversionScheme` that will be used to carry out the "transpile" step of the [Quantum Job Submission Process](/v2/sdk/user-guide/runtime/components#quantum-job-submission-process).
```python theme={"dark"}
from qbraid import QbraidProvider
from qbraid.visualization import plot_runtime_conversion_scheme
provider = QbraidProvider()
device = provider.get_device("qbraid:qbraid:sim:qir-sv")
print(device.scheme)
```
By setting the maximum path depth to 1, we ensure the `ConversionGraph` includes only program types (nodes) that are directly connected to the target program type by a single conversion step (edge).
```python theme={"dark"}
device.update_scheme(max_path_depth=1)
plot_runtime_conversion_scheme(device)
```
By setting the maximum path depth to 2, we can see how the `ConversionGraph` is expanded to include program types (nodes) that are at most two conversion steps (edges) away from the target program type.
```python theme={"dark"}
device.update_scheme(max_path_depth=2)
plot_runtime_conversion_scheme(device)
```
# qBraid VS Code
Source: https://docs.qbraid.com/v2/vscode/user-guide/code-editor
Directly connect to an online VS Code environment with pre-installed quantum extensions.
## Overview
qBraid VS Code is a cloud-hosted deployment of Visual Studio Code, designed for quantum computing and available to all qBraid users. It offers a browser-based coding environment with direct access to quantum resources, pre-configured environments, and seamless integration with qBraid Lab. Users can develop, run, and manage quantum and classical code from anywhere, without the need for local setup or installation.
## How to Launch
![vscode-launch]() 1. **Login to qBraid:**\
Go to [qbraid.com](https://qbraid.com) and sign in with your account.
2. **Choose VS Code Instance:**\
Navigate to the Dashboard section and select the VS Code option from your available compute environments. You will have an option to choose instances with varying resource allocations based on your needs.
3. **Launch:**\
Click the "Launch New Instance" button to start your cloud VS Code session. The editor will open in your browser, ready to use with all quantum tools pre-installed.
## Features
1. **Login to qBraid:**\
Go to [qbraid.com](https://qbraid.com) and sign in with your account.
2. **Choose VS Code Instance:**\
Navigate to the Dashboard section and select the VS Code option from your available compute environments. You will have an option to choose instances with varying resource allocations based on your needs.
3. **Launch:**\
Click the "Launch New Instance" button to start your cloud VS Code session. The editor will open in your browser, ready to use with all quantum tools pre-installed.
## Features
![vscode-features]() * **Quantum Console:**\
Manage quantum jobs, devices, and providers (including IBM and qBraid) directly from the VS Code interface.
* **Environment Manager:**\
Create, activate, and manage Python environments for quantum development, both locally and in the cloud.
* **Pre-configured Quantum Lab:**\
Access Jupyter notebooks, quantum SDKs, and all necessary dependencies without manual setup.
* **Seamless Integration:**\
Move between code, notebooks, and quantum resources with a unified experience, leveraging qBraid’s authentication and resource management.
qBraid VS Code streamlines quantum development, making it easy to start coding, experimenting, and running jobs on real quantum hardware — all
within the same environment.
# Environment Manager
Source: https://docs.qbraid.com/v2/vscode/user-guide/environment-manager
Manage your quantum environments directly within Visual Studio Code.
The qBraid Environment Manager extension allows you to manage your Python quantum environments directly within Visual Studio Code. This includes creating, viewing, using, removing, editing, and sharing environments both locally and in the cloud.
### Installation
The Environment Manager extension can be installed directly through the [VS Code Marketplace](https://marketplace.visualstudio.com/items?itemName=qBraid.qbraid-environment-manager) -
* **Quantum Console:**\
Manage quantum jobs, devices, and providers (including IBM and qBraid) directly from the VS Code interface.
* **Environment Manager:**\
Create, activate, and manage Python environments for quantum development, both locally and in the cloud.
* **Pre-configured Quantum Lab:**\
Access Jupyter notebooks, quantum SDKs, and all necessary dependencies without manual setup.
* **Seamless Integration:**\
Move between code, notebooks, and quantum resources with a unified experience, leveraging qBraid’s authentication and resource management.
qBraid VS Code streamlines quantum development, making it easy to start coding, experimenting, and running jobs on real quantum hardware — all
within the same environment.
# Environment Manager
Source: https://docs.qbraid.com/v2/vscode/user-guide/environment-manager
Manage your quantum environments directly within Visual Studio Code.
The qBraid Environment Manager extension allows you to manage your Python quantum environments directly within Visual Studio Code. This includes creating, viewing, using, removing, editing, and sharing environments both locally and in the cloud.
### Installation
The Environment Manager extension can be installed directly through the [VS Code Marketplace](https://marketplace.visualstudio.com/items?itemName=qBraid.qbraid-environment-manager) -
![Quantum Env Manager Extension]() ## Managing Environments
### Create
* Create a new environment by clicking on the `Add` icon in the Environment Manager panel.
* Click on the `Create Environment` button to open the environment creation dialog.
* Enter the name and description for the environment, select the Python version, tags, and packages you want to include.
* Click on the `Create` button to create the environment.
* The new environment will be created and added to the Environment Manager panel.
* You can also choose to install an environment from the pre-configured groups such as Qiskit, qBraid, etc. -
## Managing Environments
### Create
* Create a new environment by clicking on the `Add` icon in the Environment Manager panel.
* Click on the `Create Environment` button to open the environment creation dialog.
* Enter the name and description for the environment, select the Python version, tags, and packages you want to include.
* Click on the `Create` button to create the environment.
* The new environment will be created and added to the Environment Manager panel.
* You can also choose to install an environment from the pre-configured groups such as Qiskit, qBraid, etc. -
![Create Environments from Scratch]()
![Create Environments from Group]() ### View
* You can view the created Python environments on the Environment Manager panel.
* Click on the `Environment Manager` icon in the Activity Bar on the side of the VS Code window. This will open up the Environment Manager panel where you can see all of your current installed environments.
* You can expand the dropdown pertaining to each environment to see more details, such as the Python version, packages installed, and whether it is currently active.
* Clicking on the `More` button will open up a separate panel with additional options for that environment, such as viewing and updating installed Python packages,
or sharing the environment with others.
### View
* You can view the created Python environments on the Environment Manager panel.
* Click on the `Environment Manager` icon in the Activity Bar on the side of the VS Code window. This will open up the Environment Manager panel where you can see all of your current installed environments.
* You can expand the dropdown pertaining to each environment to see more details, such as the Python version, packages installed, and whether it is currently active.
* Clicking on the `More` button will open up a separate panel with additional options for that environment, such as viewing and updating installed Python packages,
or sharing the environment with others.
![View Environments]() ### Use
* Expand the dropdown for the environment you want to use and click on the `Activate` button.
* Once activated, click on the `Select Kernel` icon. This will open the selection dialog for choosing the Python kernel.
* Select the kernel corresponding to the activated environment.
* You can now run Python commands in this terminal using the selected environment.
### Use
* Expand the dropdown for the environment you want to use and click on the `Activate` button.
* Once activated, click on the `Select Kernel` icon. This will open the selection dialog for choosing the Python kernel.
* Select the kernel corresponding to the activated environment.
* You can now run Python commands in this terminal using the selected environment.
![Use Environments]() ### Edit
* Clicking on the `More` button will open up a separate panel with additional options for that environment.
* You can edit the environment general info by clicking on the `Edit` button. This will allow you to change the name, description, and other details of the environment.
* You can also add/remove packages from the environment by clicking on the `Packages` tab in the same panel:
* **Add**: Search for the package you want to add, select a version, and click on the `Add` button
* **Remove**: Click on the `Remove` button next to the package.
* Once you have made all the changes, click on the `Update` button to apply them
### Edit
* Clicking on the `More` button will open up a separate panel with additional options for that environment.
* You can edit the environment general info by clicking on the `Edit` button. This will allow you to change the name, description, and other details of the environment.
* You can also add/remove packages from the environment by clicking on the `Packages` tab in the same panel:
* **Add**: Search for the package you want to add, select a version, and click on the `Add` button
* **Remove**: Click on the `Remove` button next to the package.
* Once you have made all the changes, click on the `Update` button to apply them
![Edit Environments]() ### Uninstall
* Click on the `More` button and select the `Uninstall Environment` option.
* A confirmation dialog will appear asking you to confirm the removal of the environment. Once confirmed,
the environment will be removed from your local machine or qBraid Lab instance (if it is a cloud environment).
### Uninstall
* Click on the `More` button and select the `Uninstall Environment` option.
* A confirmation dialog will appear asking you to confirm the removal of the environment. Once confirmed,
the environment will be removed from your local machine or qBraid Lab instance (if it is a cloud environment).
![Remove Environments]() ### Share
* Click on the `More` button and select the `Share Info` option.
* You can choose to share the environment via:
* **Email**: Enter the email address of the recipient and click on the `Share` button.
* **Access Code**: Click on the `Generate Access Code` button. This will generate a unique access code that can be shared with others to access the environment.
The recipient can then use this code to access the environment in their own qBraid account.
## Managing Compute Resources
* As part of the Environment Manager is the **Compute Manager** extension, which allows you to connect to and manage remote qBraid Lab compute resources, including CPUs and NVIDIA GPUs.
* The Compute Manager allows you to:
* View available compute resources in the qBraid Lab.
* Activate or deactivate compute resources.
* View the status of your compute resources.
* Manage your compute instances directly from Visual Studio Code.
* To utilize the `Cloud` functionality of the Environment Manager, you must have a running instance of the [qBraid Lab](/v2/lab/user-guide/overview).
### Share
* Click on the `More` button and select the `Share Info` option.
* You can choose to share the environment via:
* **Email**: Enter the email address of the recipient and click on the `Share` button.
* **Access Code**: Click on the `Generate Access Code` button. This will generate a unique access code that can be shared with others to access the environment.
The recipient can then use this code to access the environment in their own qBraid account.
## Managing Compute Resources
* As part of the Environment Manager is the **Compute Manager** extension, which allows you to connect to and manage remote qBraid Lab compute resources, including CPUs and NVIDIA GPUs.
* The Compute Manager allows you to:
* View available compute resources in the qBraid Lab.
* Activate or deactivate compute resources.
* View the status of your compute resources.
* Manage your compute instances directly from Visual Studio Code.
* To utilize the `Cloud` functionality of the Environment Manager, you must have a running instance of the [qBraid Lab](/v2/lab/user-guide/overview).
![Compute Manager Extension]() # Overview
Source: https://docs.qbraid.com/v2/vscode/user-guide/overview
Get an overview of the qBraid VS Code extension pack and our custom VS Code deployment.
# qBraid and VS Code
# Overview
Source: https://docs.qbraid.com/v2/vscode/user-guide/overview
Get an overview of the qBraid VS Code extension pack and our custom VS Code deployment.
# qBraid and VS Code
![qBraid VS Code Logo]()
![qBraid VS Code Logo]() The qBraid VS Code Extension Pack brings together a curated set of extensions
designed to streamline quantum software development, device access, and
environment management—all within the familiar Visual Studio Code interface.
This pack is available for both local installations and as part of qBraid’s
custom, cloud-hosted VS Code deployment.
## Extension Packs
The extension pack includes:
* [**Quantum Console:**](/v2/vscode/user-guide/quantum-console) Manage quantum jobs, devices, and providers like qBraid, and IBM directly from VS Code.
* [**Environment Manager:**](/v2/vscode/user-guide/environment-manager) Easily switch between and manage Python environments, essential for quantum software development.
## VS Code Deployment
qBraid offers a custom deployment of Visual Studio Code, which provides:
* **Pre-installed Quantum Extensions:** All core qBraid extensions and dependencies are ready to use—no setup required.
* **Cloud-based Development:** Access your development environment from anywhere, with persistent storage and scalable compute resources.
* **Integrated Authentication:** Secure access to qBraid and IBM Quantum services, with easy API key management.
* **Consistent Experience:** Enjoy the same interface and features whether working locally or in the cloud.
Navigate to account [Lab Instances](https://account.qbraid.com/dashboard/lab-instances), choose **VS Code** as your IDE, select a compute profile, and launch.
## Local & Cloud Flexibility
The qBraid extension pack can be installed in your local VS Code or used directly within the custom cloud deployment. This ensures a consistent, powerful quantum development experience—no matter where you work.
Explore the following pages for detailed guides on each of our extensions and deployment features, including screenshots and step-by-step usage instructions.
# Quantum Console
Source: https://docs.qbraid.com/v2/vscode/user-guide/quantum-console
Manage qBraid jobs and devices directly within Visual Studio Code.
The Quantum Console VS Code extension pack provides a powerful interface for quantum computing workflows, enabling seamless management of quantum jobs and devices through qBraid's [public APIs](/v2/api-reference/user-guide/overview).
### Installation
The Quantum Console extension can be installed directly through the [VS Code Marketplace](https://marketplace.visualstudio.com/items?itemName=qBraid.quantum-console) -
The qBraid VS Code Extension Pack brings together a curated set of extensions
designed to streamline quantum software development, device access, and
environment management—all within the familiar Visual Studio Code interface.
This pack is available for both local installations and as part of qBraid’s
custom, cloud-hosted VS Code deployment.
## Extension Packs
The extension pack includes:
* [**Quantum Console:**](/v2/vscode/user-guide/quantum-console) Manage quantum jobs, devices, and providers like qBraid, and IBM directly from VS Code.
* [**Environment Manager:**](/v2/vscode/user-guide/environment-manager) Easily switch between and manage Python environments, essential for quantum software development.
## VS Code Deployment
qBraid offers a custom deployment of Visual Studio Code, which provides:
* **Pre-installed Quantum Extensions:** All core qBraid extensions and dependencies are ready to use—no setup required.
* **Cloud-based Development:** Access your development environment from anywhere, with persistent storage and scalable compute resources.
* **Integrated Authentication:** Secure access to qBraid and IBM Quantum services, with easy API key management.
* **Consistent Experience:** Enjoy the same interface and features whether working locally or in the cloud.
Navigate to account [Lab Instances](https://account.qbraid.com/dashboard/lab-instances), choose **VS Code** as your IDE, select a compute profile, and launch.
## Local & Cloud Flexibility
The qBraid extension pack can be installed in your local VS Code or used directly within the custom cloud deployment. This ensures a consistent, powerful quantum development experience—no matter where you work.
Explore the following pages for detailed guides on each of our extensions and deployment features, including screenshots and step-by-step usage instructions.
# Quantum Console
Source: https://docs.qbraid.com/v2/vscode/user-guide/quantum-console
Manage qBraid jobs and devices directly within Visual Studio Code.
The Quantum Console VS Code extension pack provides a powerful interface for quantum computing workflows, enabling seamless management of quantum jobs and devices through qBraid's [public APIs](/v2/api-reference/user-guide/overview).
### Installation
The Quantum Console extension can be installed directly through the [VS Code Marketplace](https://marketplace.visualstudio.com/items?itemName=qBraid.quantum-console) -
![Quantum Console Extension]() ## Extensions
### Cloud Providers Panel
Manage your quantum cloud providers directly from VS Code.
* **Enable/Disable Providers:** Easily toggle access to supported providers.
* **Supported Providers:** `qBraid`, `IBM`
* **Seamless Switching:** Instantly switch between providers to manage jobs and devices from multiple platforms in one place.
## Extensions
### Cloud Providers Panel
Manage your quantum cloud providers directly from VS Code.
* **Enable/Disable Providers:** Easily toggle access to supported providers.
* **Supported Providers:** `qBraid`, `IBM`
* **Seamless Switching:** Instantly switch between providers to manage jobs and devices from multiple platforms in one place.
![qbraid-vscode-cloud-providers]() ### Quantum Devices
Monitor the status, queue depth, capabilities, and other details of quantum devices accessible through both IBM and qBraid.
**IBM Devices**
* View available IBM QPUs and simulators.
* Inspect detailed device properties: qubit count, connectivity, error rates, and more.
* Monitor real-time queue depth and device status.
* Seamlessly switch to IBM as your active provider to submit jobs and manage devices.
**qBraid Devices**
* Access QPUs from IonQ, Oxford Quantum Circuits, QuEra, Rigetti, and IQM.
* Use on-demand simulators from qBraid, AWS, IonQ, QuEra, and NEC.
* Monitor device status, queue depth, and capabilities.
* Filter and sort devices by provider, type, and other attributes.
* For more details on access and costs, see the [pricing page](https://docs.qbraid.com/home/pricing).
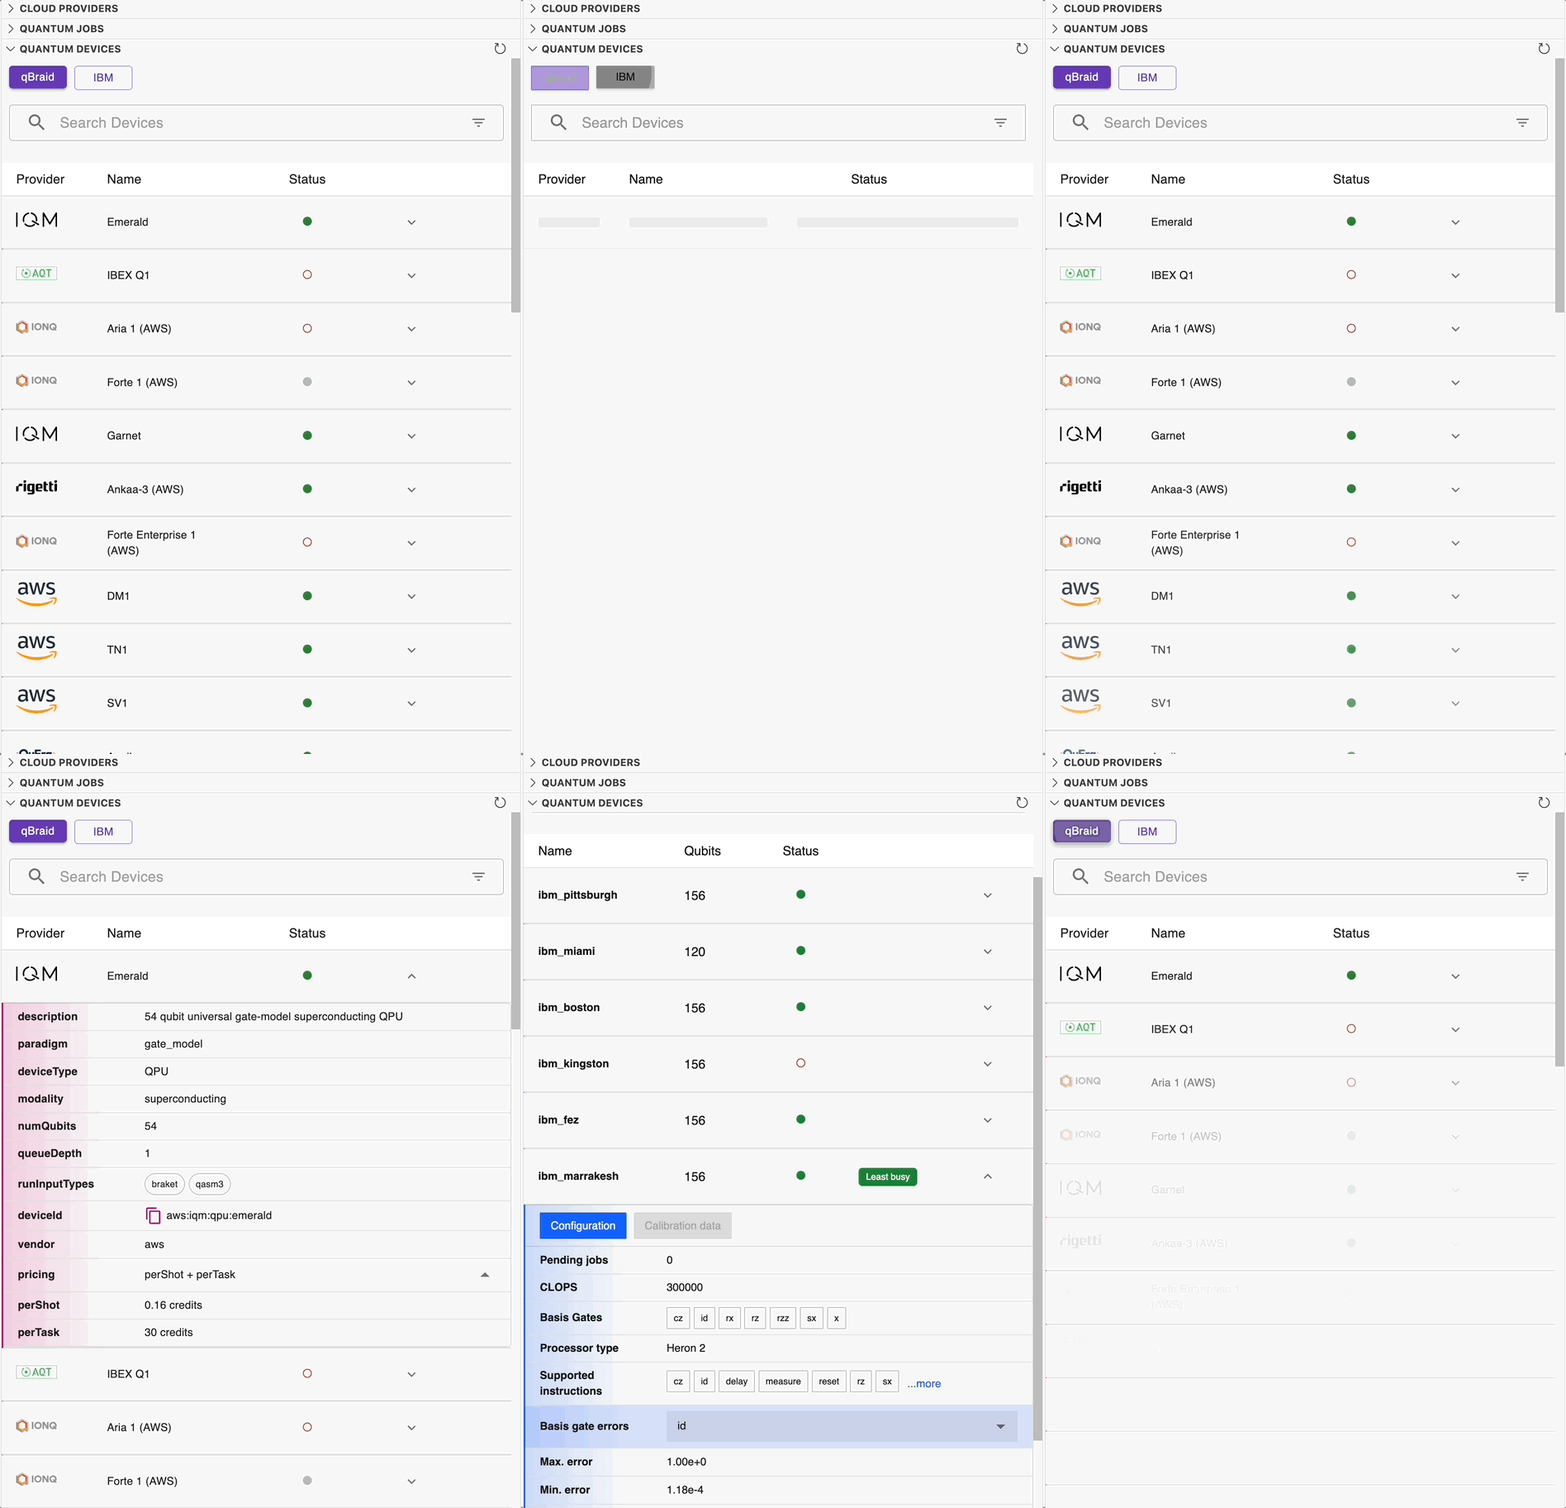
### Quantum Jobs
The **Quantum Jobs** sidebar is where you can view and manage all your quantum jobs. Jobs submitted via the [qbraid.runtime.QbraidProvider](https://docs.qbraid.com/sdk/user-guide/providers/native) will automatically appear in the **qBraid** tab. Moreover, jobs submitted directly to IBM Quantum via [Qiskit](https://quantum.cloud.ibm.com/docs/en/guides#qiskit-runtime) or [qbraid.runtime.ibm.QiskitRuntimeProvider](https://docs.qbraid.com/sdk/user-guide/providers/ibm) will appear in the **IBM** tab. The sidebar allows you to:
* *View Jobs* – Browse all jobs submitted to qBraid and IBM Quantum.
* *Monitor Progress* – Track job status and queue position in real-time.
* *Manage Jobs* – Cancel or delete jobs as needed.
* *Search & Filter* – Find jobs by ID, status, tags, and other attributes.
* *Inspect Details* – View job's qasm representation, cost estimates, and job metadata.
* *Retrieve Results* – View measurement counts and execution data.
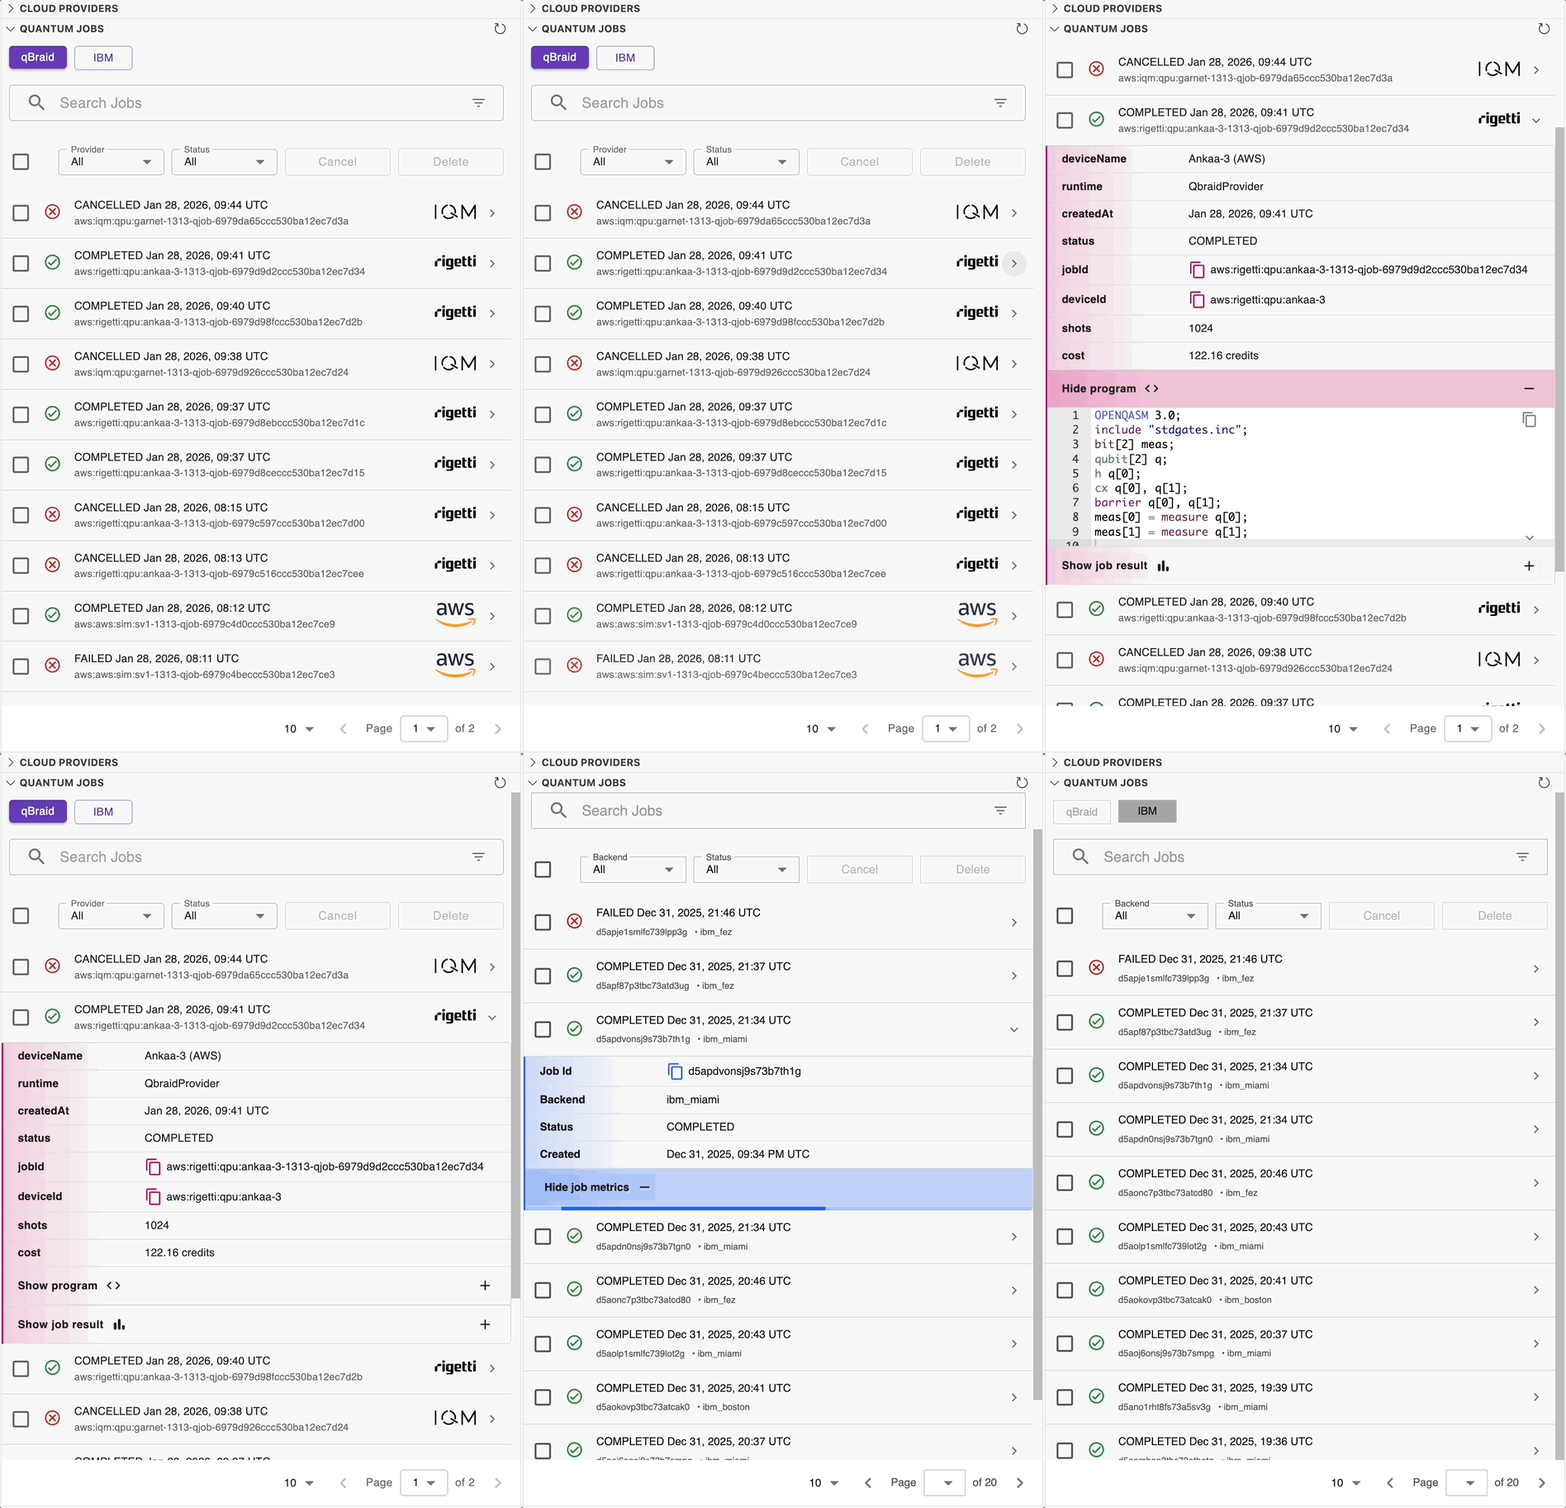
## Authentication
The Quantum Console extension pack requires authentication for both qBraid and IBM Quantum providers:
**qBraid Access**
1. Login or create a free account at [account.qbraid.com](https://account.qbraid.com).
2. Copy your API Key from the **Plan** info card on the left side of your account page.
3. Enter the API Key in the qBraid provider dropdown.
4. Click *Save* to complete the authentication process.
### Quantum Devices
Monitor the status, queue depth, capabilities, and other details of quantum devices accessible through both IBM and qBraid.
**IBM Devices**
* View available IBM QPUs and simulators.
* Inspect detailed device properties: qubit count, connectivity, error rates, and more.
* Monitor real-time queue depth and device status.
* Seamlessly switch to IBM as your active provider to submit jobs and manage devices.
**qBraid Devices**
* Access QPUs from IonQ, Oxford Quantum Circuits, QuEra, Rigetti, and IQM.
* Use on-demand simulators from qBraid, AWS, IonQ, QuEra, and NEC.
* Monitor device status, queue depth, and capabilities.
* Filter and sort devices by provider, type, and other attributes.
* For more details on access and costs, see the [pricing page](https://docs.qbraid.com/home/pricing).

### Quantum Jobs
The **Quantum Jobs** sidebar is where you can view and manage all your quantum jobs. Jobs submitted via the [qbraid.runtime.QbraidProvider](https://docs.qbraid.com/sdk/user-guide/providers/native) will automatically appear in the **qBraid** tab. Moreover, jobs submitted directly to IBM Quantum via [Qiskit](https://quantum.cloud.ibm.com/docs/en/guides#qiskit-runtime) or [qbraid.runtime.ibm.QiskitRuntimeProvider](https://docs.qbraid.com/sdk/user-guide/providers/ibm) will appear in the **IBM** tab. The sidebar allows you to:
* *View Jobs* – Browse all jobs submitted to qBraid and IBM Quantum.
* *Monitor Progress* – Track job status and queue position in real-time.
* *Manage Jobs* – Cancel or delete jobs as needed.
* *Search & Filter* – Find jobs by ID, status, tags, and other attributes.
* *Inspect Details* – View job's qasm representation, cost estimates, and job metadata.
* *Retrieve Results* – View measurement counts and execution data.

## Authentication
The Quantum Console extension pack requires authentication for both qBraid and IBM Quantum providers:
**qBraid Access**
1. Login or create a free account at [account.qbraid.com](https://account.qbraid.com).
2. Copy your API Key from the **Plan** info card on the left side of your account page.
3. Enter the API Key in the qBraid provider dropdown.
4. Click *Save* to complete the authentication process.
![qbraid-auth]() For more information, refer to the [qBraid API Keys documentation](https://docs.qbraid.com/home/account#api-keys).
**IBM Quantum Access**
1. Login or create a free account at [quantum.cloud.ibm.com](https://quantum.cloud.ibm.com/).
2. Obtain your IBM Cloud API Key and the Service Cloud Resource Name (CRN) for your IBM Quantum instance from the [IBM Cloud Console](https://quantum.cloud.ibm.com/).
3. Enter both the API Key and Service CRN in the IBM provider dropdown.
4. Click *Save* to complete the authentication process.
For more information, refer to the [qBraid API Keys documentation](https://docs.qbraid.com/home/account#api-keys).
**IBM Quantum Access**
1. Login or create a free account at [quantum.cloud.ibm.com](https://quantum.cloud.ibm.com/).
2. Obtain your IBM Cloud API Key and the Service Cloud Resource Name (CRN) for your IBM Quantum instance from the [IBM Cloud Console](https://quantum.cloud.ibm.com/).
3. Enter both the API Key and Service CRN in the IBM provider dropdown.
4. Click *Save* to complete the authentication process.
![ibm-auth]() For more information, refer to the [Qiskit Runtime documentation](https://quantum.cloud.ibm.com/docs/en/api/qiskit-runtime-rest#authentication).
# Cancel Job
Source: https://docs.qbraid.com/v2/api-reference/rest/cancel-quantum-job
post /jobs/{job_qrn}/cancel
Cancel a quantum job.
**Args:**
- **job_qrn** (string): Job QRN (qBraid Resource Name)
**Returns:**
- Object containing a confirmation message, the job QRN, and the updated status
**Raises:**
- **400**: Job is in an invalid state for cancellation or vendor is not supported
- **404**: Job is not found
- **422**: Validation error if the job_qrn parameter is invalid
```json 202 theme={"dark"}
{
"success": true,
"data": {
"message": "Job cancellation initiated successfully",
"jobQrn": "qbraid:job:abc123xyz",
"status": "CANCELLING"
}
}
```
# Delete Job
Source: https://docs.qbraid.com/v2/api-reference/rest/delete-quantum-job
delete /jobs/{job_qrn}
Delete a quantum job by its job QRN.
**Args:**
- **job_qrn** (string): Job QRN (qBraid Resource Name)
**Returns:**
- Success message confirming job deletion
**Raises:**
- **403**: You do not have permission to delete this job
- **404**: Job is not found
- **422**: Validation error if the job_qrn parameter is invalid
```json 200 theme={"dark"}
{
"success": true,
"data": {
"message": "Job deleted successfully"
}
}
```
# Delete Multiple Jobs
Source: https://docs.qbraid.com/v2/api-reference/rest/delete-quantum-jobs
delete /jobs
Delete multiple quantum jobs by their job QRNs.
**Query Parameters:**
- **qrns** (string, required): JSON array of job QRNs to delete (e.g., ["qrn1", "qrn2"])
**Returns:**
- Object containing arrays of successfully deleted and failed job QRNs
**Raises:**
- **422**: Validation error if the qrns parameter is invalid
```json 200 theme={"dark"}
{
"success": true,
"data": {
"successfulIds": ["qbraid:job:abc123xyz", "qbraid:job:def456uvw"],
"failedIds": {
"qbraid:job:invalid123": "Job not found"
}
}
}
```
# Get Device
Source: https://docs.qbraid.com/v2/api-reference/rest/get-device
get /devices/{device_qrn}
Retrieve a device by its device QRN.
**Args:**
- **device_qrn** (string): Device QRN (qBraid Resource Name)
**Returns:**
- RuntimeDevice object containing the device details
**Raises:**
- **422**: Validation error if the device_qrn parameter is invalid
```json 200 theme={"dark"}
{
"success": true,
"data": {
"runInputTypes": ["pyqir", "qasm3"],
"numberQubits": 64,
"noiseModels": [],
"statusMsg": null,
"nextAvailable": null,
"avgQueueTime": null,
"qrn": "qbraid:qbraid:sim:qir-sv",
"modality": null,
"name": "QIR Simulator",
"paradigm": "gate_model",
"pricing": {
"perTask": 0,
"perShot": 0,
"perMinute": 0
},
"status": "ONLINE",
"vendor": "qbraid",
"description": "Sparse state vector simulator using QIR compiler. Free of cost.",
"deviceType": "SIMULATOR",
"queueDepth": 0,
"directAccess": true,
"pricingModel": "fixed"
}
}
```
# Get Job Program
Source: https://docs.qbraid.com/v2/api-reference/rest/get-job-program
get /jobs/{job_qrn}/program
Retrieve the quantum program data for a job.
**Args:**
- **job_qrn** (string): Job QRN (qBraid Resource Name)
**Returns:**
- Program object containing the quantum program with format and data fields
**Raises:**
- **404**: Job is not found
- **409**: Job program is not yet available or is not valid JSON
- **422**: Validation error if the job_qrn parameter is invalid
```json 200 theme={"dark"}
{
"success": true,
"data": {
"format": "qasm3",
"data": "OPENQASM 3;\ninclude \"stdgates.inc\";\nqubit[2] q;\nh q[0];\ncx q[0], q[1];\nmeasure q;"
}
}
```
# Get All Devices
Source: https://docs.qbraid.com/v2/api-reference/rest/get-quantum-devices
get /devices
Retrieve a list of quantum devices available to the authenticated user.
**Query Parameters:**
- **qrn** (string, optional): Filter by device QRN
- **vendor** (string, optional): Filter by vendor
- **providerId** (string, optional): Filter by provider ID
- **deviceType** (string, optional): Filter by device type (`QPU` or `SIMULATOR`)
- **status** (string, optional): Filter by operational status
- **retired** (boolean, optional): Include or exclude retired devices
- **private** (boolean, optional): Filter by visibility (`true` = private, `false` = public)
- **verified** (boolean, optional): Filter by verification status
- **directAccess** (boolean, optional): Filter by direct access availability
- **search** (string, optional): Search by name, description, or about (1–255 characters)
- **sortBy** (string, optional): Field to sort by
- **sortOrder** (string, optional): Sort direction (`asc` or `desc`)
- **page** (integer, optional): Page number (default: 1)
- **limit** (integer, optional): Items per page, max 100 (default: 20)
**Returns:**
- Array of RuntimeDevice objects containing device specifications and pricing information
**Raises:**
- **401**: Authentication required
- **422**: Validation error if query parameters are invalid
```json 200 theme={"dark"}
{
"success": true,
"data": [
{
"name": "QIR sparse simulator",
"qrn": "qbraid:qbraid:sim:qir-sv",
"vendor": "qbraid",
"deviceType": "SIMULATOR",
"runInputTypes": ["qasm2", "qasm3", "qir.bc", "qir.ll"],
"status": "ONLINE",
"statusMsg": null,
"nextAvailable": null,
"queueDepth": 0,
"avgQueueTime": null,
"numberQubits": 64,
"paradigm": "gate_model",
"modality": "sparse_simulator",
"noiseModels": null,
"pricingModel": "fixed",
"pricing": {
"perTask": 0.5,
"perShot": 0,
"perMinute": 7.5
},
"directAccess": true
}
]
}
```
# Get Job
Source: https://docs.qbraid.com/v2/api-reference/rest/get-quantum-jobs
get /jobs/{job_qrn}
Retrieve a quantum job by its job QRN.
**Args:**
- **job_qrn** (string): Job QRN (qBraid Resource Name)
**Returns:**
- RuntimeJob object containing the job details
**Raises:**
- **403**: You do not have permission to access this job
- **404**: Job is not found
- **422**: Validation error if the job_qrn parameter is invalid
```json 200 theme={"dark"}
{
"success": true,
"data": {
"name": "My quantum job",
"shots": 1000,
"deviceQrn": "qbraid:qbraid:sim:qir-sv",
"tags": {},
"runtimeOptions": {},
"jobQrn": "qbraid:job:abc123xyz",
"batchJobQrn": null,
"vendor": "qbraid",
"provider": "qbraid",
"status": "COMPLETED",
"statusMsg": null,
"experimentType": "gate_model",
"queuePosition": null,
"timeStamps": {
"createdAt": "2025-01-15T10:30:00Z",
"endedAt": "2025-01-15T10:30:05Z",
"executionDuration": 5000
},
"cost": 0.501875,
"estimatedCost": 0.5,
"metadata": {}
}
}
```
# Get All Jobs
Source: https://docs.qbraid.com/v2/api-reference/rest/get-quantum-jobs-list
get /jobs
Retrieve a paginated list of quantum jobs for the authenticated user.
**Query Parameters:**
- **vendor** (string, optional): Filter by vendor (e.g., `aws`, `ibm`, `qbraid`, or `all`)
- **provider** (string, optional): Filter by provider name
- **statusGroup** (string, optional): Filter by status group — `pending`, `returned`, or `all`
- **status** (string, optional): Filter by individual job status (takes priority over `statusGroup`)
- **search** (string, optional): Search jobs by keyword (1–255 characters)
- **tags** (string, optional): Filter by tags as a JSON object (e.g., `{"env":"prod"}`)
- **page** (integer, optional): Page number (default: 1)
- **limit** (integer, optional): Items per page, max 100 (default: 50)
**Returns:**
- Paginated array of RuntimeJob objects with pagination metadata
**Raises:**
- **401**: Authentication required
- **422**: Validation error if query parameters are invalid
```json 200 theme={"dark"}
{
"success": true,
"data": [
{
"name": "Bell state job",
"shots": 1000,
"deviceQrn": "qbraid:qbraid:sim:qir-sv",
"tags": { "experiment": "bell-state" },
"runtimeOptions": {},
"jobQrn": "qbraid:job:abc123xyz",
"batchJobQrn": null,
"vendor": "qbraid",
"provider": "qbraid",
"status": "COMPLETED",
"statusMsg": null,
"experimentType": "gate_model",
"queuePosition": null,
"timeStamps": {
"createdAt": "2025-01-15T10:30:00Z",
"endedAt": "2025-01-15T10:30:05Z",
"executionDuration": 5000
},
"cost": 0.501875,
"estimatedCost": 0.5,
"metadata": {}
}
],
"pagination": {
"page": 1,
"limit": 50,
"total": 1,
"totalPages": 1,
"hasNext": false,
"hasPrev": false
},
"meta": {
"timestamp": "2025-01-15T10:30:06.000Z"
}
}
```
# Get Job Result
Source: https://docs.qbraid.com/v2/api-reference/rest/get-quantum-jobs-result
get /jobs/{job_qrn}/result
Retrieve the result data for a quantum job.
**Args:**
- **job_qrn** (string): Job QRN (qBraid Resource Name)
**Returns:**
- Result object containing job result data including measurement counts and timestamps
**Raises:**
- **404**: Job is not found
- **409**: Job results are not yet available or are not valid JSON
- **422**: Validation error if the job_qrn parameter is invalid
```json 200 theme={"dark"}
{
"success": true,
"data": {
"status": "COMPLETED",
"cost": 0.501875,
"timeStamps": {
"createdAt": "2025-01-15T10:30:00Z",
"endedAt": "2025-01-15T10:30:05Z",
"executionDuration": 5000
},
"resultData": {
"measurementCounts": { "00": 504, "11": 496 }
}
}
}
```
# Migrating from V1
Source: https://docs.qbraid.com/v2/api-reference/rest/migration
This guide covers breaking changes when migrating from the qBraid V1 API to V2.
## What's Changed
### Authentication and Response Structure
#### Base URL
| Version | Base URL |
| ------- | ---------------------------------- |
| V1 | `https://api.qbraid.com/api` |
| V2 | `https://api-v2.qbraid.com/api/v1` |
#### Authentication Header
| Version | Header |
| ------- | ----------- |
| V1 | `api-key` |
| V2 | `X-API-KEY` |
#### Response Envelope
V2 responses are wrapped in a standard envelope:
```json theme={"dark"}
{
"success": boolean,
"data": { ... }
}
```
V1 returned raw payloads without this wrapper.
### Devices
The new API v2 makes the device objects more descriptive and standardized. We include fields like `paradigm`, `modality`, and `pricingModel` to better categorize devices. We have also standardized the device identifiers to use **QRNs** (qBraid Resource Names) for consistency across the platform.
#### Routes
| Operation | V1 Route | V2 Route |
| ------------ | ---------------------- | --------------------------- |
| List devices | `GET /quantum-devices` | `GET /devices` |
| Get device | — | `GET /devices/{device_qrn}` |
#### Identifier
| Version | Field | Example |
| ------- | ------------------ | -------------------------- |
| V1 | `qbraidDeviceId` | `qbraid_qir_simulator` |
| V2 | `qrn` (QRN format) | `qbraid:qbraid:sim:qir-sv` |
#### Response Fields
V2 adds:
| Field | Description |
| --------------- | --------------------------------------------- |
| `qrn` | QRN identifier |
| `paradigm` | `gate_model`, `analog`, `annealing`, `other` |
| `modality` | Device modality (e.g., `sparse_simulator`) |
| `pricingModel` | `fixed` or `dynamic` |
| `pricing` | Object with `perTask`, `perShot`, `perMinute` |
| `directAccess` | Boolean for direct device access |
| `runInputTypes` | Array of supported input formats |
V2 renames:
* `type` → `deviceType` (values: `SIMULATOR`, `QPU`)
### Jobs
Quantum jobs responses have been re-organized and use **QRNs** as identifiers. The job submission format has also changed to explicitly specify the program format rather than using the `openQasm` or `bitcode` fields.
#### Routes
| Operation | V1 Route | V2 Route |
| -------------------- | ------------------------------ | ----------------------------- |
| Create job | `POST /quantum-jobs` | `POST /jobs` |
| Get job | `GET /quantum-jobs` | `GET /jobs/{job_qrn}` |
| Get result | `GET /quantum-jobs/result/:id` | `GET /jobs/{job_qrn}/result` |
| Get program | — | `GET /jobs/{job_qrn}/program` |
| Cancel job | `PUT /quantum-jobs/cancel/:id` | `POST /jobs/{job_qrn}/cancel` |
| Delete job | — | `DELETE /jobs/{job_qrn}` |
| Delete multiple jobs | `DELETE /quantum-jobs/:ids` | `DELETE /jobs?qrns=[...]` |
#### Request Body
**V1:**
```json theme={"dark"}
{
"qbraidDeviceId": "qbraid_qir_simulator",
"openQasm": "OPENQASM 3; ...",
"shots": 1000,
"tags": {}
}
```
**V2:**
```json theme={"dark"}
{
"deviceQrn": "qbraid:qbraid:sim:qir-sv",
"program": {
"format": "qasm3",
"data": "OPENQASM 3; ..."
},
"shots": 1000,
"tags": {}
}
```
Key differences:
* `qbraidDeviceId` → `deviceQrn` (QRN format)
* `openQasm`/`bitcode` → `program.data` with explicit `program.format`
* `circuitNumQubits` removed (inferred from program)
#### Response Fields
V2 adds these fields to job responses:
| Field | Description |
| ---------------- | ------------------------------------------------------- |
| `jobQrn` | QRN identifier (replaces V1's `_id`) |
| `batchJobQrn` | Batch job reference |
| `experimentType` | `gate_model`, `analog`, `annealing`, `other` |
| `estimatedCost` | Pre-execution cost estimate |
| `timeStamps` | Object with `createdAt`, `endedAt`, `executionDuration` |
| `metadata` | Extensible metadata object |
## What's the Same
* API key authentication model (header-based)
* Core job lifecycle: create → poll status → get result
* `shots`, `tags`, `status` fields
* Job statuses: `INITIALIZING`, `QUEUED`, `RUNNING`, `COMPLETED`, `FAILED`, `CANCELLED`
* Device statuses: `ONLINE`, `OFFLINE`, `UNAVAILABLE`
## Deprecated Endpoints
The following V1 endpoints are **not available** in V2:
| Endpoint | Notes |
| ------------------ | ------------------------------- |
| `POST /chat` | Chat completions — deprecated |
| `GET /chat/models` | Chat model listing — deprecated |
## Quick Migration Checklist
1. Update base URL to `https://api-v2.qbraid.com/api/v1`
2. Change auth header from `api-key` to `X-API-KEY`
3. Replace `qbraidDeviceId` with `deviceQrn` using QRN format
4. Wrap program in `{ "format": "...", "data": "..." }` object
5. Update route paths (`/quantum-jobs` → `/jobs`, `/quantum-devices` → `/devices`)
6. Handle new response envelope (`response.data` instead of raw payload)
7. Remove any chat endpoint integrations
# Create Job
Source: https://docs.qbraid.com/v2/api-reference/rest/post-quantum-jobs
post /jobs
Submit a quantum job to the specified device.
**Request Body:**
- **program** (object, required): Quantum program with format and data fields
- **shots** (integer, required): Number of shots to execute
- **deviceQrn** (string, required): Device QRN (qBraid Resource Name)
- **runtimeOptions** (object, optional): Runtime options
- **tags** (object, optional): Job tags
- **name** (string, optional): Job name
**Headers:**
- **X-API-KEY** (string, required): Your qBraid API key
**Returns:**
- Object containing the new job QRN and initial status
**Raises:**
- **422**: Validation error if required fields are missing or invalid
```json 201 theme={"dark"}
{
"success": true,
"data": {
"jobQrn": "aws:aws:sim:dm1-a1b2-qjob-1234567890abcdef",
"status": "INITIALIZING"
}
}
```
# Overview
Source: https://docs.qbraid.com/v2/api-reference/user-guide/overview
Learn to work with qBraid APIs
Our API employs a [RESTful](https://en.wikipedia.org/wiki/REST) architecture, featuring intuitive,
resource-oriented URLs and leveraging inherent HTTP capabilities such as response codes, authentication,
and verbs.
We support cross-site requests from any domain and return responses in JSON format.
## Quantum Job Flow
The diagram below gives a high-level view of how a quantum job moves through an application that integrates with the qBraid API: from a high-level quantum program, to an intermediate representation (IR), to the qBraid API server, then to execution on a quantum backend, with results relayed back to the user.
For more information, refer to the [Qiskit Runtime documentation](https://quantum.cloud.ibm.com/docs/en/api/qiskit-runtime-rest#authentication).
# Cancel Job
Source: https://docs.qbraid.com/v2/api-reference/rest/cancel-quantum-job
post /jobs/{job_qrn}/cancel
Cancel a quantum job.
**Args:**
- **job_qrn** (string): Job QRN (qBraid Resource Name)
**Returns:**
- Object containing a confirmation message, the job QRN, and the updated status
**Raises:**
- **400**: Job is in an invalid state for cancellation or vendor is not supported
- **404**: Job is not found
- **422**: Validation error if the job_qrn parameter is invalid
```json 202 theme={"dark"}
{
"success": true,
"data": {
"message": "Job cancellation initiated successfully",
"jobQrn": "qbraid:job:abc123xyz",
"status": "CANCELLING"
}
}
```
# Delete Job
Source: https://docs.qbraid.com/v2/api-reference/rest/delete-quantum-job
delete /jobs/{job_qrn}
Delete a quantum job by its job QRN.
**Args:**
- **job_qrn** (string): Job QRN (qBraid Resource Name)
**Returns:**
- Success message confirming job deletion
**Raises:**
- **403**: You do not have permission to delete this job
- **404**: Job is not found
- **422**: Validation error if the job_qrn parameter is invalid
```json 200 theme={"dark"}
{
"success": true,
"data": {
"message": "Job deleted successfully"
}
}
```
# Delete Multiple Jobs
Source: https://docs.qbraid.com/v2/api-reference/rest/delete-quantum-jobs
delete /jobs
Delete multiple quantum jobs by their job QRNs.
**Query Parameters:**
- **qrns** (string, required): JSON array of job QRNs to delete (e.g., ["qrn1", "qrn2"])
**Returns:**
- Object containing arrays of successfully deleted and failed job QRNs
**Raises:**
- **422**: Validation error if the qrns parameter is invalid
```json 200 theme={"dark"}
{
"success": true,
"data": {
"successfulIds": ["qbraid:job:abc123xyz", "qbraid:job:def456uvw"],
"failedIds": {
"qbraid:job:invalid123": "Job not found"
}
}
}
```
# Get Device
Source: https://docs.qbraid.com/v2/api-reference/rest/get-device
get /devices/{device_qrn}
Retrieve a device by its device QRN.
**Args:**
- **device_qrn** (string): Device QRN (qBraid Resource Name)
**Returns:**
- RuntimeDevice object containing the device details
**Raises:**
- **422**: Validation error if the device_qrn parameter is invalid
```json 200 theme={"dark"}
{
"success": true,
"data": {
"runInputTypes": ["pyqir", "qasm3"],
"numberQubits": 64,
"noiseModels": [],
"statusMsg": null,
"nextAvailable": null,
"avgQueueTime": null,
"qrn": "qbraid:qbraid:sim:qir-sv",
"modality": null,
"name": "QIR Simulator",
"paradigm": "gate_model",
"pricing": {
"perTask": 0,
"perShot": 0,
"perMinute": 0
},
"status": "ONLINE",
"vendor": "qbraid",
"description": "Sparse state vector simulator using QIR compiler. Free of cost.",
"deviceType": "SIMULATOR",
"queueDepth": 0,
"directAccess": true,
"pricingModel": "fixed"
}
}
```
# Get Job Program
Source: https://docs.qbraid.com/v2/api-reference/rest/get-job-program
get /jobs/{job_qrn}/program
Retrieve the quantum program data for a job.
**Args:**
- **job_qrn** (string): Job QRN (qBraid Resource Name)
**Returns:**
- Program object containing the quantum program with format and data fields
**Raises:**
- **404**: Job is not found
- **409**: Job program is not yet available or is not valid JSON
- **422**: Validation error if the job_qrn parameter is invalid
```json 200 theme={"dark"}
{
"success": true,
"data": {
"format": "qasm3",
"data": "OPENQASM 3;\ninclude \"stdgates.inc\";\nqubit[2] q;\nh q[0];\ncx q[0], q[1];\nmeasure q;"
}
}
```
# Get All Devices
Source: https://docs.qbraid.com/v2/api-reference/rest/get-quantum-devices
get /devices
Retrieve a list of quantum devices available to the authenticated user.
**Query Parameters:**
- **qrn** (string, optional): Filter by device QRN
- **vendor** (string, optional): Filter by vendor
- **providerId** (string, optional): Filter by provider ID
- **deviceType** (string, optional): Filter by device type (`QPU` or `SIMULATOR`)
- **status** (string, optional): Filter by operational status
- **retired** (boolean, optional): Include or exclude retired devices
- **private** (boolean, optional): Filter by visibility (`true` = private, `false` = public)
- **verified** (boolean, optional): Filter by verification status
- **directAccess** (boolean, optional): Filter by direct access availability
- **search** (string, optional): Search by name, description, or about (1–255 characters)
- **sortBy** (string, optional): Field to sort by
- **sortOrder** (string, optional): Sort direction (`asc` or `desc`)
- **page** (integer, optional): Page number (default: 1)
- **limit** (integer, optional): Items per page, max 100 (default: 20)
**Returns:**
- Array of RuntimeDevice objects containing device specifications and pricing information
**Raises:**
- **401**: Authentication required
- **422**: Validation error if query parameters are invalid
```json 200 theme={"dark"}
{
"success": true,
"data": [
{
"name": "QIR sparse simulator",
"qrn": "qbraid:qbraid:sim:qir-sv",
"vendor": "qbraid",
"deviceType": "SIMULATOR",
"runInputTypes": ["qasm2", "qasm3", "qir.bc", "qir.ll"],
"status": "ONLINE",
"statusMsg": null,
"nextAvailable": null,
"queueDepth": 0,
"avgQueueTime": null,
"numberQubits": 64,
"paradigm": "gate_model",
"modality": "sparse_simulator",
"noiseModels": null,
"pricingModel": "fixed",
"pricing": {
"perTask": 0.5,
"perShot": 0,
"perMinute": 7.5
},
"directAccess": true
}
]
}
```
# Get Job
Source: https://docs.qbraid.com/v2/api-reference/rest/get-quantum-jobs
get /jobs/{job_qrn}
Retrieve a quantum job by its job QRN.
**Args:**
- **job_qrn** (string): Job QRN (qBraid Resource Name)
**Returns:**
- RuntimeJob object containing the job details
**Raises:**
- **403**: You do not have permission to access this job
- **404**: Job is not found
- **422**: Validation error if the job_qrn parameter is invalid
```json 200 theme={"dark"}
{
"success": true,
"data": {
"name": "My quantum job",
"shots": 1000,
"deviceQrn": "qbraid:qbraid:sim:qir-sv",
"tags": {},
"runtimeOptions": {},
"jobQrn": "qbraid:job:abc123xyz",
"batchJobQrn": null,
"vendor": "qbraid",
"provider": "qbraid",
"status": "COMPLETED",
"statusMsg": null,
"experimentType": "gate_model",
"queuePosition": null,
"timeStamps": {
"createdAt": "2025-01-15T10:30:00Z",
"endedAt": "2025-01-15T10:30:05Z",
"executionDuration": 5000
},
"cost": 0.501875,
"estimatedCost": 0.5,
"metadata": {}
}
}
```
# Get All Jobs
Source: https://docs.qbraid.com/v2/api-reference/rest/get-quantum-jobs-list
get /jobs
Retrieve a paginated list of quantum jobs for the authenticated user.
**Query Parameters:**
- **vendor** (string, optional): Filter by vendor (e.g., `aws`, `ibm`, `qbraid`, or `all`)
- **provider** (string, optional): Filter by provider name
- **statusGroup** (string, optional): Filter by status group — `pending`, `returned`, or `all`
- **status** (string, optional): Filter by individual job status (takes priority over `statusGroup`)
- **search** (string, optional): Search jobs by keyword (1–255 characters)
- **tags** (string, optional): Filter by tags as a JSON object (e.g., `{"env":"prod"}`)
- **page** (integer, optional): Page number (default: 1)
- **limit** (integer, optional): Items per page, max 100 (default: 50)
**Returns:**
- Paginated array of RuntimeJob objects with pagination metadata
**Raises:**
- **401**: Authentication required
- **422**: Validation error if query parameters are invalid
```json 200 theme={"dark"}
{
"success": true,
"data": [
{
"name": "Bell state job",
"shots": 1000,
"deviceQrn": "qbraid:qbraid:sim:qir-sv",
"tags": { "experiment": "bell-state" },
"runtimeOptions": {},
"jobQrn": "qbraid:job:abc123xyz",
"batchJobQrn": null,
"vendor": "qbraid",
"provider": "qbraid",
"status": "COMPLETED",
"statusMsg": null,
"experimentType": "gate_model",
"queuePosition": null,
"timeStamps": {
"createdAt": "2025-01-15T10:30:00Z",
"endedAt": "2025-01-15T10:30:05Z",
"executionDuration": 5000
},
"cost": 0.501875,
"estimatedCost": 0.5,
"metadata": {}
}
],
"pagination": {
"page": 1,
"limit": 50,
"total": 1,
"totalPages": 1,
"hasNext": false,
"hasPrev": false
},
"meta": {
"timestamp": "2025-01-15T10:30:06.000Z"
}
}
```
# Get Job Result
Source: https://docs.qbraid.com/v2/api-reference/rest/get-quantum-jobs-result
get /jobs/{job_qrn}/result
Retrieve the result data for a quantum job.
**Args:**
- **job_qrn** (string): Job QRN (qBraid Resource Name)
**Returns:**
- Result object containing job result data including measurement counts and timestamps
**Raises:**
- **404**: Job is not found
- **409**: Job results are not yet available or are not valid JSON
- **422**: Validation error if the job_qrn parameter is invalid
```json 200 theme={"dark"}
{
"success": true,
"data": {
"status": "COMPLETED",
"cost": 0.501875,
"timeStamps": {
"createdAt": "2025-01-15T10:30:00Z",
"endedAt": "2025-01-15T10:30:05Z",
"executionDuration": 5000
},
"resultData": {
"measurementCounts": { "00": 504, "11": 496 }
}
}
}
```
# Migrating from V1
Source: https://docs.qbraid.com/v2/api-reference/rest/migration
This guide covers breaking changes when migrating from the qBraid V1 API to V2.
## What's Changed
### Authentication and Response Structure
#### Base URL
| Version | Base URL |
| ------- | ---------------------------------- |
| V1 | `https://api.qbraid.com/api` |
| V2 | `https://api-v2.qbraid.com/api/v1` |
#### Authentication Header
| Version | Header |
| ------- | ----------- |
| V1 | `api-key` |
| V2 | `X-API-KEY` |
#### Response Envelope
V2 responses are wrapped in a standard envelope:
```json theme={"dark"}
{
"success": boolean,
"data": { ... }
}
```
V1 returned raw payloads without this wrapper.
### Devices
The new API v2 makes the device objects more descriptive and standardized. We include fields like `paradigm`, `modality`, and `pricingModel` to better categorize devices. We have also standardized the device identifiers to use **QRNs** (qBraid Resource Names) for consistency across the platform.
#### Routes
| Operation | V1 Route | V2 Route |
| ------------ | ---------------------- | --------------------------- |
| List devices | `GET /quantum-devices` | `GET /devices` |
| Get device | — | `GET /devices/{device_qrn}` |
#### Identifier
| Version | Field | Example |
| ------- | ------------------ | -------------------------- |
| V1 | `qbraidDeviceId` | `qbraid_qir_simulator` |
| V2 | `qrn` (QRN format) | `qbraid:qbraid:sim:qir-sv` |
#### Response Fields
V2 adds:
| Field | Description |
| --------------- | --------------------------------------------- |
| `qrn` | QRN identifier |
| `paradigm` | `gate_model`, `analog`, `annealing`, `other` |
| `modality` | Device modality (e.g., `sparse_simulator`) |
| `pricingModel` | `fixed` or `dynamic` |
| `pricing` | Object with `perTask`, `perShot`, `perMinute` |
| `directAccess` | Boolean for direct device access |
| `runInputTypes` | Array of supported input formats |
V2 renames:
* `type` → `deviceType` (values: `SIMULATOR`, `QPU`)
### Jobs
Quantum jobs responses have been re-organized and use **QRNs** as identifiers. The job submission format has also changed to explicitly specify the program format rather than using the `openQasm` or `bitcode` fields.
#### Routes
| Operation | V1 Route | V2 Route |
| -------------------- | ------------------------------ | ----------------------------- |
| Create job | `POST /quantum-jobs` | `POST /jobs` |
| Get job | `GET /quantum-jobs` | `GET /jobs/{job_qrn}` |
| Get result | `GET /quantum-jobs/result/:id` | `GET /jobs/{job_qrn}/result` |
| Get program | — | `GET /jobs/{job_qrn}/program` |
| Cancel job | `PUT /quantum-jobs/cancel/:id` | `POST /jobs/{job_qrn}/cancel` |
| Delete job | — | `DELETE /jobs/{job_qrn}` |
| Delete multiple jobs | `DELETE /quantum-jobs/:ids` | `DELETE /jobs?qrns=[...]` |
#### Request Body
**V1:**
```json theme={"dark"}
{
"qbraidDeviceId": "qbraid_qir_simulator",
"openQasm": "OPENQASM 3; ...",
"shots": 1000,
"tags": {}
}
```
**V2:**
```json theme={"dark"}
{
"deviceQrn": "qbraid:qbraid:sim:qir-sv",
"program": {
"format": "qasm3",
"data": "OPENQASM 3; ..."
},
"shots": 1000,
"tags": {}
}
```
Key differences:
* `qbraidDeviceId` → `deviceQrn` (QRN format)
* `openQasm`/`bitcode` → `program.data` with explicit `program.format`
* `circuitNumQubits` removed (inferred from program)
#### Response Fields
V2 adds these fields to job responses:
| Field | Description |
| ---------------- | ------------------------------------------------------- |
| `jobQrn` | QRN identifier (replaces V1's `_id`) |
| `batchJobQrn` | Batch job reference |
| `experimentType` | `gate_model`, `analog`, `annealing`, `other` |
| `estimatedCost` | Pre-execution cost estimate |
| `timeStamps` | Object with `createdAt`, `endedAt`, `executionDuration` |
| `metadata` | Extensible metadata object |
## What's the Same
* API key authentication model (header-based)
* Core job lifecycle: create → poll status → get result
* `shots`, `tags`, `status` fields
* Job statuses: `INITIALIZING`, `QUEUED`, `RUNNING`, `COMPLETED`, `FAILED`, `CANCELLED`
* Device statuses: `ONLINE`, `OFFLINE`, `UNAVAILABLE`
## Deprecated Endpoints
The following V1 endpoints are **not available** in V2:
| Endpoint | Notes |
| ------------------ | ------------------------------- |
| `POST /chat` | Chat completions — deprecated |
| `GET /chat/models` | Chat model listing — deprecated |
## Quick Migration Checklist
1. Update base URL to `https://api-v2.qbraid.com/api/v1`
2. Change auth header from `api-key` to `X-API-KEY`
3. Replace `qbraidDeviceId` with `deviceQrn` using QRN format
4. Wrap program in `{ "format": "...", "data": "..." }` object
5. Update route paths (`/quantum-jobs` → `/jobs`, `/quantum-devices` → `/devices`)
6. Handle new response envelope (`response.data` instead of raw payload)
7. Remove any chat endpoint integrations
# Create Job
Source: https://docs.qbraid.com/v2/api-reference/rest/post-quantum-jobs
post /jobs
Submit a quantum job to the specified device.
**Request Body:**
- **program** (object, required): Quantum program with format and data fields
- **shots** (integer, required): Number of shots to execute
- **deviceQrn** (string, required): Device QRN (qBraid Resource Name)
- **runtimeOptions** (object, optional): Runtime options
- **tags** (object, optional): Job tags
- **name** (string, optional): Job name
**Headers:**
- **X-API-KEY** (string, required): Your qBraid API key
**Returns:**
- Object containing the new job QRN and initial status
**Raises:**
- **422**: Validation error if required fields are missing or invalid
```json 201 theme={"dark"}
{
"success": true,
"data": {
"jobQrn": "aws:aws:sim:dm1-a1b2-qjob-1234567890abcdef",
"status": "INITIALIZING"
}
}
```
# Overview
Source: https://docs.qbraid.com/v2/api-reference/user-guide/overview
Learn to work with qBraid APIs
Our API employs a [RESTful](https://en.wikipedia.org/wiki/REST) architecture, featuring intuitive,
resource-oriented URLs and leveraging inherent HTTP capabilities such as response codes, authentication,
and verbs.
We support cross-site requests from any domain and return responses in JSON format.
## Quantum Job Flow
The diagram below gives a high-level view of how a quantum job moves through an application that integrates with the qBraid API: from a high-level quantum program, to an intermediate representation (IR), to the qBraid API server, then to execution on a quantum backend, with results relayed back to the user.
![qBraid Runtime API Server]()
![qBraid Runtime API Server]() For a client-side view of how the qBraid-SDK integrates with the qBraid API see the [Runtime overview](/v2/sdk/user-guide/runtime/components#runtime-overview) in the SDK docs.
## Rate limiting
API requests are rate-limited per IP (unauthenticated) or per user (authenticated) within a rolling 15-minute window.
| Tier | Window | Max requests |
| -------------------- | ------ | ------------ |
| Unauthenticated (IP) | 15 min | 100 |
| Authenticated user | 15 min | 1,000 |
Exceeding the limit returns an HTTP 429 (Too Many Requests) response. Authenticate with a valid API key to use the higher authenticated limit.
Higher rate limits for your [organization](/v2/account/organizations/overview)
are available upon request.
# qbraid account
Source: https://docs.qbraid.com/v2/cli/api-reference/qbraid_account
Manage qBraid account.
View account information and check remaining credits.
**Usage**:
```console theme={"dark"}
$ qbraid account [OPTIONS] COMMAND [ARGS]...
```
**Options**:
* `--help`: Show this message and exit.
**Commands**:
* `credits`: Get number of qBraid credits remaining.
## qbraid account credits
Get number of qBraid credits remaining.
**Usage**:
```console theme={"dark"}
$ qbraid account credits [OPTIONS]
```
**Options**:
* `--help`: Show this message and exit.
# qbraid admin
Source: https://docs.qbraid.com/v2/cli/api-reference/qbraid_admin
CI/CD commands for qBraid maintainers.
**Usage**:
```console theme={"dark"}
$ qbraid admin [OPTIONS] COMMAND [ARGS]...
```
**Options**:
* `--help`: Show this message and exit.
**Commands**:
* `headers`: Verify and fix qBraid file headers.
## qbraid admin headers
Verify and fix qBraid file headers.
Verifies and optionally fixes qBraid headers in specified files and directories.
**Usage**:
```console theme={"dark"}
$ qbraid admin headers [OPTIONS] {src_paths}...
```
**Arguments**:
* `src_paths...`: Source file or directory paths to verify. \[required]
**Options**:
* `-t, --type `: Type of header to use. \[default: default]
* `-s, --skip `: Files to skip during verification.
* `-f, --fix`: Whether to fix the headers instead of just verifying.
* `-p, --project `: Name of the project to use in the header.
* `--help`: Show this message and exit.
# qbraid agents
Source: https://docs.qbraid.com/v2/cli/api-reference/qbraid_agents
Manage AI coding agent sessions.
Launch, monitor, and control AI coding agents.
Run Claude Code, OpenCode, or Codex in managed tmux sessions. Send
instructions, stream transcripts, handle permissions, and orchestrate
multiple agents — all from one place. Works locally and on remote
compute servers via SSH.
Use this when you want to:
* Spin up agents on specific repos or projects
* Watch what agents are doing in real-time
* Approve or deny tool-use permissions remotely
* Manage agents running on cloud compute machines
* Resume previous coding sessions
Getting started:
```bash theme={"dark"}
qbraid agents launch # Interactive launch
qbraid agents list # Show active sessions
qbraid agents watch # Stream live activity
qbraid agents send --text "..." # Send instructions
```
**Usage**:
```console theme={"dark"}
$ qbraid agents [OPTIONS] COMMAND [ARGS]...
```
**Options**:
* `--help`: Show this message and exit.
**Commands**:
* `register`: Register an agent session.
* `deregister`: Deregister an agent session.
* `list`: List agent sessions.
* `discover`: Discover new agent sessions.
* `status`: Show detailed status for an agent session.
* `update`: Update metadata fields on an agent session.
* `kill`: Stop an agent by name, session ID, or PID.
* `launch`: Launch an AI coding agent.
* `resume`: Resume a previous agent session.
* `send`: Send text to a running agent's terminal.
* `read`: Read recent terminal output from an agent.
* `approve`: Approve a tool-use prompt.
* `watch`: Stream agent transcript.
* `attach`: Attach to an agent's terminal.
* `clean`: Clean up orphaned sessions.
* `send-to`: Send a message to another agent's inbox.
* `broadcast`: Broadcast to multiple agent inboxes.
* `team`: Show a team roster with unread counts.
* `hooks`: Manage agent lifecycle hooks.
* `inbox`: Read messages sent to this agent's inbox.
## qbraid agents register
Register an agent session.
Reads session data from stdin JSON (used by hooks).
**Usage**:
```console theme={"dark"}
$ qbraid agents register [OPTIONS]
```
**Options**:
* `--help`: Show this message and exit.
## qbraid agents deregister
Deregister an agent session.
Reads session data from stdin JSON (used by hooks).
**Usage**:
```console theme={"dark"}
$ qbraid agents deregister [OPTIONS]
```
**Options**:
* `--help`: Show this message and exit.
## qbraid agents list
List agent sessions.
Use --compute to list on a remote server.
**Usage**:
```console theme={"dark"}
$ qbraid agents list [OPTIONS]
```
**Options**:
* `-t, --tool `: Filter by tool (claude, codeq, codex)
* `--status `: Filter by status
* `--tag `: Filter by tag (repeatable)
* `--since `: Time window (e.g., '1h', '30m', '2d')
* `-c, --compute `: SSH alias for remote compute (runs list on remote)
* `-s, --search `: Text search across name/cwd/tags
* `-a, --all`: Include stopped sessions
* `-l, --limit `: Entries per page \[default: 25; x>=1]
* `-p, --page `: Page number (non-interactive mode) \[default: 1; x>=1]
* `--sort `: Sort by: recent, oldest, name, tool, status, cwd, model \[default: recent]
* `--no-interactive`: Disable interactive pagination
* `--json`: Output as JSON array (for programmatic use)
* `--help`: Show this message and exit.
## qbraid agents discover
Discover new agent sessions.
Scans transcript files and registers new agent sessions.
**Usage**:
```console theme={"dark"}
$ qbraid agents discover [OPTIONS]
```
**Options**:
* `-f, --full`: Full data enrichment for all sessions (slower)
* `-c, --compute `: Sync sessions from remote compute server (SSH alias)
* `--help`: Show this message and exit.
## qbraid agents status
Show detailed status for an agent session.
**Usage**:
```console theme={"dark"}
$ qbraid agents status [OPTIONS] {session_id}
```
**Arguments**:
* `session_id`: Session ID (full or prefix) \[required]
**Options**:
* `--help`: Show this message and exit.
## qbraid agents update
Update metadata fields on an agent session.
**Usage**:
```console theme={"dark"}
$ qbraid agents update [OPTIONS] {session_id}
```
**Arguments**:
* `session_id`: Session ID (full or prefix) \[required]
**Options**:
* `--tag `: Tag to add (can be repeated)
* `--name `: Set terminal name for the session
* `--model `: Set model name (e.g. claude-sonnet-4-20250514)
* `--cwd `: Set working directory for the session
* `--status `: Set session status (working, waiting, idle, error, stopped)
* `--help`: Show this message and exit.
## qbraid agents kill
Stop an agent by name, session ID, or PID.
**Usage**:
```console theme={"dark"}
$ qbraid agents kill [OPTIONS] {target}
```
**Arguments**:
* `target`: Agent name, ID prefix, or PID \[required]
**Options**:
* `-f, --force`: Use SIGKILL instead of SIGTERM
* `--help`: Show this message and exit.
## qbraid agents launch
Launch an AI coding agent.
Starts the agent in a managed tmux session.
**Usage**:
```console theme={"dark"}
$ qbraid agents launch [OPTIONS]
```
**Options**:
* `-t, --tool `: Agent tool (claude, claude-auto, codeq, codex)
* `--cwd `: Working directory
* `-n, --name `: Agent name
* `-i, --instructions `: Initial instructions
* `-r, --repo `: GitHub repo URL, org/repo, or issue/PR URL
* `--type `: Agent type: leader, worker, observer, reviewer
* `--parent `: Parent session ID
* `--team `: Team ID
* `--tag `: Tags (repeatable)
* `-c, --compute `: SSH alias for remote compute server
* `--help`: Show this message and exit.
## qbraid agents resume
Resume a previous agent session.
Resumes in a managed tmux window.
**Usage**:
```console theme={"dark"}
$ qbraid agents resume [OPTIONS] [session_id]
```
**Arguments**:
* `session_id`: Session ID, prefix, or name. Omit for interactive picker.
**Options**:
* `-n, --name `: Agent name for the resumed session
* `--help`: Show this message and exit.
## qbraid agents send
Send text to a running agent's terminal.
**Usage**:
```console theme={"dark"}
$ qbraid agents send [OPTIONS] {session_id}
```
**Arguments**:
* `session_id`: Session ID (prefix match) \[required]
**Options**:
* `-m, --text `: Text to send \[required]
* `-c, --compute `: SSH alias for remote compute
* `--help`: Show this message and exit.
## qbraid agents read
Read recent terminal output from an agent.
**Usage**:
```console theme={"dark"}
$ qbraid agents read [OPTIONS] {session_id}
```
**Arguments**:
* `session_id`: Session ID (prefix match) \[required]
**Options**:
* `-n, --lines `: Number of lines to capture \[default: 50]
* `-c, --compute `: SSH alias for remote compute
* `--help`: Show this message and exit.
## qbraid agents approve
Approve a tool-use prompt.
Sends 'y' + Enter to the agent's terminal.
**Usage**:
```console theme={"dark"}
$ qbraid agents approve [OPTIONS] {session_id}
```
**Arguments**:
* `session_id`: Session ID (prefix match) \[required]
**Options**:
* `--help`: Show this message and exit.
## qbraid agents watch
Stream agent transcript.
Streams live transcript from an agent session.
**Usage**:
```console theme={"dark"}
$ qbraid agents watch [OPTIONS] {session_id}
```
**Arguments**:
* `session_id`: Session ID (prefix match) \[required]
**Options**:
* `-n, --lines `: Initial history lines \[default: 20]
* `--interactive / --no-interactive`: Prompt for permission decisions \[default: interactive]
* `--stream`: Stream-only mode: emit JSON events, no interactive prompts (for frontends)
* `-c, --compute `: SSH alias for remote compute
* `--help`: Show this message and exit.
## qbraid agents attach
Attach to an agent's terminal.
Opens an interactive tmux window for the agent session.
**Usage**:
```console theme={"dark"}
$ qbraid agents attach [OPTIONS] [session_id]
```
**Arguments**:
* `session_id`: Session ID (prefix match). Omit for interactive picker.
**Options**:
* `-c, --compute `: SSH alias for remote compute
* `--help`: Show this message and exit.
## qbraid agents clean
Clean up orphaned sessions.
Removes orphaned tmux windows and stopped sessions.
**Usage**:
```console theme={"dark"}
$ qbraid agents clean [OPTIONS]
```
**Options**:
* `-y, --yes`: Skip confirmation
* `--help`: Show this message and exit.
## qbraid agents send-to
Send a message to another agent's inbox.
For multi-recipient / team broadcast, use `qbraid agents broadcast`.
Delivery is a JSONL append at \~/.qbraid/inboxes/\.jsonl
(local host only — cross-host messaging isn't yet supported and will raise
a clear error). Permission rules (leader/worker/observer/reviewer) are
enforced by default.
**Usage**:
```console theme={"dark"}
$ qbraid agents send-to [OPTIONS] {to} {text}
```
**Arguments**:
* `to`: Target session id (full or prefix), tmux window name, or terminal name. \[required]
* `text`: Message body. \[required]
**Options**:
* `--from `: Sender session id. Defaults to \$QBRAID\_SESSION\_ID (set by the qBraid launcher for every managed agent shell).
* `--type `: One of: message, task\_assignment, status\_update, shutdown\_request. Controls how the recipient's UI/hooks categorize it. \[default: message]
* `--no-permission-check`: Skip the sender→target permission check (agent-type rules from qbraid\_core.services.agents.types.can\_message). Use for testing.
* `--help`: Show this message and exit.
## qbraid agents broadcast
Broadcast to multiple agent inboxes.
Two selectors — pick exactly one:
* `--team <team_id>` — every session with that team\_id (except sender)
* `--to A,B,C` — explicit id/prefix/name list
Delivery is all-or-nothing on target resolution: if any target can't be
resolved, NOTHING is sent (avoids partial-delivery surprises). Once
resolved, per-target send failures are reported individually; a partial
delivery exits with code 3.
**Usage**:
```console theme={"dark"}
$ qbraid agents broadcast [OPTIONS] {text}
```
**Arguments**:
* `text`: Message body — delivered to every target. \[required]
**Options**:
* `--team `: Deliver to every session with this team\_id (excluding the sender). Use one of --team or --to.
* `--to `: Comma-separated list of target session ids/prefixes/names for multi-recipient send. Use one of --team or --to.
* `--from `: Sender session id. Defaults to \$QBRAID\_SESSION\_ID.
* `--type `: One of: message, task\_assignment, status\_update, shutdown\_request. Controls how the recipient's UI/hooks categorize it. \[default: message]
* `--no-permission-check`: Skip the sender→target permission check. Use for testing.
* `--help`: Show this message and exit.
## qbraid agents team
Show a team roster with unread counts.
Answers the leader-orchestrator question "who is on my team, how many
unread messages do they have, and what was the last thing they heard from
anyone?" — which today requires peeking each worker's inbox individually.
Rows are sorted with the current session first (identified via
\$QBRAID\_SESSION\_ID), then by agent\_type (leader → worker → observer →
reviewer), then by session\_id.
**Usage**:
```console theme={"dark"}
$ qbraid agents team [OPTIONS] {team_id}
```
**Arguments**:
* `team_id`: Team identifier (matches AgentSession.team\_id). \[required]
**Options**:
* `-w, --wide`: Show full session ids instead of the 12-char prefix.
* `--help`: Show this message and exit.
## qbraid agents hooks
Manage agent lifecycle hooks.
**Usage**:
```console theme={"dark"}
$ qbraid agents hooks [OPTIONS] COMMAND [ARGS]...
```
**Options**:
* `--help`: Show this message and exit.
**Commands**:
* `install`: Install agent lifecycle hooks.
* `uninstall`: Remove agent lifecycle hooks.
### qbraid agents hooks install
Install agent lifecycle hooks.
Installs hooks for AI coding tools.
**Usage**:
```console theme={"dark"}
$ qbraid agents hooks install [OPTIONS]
```
**Options**:
* `-t, --tool `: Install hooks for a specific tool (claude, codeq, codex)
* `--help`: Show this message and exit.
### qbraid agents hooks uninstall
Remove agent lifecycle hooks.
Removes hooks from all supported tools.
**Usage**:
```console theme={"dark"}
$ qbraid agents hooks uninstall [OPTIONS]
```
**Options**:
* `--help`: Show this message and exit.
## qbraid agents inbox
Read messages sent to this agent's inbox.
Follow, filter unread, and mark-read messages sent to this agent
session's inbox. Inboxes are per-session JSONL files at
\~/.qbraid/inboxes/. Every agent session has one; peers use
`qbraid agents send-to` to write to it.
**Usage**:
```console theme={"dark"}
$ qbraid agents inbox [OPTIONS] COMMAND [ARGS]...
```
**Options**:
* `-s, --session `: Session whose inbox to read. Accepts full id, prefix, or tmux/terminal name (resolved via the registry). Defaults to \$QBRAID\_SESSION\_ID.
* `-f, --follow`: Stream new messages as they arrive.
* `-u, --unread`: Show only unread messages.
* `-n, --limit `: Max messages to show (most recent). \[default: 50]
* `--mark-read / --no-mark-read`: Mark shown messages as read after display. Default on. \[default: mark-read]
* `-w, --wide`: Show full session ids in the From column and title (not the 12-char prefix). Use when multiple senders share a prefix.
* `--help`: Show this message and exit.
**Commands**:
* `mark-read`: Mark inbox messages as read.
### qbraid agents inbox mark-read
Mark inbox messages as read.
Without --message-id, marks every unread message in the session's inbox.
**Usage**:
```console theme={"dark"}
$ qbraid agents inbox mark-read [OPTIONS]
```
**Options**:
* `-s, --session `: Session whose inbox to update. Accepts full id, prefix, or tmux/terminal name. Defaults to \$QBRAID\_SESSION\_ID.
* `-m, --message-id `: Specific message id(s) to mark. May be passed multiple times. Omit to mark ALL unread messages in the inbox.
* `--help`: Show this message and exit.
# qbraid compute
Source: https://docs.qbraid.com/v2/cli/api-reference/qbraid_compute
Manage cloud compute and SSH.
Manage cloud compute servers, profiles, and SSH access.
Start GPU or CPU servers on qBraid infrastructure. SSH in from any
terminal, connect your IDE (VS Code, Cursor), or launch AI agents
on remote hardware. Persistent storage across sessions.
Use this when you want to:
* Run heavy workloads on cloud GPUs without local setup
* SSH into a cloud dev environment from your terminal
* Connect VS Code or Cursor to a remote server
* Launch AI agents on more powerful hardware
Quick start:
```bash theme={"dark"}
qbraid compute up # Start server + configure SSH
qbraid compute status # Check server status
qbraid compute ssh connect # SSH into running server
qbraid compute down # Stop server
```
**Usage**:
```console theme={"dark"}
$ qbraid compute [OPTIONS] COMMAND [ARGS]...
```
**Options**:
* `--help`: Show this message and exit.
**Commands**:
* `up`: Start server and configure SSH.
* `down`: Stop the running server.
* `status`: Check server status.
* `list`: List compute profiles.
* `sessions`: List compute sessions.
* `usage`: Show compute usage summary.
* `profiles`: Manage compute profiles.
* `server`: Manage compute servers.
* `ssh`: SSH access to compute servers.
## qbraid compute up
Start server and configure SSH.
Waits for the server to be ready. This is a convenience command that combines:
* qbraid compute server start \ --wait
* qbraid compute ssh setup
Example:
```bash theme={"dark"}
qbraid compute up 2vCPU_4GB
```
**Usage**:
```console theme={"dark"}
$ qbraid compute up [OPTIONS] {profile_slug}
```
**Arguments**:
* `profile_slug`: Profile slug to start \[required]
**Options**:
* `-c, --cluster `: Cluster ID
* `-t, --timeout `: Server start timeout \[default: 120]
* `--no-ssh`: Skip SSH configuration
* `--help`: Show this message and exit.
## qbraid compute down
Stop the running server.
Example:
```bash theme={"dark"}
qbraid compute down
qbraid compute down --cleanup-ssh
```
**Usage**:
```console theme={"dark"}
$ qbraid compute down [OPTIONS]
```
**Options**:
* `-c, --cluster `: Cluster ID
* `-f, --force`: Skip confirmation
* `--cleanup-ssh`: Remove SSH config
* `--help`: Show this message and exit.
## qbraid compute status
Check server status.
Quick status check (alias for 'server status').
**Usage**:
```console theme={"dark"}
$ qbraid compute status [OPTIONS]
```
**Options**:
* `-c, --cluster `: Cluster ID
* `--help`: Show this message and exit.
## qbraid compute list
List compute profiles.
Quick list profiles (alias for 'profiles list').
**Usage**:
```console theme={"dark"}
$ qbraid compute list [OPTIONS]
```
**Options**:
* `-g, --gpu`: Show only GPU profiles
* `-a, --available`: Show only available profiles
* `-l, --limit `: Number of results \[default: 20]
* `--help`: Show this message and exit.
## qbraid compute sessions
List compute sessions.
**Usage**:
```console theme={"dark"}
$ qbraid compute sessions [OPTIONS]
```
**Options**:
* `-l, --limit `: Number of sessions to show \[default: 10]
* `-s, --status `: Filter by status (active, ended)
* `-t, --type `: Filter by type (cpu, gpu)
* `-d, --days `: Show sessions from last N days
* `--help`: Show this message and exit.
## qbraid compute usage
Show compute usage summary.
**Usage**:
```console theme={"dark"}
$ qbraid compute usage [OPTIONS]
```
**Options**:
* `-d, --days `: Number of days (default: 30)
* `--tz `: Timezone (e.g. America/New\_York)
* `--daily`: Show daily breakdown
* `--help`: Show this message and exit.
## qbraid compute profiles
Manage compute profiles.
**Usage**:
```console theme={"dark"}
$ qbraid compute profiles [OPTIONS] COMMAND [ARGS]...
```
**Options**:
* `--help`: Show this message and exit.
**Commands**:
* `list`: List available compute profiles.
* `info`: Get detailed profile information.
* `create-try`: Create a try-mode profile.
* `create-save`: Create a save-mode profile.
* `build-status`: Check build status for a save-mode profile.
* `delete`: Delete a user-owned profile.
### qbraid compute profiles list
List available compute profiles.
**Usage**:
```console theme={"dark"}
$ qbraid compute profiles list [OPTIONS]
```
**Options**:
* `-p, --plan `: Filter by plan tier
* `-g, --gpu`: Filter GPU profiles
* `-c, --has-capacity`: Filter by capacity
* `--cluster `: Filter by cluster
* `-l, --limit `: Results per page \[default: 50]
* `--help`: Show this message and exit.
### qbraid compute profiles info
Get detailed profile information.
**Usage**:
```console theme={"dark"}
$ qbraid compute profiles info [OPTIONS] {slug}
```
**Arguments**:
* `slug`: Profile slug \[required]
**Options**:
* `--help`: Show this message and exit.
### qbraid compute profiles create-try
Create a try-mode profile.
Standard+ plan required.
Try-mode profiles use on-the-fly overlay injection - no build step required.
**Usage**:
```console theme={"dark"}
$ qbraid compute profiles create-try [OPTIONS]
```
**Options**:
* `-i, --image `: Base Docker image (required) \[required]
* `-n, --name `: Display name
* `-d, --description `: Description
* `--cpu `: CPU cores (guarantee and limit)
* `-m, --mem `: Memory (e.g., '8G')
* `-g, --gpu`: Enable GPU
* `--ide `: IDE type: lab, vscode, ssh \[default: lab]
* `-f, --features `: Features (e.g., 'claude,codeq')
* `--help`: Show this message and exit.
### qbraid compute profiles create-save
Create a save-mode profile.
Pro+ plan required.
Save-mode profiles trigger a Cloud Build to create a permanent overlay image.
Use --wait to wait for the build to complete.
**Usage**:
```console theme={"dark"}
$ qbraid compute profiles create-save [OPTIONS]
```
**Options**:
* `-i, --image `: Base Docker image (required) \[required]
* `-n, --name `: Display name
* `-d, --description `: Description
* `--cpu `: CPU cores (guarantee and limit)
* `-m, --mem `: Memory (e.g., '8G')
* `-g, --gpu`: Enable GPU
* `--ide `: IDE type: lab, vscode, ssh \[default: lab]
* `-f, --features `: Features (e.g., 'claude,codeq')
* `-w, --wait`: Wait for build to complete
* `-t, --timeout `: Build timeout in seconds \[default: 600]
* `--help`: Show this message and exit.
### qbraid compute profiles build-status
Check build status for a save-mode profile.
**Usage**:
```console theme={"dark"}
$ qbraid compute profiles build-status [OPTIONS] {slug}
```
**Arguments**:
* `slug`: Profile slug \[required]
**Options**:
* `--help`: Show this message and exit.
### qbraid compute profiles delete
Delete a user-owned profile.
**Usage**:
```console theme={"dark"}
$ qbraid compute profiles delete [OPTIONS] {slug}
```
**Arguments**:
* `slug`: Profile slug to delete \[required]
**Options**:
* `-f, --force`: Skip confirmation
* `--help`: Show this message and exit.
## qbraid compute server
Manage compute servers.
**Usage**:
```console theme={"dark"}
$ qbraid compute server [OPTIONS] COMMAND [ARGS]...
```
**Options**:
* `--help`: Show this message and exit.
**Commands**:
* `status`: Check server status.
* `start`: Start a server.
* `stop`: Stop a running server or on-demand instance.
* `terminate`: Terminate (delete) an on-demand instance.
* `url`: Print the full server URL with auth token.
* `stop-all`: Stop all servers across all organizations.
### qbraid compute server status
Check server status.
**Usage**:
```console theme={"dark"}
$ qbraid compute server status [OPTIONS]
```
**Options**:
* `-c, --cluster `: Cluster ID
* `--show-url`: Show full server URL with auth token
* `--help`: Show this message and exit.
### qbraid compute server start
Start a server.
Pass a profile slug to provision a new instance, or an existing on-demand
instance ID to resume a stopped one.
**Usage**:
```console theme={"dark"}
$ qbraid compute server start [OPTIONS] {target}
```
**Arguments**:
* `target`: Profile slug (new instance) or instance ID (resume a stopped one) \[required]
**Options**:
* `-c, --cluster `: Cluster ID
* `-w, --wait`: Wait for server to be ready
* `-t, --timeout `: Wait timeout in seconds \[default: 120]
* `--ssh`: Configure SSH after start
* `--help`: Show this message and exit.
### qbraid compute server stop
Stop a running server or on-demand instance.
On-demand BMA instances are detected automatically. If more than one
is running, you'll be prompted to choose; pass --instance to target one
directly. With no BMA instances, stops the legacy cluster server.
**Usage**:
```console theme={"dark"}
$ qbraid compute server stop [OPTIONS]
```
**Options**:
* `-c, --cluster `: Cluster ID
* `-i, --instance `: BMA instance ID to stop (auto-detected if omitted)
* `-f, --force`: Skip confirmation
* `--help`: Show this message and exit.
### qbraid compute server terminate
Terminate (delete) an on-demand instance.
DESTRUCTIVE: unlike 'stop' (which preserves the disk and is resumable),
terminate permanently deletes the instance AND its disk — data cannot be
recovered. Applies to on-demand BMA instances only.
**Usage**:
```console theme={"dark"}
$ qbraid compute server terminate [OPTIONS]
```
**Options**:
* `-i, --instance `: On-demand instance ID to terminate
* `-f, --force`: Skip confirmations (DANGEROUS)
* `--help`: Show this message and exit.
### qbraid compute server url
Print the full server URL with auth token.
Use this to get a clickable URL for browser access or to pass
the token to other tools. The token is intentionally shown in full.
**Usage**:
```console theme={"dark"}
$ qbraid compute server url [OPTIONS]
```
**Options**:
* `-c, --cluster `: Cluster ID
* `--help`: Show this message and exit.
### qbraid compute server stop-all
Stop all servers across all organizations.
**Usage**:
```console theme={"dark"}
$ qbraid compute server stop-all [OPTIONS]
```
**Options**:
* `-c, --cluster `: Cluster ID
* `-f, --force`: Skip confirmation
* `--help`: Show this message and exit.
## qbraid compute ssh
SSH access to compute servers.
**Usage**:
```console theme={"dark"}
$ qbraid compute ssh [OPTIONS] COMMAND [ARGS]...
```
**Options**:
* `--help`: Show this message and exit.
**Commands**:
* `setup`: Configure SSH for the server.
* `connect`: SSH into the running server.
* `token`: Get SSH session token.
* `config`: Show or edit SSH configuration.
* `remove`: Remove SSH configuration for a host.
### qbraid compute ssh setup
Configure SSH for the server.
Sets up SSH config with a ProxyCommand that tunnels SSH through
the jupyter-server-proxy WebSocket endpoint. No websocat required.
On-demand BMA instances are handled automatically: if one is running
it's configured under its own alias; pass --instance to target a specific
one. Each instance gets an independent alias so several can be reachable at
once.
**Usage**:
```console theme={"dark"}
$ qbraid compute ssh setup [OPTIONS]
```
**Options**:
* `-c, --cluster `: Cluster ID
* `-i, --instance `: On-demand instance ID (auto-detected if omitted)
* `-t, --tool `: Configure for specific tool: vscode, cursor, claude-code, codex
* `-a, --alias `: SSH config alias (default: qbraid-\{cluster})
* `--help`: Show this message and exit.
### qbraid compute ssh connect
SSH into the running server.
This opens an interactive SSH session to the server. Pass --instance to
connect to a specific on-demand instance (resolves to its per-instance
alias from 'ssh setup --instance').
**Usage**:
```console theme={"dark"}
$ qbraid compute ssh connect [OPTIONS]
```
**Options**:
* `-a, --alias `: SSH config alias (auto-detected if not set)
* `-i, --instance `: On-demand instance ID to connect to
* `--help`: Show this message and exit.
### qbraid compute ssh token
Get SSH session token.
Retrieves a JupyterHub session token for SSH access.
**Usage**:
```console theme={"dark"}
$ qbraid compute ssh token [OPTIONS]
```
**Options**:
* `-c, --cluster `: Cluster ID
* `-r, --raw`: Output raw token only
* `--help`: Show this message and exit.
### qbraid compute ssh config
Show or edit SSH configuration.
**Usage**:
```console theme={"dark"}
$ qbraid compute ssh config [OPTIONS]
```
**Options**:
* `-e, --edit`: Open config in editor
* `--help`: Show this message and exit.
### qbraid compute ssh remove
Remove SSH configuration for a host.
**Usage**:
```console theme={"dark"}
$ qbraid compute ssh remove [OPTIONS] {alias}
```
**Arguments**:
* `alias`: SSH alias to remove \[required]
**Options**:
* `-f, --force`: Skip confirmation
* `--help`: Show this message and exit.
# qbraid configure
Source: https://docs.qbraid.com/v2/cli/api-reference/qbraid_configure
Configure CLI settings.
Set API keys and config values for your qBraid CLI.
Use this when you want to:
* Set your qBraid API key
* Enable qBraid magic commands in Jupyter
**Usage**:
```console theme={"dark"}
$ qbraid configure [OPTIONS] COMMAND [ARGS]...
```
**Options**:
* `--help`: Show this message and exit.
**Commands**:
* `set`: Set configuration value in qbraidrc file.
* `get`: Get configuration value from qbraidrc file.
* `list`: List all configuration values in qbraidrc.
* `magic`: Enable qBraid IPython magic commands.
## qbraid configure set
Set configuration value in qbraidrc file.
**Usage**:
```console theme={"dark"}
$ qbraid configure set [OPTIONS] {name} {value}
```
**Arguments**:
* `name`: Config name \[required]
* `value`: Config value \[required]
**Options**:
* `-p, --profile `: Profile name \[default: default]
* `--help`: Show this message and exit.
## qbraid configure get
Get configuration value from qbraidrc file.
**Usage**:
```console theme={"dark"}
$ qbraid configure get [OPTIONS] {name}
```
**Arguments**:
* `name`: Config name \[required]
**Options**:
* `-p, --profile `: Profile name \[default: default]
* `--help`: Show this message and exit.
## qbraid configure list
List all configuration values in qbraidrc.
**Usage**:
```console theme={"dark"}
$ qbraid configure list [OPTIONS]
```
**Options**:
* `--help`: Show this message and exit.
## qbraid configure magic
Enable qBraid IPython magic commands.
**Usage**:
```console theme={"dark"}
$ qbraid configure magic [OPTIONS]
```
**Options**:
* `--help`: Show this message and exit.
# qbraid devices
Source: https://docs.qbraid.com/v2/cli/api-reference/qbraid_devices
Browse quantum devices.
Browse and query quantum devices across providers.
Access quantum hardware and simulators from IonQ, IBM, AWS Braket,
Rigetti, QuEra, Pasqal, and more through the unified qBraid runtime.
Use this when you want to:
* Find available quantum devices and their current status
* Compare pricing, qubit counts, and queue depths
* Check device specifications before submitting jobs
**Usage**:
```console theme={"dark"}
$ qbraid devices [OPTIONS] COMMAND [ARGS]...
```
**Options**:
* `--help`: Show this message and exit.
**Commands**:
* `list`: List qBraid quantum devices.
* `get`: Get a qBraid quantum device.
## qbraid devices list
List qBraid quantum devices.
**Usage**:
```console theme={"dark"}
$ qbraid devices list [OPTIONS]
```
**Options**:
* `-s, --status `: Filter by status: ONLINE, UNAVAILABLE, OFFLINE, RETIRED
* `-t, --type `: 'QPU'|'SIMULATOR'
* `-v, --vendor `: Filter by vendor: AWS, AZURE, IBM, IONQ, QBRAID
* `-p, --provider `: Filter by provider: AQT, AWS, AZURE, EQUAL1, IBM, IQM, IONQ, NEC, OQC, PASQAL, QUANTINUUM, QUERA, RIGETTI, QBRAID
* `--help`: Show this message and exit.
## qbraid devices get
Get a qBraid quantum device.
**Usage**:
```console theme={"dark"}
$ qbraid devices get [OPTIONS] {device_id}
```
**Arguments**:
* `device_id`: The QRN or ID of the device to get. \[required]
**Options**:
* `--no-fmt`: Disable rich console formatting (output raw data) \[default: True]
* `--help`: Show this message and exit.
# qbraid envs
Source: https://docs.qbraid.com/v2/cli/api-reference/qbraid_envs
Manage Python environments.
Create, install, upload, and share Python environments.
Isolated Python environments with automatic Jupyter kernel integration.
Create environments locally, upload them to the cloud, share with
teammates, or install pre-built environments from the catalog. Works
identically on qBraid Lab and local machines.
Use this when you want to:
* Set up a reproducible Python environment for a project
* Share your environment with collaborators
* Install a pre-configured environment (e.g., qBraid SDK, Qiskit)
* Publish an environment to the public catalog
Quick start:
```bash theme={"dark"}
qbraid envs create # Create new environment
qbraid envs available # Browse installable environments
qbraid envs install # Install from cloud
qbraid envs list # List local environments
qbraid envs upload # Upload to cloud
```
**Usage**:
```console theme={"dark"}
$ qbraid envs [OPTIONS] COMMAND [ARGS]...
```
**Options**:
* `--help`: Show this message and exit.
**Commands**:
* `create`: Create a new qBraid environment.
* `uninstall`: Remove a local environment.
* `delete`: (Admin) Delete a cloud environment.
* `list`: List installed qBraid environments.
* `activate`: Activate qBraid environment.
* `available`: List installable environments.
* `info`: Show environment details.
* `install`: Install an environment.
* `upload`: Upload an environment.
* `health`: Check the health of an environment.
* `repair`: Repair a broken environment.
* `pythons`: List available Python versions.
* `config`: View or update environment configuration.
* `publish`: Manage environment publishing.
* `share`: Manage environment sharing via share codes.
* `groups`: Manage environment groups.
* `registry`: Manage the local environment registry.
## qbraid envs create
Create a new qBraid environment.
Run without options for an interactive walkthrough, or provide options via flags.
**Usage**:
```console theme={"dark"}
$ qbraid envs create [OPTIONS]
```
**Options**:
* `-n, --name `: Name of the environment to create
* `-d, --description `: Short description of the environment
* `-l, --logo `: Company name for logo (e.g., 'ibm', 'google')
* `-r, --requirements `: Path to requirements.txt file
* `-k, --kernel-name `: Display name for Jupyter kernel
* `-t, --tags `: Comma-separated tags
* `-y, --yes`: Automatically answer 'yes' to all prompts
* `--help`: Show this message and exit.
## qbraid envs uninstall
Remove a local environment.
By default this removes only the local copy — the cloud environment is
preserved so you can reinstall it later. Pass `--delete-cloud` to also
retire the cloud environment (requires ownership).
**Usage**:
```console theme={"dark"}
$ qbraid envs uninstall [OPTIONS]
```
**Options**:
* `-n, --name `: Name of the environment to remove \[required]
* `-c, --delete-cloud`: Also delete the environment from qBraid cloud (requires ownership). By default only the local copy is removed and the cloud slug is preserved, so you can reinstall it later.
* `-y, --yes`: Automatically answer 'yes' to all prompts
* `--help`: Show this message and exit.
## qbraid envs delete
(Admin) Delete a cloud environment.
Removes the DB entry and storage files.
**Usage**:
```console theme={"dark"}
$ qbraid envs delete [OPTIONS] {slug}
```
**Arguments**:
* `slug`: Slug of the cloud environment to delete \[required]
**Options**:
* `-y, --yes`: Automatically answer 'yes' to all prompts
* `--help`: Show this message and exit.
## qbraid envs list
List installed qBraid environments.
**Usage**:
```console theme={"dark"}
$ qbraid envs list [OPTIONS]
```
**Options**:
* `--help`: Show this message and exit.
## qbraid envs activate
Activate qBraid environment.
NOTE: Currently only works on qBraid Lab platform, and select few other OS types.
**Usage**:
```console theme={"dark"}
$ qbraid envs activate [OPTIONS] {name}
```
**Arguments**:
* `name`: Name of the environment. Values from 'qbraid envs list'. \[required]
**Options**:
* `--help`: Show this message and exit.
## qbraid envs available
List installable environments.
Shows available pre-built environments for installation.
**Usage**:
```console theme={"dark"}
$ qbraid envs available [OPTIONS]
```
**Options**:
* `-p, --page `: Page number for pagination (default: 1)
* `-l, --limit `: Number of environments per page (default: 20)
* `--help`: Show this message and exit.
## qbraid envs info
Show environment details.
Get detailed information about an environment.
Accepts either a local env\_id or a cloud slug. Shows information from
both local registry and cloud catalog when available.
Examples:
```bash theme={"dark"}
$ qbraid envs info qiskit_1.0 # By slug (cloud + local if installed)
$ qbraid envs info a1b2 # By env_id (local only)
$ qbraid envs info my_custom_abc123 # Custom environment
```
**Usage**:
```console theme={"dark"}
$ qbraid envs info [OPTIONS] {identifier}
```
**Arguments**:
* `identifier`: Environment identifier (env\_id or slug) \[required]
**Options**:
* `--help`: Show this message and exit.
## qbraid envs install
Install an environment.
Installs a pre-built environment from cloud storage.
If the environment was built for a different platform or requires a Python
version not available on your system, you'll be offered options to either
create a similar local environment or proceed with the download anyway.
**Usage**:
```console theme={"dark"}
$ qbraid envs install [OPTIONS] {env_slug}
```
**Arguments**:
* `env_slug`: Environment slug to install (from 'qbraid envs available') \[required]
**Options**:
* `-t, --temp`: Install as temporary environment (faster, non-persistent)
* `--target `: Custom target directory (defaults to \~/.qbraid/environments)
* `-y, --yes`: Automatically proceed with default options without prompting
* `--help`: Show this message and exit.
## qbraid envs upload
Upload an environment.
Upload environment to qBraid cloud storage (private by default).
This uploads your local environment to make it available for sharing
with specific users. Use 'qbraid envs publish request' after upload to request
public visibility.
Examples:
```bash theme={"dark"}
$ qbraid envs upload my_custom_env
$ qbraid envs upload a1b2 --overwrite
$ qbraid envs upload my_env --group quantum_sdk
$ qbraid envs upload my_env --slug existing_slug_abc123 # Re-upload
```
**Usage**:
```console theme={"dark"}
$ qbraid envs upload [OPTIONS] {identifier}
```
**Arguments**:
* `identifier`: Environment name (if unique) or env\_id to upload \[required]
**Options**:
* `-s, --slug `: Re-upload to existing slug (replaces previous upload)
* `-g, --group `: Environment group to add this environment to
* `-o, --overwrite`: Overwrite existing uploaded environment
* `-y, --yes`: Skip confirmation prompts
* `--help`: Show this message and exit.
## qbraid envs health
Check the health of an environment.
This performs comprehensive checks on the virtual environment:
* Python symlinks and executables
* pyvenv.cfg configuration
* Activate scripts
* Kernel configuration (if present)
Examples:
```bash theme={"dark"}
$ qbraid envs health my_env
$ qbraid envs health a1b2
```
**Usage**:
```console theme={"dark"}
$ qbraid envs health [OPTIONS] {identifier}
```
**Arguments**:
* `identifier`: Environment name or env\_id to check \[required]
**Options**:
* `--help`: Show this message and exit.
## qbraid envs repair
Repair a broken environment.
This attempts to fix common issues:
* Broken Python symlinks
* Invalid pyvenv.cfg paths
* Broken activate scripts
* Invalid kernel.json paths
Use --auto-install to automatically install Python via uv if the
required version is not available.
Examples:
```bash theme={"dark"}
$ qbraid envs repair my_env
$ qbraid envs repair a1b2 --auto-install
```
**Usage**:
```console theme={"dark"}
$ qbraid envs repair [OPTIONS] {identifier}
```
**Arguments**:
* `identifier`: Environment name or env\_id to repair \[required]
**Options**:
* `-a, --auto-install`: Automatically install Python via uv if needed
* `--help`: Show this message and exit.
## qbraid envs pythons
List available Python versions.
Shows all Python installations found on the system, including:
* System Python (PATH)
* uv-managed Python
* Conda environments
* Homebrew (macOS)
* pyenv installations
Use this to see which Python versions are available for creating
new environments.
Examples:
```bash theme={"dark"}
$ qbraid envs pythons
```
**Usage**:
```console theme={"dark"}
$ qbraid envs pythons [OPTIONS]
```
**Options**:
* `--help`: Show this message and exit.
## qbraid envs config
View or update environment configuration.
Without flags, prints the current config. With flags, applies the updates
and prints the new state. Multiple update flags can be combined in one call.
Examples:
```bash theme={"dark"}
$ qbraid envs config 5dcc
$ qbraid envs config myenv --description "Quantum sim env"
$ qbraid envs config myenv --tags "quantum,sim,gpu"
$ qbraid envs config myenv --add-tag gpu --add-tag cuda
$ qbraid envs config myenv --remove-tag deprecated
$ qbraid envs config myenv --system-site-packages true
```
**Usage**:
```console theme={"dark"}
$ qbraid envs config [OPTIONS] {environment}
```
**Arguments**:
* `environment`: Environment name, env\_id, or slug \[required]
**Options**:
* `-d, --description `: Update environment description
* `--tags `: Replace tags (comma-separated, use '' to clear)
* `--add-tag `: Append a tag (repeatable)
* `--remove-tag `: Remove a tag (repeatable)
* `--kernel-name `: Update Jupyter kernel display name
* `--system-site-packages `: Enable/disable inheriting packages from parent Python (true/false)
* `--help`: Show this message and exit.
## qbraid envs publish
Manage environment publishing.
**Usage**:
```console theme={"dark"}
$ qbraid envs publish [OPTIONS] COMMAND [ARGS]...
```
**Options**:
* `--help`: Show this message and exit.
**Commands**:
* `request`: Request to publish environment.
* `status`: Check publish status.
* `cancel`: Cancel a pending publish request.
* `review`: (Admin) Mark as under review.
* `approve`: (Admin) Approve and publish.
* `deny`: (Admin) Deny a publish request.
### qbraid envs publish request
Request to publish environment.
Submits your uploaded environment to the public catalog for admin review. Once approved,
it will be publicly visible and installable by all users.
The environment must be uploaded first with 'qbraid envs upload'.
Examples:
```bash theme={"dark"}
$ qbraid envs publish request my_env_abc123
```
**Usage**:
```console theme={"dark"}
$ qbraid envs publish request [OPTIONS] {slug}
```
**Arguments**:
* `slug`: Environment slug (from upload) \[required]
**Options**:
* `--help`: Show this message and exit.
### qbraid envs publish status
Check publish status.
Check the publishing status of an environment.
Status values:
* none: Not submitted for publishing
* requested: Waiting for admin review
* pending: Under admin review
* approved: Published to public catalog
* denied: Publish request was denied
Examples:
```bash theme={"dark"}
$ qbraid envs publish status my_env_abc123
```
**Usage**:
```console theme={"dark"}
$ qbraid envs publish status [OPTIONS] {slug}
```
**Arguments**:
* `slug`: Environment slug to check \[required]
**Options**:
* `--help`: Show this message and exit.
### qbraid envs publish cancel
Cancel a pending publish request.
This withdraws your publish request before it's approved.
You can resubmit later with 'qbraid envs publish request'.
Examples:
```bash theme={"dark"}
$ qbraid envs publish cancel my_env_abc123
```
**Usage**:
```console theme={"dark"}
$ qbraid envs publish cancel [OPTIONS] {slug}
```
**Arguments**:
* `slug`: Environment slug \[required]
**Options**:
* `--help`: Show this message and exit.
### qbraid envs publish review
(Admin) Mark as under review.
Transitions the environment from 'requested' to 'pending' status,
indicating an admin is actively reviewing it.
Examples:
```bash theme={"dark"}
$ qbraid envs publish review my_env_abc123
```
**Usage**:
```console theme={"dark"}
$ qbraid envs publish review [OPTIONS] {slug}
```
**Arguments**:
* `slug`: Environment slug to review \[required]
**Options**:
* `--help`: Show this message and exit.
### qbraid envs publish approve
(Admin) Approve and publish.
Approve and publish an environment to the public catalog.
This makes the environment publicly visible and installable by all users.
After approval, you'll be prompted to add the environment to a group
if it's not already in one.
Examples:
```bash theme={"dark"}
$ qbraid envs publish approve my_env_abc123
$ qbraid envs publish approve my_env_abc123 --group qiskit
$ qbraid envs publish approve my_env_abc123 --no-group
```
**Usage**:
```console theme={"dark"}
$ qbraid envs publish approve [OPTIONS] {slug}
```
**Arguments**:
* `slug`: Environment slug to approve \[required]
**Options**:
* `-g, --group `: Add environment to this group after approval
* `--no-group`: Skip the group assignment prompt
* `--help`: Show this message and exit.
### qbraid envs publish deny
(Admin) Deny a publish request.
The owner will be notified with the denial reason.
Examples:
```bash theme={"dark"}
$ qbraid envs publish deny my_env_abc123
$ qbraid envs publish deny my_env_abc123 --message "Missing documentation"
```
**Usage**:
```console theme={"dark"}
$ qbraid envs publish deny [OPTIONS] {slug}
```
**Arguments**:
* `slug`: Environment slug to deny \[required]
**Options**:
* `-m, --message `: Reason for denial (sent to owner)
* `--help`: Show this message and exit.
## qbraid envs share
Manage environment sharing via share codes.
**Usage**:
```console theme={"dark"}
$ qbraid envs share [OPTIONS] COMMAND [ARGS]...
```
**Options**:
* `--help`: Show this message and exit.
**Commands**:
* `list`: List users with access.
* `create-code`: Generate a share code.
* `delete-code`: Delete the share code for an environment.
* `redeem-code`: Redeem a share code.
### qbraid envs share list
List users with access.
Shows all users with read or write access to the specified environment.
Examples:
```bash theme={"dark"}
$ qbraid envs share list my_env_abc123
```
**Usage**:
```console theme={"dark"}
$ qbraid envs share list [OPTIONS] {slug}
```
**Arguments**:
* `slug`: Environment slug to check \[required]
**Options**:
* `--help`: Show this message and exit.
### qbraid envs share create-code
Generate a share code.
Creates an 8-character code that others can redeem with
'qbraid envs share redeem-code' to gain read access to your environment.
Only the owner can generate codes.
Generating a new code invalidates any previous code for this environment.
Examples:
```bash theme={"dark"}
$ qbraid envs share create-code my_env_abc123
Share code: ABC12XYZ
# Share the code with collaborators, they can redeem it with:
$ qbraid envs share redeem-code ABC12XYZ
```
**Usage**:
```console theme={"dark"}
$ qbraid envs share create-code [OPTIONS] {slug}
```
**Arguments**:
* `slug`: Environment slug to generate share code for \[required]
**Options**:
* `--help`: Show this message and exit.
### qbraid envs share delete-code
Delete the share code for an environment.
Removes the share code, preventing new users from redeeming it.
Users who have already redeemed the code keep their access.
Examples:
```bash theme={"dark"}
$ qbraid envs share delete-code my_env_abc123
```
**Usage**:
```console theme={"dark"}
$ qbraid envs share delete-code [OPTIONS] {slug}
```
**Arguments**:
* `slug`: Environment slug to delete share code for \[required]
**Options**:
* `--help`: Show this message and exit.
### qbraid envs share redeem-code
Redeem a share code.
Redeem a share code to gain access to an environment.
Enter a share code received from an environment owner to gain read access.
The code is case-insensitive.
Examples:
```bash theme={"dark"}
$ qbraid envs share redeem-code ABC12XYZ
Access granted to: My Environment (my_env_abc123)
# After redeeming, you can install the environment:
$ qbraid envs install my_env_abc123
```
**Usage**:
```console theme={"dark"}
$ qbraid envs share redeem-code [OPTIONS] {code}
```
**Arguments**:
* `code`: Share code to redeem \[required]
**Options**:
* `--help`: Show this message and exit.
## qbraid envs groups
Manage environment groups.
**Usage**:
```console theme={"dark"}
$ qbraid envs groups [OPTIONS] COMMAND [ARGS]...
```
**Options**:
* `--help`: Show this message and exit.
**Commands**:
* `list`: List all environment groups.
* `info`: Show environment group details.
* `create`: (Admin) Create a new environment group.
* `update`: (Admin) Update an environment group.
* `delete`: (Admin) Delete an environment group.
### qbraid envs groups list
List all environment groups.
Environment groups are collections of related environments. Use the group
slug when uploading an environment to add it to a group.
Examples:
```bash theme={"dark"}
$ qbraid envs groups list
```
**Usage**:
```console theme={"dark"}
$ qbraid envs groups list [OPTIONS]
```
**Options**:
* `--help`: Show this message and exit.
### qbraid envs groups info
Show environment group details.
Examples:
```bash theme={"dark"}
$ qbraid envs groups info quantum_sdk
```
**Usage**:
```console theme={"dark"}
$ qbraid envs groups info [OPTIONS] {group_slug}
```
**Arguments**:
* `group_slug`: Group slug to get details for \[required]
**Options**:
* `--help`: Show this message and exit.
### qbraid envs groups create
(Admin) Create a new environment group.
Environment groups are collections of related environments, typically
different versions of the same package or tool.
Examples:
```bash theme={"dark"}
$ qbraid envs groups create "Qiskit" --description "IBM Qiskit environments"
$ qbraid envs groups create "Cirq" --category package --visibility public
$ qbraid envs groups create "PennyLane" --envs "pen_1x0,pen_0x9" --latest pen_1x0
```
**Usage**:
```console theme={"dark"}
$ qbraid envs groups create [OPTIONS] {display_name}
```
**Arguments**:
* `display_name`: Display name for the group (1-100 chars) \[required]
**Options**:
* `-d, --description `: Group description (max 500 chars)
* `-t, --tags `: Comma-separated tags
* `-c, --category `: Category: 'package' or 'subject-matter'
* `-v, --visibility `: Visibility: 'private' or 'public'
* `-e, --envs `: Comma-separated environment slugs to include
* `-l, --latest `: Environment slug to set as the current version
* `--help`: Show this message and exit.
### qbraid envs groups update
(Admin) Update an environment group.
Use --add and --remove for delta updates to the environment list.
Use --latest to set which environment is the "current" version.
Examples:
```bash theme={"dark"}
$ qbraid envs groups update qiskit --add qiskit_1x0abc --latest qiskit_1x0abc
$ qbraid envs groups update cirq --remove cirq_0x8xyz,cirq_0x7def
$ qbraid envs groups update pennylane --name "PennyLane SDK" --visibility public
```
**Usage**:
```console theme={"dark"}
$ qbraid envs groups update [OPTIONS] {group_slug}
```
**Arguments**:
* `group_slug`: Slug of the group to update \[required]
**Options**:
* `-n, --name `: New display name
* `-d, --description `: New description
* `-a, --add `: Comma-separated environment slugs to add
* `-r, --remove `: Comma-separated environment slugs to remove
* `-l, --latest `: Set the current version environment slug
* `-c, --category `: Category: 'package' or 'subject-matter'
* `-v, --visibility `: Visibility: 'private' or 'public'
* `--help`: Show this message and exit.
### qbraid envs groups delete
(Admin) Delete an environment group.
This removes the group but does not delete the environments in it.
Examples:
```bash theme={"dark"}
$ qbraid envs groups delete old_group
$ qbraid envs groups delete old_group --yes
```
**Usage**:
```console theme={"dark"}
$ qbraid envs groups delete [OPTIONS] {group_slug}
```
**Arguments**:
* `group_slug`: Slug of the group to delete \[required]
**Options**:
* `-y, --yes`: Skip confirmation prompt
* `--help`: Show this message and exit.
## qbraid envs registry
Manage the local environment registry.
**Usage**:
```console theme={"dark"}
$ qbraid envs registry [OPTIONS] COMMAND [ARGS]...
```
**Options**:
* `--help`: Show this message and exit.
**Commands**:
* `add`: Register an external environment.
* `remove`: Unregister an external environment.
* `sync`: Sync the environment registry.
### qbraid envs registry add
Register an external environment.
Allows you to use existing Python environments (conda, venv, etc.)
with qBraid commands like kernel management and activation.
Examples:
```bash theme={"dark"}
$ qbraid envs registry add /path/to/my_env --alias myenv
$ qbraid envs registry add ~/conda/envs/quantum --name quantum_abc123
```
**Usage**:
```console theme={"dark"}
$ qbraid envs registry add [OPTIONS] {path}
```
**Arguments**:
* `path`: \[required]
**Options**:
* `-a, --alias `: Alias for the environment
* `-n, --name `: Name/slug for the environment
* `-y, --yes`
* `--help`: Show this message and exit.
### qbraid envs registry remove
Unregister an external environment.
This only removes the environment from qBraid's registry.
The actual environment files are NOT deleted.
**Usage**:
```console theme={"dark"}
$ qbraid envs registry remove [OPTIONS] {name}
```
**Arguments**:
* `name`: Name or alias of environment to unregister \[required]
**Options**:
* `-y, --yes`
* `--help`: Show this message and exit.
### qbraid envs registry sync
Sync the environment registry.
This will:
* Remove registry entries for deleted environments
* Auto-discover new environments in default paths
* Verify all registered paths still exist
**Usage**:
```console theme={"dark"}
$ qbraid envs registry sync [OPTIONS]
```
**Options**:
* `--help`: Show this message and exit.
# qbraid jobs
Source: https://docs.qbraid.com/v2/cli/api-reference/qbraid_jobs
Submit and track quantum computing jobs.
Monitor quantum jobs across all providers from a single interface.
View job status, results, and costs.
Use this when you want to:
* Check the status of submitted quantum jobs
* View results from completed experiments
* Track costs across providers
* Bundle related jobs into groups (qbraid jobs groups)
**Usage**:
```console theme={"dark"}
$ qbraid jobs [OPTIONS] COMMAND [ARGS]...
```
**Options**:
* `--help`: Show this message and exit.
**Commands**:
* `submit`: Submit a quantum job.
* `list`: List quantum jobs.
* `get`: Get a qBraid Quantum Job.
* `groups`: Manage job groups.
## qbraid jobs submit
Submit a quantum job.
Submit a quantum program to a device on the qBraid platform.
The program can be provided as a file path or piped via stdin.
Examples:
```bash theme={"dark"}
qbraid jobs submit circuit.qasm -d qbraid:qbraid:sim:qir-sv --shots 100
cat circuit.qasm | qbraid jobs submit - -d qbraid:qbraid:sim:qir-sv -f qasm2
qbraid jobs submit program.ll -d qbraid:qbraid:sim:qir-sv --json
```
**Usage**:
```console theme={"dark"}
$ qbraid jobs submit [OPTIONS] {program}
```
**Arguments**:
* `program`: Path to a quantum program file, or '-' to read from stdin. \[required]
**Options**:
* `-d, --device `: Target device QRN (e.g. 'qbraid:qbraid:sim:qir-sv'). \[required]
* `-f, --format `: Program format. Required when reading from stdin. Auto-detected from file extension when omitted. Options: qasm2, qasm3, qir.bc, qir.ll, analog, pulser.sequence, quil, ionq.circuit.v0, problem
* `-s, --shots `: Number of shots to execute. \[x>=1]
* `-n, --name `: Job name.
* `-t, --tags `: Job tags as a JSON object (e.g. '\{"experiment":"bell"}').
* `--options `: Runtime options as a JSON object.
* `--group `: Group job QRN to associate this job with.
* `--json`: Output full job response as JSON (for programmatic use).
* `--help`: Show this message and exit.
## qbraid jobs list
List quantum jobs.
Lists quantum jobs submitted through the qBraid platform.
**Usage**:
```console theme={"dark"}
$ qbraid jobs list [OPTIONS]
```
**Options**:
* `-l, --limit `: Limit the maximum number of results returned \[default: 10]
* `-s, --status `: Filter by status: INITIALIZING, QUEUED, VALIDATING, RUNNING, CANCELLING, CANCELLED, COMPLETED, FAILED, UNKNOWN, HOLD
* `-v, --vendor `: Filter by vendor: AWS, AZURE, IBM, IONQ, QBRAID
* `-p, --provider `: Filter by provider: AQT, AWS, AZURE, EQUAL1, IBM, IQM, IONQ, NEC, OQC, PASQAL, QUANTINUUM, QUERA, RIGETTI, QBRAID
* `--page `: Page number for pagination \[default: 1]
* `--help`: Show this message and exit.
## qbraid jobs get
Get a qBraid Quantum Job.
**Usage**:
```console theme={"dark"}
$ qbraid jobs get [OPTIONS] {job_id}
```
**Arguments**:
* `job_id`: The QRN or ID of the job to get. \[required]
**Options**:
* `--no-fmt`: Disable rich console formatting (output raw data) \[default: True]
* `--help`: Show this message and exit.
## qbraid jobs groups
Manage job groups.
A group bundles related jobs into one session so the runtime can
track aggregate cost and status. Submit into a group with
`qbraid jobs submit --group <qrn>`.
Quick start:
```bash theme={"dark"}
qbraid jobs groups create -n my-batch
qbraid jobs groups list
qbraid jobs groups info
qbraid jobs groups jobs
qbraid jobs groups close # no more submissions, jobs run
qbraid jobs groups cancel # cancel group + non-terminal jobs
qbraid jobs groups delete # remove the record
```
**Usage**:
```console theme={"dark"}
$ qbraid jobs groups [OPTIONS] COMMAND [ARGS]...
```
**Options**:
* `--help`: Show this message and exit.
**Commands**:
* `list`: List your job groups.
* `info`: Show full details for one group.
* `create`: Create a new group.
* `close`: Close a group to new submissions.
* `cancel`: Cancel a group and its non-terminal jobs.
* `jobs`: List the jobs in a group.
* `delete`: Delete a group record.
### qbraid jobs groups list
List your job groups.
**Usage**:
```console theme={"dark"}
$ qbraid jobs groups list [OPTIONS]
```
**Options**:
* `-s, --status `: Filter by status (OPEN/CLOSED/COMPLETED/FAILED/CANCELLED)
* `-p, --page `: Page number \[x>=1]
* `-l, --limit `: Results per page \[x>=1]
* `--help`: Show this message and exit.
### qbraid jobs groups info
Show full details for one group.
**Usage**:
```console theme={"dark"}
$ qbraid jobs groups info [OPTIONS] {qrn}
```
**Arguments**:
* `qrn`: Group QRN \[required]
**Options**:
* `--help`: Show this message and exit.
### qbraid jobs groups create
Create a new group.
Returns the new group's QRN — pass it to `qbraid jobs submit --group`
to attach jobs into the group.
**Usage**:
```console theme={"dark"}
$ qbraid jobs groups create [OPTIONS]
```
**Options**:
* `-n, --name `: Human-readable group name
* `-t, --tags `: Comma-separated key=value tags (values stored as strings)
* `-m, --metadata `: Comma-separated key=value metadata (values stored as strings)
* `--max-ttl `: Max time-to-live in seconds (1-86400) \[1\<=x\<=86400]
* `--help`: Show this message and exit.
### qbraid jobs groups close
Close a group to new submissions.
Existing jobs continue running; only new submissions are blocked.
**Usage**:
```console theme={"dark"}
$ qbraid jobs groups close [OPTIONS] {qrn}
```
**Arguments**:
* `qrn`: Group QRN \[required]
**Options**:
* `--help`: Show this message and exit.
### qbraid jobs groups cancel
Cancel a group and its non-terminal jobs.
**Usage**:
```console theme={"dark"}
$ qbraid jobs groups cancel [OPTIONS] {qrn}
```
**Arguments**:
* `qrn`: Group QRN \[required]
**Options**:
* `-f, --force`: Skip confirmation
* `--help`: Show this message and exit.
### qbraid jobs groups jobs
List the jobs in a group.
Requires qbraid-core >= 0.3.3 (the get\_group\_jobs helper).
**Usage**:
```console theme={"dark"}
$ qbraid jobs groups jobs [OPTIONS] {qrn}
```
**Arguments**:
* `qrn`: Group QRN \[required]
**Options**:
* `--help`: Show this message and exit.
### qbraid jobs groups delete
Delete a group record.
Underlying jobs are not affected — cancel the group first if you want
to stop them. Idempotent: deleting an already-deleted group is a no-op.
Requires qbraid-core >= 0.3.3 (the delete\_group helper).
**Usage**:
```console theme={"dark"}
$ qbraid jobs groups delete [OPTIONS] {qrn}
```
**Arguments**:
* `qrn`: Group QRN \[required]
**Options**:
* `-f, --force`: Skip confirmation
* `--help`: Show this message and exit.
# qbraid kernels
Source: https://docs.qbraid.com/v2/cli/api-reference/qbraid_kernels
Add, remove, and repair Jupyter kernels.
Manage Jupyter kernel specs for qBraid environments. Each environment
can have its own kernel visible in JupyterLab's launcher.
Use this when you want to:
* Make an environment available as a Jupyter kernel
* Fix a broken kernel that points to a missing environment
* Clean up orphaned kernels from deleted environments
**Usage**:
```console theme={"dark"}
$ qbraid kernels [OPTIONS] COMMAND [ARGS]...
```
**Options**:
* `--help`: Show this message and exit.
**Commands**:
* `list`: List all available kernels.
* `add`: Add a kernel to Jupyter.
* `remove`: Remove a kernel from Jupyter.
* `status`: Check kernel status for an environment.
* `repair`: Repair a kernel's Python path.
* `clean`: Remove orphaned kernels.
## qbraid kernels list
List all available kernels.
**Usage**:
```console theme={"dark"}
$ qbraid kernels list [OPTIONS]
```
**Options**:
* `--help`: Show this message and exit.
## qbraid kernels add
Add a kernel to Jupyter.
**Usage**:
```console theme={"dark"}
$ qbraid kernels add [OPTIONS] {environment}
```
**Arguments**:
* `environment`: Name of environment for which to add ipykernel. Values from 'qbraid envs list'. \[required]
**Options**:
* `--help`: Show this message and exit.
## qbraid kernels remove
Remove a kernel from Jupyter.
**Usage**:
```console theme={"dark"}
$ qbraid kernels remove [OPTIONS] {environment}
```
**Arguments**:
* `environment`: Name of environment for which to remove ipykernel. Values from 'qbraid envs list'. \[required]
**Options**:
* `--help`: Show this message and exit.
## qbraid kernels status
Check kernel status for an environment.
**Usage**:
```console theme={"dark"}
$ qbraid kernels status [OPTIONS] {environment}
```
**Arguments**:
* `environment`: Environment name or env\_id to check kernel status. \[required]
**Options**:
* `--help`: Show this message and exit.
## qbraid kernels repair
Repair a kernel's Python path.
Fixes kernel.json with the correct Python path.
**Usage**:
```console theme={"dark"}
$ qbraid kernels repair [OPTIONS] {environment}
```
**Arguments**:
* `environment`: Environment name or env\_id to repair kernel. \[required]
**Options**:
* `--help`: Show this message and exit.
## qbraid kernels clean
Remove orphaned kernels.
Removes kernels whose Python environment no longer exists.
Without arguments, scans all kernels and prompts to remove broken ones.
With a kernel name, removes it directly without checking validity.
**Usage**:
```console theme={"dark"}
$ qbraid kernels clean [OPTIONS] [slug]
```
**Arguments**:
* `slug`: Kernel name to remove directly (no validation check).
**Options**:
* `-y, --yes`: Skip confirmation prompt
* `--help`: Show this message and exit.
# qbraid lab
Source: https://docs.qbraid.com/v2/cli/api-reference/qbraid_lab
Launch qBraid Lab (JupyterLab).
**Usage**:
```console theme={"dark"}
$ qbraid lab [OPTIONS] COMMAND [ARGS]...
```
**Options**:
* `--help`: Show this message and exit.
# qbraid pip
Source: https://docs.qbraid.com/v2/cli/api-reference/qbraid_pip
Run pip command in active qBraid environment.
**Usage**:
```console theme={"dark"}
$ qbraid pip [OPTIONS] COMMAND [ARGS]...
```
**Options**:
* `--help`: Show this message and exit.
**Commands**:
* `install`: Run pip install in environment.
## qbraid pip install
Run pip install in environment.
Performs pip install action with open-ended arguments and options.
**Usage**:
```console theme={"dark"}
$ qbraid pip install [OPTIONS]
```
**Options**:
* `--help`: Show this message and exit.
# qbraid projects
Source: https://docs.qbraid.com/v2/cli/api-reference/qbraid_projects
Browse and install qBraid Hub projects.
Hub projects are GitHub-hosted templates with optional pre-configured
environments. Use 'qbraid projects install \
For a client-side view of how the qBraid-SDK integrates with the qBraid API see the [Runtime overview](/v2/sdk/user-guide/runtime/components#runtime-overview) in the SDK docs.
## Rate limiting
API requests are rate-limited per IP (unauthenticated) or per user (authenticated) within a rolling 15-minute window.
| Tier | Window | Max requests |
| -------------------- | ------ | ------------ |
| Unauthenticated (IP) | 15 min | 100 |
| Authenticated user | 15 min | 1,000 |
Exceeding the limit returns an HTTP 429 (Too Many Requests) response. Authenticate with a valid API key to use the higher authenticated limit.
Higher rate limits for your [organization](/v2/account/organizations/overview)
are available upon request.
# qbraid account
Source: https://docs.qbraid.com/v2/cli/api-reference/qbraid_account
Manage qBraid account.
View account information and check remaining credits.
**Usage**:
```console theme={"dark"}
$ qbraid account [OPTIONS] COMMAND [ARGS]...
```
**Options**:
* `--help`: Show this message and exit.
**Commands**:
* `credits`: Get number of qBraid credits remaining.
## qbraid account credits
Get number of qBraid credits remaining.
**Usage**:
```console theme={"dark"}
$ qbraid account credits [OPTIONS]
```
**Options**:
* `--help`: Show this message and exit.
# qbraid admin
Source: https://docs.qbraid.com/v2/cli/api-reference/qbraid_admin
CI/CD commands for qBraid maintainers.
**Usage**:
```console theme={"dark"}
$ qbraid admin [OPTIONS] COMMAND [ARGS]...
```
**Options**:
* `--help`: Show this message and exit.
**Commands**:
* `headers`: Verify and fix qBraid file headers.
## qbraid admin headers
Verify and fix qBraid file headers.
Verifies and optionally fixes qBraid headers in specified files and directories.
**Usage**:
```console theme={"dark"}
$ qbraid admin headers [OPTIONS] {src_paths}...
```
**Arguments**:
* `src_paths...`: Source file or directory paths to verify. \[required]
**Options**:
* `-t, --type `: Type of header to use. \[default: default]
* `-s, --skip `: Files to skip during verification.
* `-f, --fix`: Whether to fix the headers instead of just verifying.
* `-p, --project `: Name of the project to use in the header.
* `--help`: Show this message and exit.
# qbraid agents
Source: https://docs.qbraid.com/v2/cli/api-reference/qbraid_agents
Manage AI coding agent sessions.
Launch, monitor, and control AI coding agents.
Run Claude Code, OpenCode, or Codex in managed tmux sessions. Send
instructions, stream transcripts, handle permissions, and orchestrate
multiple agents — all from one place. Works locally and on remote
compute servers via SSH.
Use this when you want to:
* Spin up agents on specific repos or projects
* Watch what agents are doing in real-time
* Approve or deny tool-use permissions remotely
* Manage agents running on cloud compute machines
* Resume previous coding sessions
Getting started:
```bash theme={"dark"}
qbraid agents launch # Interactive launch
qbraid agents list # Show active sessions
qbraid agents watch # Stream live activity
qbraid agents send --text "..." # Send instructions
```
**Usage**:
```console theme={"dark"}
$ qbraid agents [OPTIONS] COMMAND [ARGS]...
```
**Options**:
* `--help`: Show this message and exit.
**Commands**:
* `register`: Register an agent session.
* `deregister`: Deregister an agent session.
* `list`: List agent sessions.
* `discover`: Discover new agent sessions.
* `status`: Show detailed status for an agent session.
* `update`: Update metadata fields on an agent session.
* `kill`: Stop an agent by name, session ID, or PID.
* `launch`: Launch an AI coding agent.
* `resume`: Resume a previous agent session.
* `send`: Send text to a running agent's terminal.
* `read`: Read recent terminal output from an agent.
* `approve`: Approve a tool-use prompt.
* `watch`: Stream agent transcript.
* `attach`: Attach to an agent's terminal.
* `clean`: Clean up orphaned sessions.
* `send-to`: Send a message to another agent's inbox.
* `broadcast`: Broadcast to multiple agent inboxes.
* `team`: Show a team roster with unread counts.
* `hooks`: Manage agent lifecycle hooks.
* `inbox`: Read messages sent to this agent's inbox.
## qbraid agents register
Register an agent session.
Reads session data from stdin JSON (used by hooks).
**Usage**:
```console theme={"dark"}
$ qbraid agents register [OPTIONS]
```
**Options**:
* `--help`: Show this message and exit.
## qbraid agents deregister
Deregister an agent session.
Reads session data from stdin JSON (used by hooks).
**Usage**:
```console theme={"dark"}
$ qbraid agents deregister [OPTIONS]
```
**Options**:
* `--help`: Show this message and exit.
## qbraid agents list
List agent sessions.
Use --compute to list on a remote server.
**Usage**:
```console theme={"dark"}
$ qbraid agents list [OPTIONS]
```
**Options**:
* `-t, --tool `: Filter by tool (claude, codeq, codex)
* `--status `: Filter by status
* `--tag `: Filter by tag (repeatable)
* `--since `: Time window (e.g., '1h', '30m', '2d')
* `-c, --compute `: SSH alias for remote compute (runs list on remote)
* `-s, --search `: Text search across name/cwd/tags
* `-a, --all`: Include stopped sessions
* `-l, --limit `: Entries per page \[default: 25; x>=1]
* `-p, --page `: Page number (non-interactive mode) \[default: 1; x>=1]
* `--sort `: Sort by: recent, oldest, name, tool, status, cwd, model \[default: recent]
* `--no-interactive`: Disable interactive pagination
* `--json`: Output as JSON array (for programmatic use)
* `--help`: Show this message and exit.
## qbraid agents discover
Discover new agent sessions.
Scans transcript files and registers new agent sessions.
**Usage**:
```console theme={"dark"}
$ qbraid agents discover [OPTIONS]
```
**Options**:
* `-f, --full`: Full data enrichment for all sessions (slower)
* `-c, --compute `: Sync sessions from remote compute server (SSH alias)
* `--help`: Show this message and exit.
## qbraid agents status
Show detailed status for an agent session.
**Usage**:
```console theme={"dark"}
$ qbraid agents status [OPTIONS] {session_id}
```
**Arguments**:
* `session_id`: Session ID (full or prefix) \[required]
**Options**:
* `--help`: Show this message and exit.
## qbraid agents update
Update metadata fields on an agent session.
**Usage**:
```console theme={"dark"}
$ qbraid agents update [OPTIONS] {session_id}
```
**Arguments**:
* `session_id`: Session ID (full or prefix) \[required]
**Options**:
* `--tag `: Tag to add (can be repeated)
* `--name `: Set terminal name for the session
* `--model `: Set model name (e.g. claude-sonnet-4-20250514)
* `--cwd `: Set working directory for the session
* `--status `: Set session status (working, waiting, idle, error, stopped)
* `--help`: Show this message and exit.
## qbraid agents kill
Stop an agent by name, session ID, or PID.
**Usage**:
```console theme={"dark"}
$ qbraid agents kill [OPTIONS] {target}
```
**Arguments**:
* `target`: Agent name, ID prefix, or PID \[required]
**Options**:
* `-f, --force`: Use SIGKILL instead of SIGTERM
* `--help`: Show this message and exit.
## qbraid agents launch
Launch an AI coding agent.
Starts the agent in a managed tmux session.
**Usage**:
```console theme={"dark"}
$ qbraid agents launch [OPTIONS]
```
**Options**:
* `-t, --tool `: Agent tool (claude, claude-auto, codeq, codex)
* `--cwd `: Working directory
* `-n, --name `: Agent name
* `-i, --instructions `: Initial instructions
* `-r, --repo `: GitHub repo URL, org/repo, or issue/PR URL
* `--type `: Agent type: leader, worker, observer, reviewer
* `--parent `: Parent session ID
* `--team `: Team ID
* `--tag `: Tags (repeatable)
* `-c, --compute `: SSH alias for remote compute server
* `--help`: Show this message and exit.
## qbraid agents resume
Resume a previous agent session.
Resumes in a managed tmux window.
**Usage**:
```console theme={"dark"}
$ qbraid agents resume [OPTIONS] [session_id]
```
**Arguments**:
* `session_id`: Session ID, prefix, or name. Omit for interactive picker.
**Options**:
* `-n, --name `: Agent name for the resumed session
* `--help`: Show this message and exit.
## qbraid agents send
Send text to a running agent's terminal.
**Usage**:
```console theme={"dark"}
$ qbraid agents send [OPTIONS] {session_id}
```
**Arguments**:
* `session_id`: Session ID (prefix match) \[required]
**Options**:
* `-m, --text `: Text to send \[required]
* `-c, --compute `: SSH alias for remote compute
* `--help`: Show this message and exit.
## qbraid agents read
Read recent terminal output from an agent.
**Usage**:
```console theme={"dark"}
$ qbraid agents read [OPTIONS] {session_id}
```
**Arguments**:
* `session_id`: Session ID (prefix match) \[required]
**Options**:
* `-n, --lines `: Number of lines to capture \[default: 50]
* `-c, --compute `: SSH alias for remote compute
* `--help`: Show this message and exit.
## qbraid agents approve
Approve a tool-use prompt.
Sends 'y' + Enter to the agent's terminal.
**Usage**:
```console theme={"dark"}
$ qbraid agents approve [OPTIONS] {session_id}
```
**Arguments**:
* `session_id`: Session ID (prefix match) \[required]
**Options**:
* `--help`: Show this message and exit.
## qbraid agents watch
Stream agent transcript.
Streams live transcript from an agent session.
**Usage**:
```console theme={"dark"}
$ qbraid agents watch [OPTIONS] {session_id}
```
**Arguments**:
* `session_id`: Session ID (prefix match) \[required]
**Options**:
* `-n, --lines `: Initial history lines \[default: 20]
* `--interactive / --no-interactive`: Prompt for permission decisions \[default: interactive]
* `--stream`: Stream-only mode: emit JSON events, no interactive prompts (for frontends)
* `-c, --compute `: SSH alias for remote compute
* `--help`: Show this message and exit.
## qbraid agents attach
Attach to an agent's terminal.
Opens an interactive tmux window for the agent session.
**Usage**:
```console theme={"dark"}
$ qbraid agents attach [OPTIONS] [session_id]
```
**Arguments**:
* `session_id`: Session ID (prefix match). Omit for interactive picker.
**Options**:
* `-c, --compute `: SSH alias for remote compute
* `--help`: Show this message and exit.
## qbraid agents clean
Clean up orphaned sessions.
Removes orphaned tmux windows and stopped sessions.
**Usage**:
```console theme={"dark"}
$ qbraid agents clean [OPTIONS]
```
**Options**:
* `-y, --yes`: Skip confirmation
* `--help`: Show this message and exit.
## qbraid agents send-to
Send a message to another agent's inbox.
For multi-recipient / team broadcast, use `qbraid agents broadcast`.
Delivery is a JSONL append at \~/.qbraid/inboxes/\.jsonl
(local host only — cross-host messaging isn't yet supported and will raise
a clear error). Permission rules (leader/worker/observer/reviewer) are
enforced by default.
**Usage**:
```console theme={"dark"}
$ qbraid agents send-to [OPTIONS] {to} {text}
```
**Arguments**:
* `to`: Target session id (full or prefix), tmux window name, or terminal name. \[required]
* `text`: Message body. \[required]
**Options**:
* `--from `: Sender session id. Defaults to \$QBRAID\_SESSION\_ID (set by the qBraid launcher for every managed agent shell).
* `--type `: One of: message, task\_assignment, status\_update, shutdown\_request. Controls how the recipient's UI/hooks categorize it. \[default: message]
* `--no-permission-check`: Skip the sender→target permission check (agent-type rules from qbraid\_core.services.agents.types.can\_message). Use for testing.
* `--help`: Show this message and exit.
## qbraid agents broadcast
Broadcast to multiple agent inboxes.
Two selectors — pick exactly one:
* `--team <team_id>` — every session with that team\_id (except sender)
* `--to A,B,C` — explicit id/prefix/name list
Delivery is all-or-nothing on target resolution: if any target can't be
resolved, NOTHING is sent (avoids partial-delivery surprises). Once
resolved, per-target send failures are reported individually; a partial
delivery exits with code 3.
**Usage**:
```console theme={"dark"}
$ qbraid agents broadcast [OPTIONS] {text}
```
**Arguments**:
* `text`: Message body — delivered to every target. \[required]
**Options**:
* `--team `: Deliver to every session with this team\_id (excluding the sender). Use one of --team or --to.
* `--to `: Comma-separated list of target session ids/prefixes/names for multi-recipient send. Use one of --team or --to.
* `--from `: Sender session id. Defaults to \$QBRAID\_SESSION\_ID.
* `--type `: One of: message, task\_assignment, status\_update, shutdown\_request. Controls how the recipient's UI/hooks categorize it. \[default: message]
* `--no-permission-check`: Skip the sender→target permission check. Use for testing.
* `--help`: Show this message and exit.
## qbraid agents team
Show a team roster with unread counts.
Answers the leader-orchestrator question "who is on my team, how many
unread messages do they have, and what was the last thing they heard from
anyone?" — which today requires peeking each worker's inbox individually.
Rows are sorted with the current session first (identified via
\$QBRAID\_SESSION\_ID), then by agent\_type (leader → worker → observer →
reviewer), then by session\_id.
**Usage**:
```console theme={"dark"}
$ qbraid agents team [OPTIONS] {team_id}
```
**Arguments**:
* `team_id`: Team identifier (matches AgentSession.team\_id). \[required]
**Options**:
* `-w, --wide`: Show full session ids instead of the 12-char prefix.
* `--help`: Show this message and exit.
## qbraid agents hooks
Manage agent lifecycle hooks.
**Usage**:
```console theme={"dark"}
$ qbraid agents hooks [OPTIONS] COMMAND [ARGS]...
```
**Options**:
* `--help`: Show this message and exit.
**Commands**:
* `install`: Install agent lifecycle hooks.
* `uninstall`: Remove agent lifecycle hooks.
### qbraid agents hooks install
Install agent lifecycle hooks.
Installs hooks for AI coding tools.
**Usage**:
```console theme={"dark"}
$ qbraid agents hooks install [OPTIONS]
```
**Options**:
* `-t, --tool `: Install hooks for a specific tool (claude, codeq, codex)
* `--help`: Show this message and exit.
### qbraid agents hooks uninstall
Remove agent lifecycle hooks.
Removes hooks from all supported tools.
**Usage**:
```console theme={"dark"}
$ qbraid agents hooks uninstall [OPTIONS]
```
**Options**:
* `--help`: Show this message and exit.
## qbraid agents inbox
Read messages sent to this agent's inbox.
Follow, filter unread, and mark-read messages sent to this agent
session's inbox. Inboxes are per-session JSONL files at
\~/.qbraid/inboxes/. Every agent session has one; peers use
`qbraid agents send-to` to write to it.
**Usage**:
```console theme={"dark"}
$ qbraid agents inbox [OPTIONS] COMMAND [ARGS]...
```
**Options**:
* `-s, --session `: Session whose inbox to read. Accepts full id, prefix, or tmux/terminal name (resolved via the registry). Defaults to \$QBRAID\_SESSION\_ID.
* `-f, --follow`: Stream new messages as they arrive.
* `-u, --unread`: Show only unread messages.
* `-n, --limit `: Max messages to show (most recent). \[default: 50]
* `--mark-read / --no-mark-read`: Mark shown messages as read after display. Default on. \[default: mark-read]
* `-w, --wide`: Show full session ids in the From column and title (not the 12-char prefix). Use when multiple senders share a prefix.
* `--help`: Show this message and exit.
**Commands**:
* `mark-read`: Mark inbox messages as read.
### qbraid agents inbox mark-read
Mark inbox messages as read.
Without --message-id, marks every unread message in the session's inbox.
**Usage**:
```console theme={"dark"}
$ qbraid agents inbox mark-read [OPTIONS]
```
**Options**:
* `-s, --session `: Session whose inbox to update. Accepts full id, prefix, or tmux/terminal name. Defaults to \$QBRAID\_SESSION\_ID.
* `-m, --message-id `: Specific message id(s) to mark. May be passed multiple times. Omit to mark ALL unread messages in the inbox.
* `--help`: Show this message and exit.
# qbraid compute
Source: https://docs.qbraid.com/v2/cli/api-reference/qbraid_compute
Manage cloud compute and SSH.
Manage cloud compute servers, profiles, and SSH access.
Start GPU or CPU servers on qBraid infrastructure. SSH in from any
terminal, connect your IDE (VS Code, Cursor), or launch AI agents
on remote hardware. Persistent storage across sessions.
Use this when you want to:
* Run heavy workloads on cloud GPUs without local setup
* SSH into a cloud dev environment from your terminal
* Connect VS Code or Cursor to a remote server
* Launch AI agents on more powerful hardware
Quick start:
```bash theme={"dark"}
qbraid compute up # Start server + configure SSH
qbraid compute status # Check server status
qbraid compute ssh connect # SSH into running server
qbraid compute down # Stop server
```
**Usage**:
```console theme={"dark"}
$ qbraid compute [OPTIONS] COMMAND [ARGS]...
```
**Options**:
* `--help`: Show this message and exit.
**Commands**:
* `up`: Start server and configure SSH.
* `down`: Stop the running server.
* `status`: Check server status.
* `list`: List compute profiles.
* `sessions`: List compute sessions.
* `usage`: Show compute usage summary.
* `profiles`: Manage compute profiles.
* `server`: Manage compute servers.
* `ssh`: SSH access to compute servers.
## qbraid compute up
Start server and configure SSH.
Waits for the server to be ready. This is a convenience command that combines:
* qbraid compute server start \ --wait
* qbraid compute ssh setup
Example:
```bash theme={"dark"}
qbraid compute up 2vCPU_4GB
```
**Usage**:
```console theme={"dark"}
$ qbraid compute up [OPTIONS] {profile_slug}
```
**Arguments**:
* `profile_slug`: Profile slug to start \[required]
**Options**:
* `-c, --cluster `: Cluster ID
* `-t, --timeout `: Server start timeout \[default: 120]
* `--no-ssh`: Skip SSH configuration
* `--help`: Show this message and exit.
## qbraid compute down
Stop the running server.
Example:
```bash theme={"dark"}
qbraid compute down
qbraid compute down --cleanup-ssh
```
**Usage**:
```console theme={"dark"}
$ qbraid compute down [OPTIONS]
```
**Options**:
* `-c, --cluster `: Cluster ID
* `-f, --force`: Skip confirmation
* `--cleanup-ssh`: Remove SSH config
* `--help`: Show this message and exit.
## qbraid compute status
Check server status.
Quick status check (alias for 'server status').
**Usage**:
```console theme={"dark"}
$ qbraid compute status [OPTIONS]
```
**Options**:
* `-c, --cluster `: Cluster ID
* `--help`: Show this message and exit.
## qbraid compute list
List compute profiles.
Quick list profiles (alias for 'profiles list').
**Usage**:
```console theme={"dark"}
$ qbraid compute list [OPTIONS]
```
**Options**:
* `-g, --gpu`: Show only GPU profiles
* `-a, --available`: Show only available profiles
* `-l, --limit `: Number of results \[default: 20]
* `--help`: Show this message and exit.
## qbraid compute sessions
List compute sessions.
**Usage**:
```console theme={"dark"}
$ qbraid compute sessions [OPTIONS]
```
**Options**:
* `-l, --limit `: Number of sessions to show \[default: 10]
* `-s, --status `: Filter by status (active, ended)
* `-t, --type `: Filter by type (cpu, gpu)
* `-d, --days `: Show sessions from last N days
* `--help`: Show this message and exit.
## qbraid compute usage
Show compute usage summary.
**Usage**:
```console theme={"dark"}
$ qbraid compute usage [OPTIONS]
```
**Options**:
* `-d, --days `: Number of days (default: 30)
* `--tz `: Timezone (e.g. America/New\_York)
* `--daily`: Show daily breakdown
* `--help`: Show this message and exit.
## qbraid compute profiles
Manage compute profiles.
**Usage**:
```console theme={"dark"}
$ qbraid compute profiles [OPTIONS] COMMAND [ARGS]...
```
**Options**:
* `--help`: Show this message and exit.
**Commands**:
* `list`: List available compute profiles.
* `info`: Get detailed profile information.
* `create-try`: Create a try-mode profile.
* `create-save`: Create a save-mode profile.
* `build-status`: Check build status for a save-mode profile.
* `delete`: Delete a user-owned profile.
### qbraid compute profiles list
List available compute profiles.
**Usage**:
```console theme={"dark"}
$ qbraid compute profiles list [OPTIONS]
```
**Options**:
* `-p, --plan `: Filter by plan tier
* `-g, --gpu`: Filter GPU profiles
* `-c, --has-capacity`: Filter by capacity
* `--cluster `: Filter by cluster
* `-l, --limit `: Results per page \[default: 50]
* `--help`: Show this message and exit.
### qbraid compute profiles info
Get detailed profile information.
**Usage**:
```console theme={"dark"}
$ qbraid compute profiles info [OPTIONS] {slug}
```
**Arguments**:
* `slug`: Profile slug \[required]
**Options**:
* `--help`: Show this message and exit.
### qbraid compute profiles create-try
Create a try-mode profile.
Standard+ plan required.
Try-mode profiles use on-the-fly overlay injection - no build step required.
**Usage**:
```console theme={"dark"}
$ qbraid compute profiles create-try [OPTIONS]
```
**Options**:
* `-i, --image `: Base Docker image (required) \[required]
* `-n, --name `: Display name
* `-d, --description `: Description
* `--cpu `: CPU cores (guarantee and limit)
* `-m, --mem `: Memory (e.g., '8G')
* `-g, --gpu`: Enable GPU
* `--ide `: IDE type: lab, vscode, ssh \[default: lab]
* `-f, --features `: Features (e.g., 'claude,codeq')
* `--help`: Show this message and exit.
### qbraid compute profiles create-save
Create a save-mode profile.
Pro+ plan required.
Save-mode profiles trigger a Cloud Build to create a permanent overlay image.
Use --wait to wait for the build to complete.
**Usage**:
```console theme={"dark"}
$ qbraid compute profiles create-save [OPTIONS]
```
**Options**:
* `-i, --image `: Base Docker image (required) \[required]
* `-n, --name `: Display name
* `-d, --description `: Description
* `--cpu `: CPU cores (guarantee and limit)
* `-m, --mem `: Memory (e.g., '8G')
* `-g, --gpu`: Enable GPU
* `--ide `: IDE type: lab, vscode, ssh \[default: lab]
* `-f, --features `: Features (e.g., 'claude,codeq')
* `-w, --wait`: Wait for build to complete
* `-t, --timeout `: Build timeout in seconds \[default: 600]
* `--help`: Show this message and exit.
### qbraid compute profiles build-status
Check build status for a save-mode profile.
**Usage**:
```console theme={"dark"}
$ qbraid compute profiles build-status [OPTIONS] {slug}
```
**Arguments**:
* `slug`: Profile slug \[required]
**Options**:
* `--help`: Show this message and exit.
### qbraid compute profiles delete
Delete a user-owned profile.
**Usage**:
```console theme={"dark"}
$ qbraid compute profiles delete [OPTIONS] {slug}
```
**Arguments**:
* `slug`: Profile slug to delete \[required]
**Options**:
* `-f, --force`: Skip confirmation
* `--help`: Show this message and exit.
## qbraid compute server
Manage compute servers.
**Usage**:
```console theme={"dark"}
$ qbraid compute server [OPTIONS] COMMAND [ARGS]...
```
**Options**:
* `--help`: Show this message and exit.
**Commands**:
* `status`: Check server status.
* `start`: Start a server.
* `stop`: Stop a running server or on-demand instance.
* `terminate`: Terminate (delete) an on-demand instance.
* `url`: Print the full server URL with auth token.
* `stop-all`: Stop all servers across all organizations.
### qbraid compute server status
Check server status.
**Usage**:
```console theme={"dark"}
$ qbraid compute server status [OPTIONS]
```
**Options**:
* `-c, --cluster `: Cluster ID
* `--show-url`: Show full server URL with auth token
* `--help`: Show this message and exit.
### qbraid compute server start
Start a server.
Pass a profile slug to provision a new instance, or an existing on-demand
instance ID to resume a stopped one.
**Usage**:
```console theme={"dark"}
$ qbraid compute server start [OPTIONS] {target}
```
**Arguments**:
* `target`: Profile slug (new instance) or instance ID (resume a stopped one) \[required]
**Options**:
* `-c, --cluster `: Cluster ID
* `-w, --wait`: Wait for server to be ready
* `-t, --timeout `: Wait timeout in seconds \[default: 120]
* `--ssh`: Configure SSH after start
* `--help`: Show this message and exit.
### qbraid compute server stop
Stop a running server or on-demand instance.
On-demand BMA instances are detected automatically. If more than one
is running, you'll be prompted to choose; pass --instance to target one
directly. With no BMA instances, stops the legacy cluster server.
**Usage**:
```console theme={"dark"}
$ qbraid compute server stop [OPTIONS]
```
**Options**:
* `-c, --cluster `: Cluster ID
* `-i, --instance `: BMA instance ID to stop (auto-detected if omitted)
* `-f, --force`: Skip confirmation
* `--help`: Show this message and exit.
### qbraid compute server terminate
Terminate (delete) an on-demand instance.
DESTRUCTIVE: unlike 'stop' (which preserves the disk and is resumable),
terminate permanently deletes the instance AND its disk — data cannot be
recovered. Applies to on-demand BMA instances only.
**Usage**:
```console theme={"dark"}
$ qbraid compute server terminate [OPTIONS]
```
**Options**:
* `-i, --instance `: On-demand instance ID to terminate
* `-f, --force`: Skip confirmations (DANGEROUS)
* `--help`: Show this message and exit.
### qbraid compute server url
Print the full server URL with auth token.
Use this to get a clickable URL for browser access or to pass
the token to other tools. The token is intentionally shown in full.
**Usage**:
```console theme={"dark"}
$ qbraid compute server url [OPTIONS]
```
**Options**:
* `-c, --cluster `: Cluster ID
* `--help`: Show this message and exit.
### qbraid compute server stop-all
Stop all servers across all organizations.
**Usage**:
```console theme={"dark"}
$ qbraid compute server stop-all [OPTIONS]
```
**Options**:
* `-c, --cluster `: Cluster ID
* `-f, --force`: Skip confirmation
* `--help`: Show this message and exit.
## qbraid compute ssh
SSH access to compute servers.
**Usage**:
```console theme={"dark"}
$ qbraid compute ssh [OPTIONS] COMMAND [ARGS]...
```
**Options**:
* `--help`: Show this message and exit.
**Commands**:
* `setup`: Configure SSH for the server.
* `connect`: SSH into the running server.
* `token`: Get SSH session token.
* `config`: Show or edit SSH configuration.
* `remove`: Remove SSH configuration for a host.
### qbraid compute ssh setup
Configure SSH for the server.
Sets up SSH config with a ProxyCommand that tunnels SSH through
the jupyter-server-proxy WebSocket endpoint. No websocat required.
On-demand BMA instances are handled automatically: if one is running
it's configured under its own alias; pass --instance to target a specific
one. Each instance gets an independent alias so several can be reachable at
once.
**Usage**:
```console theme={"dark"}
$ qbraid compute ssh setup [OPTIONS]
```
**Options**:
* `-c, --cluster `: Cluster ID
* `-i, --instance `: On-demand instance ID (auto-detected if omitted)
* `-t, --tool `: Configure for specific tool: vscode, cursor, claude-code, codex
* `-a, --alias `: SSH config alias (default: qbraid-\{cluster})
* `--help`: Show this message and exit.
### qbraid compute ssh connect
SSH into the running server.
This opens an interactive SSH session to the server. Pass --instance to
connect to a specific on-demand instance (resolves to its per-instance
alias from 'ssh setup --instance').
**Usage**:
```console theme={"dark"}
$ qbraid compute ssh connect [OPTIONS]
```
**Options**:
* `-a, --alias `: SSH config alias (auto-detected if not set)
* `-i, --instance `: On-demand instance ID to connect to
* `--help`: Show this message and exit.
### qbraid compute ssh token
Get SSH session token.
Retrieves a JupyterHub session token for SSH access.
**Usage**:
```console theme={"dark"}
$ qbraid compute ssh token [OPTIONS]
```
**Options**:
* `-c, --cluster `: Cluster ID
* `-r, --raw`: Output raw token only
* `--help`: Show this message and exit.
### qbraid compute ssh config
Show or edit SSH configuration.
**Usage**:
```console theme={"dark"}
$ qbraid compute ssh config [OPTIONS]
```
**Options**:
* `-e, --edit`: Open config in editor
* `--help`: Show this message and exit.
### qbraid compute ssh remove
Remove SSH configuration for a host.
**Usage**:
```console theme={"dark"}
$ qbraid compute ssh remove [OPTIONS] {alias}
```
**Arguments**:
* `alias`: SSH alias to remove \[required]
**Options**:
* `-f, --force`: Skip confirmation
* `--help`: Show this message and exit.
# qbraid configure
Source: https://docs.qbraid.com/v2/cli/api-reference/qbraid_configure
Configure CLI settings.
Set API keys and config values for your qBraid CLI.
Use this when you want to:
* Set your qBraid API key
* Enable qBraid magic commands in Jupyter
**Usage**:
```console theme={"dark"}
$ qbraid configure [OPTIONS] COMMAND [ARGS]...
```
**Options**:
* `--help`: Show this message and exit.
**Commands**:
* `set`: Set configuration value in qbraidrc file.
* `get`: Get configuration value from qbraidrc file.
* `list`: List all configuration values in qbraidrc.
* `magic`: Enable qBraid IPython magic commands.
## qbraid configure set
Set configuration value in qbraidrc file.
**Usage**:
```console theme={"dark"}
$ qbraid configure set [OPTIONS] {name} {value}
```
**Arguments**:
* `name`: Config name \[required]
* `value`: Config value \[required]
**Options**:
* `-p, --profile `: Profile name \[default: default]
* `--help`: Show this message and exit.
## qbraid configure get
Get configuration value from qbraidrc file.
**Usage**:
```console theme={"dark"}
$ qbraid configure get [OPTIONS] {name}
```
**Arguments**:
* `name`: Config name \[required]
**Options**:
* `-p, --profile `: Profile name \[default: default]
* `--help`: Show this message and exit.
## qbraid configure list
List all configuration values in qbraidrc.
**Usage**:
```console theme={"dark"}
$ qbraid configure list [OPTIONS]
```
**Options**:
* `--help`: Show this message and exit.
## qbraid configure magic
Enable qBraid IPython magic commands.
**Usage**:
```console theme={"dark"}
$ qbraid configure magic [OPTIONS]
```
**Options**:
* `--help`: Show this message and exit.
# qbraid devices
Source: https://docs.qbraid.com/v2/cli/api-reference/qbraid_devices
Browse quantum devices.
Browse and query quantum devices across providers.
Access quantum hardware and simulators from IonQ, IBM, AWS Braket,
Rigetti, QuEra, Pasqal, and more through the unified qBraid runtime.
Use this when you want to:
* Find available quantum devices and their current status
* Compare pricing, qubit counts, and queue depths
* Check device specifications before submitting jobs
**Usage**:
```console theme={"dark"}
$ qbraid devices [OPTIONS] COMMAND [ARGS]...
```
**Options**:
* `--help`: Show this message and exit.
**Commands**:
* `list`: List qBraid quantum devices.
* `get`: Get a qBraid quantum device.
## qbraid devices list
List qBraid quantum devices.
**Usage**:
```console theme={"dark"}
$ qbraid devices list [OPTIONS]
```
**Options**:
* `-s, --status `: Filter by status: ONLINE, UNAVAILABLE, OFFLINE, RETIRED
* `-t, --type `: 'QPU'|'SIMULATOR'
* `-v, --vendor `: Filter by vendor: AWS, AZURE, IBM, IONQ, QBRAID
* `-p, --provider `: Filter by provider: AQT, AWS, AZURE, EQUAL1, IBM, IQM, IONQ, NEC, OQC, PASQAL, QUANTINUUM, QUERA, RIGETTI, QBRAID
* `--help`: Show this message and exit.
## qbraid devices get
Get a qBraid quantum device.
**Usage**:
```console theme={"dark"}
$ qbraid devices get [OPTIONS] {device_id}
```
**Arguments**:
* `device_id`: The QRN or ID of the device to get. \[required]
**Options**:
* `--no-fmt`: Disable rich console formatting (output raw data) \[default: True]
* `--help`: Show this message and exit.
# qbraid envs
Source: https://docs.qbraid.com/v2/cli/api-reference/qbraid_envs
Manage Python environments.
Create, install, upload, and share Python environments.
Isolated Python environments with automatic Jupyter kernel integration.
Create environments locally, upload them to the cloud, share with
teammates, or install pre-built environments from the catalog. Works
identically on qBraid Lab and local machines.
Use this when you want to:
* Set up a reproducible Python environment for a project
* Share your environment with collaborators
* Install a pre-configured environment (e.g., qBraid SDK, Qiskit)
* Publish an environment to the public catalog
Quick start:
```bash theme={"dark"}
qbraid envs create # Create new environment
qbraid envs available # Browse installable environments
qbraid envs install # Install from cloud
qbraid envs list # List local environments
qbraid envs upload # Upload to cloud
```
**Usage**:
```console theme={"dark"}
$ qbraid envs [OPTIONS] COMMAND [ARGS]...
```
**Options**:
* `--help`: Show this message and exit.
**Commands**:
* `create`: Create a new qBraid environment.
* `uninstall`: Remove a local environment.
* `delete`: (Admin) Delete a cloud environment.
* `list`: List installed qBraid environments.
* `activate`: Activate qBraid environment.
* `available`: List installable environments.
* `info`: Show environment details.
* `install`: Install an environment.
* `upload`: Upload an environment.
* `health`: Check the health of an environment.
* `repair`: Repair a broken environment.
* `pythons`: List available Python versions.
* `config`: View or update environment configuration.
* `publish`: Manage environment publishing.
* `share`: Manage environment sharing via share codes.
* `groups`: Manage environment groups.
* `registry`: Manage the local environment registry.
## qbraid envs create
Create a new qBraid environment.
Run without options for an interactive walkthrough, or provide options via flags.
**Usage**:
```console theme={"dark"}
$ qbraid envs create [OPTIONS]
```
**Options**:
* `-n, --name `: Name of the environment to create
* `-d, --description `: Short description of the environment
* `-l, --logo `: Company name for logo (e.g., 'ibm', 'google')
* `-r, --requirements `: Path to requirements.txt file
* `-k, --kernel-name `: Display name for Jupyter kernel
* `-t, --tags `: Comma-separated tags
* `-y, --yes`: Automatically answer 'yes' to all prompts
* `--help`: Show this message and exit.
## qbraid envs uninstall
Remove a local environment.
By default this removes only the local copy — the cloud environment is
preserved so you can reinstall it later. Pass `--delete-cloud` to also
retire the cloud environment (requires ownership).
**Usage**:
```console theme={"dark"}
$ qbraid envs uninstall [OPTIONS]
```
**Options**:
* `-n, --name `: Name of the environment to remove \[required]
* `-c, --delete-cloud`: Also delete the environment from qBraid cloud (requires ownership). By default only the local copy is removed and the cloud slug is preserved, so you can reinstall it later.
* `-y, --yes`: Automatically answer 'yes' to all prompts
* `--help`: Show this message and exit.
## qbraid envs delete
(Admin) Delete a cloud environment.
Removes the DB entry and storage files.
**Usage**:
```console theme={"dark"}
$ qbraid envs delete [OPTIONS] {slug}
```
**Arguments**:
* `slug`: Slug of the cloud environment to delete \[required]
**Options**:
* `-y, --yes`: Automatically answer 'yes' to all prompts
* `--help`: Show this message and exit.
## qbraid envs list
List installed qBraid environments.
**Usage**:
```console theme={"dark"}
$ qbraid envs list [OPTIONS]
```
**Options**:
* `--help`: Show this message and exit.
## qbraid envs activate
Activate qBraid environment.
NOTE: Currently only works on qBraid Lab platform, and select few other OS types.
**Usage**:
```console theme={"dark"}
$ qbraid envs activate [OPTIONS] {name}
```
**Arguments**:
* `name`: Name of the environment. Values from 'qbraid envs list'. \[required]
**Options**:
* `--help`: Show this message and exit.
## qbraid envs available
List installable environments.
Shows available pre-built environments for installation.
**Usage**:
```console theme={"dark"}
$ qbraid envs available [OPTIONS]
```
**Options**:
* `-p, --page `: Page number for pagination (default: 1)
* `-l, --limit `: Number of environments per page (default: 20)
* `--help`: Show this message and exit.
## qbraid envs info
Show environment details.
Get detailed information about an environment.
Accepts either a local env\_id or a cloud slug. Shows information from
both local registry and cloud catalog when available.
Examples:
```bash theme={"dark"}
$ qbraid envs info qiskit_1.0 # By slug (cloud + local if installed)
$ qbraid envs info a1b2 # By env_id (local only)
$ qbraid envs info my_custom_abc123 # Custom environment
```
**Usage**:
```console theme={"dark"}
$ qbraid envs info [OPTIONS] {identifier}
```
**Arguments**:
* `identifier`: Environment identifier (env\_id or slug) \[required]
**Options**:
* `--help`: Show this message and exit.
## qbraid envs install
Install an environment.
Installs a pre-built environment from cloud storage.
If the environment was built for a different platform or requires a Python
version not available on your system, you'll be offered options to either
create a similar local environment or proceed with the download anyway.
**Usage**:
```console theme={"dark"}
$ qbraid envs install [OPTIONS] {env_slug}
```
**Arguments**:
* `env_slug`: Environment slug to install (from 'qbraid envs available') \[required]
**Options**:
* `-t, --temp`: Install as temporary environment (faster, non-persistent)
* `--target `: Custom target directory (defaults to \~/.qbraid/environments)
* `-y, --yes`: Automatically proceed with default options without prompting
* `--help`: Show this message and exit.
## qbraid envs upload
Upload an environment.
Upload environment to qBraid cloud storage (private by default).
This uploads your local environment to make it available for sharing
with specific users. Use 'qbraid envs publish request' after upload to request
public visibility.
Examples:
```bash theme={"dark"}
$ qbraid envs upload my_custom_env
$ qbraid envs upload a1b2 --overwrite
$ qbraid envs upload my_env --group quantum_sdk
$ qbraid envs upload my_env --slug existing_slug_abc123 # Re-upload
```
**Usage**:
```console theme={"dark"}
$ qbraid envs upload [OPTIONS] {identifier}
```
**Arguments**:
* `identifier`: Environment name (if unique) or env\_id to upload \[required]
**Options**:
* `-s, --slug `: Re-upload to existing slug (replaces previous upload)
* `-g, --group `: Environment group to add this environment to
* `-o, --overwrite`: Overwrite existing uploaded environment
* `-y, --yes`: Skip confirmation prompts
* `--help`: Show this message and exit.
## qbraid envs health
Check the health of an environment.
This performs comprehensive checks on the virtual environment:
* Python symlinks and executables
* pyvenv.cfg configuration
* Activate scripts
* Kernel configuration (if present)
Examples:
```bash theme={"dark"}
$ qbraid envs health my_env
$ qbraid envs health a1b2
```
**Usage**:
```console theme={"dark"}
$ qbraid envs health [OPTIONS] {identifier}
```
**Arguments**:
* `identifier`: Environment name or env\_id to check \[required]
**Options**:
* `--help`: Show this message and exit.
## qbraid envs repair
Repair a broken environment.
This attempts to fix common issues:
* Broken Python symlinks
* Invalid pyvenv.cfg paths
* Broken activate scripts
* Invalid kernel.json paths
Use --auto-install to automatically install Python via uv if the
required version is not available.
Examples:
```bash theme={"dark"}
$ qbraid envs repair my_env
$ qbraid envs repair a1b2 --auto-install
```
**Usage**:
```console theme={"dark"}
$ qbraid envs repair [OPTIONS] {identifier}
```
**Arguments**:
* `identifier`: Environment name or env\_id to repair \[required]
**Options**:
* `-a, --auto-install`: Automatically install Python via uv if needed
* `--help`: Show this message and exit.
## qbraid envs pythons
List available Python versions.
Shows all Python installations found on the system, including:
* System Python (PATH)
* uv-managed Python
* Conda environments
* Homebrew (macOS)
* pyenv installations
Use this to see which Python versions are available for creating
new environments.
Examples:
```bash theme={"dark"}
$ qbraid envs pythons
```
**Usage**:
```console theme={"dark"}
$ qbraid envs pythons [OPTIONS]
```
**Options**:
* `--help`: Show this message and exit.
## qbraid envs config
View or update environment configuration.
Without flags, prints the current config. With flags, applies the updates
and prints the new state. Multiple update flags can be combined in one call.
Examples:
```bash theme={"dark"}
$ qbraid envs config 5dcc
$ qbraid envs config myenv --description "Quantum sim env"
$ qbraid envs config myenv --tags "quantum,sim,gpu"
$ qbraid envs config myenv --add-tag gpu --add-tag cuda
$ qbraid envs config myenv --remove-tag deprecated
$ qbraid envs config myenv --system-site-packages true
```
**Usage**:
```console theme={"dark"}
$ qbraid envs config [OPTIONS] {environment}
```
**Arguments**:
* `environment`: Environment name, env\_id, or slug \[required]
**Options**:
* `-d, --description `: Update environment description
* `--tags `: Replace tags (comma-separated, use '' to clear)
* `--add-tag `: Append a tag (repeatable)
* `--remove-tag `: Remove a tag (repeatable)
* `--kernel-name `: Update Jupyter kernel display name
* `--system-site-packages `: Enable/disable inheriting packages from parent Python (true/false)
* `--help`: Show this message and exit.
## qbraid envs publish
Manage environment publishing.
**Usage**:
```console theme={"dark"}
$ qbraid envs publish [OPTIONS] COMMAND [ARGS]...
```
**Options**:
* `--help`: Show this message and exit.
**Commands**:
* `request`: Request to publish environment.
* `status`: Check publish status.
* `cancel`: Cancel a pending publish request.
* `review`: (Admin) Mark as under review.
* `approve`: (Admin) Approve and publish.
* `deny`: (Admin) Deny a publish request.
### qbraid envs publish request
Request to publish environment.
Submits your uploaded environment to the public catalog for admin review. Once approved,
it will be publicly visible and installable by all users.
The environment must be uploaded first with 'qbraid envs upload'.
Examples:
```bash theme={"dark"}
$ qbraid envs publish request my_env_abc123
```
**Usage**:
```console theme={"dark"}
$ qbraid envs publish request [OPTIONS] {slug}
```
**Arguments**:
* `slug`: Environment slug (from upload) \[required]
**Options**:
* `--help`: Show this message and exit.
### qbraid envs publish status
Check publish status.
Check the publishing status of an environment.
Status values:
* none: Not submitted for publishing
* requested: Waiting for admin review
* pending: Under admin review
* approved: Published to public catalog
* denied: Publish request was denied
Examples:
```bash theme={"dark"}
$ qbraid envs publish status my_env_abc123
```
**Usage**:
```console theme={"dark"}
$ qbraid envs publish status [OPTIONS] {slug}
```
**Arguments**:
* `slug`: Environment slug to check \[required]
**Options**:
* `--help`: Show this message and exit.
### qbraid envs publish cancel
Cancel a pending publish request.
This withdraws your publish request before it's approved.
You can resubmit later with 'qbraid envs publish request'.
Examples:
```bash theme={"dark"}
$ qbraid envs publish cancel my_env_abc123
```
**Usage**:
```console theme={"dark"}
$ qbraid envs publish cancel [OPTIONS] {slug}
```
**Arguments**:
* `slug`: Environment slug \[required]
**Options**:
* `--help`: Show this message and exit.
### qbraid envs publish review
(Admin) Mark as under review.
Transitions the environment from 'requested' to 'pending' status,
indicating an admin is actively reviewing it.
Examples:
```bash theme={"dark"}
$ qbraid envs publish review my_env_abc123
```
**Usage**:
```console theme={"dark"}
$ qbraid envs publish review [OPTIONS] {slug}
```
**Arguments**:
* `slug`: Environment slug to review \[required]
**Options**:
* `--help`: Show this message and exit.
### qbraid envs publish approve
(Admin) Approve and publish.
Approve and publish an environment to the public catalog.
This makes the environment publicly visible and installable by all users.
After approval, you'll be prompted to add the environment to a group
if it's not already in one.
Examples:
```bash theme={"dark"}
$ qbraid envs publish approve my_env_abc123
$ qbraid envs publish approve my_env_abc123 --group qiskit
$ qbraid envs publish approve my_env_abc123 --no-group
```
**Usage**:
```console theme={"dark"}
$ qbraid envs publish approve [OPTIONS] {slug}
```
**Arguments**:
* `slug`: Environment slug to approve \[required]
**Options**:
* `-g, --group `: Add environment to this group after approval
* `--no-group`: Skip the group assignment prompt
* `--help`: Show this message and exit.
### qbraid envs publish deny
(Admin) Deny a publish request.
The owner will be notified with the denial reason.
Examples:
```bash theme={"dark"}
$ qbraid envs publish deny my_env_abc123
$ qbraid envs publish deny my_env_abc123 --message "Missing documentation"
```
**Usage**:
```console theme={"dark"}
$ qbraid envs publish deny [OPTIONS] {slug}
```
**Arguments**:
* `slug`: Environment slug to deny \[required]
**Options**:
* `-m, --message `: Reason for denial (sent to owner)
* `--help`: Show this message and exit.
## qbraid envs share
Manage environment sharing via share codes.
**Usage**:
```console theme={"dark"}
$ qbraid envs share [OPTIONS] COMMAND [ARGS]...
```
**Options**:
* `--help`: Show this message and exit.
**Commands**:
* `list`: List users with access.
* `create-code`: Generate a share code.
* `delete-code`: Delete the share code for an environment.
* `redeem-code`: Redeem a share code.
### qbraid envs share list
List users with access.
Shows all users with read or write access to the specified environment.
Examples:
```bash theme={"dark"}
$ qbraid envs share list my_env_abc123
```
**Usage**:
```console theme={"dark"}
$ qbraid envs share list [OPTIONS] {slug}
```
**Arguments**:
* `slug`: Environment slug to check \[required]
**Options**:
* `--help`: Show this message and exit.
### qbraid envs share create-code
Generate a share code.
Creates an 8-character code that others can redeem with
'qbraid envs share redeem-code' to gain read access to your environment.
Only the owner can generate codes.
Generating a new code invalidates any previous code for this environment.
Examples:
```bash theme={"dark"}
$ qbraid envs share create-code my_env_abc123
Share code: ABC12XYZ
# Share the code with collaborators, they can redeem it with:
$ qbraid envs share redeem-code ABC12XYZ
```
**Usage**:
```console theme={"dark"}
$ qbraid envs share create-code [OPTIONS] {slug}
```
**Arguments**:
* `slug`: Environment slug to generate share code for \[required]
**Options**:
* `--help`: Show this message and exit.
### qbraid envs share delete-code
Delete the share code for an environment.
Removes the share code, preventing new users from redeeming it.
Users who have already redeemed the code keep their access.
Examples:
```bash theme={"dark"}
$ qbraid envs share delete-code my_env_abc123
```
**Usage**:
```console theme={"dark"}
$ qbraid envs share delete-code [OPTIONS] {slug}
```
**Arguments**:
* `slug`: Environment slug to delete share code for \[required]
**Options**:
* `--help`: Show this message and exit.
### qbraid envs share redeem-code
Redeem a share code.
Redeem a share code to gain access to an environment.
Enter a share code received from an environment owner to gain read access.
The code is case-insensitive.
Examples:
```bash theme={"dark"}
$ qbraid envs share redeem-code ABC12XYZ
Access granted to: My Environment (my_env_abc123)
# After redeeming, you can install the environment:
$ qbraid envs install my_env_abc123
```
**Usage**:
```console theme={"dark"}
$ qbraid envs share redeem-code [OPTIONS] {code}
```
**Arguments**:
* `code`: Share code to redeem \[required]
**Options**:
* `--help`: Show this message and exit.
## qbraid envs groups
Manage environment groups.
**Usage**:
```console theme={"dark"}
$ qbraid envs groups [OPTIONS] COMMAND [ARGS]...
```
**Options**:
* `--help`: Show this message and exit.
**Commands**:
* `list`: List all environment groups.
* `info`: Show environment group details.
* `create`: (Admin) Create a new environment group.
* `update`: (Admin) Update an environment group.
* `delete`: (Admin) Delete an environment group.
### qbraid envs groups list
List all environment groups.
Environment groups are collections of related environments. Use the group
slug when uploading an environment to add it to a group.
Examples:
```bash theme={"dark"}
$ qbraid envs groups list
```
**Usage**:
```console theme={"dark"}
$ qbraid envs groups list [OPTIONS]
```
**Options**:
* `--help`: Show this message and exit.
### qbraid envs groups info
Show environment group details.
Examples:
```bash theme={"dark"}
$ qbraid envs groups info quantum_sdk
```
**Usage**:
```console theme={"dark"}
$ qbraid envs groups info [OPTIONS] {group_slug}
```
**Arguments**:
* `group_slug`: Group slug to get details for \[required]
**Options**:
* `--help`: Show this message and exit.
### qbraid envs groups create
(Admin) Create a new environment group.
Environment groups are collections of related environments, typically
different versions of the same package or tool.
Examples:
```bash theme={"dark"}
$ qbraid envs groups create "Qiskit" --description "IBM Qiskit environments"
$ qbraid envs groups create "Cirq" --category package --visibility public
$ qbraid envs groups create "PennyLane" --envs "pen_1x0,pen_0x9" --latest pen_1x0
```
**Usage**:
```console theme={"dark"}
$ qbraid envs groups create [OPTIONS] {display_name}
```
**Arguments**:
* `display_name`: Display name for the group (1-100 chars) \[required]
**Options**:
* `-d, --description `: Group description (max 500 chars)
* `-t, --tags `: Comma-separated tags
* `-c, --category `: Category: 'package' or 'subject-matter'
* `-v, --visibility `: Visibility: 'private' or 'public'
* `-e, --envs `: Comma-separated environment slugs to include
* `-l, --latest `: Environment slug to set as the current version
* `--help`: Show this message and exit.
### qbraid envs groups update
(Admin) Update an environment group.
Use --add and --remove for delta updates to the environment list.
Use --latest to set which environment is the "current" version.
Examples:
```bash theme={"dark"}
$ qbraid envs groups update qiskit --add qiskit_1x0abc --latest qiskit_1x0abc
$ qbraid envs groups update cirq --remove cirq_0x8xyz,cirq_0x7def
$ qbraid envs groups update pennylane --name "PennyLane SDK" --visibility public
```
**Usage**:
```console theme={"dark"}
$ qbraid envs groups update [OPTIONS] {group_slug}
```
**Arguments**:
* `group_slug`: Slug of the group to update \[required]
**Options**:
* `-n, --name `: New display name
* `-d, --description `: New description
* `-a, --add `: Comma-separated environment slugs to add
* `-r, --remove `: Comma-separated environment slugs to remove
* `-l, --latest `: Set the current version environment slug
* `-c, --category `: Category: 'package' or 'subject-matter'
* `-v, --visibility `: Visibility: 'private' or 'public'
* `--help`: Show this message and exit.
### qbraid envs groups delete
(Admin) Delete an environment group.
This removes the group but does not delete the environments in it.
Examples:
```bash theme={"dark"}
$ qbraid envs groups delete old_group
$ qbraid envs groups delete old_group --yes
```
**Usage**:
```console theme={"dark"}
$ qbraid envs groups delete [OPTIONS] {group_slug}
```
**Arguments**:
* `group_slug`: Slug of the group to delete \[required]
**Options**:
* `-y, --yes`: Skip confirmation prompt
* `--help`: Show this message and exit.
## qbraid envs registry
Manage the local environment registry.
**Usage**:
```console theme={"dark"}
$ qbraid envs registry [OPTIONS] COMMAND [ARGS]...
```
**Options**:
* `--help`: Show this message and exit.
**Commands**:
* `add`: Register an external environment.
* `remove`: Unregister an external environment.
* `sync`: Sync the environment registry.
### qbraid envs registry add
Register an external environment.
Allows you to use existing Python environments (conda, venv, etc.)
with qBraid commands like kernel management and activation.
Examples:
```bash theme={"dark"}
$ qbraid envs registry add /path/to/my_env --alias myenv
$ qbraid envs registry add ~/conda/envs/quantum --name quantum_abc123
```
**Usage**:
```console theme={"dark"}
$ qbraid envs registry add [OPTIONS] {path}
```
**Arguments**:
* `path`: \[required]
**Options**:
* `-a, --alias `: Alias for the environment
* `-n, --name `: Name/slug for the environment
* `-y, --yes`
* `--help`: Show this message and exit.
### qbraid envs registry remove
Unregister an external environment.
This only removes the environment from qBraid's registry.
The actual environment files are NOT deleted.
**Usage**:
```console theme={"dark"}
$ qbraid envs registry remove [OPTIONS] {name}
```
**Arguments**:
* `name`: Name or alias of environment to unregister \[required]
**Options**:
* `-y, --yes`
* `--help`: Show this message and exit.
### qbraid envs registry sync
Sync the environment registry.
This will:
* Remove registry entries for deleted environments
* Auto-discover new environments in default paths
* Verify all registered paths still exist
**Usage**:
```console theme={"dark"}
$ qbraid envs registry sync [OPTIONS]
```
**Options**:
* `--help`: Show this message and exit.
# qbraid jobs
Source: https://docs.qbraid.com/v2/cli/api-reference/qbraid_jobs
Submit and track quantum computing jobs.
Monitor quantum jobs across all providers from a single interface.
View job status, results, and costs.
Use this when you want to:
* Check the status of submitted quantum jobs
* View results from completed experiments
* Track costs across providers
* Bundle related jobs into groups (qbraid jobs groups)
**Usage**:
```console theme={"dark"}
$ qbraid jobs [OPTIONS] COMMAND [ARGS]...
```
**Options**:
* `--help`: Show this message and exit.
**Commands**:
* `submit`: Submit a quantum job.
* `list`: List quantum jobs.
* `get`: Get a qBraid Quantum Job.
* `groups`: Manage job groups.
## qbraid jobs submit
Submit a quantum job.
Submit a quantum program to a device on the qBraid platform.
The program can be provided as a file path or piped via stdin.
Examples:
```bash theme={"dark"}
qbraid jobs submit circuit.qasm -d qbraid:qbraid:sim:qir-sv --shots 100
cat circuit.qasm | qbraid jobs submit - -d qbraid:qbraid:sim:qir-sv -f qasm2
qbraid jobs submit program.ll -d qbraid:qbraid:sim:qir-sv --json
```
**Usage**:
```console theme={"dark"}
$ qbraid jobs submit [OPTIONS] {program}
```
**Arguments**:
* `program`: Path to a quantum program file, or '-' to read from stdin. \[required]
**Options**:
* `-d, --device `: Target device QRN (e.g. 'qbraid:qbraid:sim:qir-sv'). \[required]
* `-f, --format `: Program format. Required when reading from stdin. Auto-detected from file extension when omitted. Options: qasm2, qasm3, qir.bc, qir.ll, analog, pulser.sequence, quil, ionq.circuit.v0, problem
* `-s, --shots `: Number of shots to execute. \[x>=1]
* `-n, --name `: Job name.
* `-t, --tags `: Job tags as a JSON object (e.g. '\{"experiment":"bell"}').
* `--options `: Runtime options as a JSON object.
* `--group `: Group job QRN to associate this job with.
* `--json`: Output full job response as JSON (for programmatic use).
* `--help`: Show this message and exit.
## qbraid jobs list
List quantum jobs.
Lists quantum jobs submitted through the qBraid platform.
**Usage**:
```console theme={"dark"}
$ qbraid jobs list [OPTIONS]
```
**Options**:
* `-l, --limit `: Limit the maximum number of results returned \[default: 10]
* `-s, --status `: Filter by status: INITIALIZING, QUEUED, VALIDATING, RUNNING, CANCELLING, CANCELLED, COMPLETED, FAILED, UNKNOWN, HOLD
* `-v, --vendor `: Filter by vendor: AWS, AZURE, IBM, IONQ, QBRAID
* `-p, --provider `: Filter by provider: AQT, AWS, AZURE, EQUAL1, IBM, IQM, IONQ, NEC, OQC, PASQAL, QUANTINUUM, QUERA, RIGETTI, QBRAID
* `--page `: Page number for pagination \[default: 1]
* `--help`: Show this message and exit.
## qbraid jobs get
Get a qBraid Quantum Job.
**Usage**:
```console theme={"dark"}
$ qbraid jobs get [OPTIONS] {job_id}
```
**Arguments**:
* `job_id`: The QRN or ID of the job to get. \[required]
**Options**:
* `--no-fmt`: Disable rich console formatting (output raw data) \[default: True]
* `--help`: Show this message and exit.
## qbraid jobs groups
Manage job groups.
A group bundles related jobs into one session so the runtime can
track aggregate cost and status. Submit into a group with
`qbraid jobs submit --group <qrn>`.
Quick start:
```bash theme={"dark"}
qbraid jobs groups create -n my-batch
qbraid jobs groups list
qbraid jobs groups info
qbraid jobs groups jobs
qbraid jobs groups close # no more submissions, jobs run
qbraid jobs groups cancel # cancel group + non-terminal jobs
qbraid jobs groups delete # remove the record
```
**Usage**:
```console theme={"dark"}
$ qbraid jobs groups [OPTIONS] COMMAND [ARGS]...
```
**Options**:
* `--help`: Show this message and exit.
**Commands**:
* `list`: List your job groups.
* `info`: Show full details for one group.
* `create`: Create a new group.
* `close`: Close a group to new submissions.
* `cancel`: Cancel a group and its non-terminal jobs.
* `jobs`: List the jobs in a group.
* `delete`: Delete a group record.
### qbraid jobs groups list
List your job groups.
**Usage**:
```console theme={"dark"}
$ qbraid jobs groups list [OPTIONS]
```
**Options**:
* `-s, --status `: Filter by status (OPEN/CLOSED/COMPLETED/FAILED/CANCELLED)
* `-p, --page `: Page number \[x>=1]
* `-l, --limit `: Results per page \[x>=1]
* `--help`: Show this message and exit.
### qbraid jobs groups info
Show full details for one group.
**Usage**:
```console theme={"dark"}
$ qbraid jobs groups info [OPTIONS] {qrn}
```
**Arguments**:
* `qrn`: Group QRN \[required]
**Options**:
* `--help`: Show this message and exit.
### qbraid jobs groups create
Create a new group.
Returns the new group's QRN — pass it to `qbraid jobs submit --group`
to attach jobs into the group.
**Usage**:
```console theme={"dark"}
$ qbraid jobs groups create [OPTIONS]
```
**Options**:
* `-n, --name `: Human-readable group name
* `-t, --tags `: Comma-separated key=value tags (values stored as strings)
* `-m, --metadata `: Comma-separated key=value metadata (values stored as strings)
* `--max-ttl `: Max time-to-live in seconds (1-86400) \[1\<=x\<=86400]
* `--help`: Show this message and exit.
### qbraid jobs groups close
Close a group to new submissions.
Existing jobs continue running; only new submissions are blocked.
**Usage**:
```console theme={"dark"}
$ qbraid jobs groups close [OPTIONS] {qrn}
```
**Arguments**:
* `qrn`: Group QRN \[required]
**Options**:
* `--help`: Show this message and exit.
### qbraid jobs groups cancel
Cancel a group and its non-terminal jobs.
**Usage**:
```console theme={"dark"}
$ qbraid jobs groups cancel [OPTIONS] {qrn}
```
**Arguments**:
* `qrn`: Group QRN \[required]
**Options**:
* `-f, --force`: Skip confirmation
* `--help`: Show this message and exit.
### qbraid jobs groups jobs
List the jobs in a group.
Requires qbraid-core >= 0.3.3 (the get\_group\_jobs helper).
**Usage**:
```console theme={"dark"}
$ qbraid jobs groups jobs [OPTIONS] {qrn}
```
**Arguments**:
* `qrn`: Group QRN \[required]
**Options**:
* `--help`: Show this message and exit.
### qbraid jobs groups delete
Delete a group record.
Underlying jobs are not affected — cancel the group first if you want
to stop them. Idempotent: deleting an already-deleted group is a no-op.
Requires qbraid-core >= 0.3.3 (the delete\_group helper).
**Usage**:
```console theme={"dark"}
$ qbraid jobs groups delete [OPTIONS] {qrn}
```
**Arguments**:
* `qrn`: Group QRN \[required]
**Options**:
* `-f, --force`: Skip confirmation
* `--help`: Show this message and exit.
# qbraid kernels
Source: https://docs.qbraid.com/v2/cli/api-reference/qbraid_kernels
Add, remove, and repair Jupyter kernels.
Manage Jupyter kernel specs for qBraid environments. Each environment
can have its own kernel visible in JupyterLab's launcher.
Use this when you want to:
* Make an environment available as a Jupyter kernel
* Fix a broken kernel that points to a missing environment
* Clean up orphaned kernels from deleted environments
**Usage**:
```console theme={"dark"}
$ qbraid kernels [OPTIONS] COMMAND [ARGS]...
```
**Options**:
* `--help`: Show this message and exit.
**Commands**:
* `list`: List all available kernels.
* `add`: Add a kernel to Jupyter.
* `remove`: Remove a kernel from Jupyter.
* `status`: Check kernel status for an environment.
* `repair`: Repair a kernel's Python path.
* `clean`: Remove orphaned kernels.
## qbraid kernels list
List all available kernels.
**Usage**:
```console theme={"dark"}
$ qbraid kernels list [OPTIONS]
```
**Options**:
* `--help`: Show this message and exit.
## qbraid kernels add
Add a kernel to Jupyter.
**Usage**:
```console theme={"dark"}
$ qbraid kernels add [OPTIONS] {environment}
```
**Arguments**:
* `environment`: Name of environment for which to add ipykernel. Values from 'qbraid envs list'. \[required]
**Options**:
* `--help`: Show this message and exit.
## qbraid kernels remove
Remove a kernel from Jupyter.
**Usage**:
```console theme={"dark"}
$ qbraid kernels remove [OPTIONS] {environment}
```
**Arguments**:
* `environment`: Name of environment for which to remove ipykernel. Values from 'qbraid envs list'. \[required]
**Options**:
* `--help`: Show this message and exit.
## qbraid kernels status
Check kernel status for an environment.
**Usage**:
```console theme={"dark"}
$ qbraid kernels status [OPTIONS] {environment}
```
**Arguments**:
* `environment`: Environment name or env\_id to check kernel status. \[required]
**Options**:
* `--help`: Show this message and exit.
## qbraid kernels repair
Repair a kernel's Python path.
Fixes kernel.json with the correct Python path.
**Usage**:
```console theme={"dark"}
$ qbraid kernels repair [OPTIONS] {environment}
```
**Arguments**:
* `environment`: Environment name or env\_id to repair kernel. \[required]
**Options**:
* `--help`: Show this message and exit.
## qbraid kernels clean
Remove orphaned kernels.
Removes kernels whose Python environment no longer exists.
Without arguments, scans all kernels and prompts to remove broken ones.
With a kernel name, removes it directly without checking validity.
**Usage**:
```console theme={"dark"}
$ qbraid kernels clean [OPTIONS] [slug]
```
**Arguments**:
* `slug`: Kernel name to remove directly (no validation check).
**Options**:
* `-y, --yes`: Skip confirmation prompt
* `--help`: Show this message and exit.
# qbraid lab
Source: https://docs.qbraid.com/v2/cli/api-reference/qbraid_lab
Launch qBraid Lab (JupyterLab).
**Usage**:
```console theme={"dark"}
$ qbraid lab [OPTIONS] COMMAND [ARGS]...
```
**Options**:
* `--help`: Show this message and exit.
# qbraid pip
Source: https://docs.qbraid.com/v2/cli/api-reference/qbraid_pip
Run pip command in active qBraid environment.
**Usage**:
```console theme={"dark"}
$ qbraid pip [OPTIONS] COMMAND [ARGS]...
```
**Options**:
* `--help`: Show this message and exit.
**Commands**:
* `install`: Run pip install in environment.
## qbraid pip install
Run pip install in environment.
Performs pip install action with open-ended arguments and options.
**Usage**:
```console theme={"dark"}
$ qbraid pip install [OPTIONS]
```
**Options**:
* `--help`: Show this message and exit.
# qbraid projects
Source: https://docs.qbraid.com/v2/cli/api-reference/qbraid_projects
Browse and install qBraid Hub projects.
Hub projects are GitHub-hosted templates with optional pre-configured
environments. Use 'qbraid projects install \